Recently Google included both a Gmail app and a stock email app (for non-Gmail accounts) in Android. While many third-party manufacturers still include standalone email applications, Gmail now works with any kind of third-party email account that supports IMAP, so you can handle all your emails in one place. It’s almost like having your cake and eating it too.
To add a non-Gmail account to the Gmail app, first tap the hamburger menu or swipe from the left side of the screen in Gmail, opening the menu.
From here, tap your name/email address, which will open the drop down to change, add, and manage accounts. Tap the “Add account” button.
The next screen will give you a list of options: Google, Outlook, Hotmail, Live, Yahoo, Exchange, and Other. Just select the one that best applies to what you’re trying to add—I’m using a Live email address in this example, but the process should be basically the same across the board (unless you’re setting up a corporate email address with specific settings, of course).
In our test scenario, this opens a Microsoft login window, but the idea is going to be the same across all accounts: sign in.
The next screen will likely require you to grant Gmail access to your account, then ask you to confirm the sync frequency. In our example, push services aren’t available, so it’ll just sync email on a regular schedule.
From there, just confirm your name and that’s it—you’re ready to roll!
If you have multiple email accounts across multiple services, the option to manage them all in one app is great. And when that app is Gmail, it’s even better—Google’s approach to email is arguably the best, so having the option to incorporate some of its nicer features into other services is always welcome.
Getting a new phone is rough. You essentially lose everything you had on the old phone, which can be a little be a bit of a shock for the first several days. While some things—like pictures, for example—automatically come with you through your Google account, other creature comforts, like your text messages, don’t automatically sync.
But it doesn’t have to be that way. If you can’t stand the sight of an empty SMS box, you can easily move all of your current messages to a new phone in just a few steps with an app called SMS Backup & Restore.
The first thing you’ll need to do is install said app on both phones, and make sure each of them are on the same Wi-Fi network. It won’t work over a cellular network!
Open the app on both phones. On the main screen, tap the “Transfer” button. A new box will open with the details of how transferring works—in a nutshell, it sends the info over Wi-Fi. Select the appropriate option on each phone: “Send from this phone” on the old handset, “Receive on this phone” on the new one.
The phones will immediately start looking for each other on the network. Once the sending phone sees the receiving phone, tap it in the list. This will initiate the transfer.
The sending phone will push an “invite” to the receiving phone. You’ll of course need to accept this invite before anything will happen.
Once the phones have made a connection, the sending phone will give you a few options: “Transfer texts and call logs from the current state”, or “Use the most recent backup”. If you’ve never used SMS Backup & Restore before, then you shouldn’t have a backup available and will want to use the first option. Either way, honestly, I’d just go ahead and choose the first one. It’s the most up-to-date.
The sending phone will immediately make a backup and push it over to the receiving phone. At this point, just hang out for a second. It won’t take long. Once it’s finished, you’ll get a notification on the receiving phone asking if you want to Accept and Restore. You do.
Once you’ve chosen to do so, the transfer will begin. When it’s finished, you’re essentially done with the sending phone—from here on out, everything else is handled on the receiving phone. After the file finishes transferring, you’ll get a notification about a limitation in Android starting with KitKat that only allows the default SMS app to restore messages. Ergo, you’ll have to set SMS Backup & Restore as your default, at least until the transfer is finished. Tap “OK.”
On the next screen, tap “Yes” to make SMS Backup & Restore your default SMS app. Again, you can change it back to your preferred texting app once it’s finished restoring.
And now, that process begins. Kick back, get a coffee. Read a book. Watch TV. Do something that doesn’t including messing with your phone—this is going to take a while (depending on how much info it has to transfer), so just let it do its thing.
Once it’s finished, you’ll get a notification stating such, along with all the details of the transfer. Look at all those messages! You can tap the notification if you want, but it’ll just launch the SMS Backup & Restore app with the same info, so you might as well just dismiss it.
Go ahead and jump into your preferred SMS app—all of your existing texts should now show up in the new phone. The call log should also be populated with the info from your other phone.
If you had to make SMS Backup & Restore the default app in the steps above, go ahead and jump into Android’s Default Apps menu and change it back to your normal messaging app. You’re done!
If you’ve ever found yourself wishing you had a magnifying glass with you, iOS 10 can now serve as an excellent replacement. The new Magnifier–not to be confused with the Text Size and Zoom features that makes your on-screen text bigger–uses your phone’s camera and flashlight to make sure you can always read that receipt or dig out that splinter.
How to Enable the Magnifier
Before using the Magnifier, you’ll have to enable it. In Settings, tap “General.”
On the General settings screen, tap “Accessibility.”
On the Accessibility screen, tap the “Magnifier” setting.
Turn on the “Magnifier” option. And if you want iOS to automatically set the default brightness and contrast when you open the Magnifier, go ahead and turn on the “Auto-Brightness” setting. You can always adjust them yourself when you’re using Magnifier, regardless of whether “Auto-Brightness” is turned on.
And now that you’ve got Magnifier enabled, it’s time to put it to use.
How to Use the Magnifier
To start the Magnifier, triple-click your Home button. If Magnifier is the only accessibility option you have enabled to use triple-click, Magnifier will open immediately. If you have more than one setting assigned to use triple-click, you’ll see a pop up menu with your options. Just tap “Magnifier.”
The Magnifier opens to its lowest level zoom, which is pretty much no zoom at all. Below on the left, you can see the default zoom on some 4-point type. Slide the “Zoom” slider, though, and all is revealed.
If you’re in a dark room–say, trying to read a receipt in a dimly-lit restaurant–you can turn on your flashlight to illuminate things by hitting the “Flashlight” button with the lightning bolt. And don’t worry, it uses a lower setting than the blinding default used by the normal flashlight (which, by the way, you can now change).
If you’re having trouble with the focus going in and out at higher zoom levels, tap the “Lock” button to lock the focus and stabilize things a bit.
Perhaps one of the best features of the Magnifier is the ability to freeze the frame and then look at it without having to hold your hand in place over what you’re looking at. Tap the big “Freeze Frame” button at the bottom center.
Whatever you were looking at is captured and displayed full screen. You can move the screen around by dragging it and adjust the zoom level however you want. When you want return to the Magnifier, just tap the screen. Note that this doesn’t actually save a picture of what you’re looking at, but you can always take a screenshot of your captured image by pressing your Home and Power buttons at the same time.
Back on the main Magnifier screen, you also have a set of filters you can play with that might make what you’re looking at a little more visible. Just tap the “Filters” button.
At the top of the controls, you can slide left and right to select different color filters like “Yellow/Blue,” “Grayscale,” “Red/Black,” and more. You can also tap the “Invert Filters” button to invert the colors of whatever filter you have applied or just invert the normal colors if you have no filter applied. You can also use this screen to change brightness and contrast levels.
The filter you choose will stay applied until you turn it off by disabling the Invert Filters switch and sliding the filter setting back to none. This means that once you set a filter, you can return to the main Magnifier screen by tapping the “Filters” button again. There, you can adjust zoom levels or take a freeze frame while your filter is still applied.
All in all, Magnifier is a pretty handy addition for anyone, even if you don’t have difficulty reading fine print.
VMware vCenter 6 Content Library is a new feature that introduces tighter security controls into your virtual infrastructure.
Most of us have stored VMware content such as ISO images, OVF VMs, OVA VMs and valuable scripts on a local or remote datastore to build out Windows Virtual Machines (VMs), ESXi hosts or Linux VMs. The content is accessible to anyone with admin rights to the vCenter environment on which the content is hosted. So anyone with access to the vCenter and its datastore can initiate an unauthorized VM build with unprotected VMware content.
VMware has taken a big step with vSphere 6 to help VMware administrators maintain their content and securely deploy VMs or ESXi hosts. It's a new feature called Content Libraries (CL). A CL is a centralized location repository that houses ISO images, templates, scripts and other content utilized in your VMware build processes.
The CL is flexible around your organization's requirements. You can create and deploy a CL for one local vCenter Server instance, or publish and share the organization's content across multiple vCenter instances. Once your CL is created, secured and available, you can deploy your VMs from it. The CL also allows you to a secure your content with a password, so that only those who need access will have it.
Creating a CL is straightforward. You want to make sure that all the content the CL needs has been obtained, so you don't spend time browsing all over your network for it.
Let's create a CL within vSphere 6. Once the CL's created, I'll show you the procedure for deploying a VM from the secured CL within vSphere 6. Please keep in mind that the CL is part of vSphere 6 and requires the vSphere 6 Web Client.
Creating a Content Library within vSphere 6
Navigate to the "Home" tab in the VMware vSphere 6 Web Client and click the "Content Libraries" icon under Inventories, as shown in Figure 1.
Figure 1. Content Libraries is a new feature in vSphere 6.
Highlight the "Content Libraries" icon in the left Navigator window.
In the Objects window on the right click on the "Create a New Library" icon to start the process.
You can configure your library for local or subscribed content to include enabled authentication, as shown in Figure 2.
Figure 2. Content and authentication settings are made here.
Select a storage location for your CL.
Review the CL settings and publish it.
Now that your CL is published you can now add your ISO images, OVF VMs, OVA VMs and valuable scripts for VM builds and deployments. CLs provide a secure deployment location that will also assist in maintaining your organization's compliance requirements.
Now, let's deploy a VM using an OVF VM template from our newly created CL.
Deploying a VM from the Content Library
Highlight the newly created CL and navigate to the "Related Objects" tab.
Select the "Templates" sub-tab.
Choose the OVF VM template to deploy and click on the "Create a new virtual machine from a content library" icon, which is highlighted in Figure 3.
Figure 3. The "create a new virtual machine" icon is highlighted in yellow.
Navigate back to your "Host and Clusters" page of the VMware vSphere 6 Web Client, and you'll see the VM being deployed.
Once the VM is finished deploying, you can power on the VM and finish the configuration process, as shown in Figure 4.
Figure 4. Configuring the new virtual machine.
With CLs you can also create multisite content libraries that allow any content to be updated automatically to other vCenter instances and across your entire organization. Also, older versions of your content are purged as new ones are added to your CL. As you provide update content, your CL will provide consistency, compliance and also provide everyone with more time to be spent on other system administrator duties.
You can schedule the CL to synchronize during non-peak hours in relation to your bandwidth requirements and usage. So once you have vSphere 6 up and running, you can explore the benefits of the CL and save time within your organization and enhance the security and compliance of your vSphere environment. You can download a 60 day evaluation of vSphere 6 and start becoming an expert by configuring and deploying your own CLs.
With the release of Windows Server 2016 right around the corner, there’s been a great deal of buzz around the new features that will appear in Hyper-V. We are at the point where not many of the new features add a great deal of value for small businesses, which could be a good thing or a bad thing, depending on your perspective. One hot feature that will add almost nothing to a small business environment is Switch Embedded Teaming. It’s not going to hurt you any, to be sure, but it’s not going to solve any problems for you, either.
What is Switch Embedded Teaming?
Switch Embedded Teaming enables the Hyper-V virtual switch to directly control multiple physical network adapters simultaneously. Compare and contrast this with the method used in 2012 and 2012 R2, in which a single Hyper-V virtual switch can only control a single physical or logical adapter. In order to use teaming with these earlier versions of Hyper-V, your only option is to use some other method to team the adapters. The only supported method is with Microsoft’s load-balancing failover (LBFO) features.
Pros of Switch Embedded Teaming
There are several reasons to embrace the addition of Switch Embedded Teaming to the Hyper-V stack.
Reduced administrative overhead
Reduced networking stack complexity
Enables RDMA with physical adapter teaming
Enables SR-IOV with physical adapter teaming
Full support for Datacenter Bridging (perhaps a bit over-simplified, but mostly correct to just say 802.1p)
Cons of Switch Embedded Teaming
Switch Embedded Teaming looks fantastic on the brochure, but does not come without cost.
Switch independent is the only available teaming mode — no static or LACP (802.3ad/802.1ax)
Most hardware acceleration features available on inexpensive gigabit cards are disabled
VMQ is recommended — fine for 10GbE, not so fine for 1GbE
The QoS modes for the virtual switch do not function; if you need networking QoS, DCB is all you get
Works best with hardware that costs more than the average small business can afford/justify
Only identical NICs can belong to a single SET
Limit of 8 pNICs per SET as opposed to 32 per LBFO (I’m not entirely certain that’s a negative)
No active/passive configurations (not sure if that’s a negative, either)
Comparison of the Hyper-V Virtual Switch with Teaming against Switch Embedded Teaming
My aim in this article is to show that most small businesses already have a great solution with the existing switch-over-team design. Let’s take a look at the two options side-by-side:
Visual Comparison of SET and Traditional Teaming
The big takeaway here is that the Hyper-V virtual switch can only operate with the feature set that is exposed to it. In the traditional team, the virtual switch sits atop the logical NIC created by the teaming software. You can easily see which features are available by looking at the property sheet of the adapter:
Team NIC FeaturesThere are several features available here, each available to the Hyper-V virtual switch (although RSS doesn’t really do much in this context).
When we turn to SET, the switch is created directly from the physical adapters. There is no intervening team NIC. Does that mean that we get to use all of the features available on the network adapter? Sadly, it does not. No RSS, no RSC, no IPSec offloading, to name the big ones. SET’s focus is on VMQ, RDMA, and IOV. That’s where we encounter problems for the small business.
Simply put, SET shines on 10GbE hardware, especially high-end adapters that support RDMA. For the small business, it offers almost nothing except a bit of configuration-time convenience. Do you really need 10GbE for your environment? Here is where I’m supposed to say, “of course”, because as a tech writer, I shouldn’t have any problems spending other people’s money to solve problems that don’t even exist so that I can be like all the other tech writers and generate ad revenue from hardware vendors. But, since I’m not interested in winning any popularity contests among tech writers or having hardware outfits shove advertising dollars at me, I’ll opt for honesty and integrity instead. If you are operating a typical small business, you almost definitely do not need 10GbE. Most medium-sized businesses don’t even need 10GbE outside of their backbones and interconnects.
Answering 10GbE, RDMA, and IOV FUD
I’d like to leave that discussion there and jump right into comparing SET and switch+team, but we’ll have to take a detour to address all the FUD articles that are already being written in “response” to this one. There are more than a few otherwise respectable authors out there doing everything in their effort to convince everyone using Hyper-V that they absolutely must forklift out their Hyper-V environment’s gigabit infrastructure and replace it all with 10GbE hardware OR ELSE. If you can demonstrably justify 10GbE, then go ahead and buy it. If you can’t, or haven’t run the numbers to find out, then take their advice at your budget’s peril.
Identify the Hallmarks of Baseless FUD
We’ll start with the placement of the period in that “OR ELSE” statement. They have nothing to offer after the OR ELSE. I do occasionally see attempts to terrify readers with the promise of long times for Live Migrations. Well, if you’re spending so much time sitting around waiting on migrations to the point that it’s meaningfully impacting your work effort, then you need to focus your attention on fixing whatever problem is causing that before trying to bandage it with expensive hardware. If preventive maintenance is the source of your woes, then you desperately need to learn to automate. Preventive maintenance should be occurring while you’re snug at home in bed, not while you’re standing around waiting for it to finish. If you can’t avoid that for some reason and you also can’t find anything else to do to fill in the time, then Live Migration time isn’t really a problem, now is it? You can safely ignore any commentary about your environment by any author that cannot properly architect his/her own.
The next thing to look at is who employs these FUDders. Almost all of them work for training outfits or resellers. Pure trainers always get starry-eyed around new tech because they do little in the real world and don’t have to pay for it and their students are almost always zero-experience greenhorns trying to get into the market or employees of firms with big enough budgets to pay for trainers and sufficient need for 10GbE. Resellers love 10GbE because it has the same sort of margins as SANs, especially when bundled into any of the shiny new “hyper-convergence” packages. None of these people have any concerns over your budget or any motivation to investigate whether or not 10GbE is suitable to your needs.
10GbE FUD-Busting by the Numbers
The easiest and quickest way to bust FUD is to disprove it in numbers. There are two sets of numbers that you need, and they are not at all complicated to acquire. The first is by far the most important: do you have sufficient demand to even justify looking into the expense of 10GbE? If not, you don’t even need to bother with the second. The second compares the fiscal distance between 1GbE and 10GbE.
Do I Need 10GbE?
The easiest way to know if you need to purchase 10GbE is if you are routinely starved for network bandwidth. Take extra points if you’ve needed to setup QoS to address it. “I did a file copy and it was slow” does not count for anything. If you’re not certain, then that alone is a good indicator that you don’t need 10GbE. If you’d like to be certain, then you can easily become certain. Look at this environment:
Sample Networking Meter
That’s only two network adapters per host carrying VM traffic, Live Migration traffic, and cluster traffic, and it peaks at 52 KILObits per second. The 90% bar is well under 35kbps. Anyone who would counsel that the above should be upgraded to 10GbE is just trying to take your money or drum up demand to keep the pricing high. Not sure how to get the above for your own environment? You can have it in an hour or so. On the other hand, if the charts were routinely at or near the 1 gigabit mark and there aren’t any additional 1GbE adapters/ports to easily scale out with, or if you have one or two adapters that are routinely hotspotting right up to their maximum, then 10GbE might be justified.
Another potential sign that 10GbE might make more sense is if you’re using stacks and stacks of 1GbE adapters. The above example uses two per host, and as you can see, that’s plenty. Four per host should be more than adequate for the average small business host, even in a cluster (add a pair for storage). If you have more adapters than that, then the first thing that I would do is look into reducing the number of adapters that you have in play. If you can’t do that due to measured bandwidth limitations, then start looking into 10GbE. If I walked into a customer’s site and found Hyper-V hosts with 12x 1GbE adapters, I would immediately start pulling performance traces with an end goal of implementing change, either down to a reasonable number of adapters or up to 10GbE. I don’t really have a hard number in mind, but I think that, with the network convergence options made available by the Hyper-V virtual switch, that 8 or more physical gigabit adapters in a single host is where I would start to question the sensibility of the network architecture.
10GbE Pricing
The other part of the FUD claims that 10GbE doesn’t really cost as much it does, which is an absurd claim on its face. Sure, if you’re dedicating most of a 20-port switch to a single host because it’s got a lot of 1GbE adapters, that’s a problem. However, the problem is most likely that you are just using more 1GbE adapters than you need (addressed in the previous section). If you truly are pushing 12x 1GbE adapters to their limits, then I would be likely to counsel you to consider 10GbE myself. But, if you’re not at capacity, then that advice would mostly be about simplifying the complexity of your environment. It’s still cheaper to buy a 20-port 1GbE switch and fill it up with 1GbE connections than it is to simplify down to a pair of 10GbE adapters on a 10GbE switch — to a point. If you’re talking about filling up racks with multiple hosts using lots of 1GbE adapters and trying to match that with one switch per host, the math is different. But, if you’ve got that many hosts, then you’re probably not in the expected target audience for this article. Either way, there’s still a good chance that you could safely cut down a lot on your gigabit infrastructure expense just by not using so many adapters per host.
But, let’s not emulate the FUDders with a lot of “maybes” and “what-ifs”. Let’s get some solid numbers. I have chosen to gather pricing from PC Connection. This is not an endorsement of that company nor am I receiving any compensation from them (they don’t even know that I’m writing this article). I chose them primarily because they are one of the few large tech stores that does not constantly spam my work e-mail address and secondarily because I’ve had some positive business dealings with them in the past. This article is written to compare pricing, which means using a single point of reference. If you are interested in making a purchase, I recommend that you shop around to find the best pricing.
Network adapter pricing is tough to get a solid read on. You can get 10GbE adapters as inexpensively as $100 per port (not counting open box, refurbished, off-brands, etc). The ones that I would be most inclined to purchase drifted up toward $200 per port. When compared to, say, a quad-port 1GbE adapter card, I would actually consider that to be fairly reasonable pricing.
Don’t be fooled by some of the starting low prices — those usually only have a couple of 10GbE ports for uplink (which is what most people should be using 10GbE for anyway). The cheapest entry on that list that is all-10GbE (at least, the day that I wrote this) costs a bit over $1,000 for twelve ports. In case you’re new to 10GbE, note that none of those are RJ-45 ports, so you’ll need to go buy some SFP modules:
So, if you use a model with all SFP, then that’s an extra $30 per port. Minimum. Let’s do the math on that. You have a host with a single dual 10GbE port adapter for $200, then two SFPs for $60 into your $1,000 switch, then another SFP to connect it into your core switch where all of your gigabit desktops are connected which is another $30. Your out-of-pocket expense is $1,300 to connect a single host with the only redundancy being one port failing on your lone adapter! In contrast, if I were to rework the gigabit setup that I just built for switch redundancy, it would be 2x $200 for managed switches, 2x $80 for dual-port gigabit adapters, and less than $5 to cable it all. $485 for full redundancy vs. $1,300 for almost no redundancy. If I architect for full redundancy:
“Cheap” 10 Gigabit Full Redundancy
2x $1,000 for 2x 12-port 10GbE switches
4x $100 for 1-port 10GbE adapters (separating the ports for NIC/slot redundancy)
8x $30 for SFPs (two per host plus two per switch for uplink)
Total: $2,640
Gigabit Full Redundancy
2x $200 for two 24-port gigabit switches
4x $50 for 2-port 1GbE adapters
$10 for cabling, including uplinks
Total: $610
I didn’t get exact pricing on the gigabit lines and I rounded down on the 10GbE lines — I know that I estimated high for gigabit cabling and what I listed is certainly well above the price for the cheapest dual gigabit adapters. Of course, you can also pay $3,000 for a 10GbE switch that uses Cat6A/7 RJ-45s instead of SFPs if you prefer, but that’s certainly not going to save you anything. I challenge any 10 GbE apologist to explain how the first set that uses the absolute cheapest 10GbE pricing costs less than the second set that aims for more moderately priced gigabit hardware for a customer that generates network utilization charts like the one that I posted above.
10GbE is expensive. If you need it, it’s worth it. If you’re not going to be utilizing it, you should not be paying for it.
I should also point out that the cheapest adapter I found that conclusively supports RDMA was a Broadcom adapter that costs $350 for a dual port model. I wanted to find the cheapest adapter from a more reliable manufacturer, but gave up when I hit the $250/port range. When you’re talking about SET vs switch+team in 10GbE terms, RDMA is very important.
SET on Small Business Real-World Hardware
My concrete exhibit will apply to those shops that are using affordable gigabit hardware. My current test systems are using Intel PRO/1000 PT adapters; capable, but with no frills. I ran a sequence of tests on them using different teaming modes to see what, if any, would be the “best” way to team.
The Test Bed
This is the configuration that I used:
Two identical hosts with a pair of Intel PRO/1000 PT, teamed as shown in the test.
All teams use the Dynamic load-balancing algorithm
I ran each test 5 times and got similar results each time, so I only selected the output of the final run to publish here. I also ran one of the tests for 60 seconds instead of 15, but it didn’t deviate from the patterns set in the 15 second tests so I left that out as well.
Packets Sent Packets Received Retransmits Errors Avg. CPU % ============ ================ =========== ====== ========== 419363 1207355 0 0 5.257
To make things a little easier to process, I created a couple of charts to compare the metrics that I found to be the most relevant, which was the throughput of each individual thread:
SET vs Virtual Switch Speed Comparison 1
I then created a stacked line chart, which more clearly illustrates the only part of this testing that I found anything to note (the numbers at the left of the chart are meaningless for all except LACP):
SET vs Virtual Switch Speed Comparison 2
Speed Test Results Discussion
In my testing, the standard virtual switch on top of a switch independent team always came out with slightly better overall throughput, with LACP+switch and SET dancing around each other for second place. However, SET was noticeably worse at load-balancing than the other two (see how flat the LACP line is in the second chart compared to the other two, especially SET). When compared to LACP, that just makes sense. The connected physical switch doesn’t get to make any decisions on load balancing the traffic that it sends to Hyper-V whereas with LACP, it is intimately involved. I was a little surprised at how well basic switch independent mode was able to keep its traffic balanced.
Conclusion
The big takeaway here is that if you’re a typical small business just using cheap commodity gigabit networking hardware, it doesn’t really matter whether you use Switch Embedded Teaming or the “old” way of team plus switch. Unless one or more of those bullet points in the “cons” list at the beginning of this article hit you really hard, SET isn’t bad for you, but it’s also not anything for you to be excited about.
If you have a larger gigabit environment, I would expect the load-balancing variance to become more pronounced. I’m only using two gigabit adapters per team and I only had the pair of VMs to test with. With more physical adapters and more virtual network adapters, inbound traffic on a Switch Embedded Teaming configuration would likely experience more hotspotting. For typical small business environments, I still don’t think that it would be enough to matter.
If inbound network balancing really matters but standard low-end gigabit is what you have available, then a standard virtual switch on an LACP team is your best choice. I don’t really think that combination of requirement and hardware makes a lot of sense, though. Buy better hardware.
What also raises a yellow flag for SET and the small business is the inability to use disparate NICs. I don’t worry much about not being able to combine different NIC speeds — I’m not sure of any solid reason to combine NICs of different speed in a team, except perhaps in active/passive, which isn’t even possible in SET anyway. That part doesn’t seem to matter very much. But, it’s not uncommon to purchase a rackmount system that uses one type of onboard adapter with different adapters in the slots. Teaming daughter card adapters to slot adapters makes sense as it gives you hardware redundancy. SET will limit that ability, again in a way that will impact gigabit hosts more than 10GbE hosts.
Where Switch Embedded Teaming is of most value is on 10GbE (or faster!) hardware that support both IOV and RDMA. It also benefits from VMQ which doesn’t do very much for 1GbE — if you’re lucky enough for it to not cause problems. If you’re using the upper tier of hardware and you need that power, then SET will substantially add to Hyper-V’s appeal because RDMA-boosted equipment is FAST. For the rest of us, SET is just another three-letter acronym.
Ever taken a picture that has a focus that’s just a little bit too soft? Today’s graphics idea was requested by a reader that wanted to do something about those blurry images. Keep reading to see our solution!
What Can Work, And What’s Going to Crash and Burn
Not every image is ideal for this treatment. The ideal candidate is going to be a photo that is slightly out of focus or was damaged by a little motion blur—the kind of photo that’s good, but frustratingly a little bit blurry.
An image like this one doesn’t have enough detail to be repaired with this method and would require extensive repainting—a little too advanced for today’s tip. Remember, you can’t create image data from nothing, so no filter is going to bring out details that the camera didn’t resolve.
Extensive motion blur (leading to double images, as shown here) is also very tough to deal with, and likely requires radically rebuilding the image. Today, we’ll start simpler, with a tip that only requires a few filters and some clever masking.
Repairing Blurs in Photographs
Today, our demonstration is in Photoshop, but it is very GIMP friendly. Feel free to follow along, although your menus and shortcuts may be different than we use here.
Duplicate a copy of your photo background layer. We’ll be working mostly in that background layer, so make sure you have it selected, as shown, above right.
Navigate to Image > Mode > Lab Color and select it.
If you don’t have your “channels” panel open, find it by going to Window > Channels. Then select only the “Lightness” channel. Your image should jump to a grayscale—that’s normal.
In that grayscale, navigate to Filter > Sharpen > Unsharp Mask. These settings harshly overdo our sharpening, unintentionally bringing out grain texture in our image. You can use the settings shown here, but adjust it to suit your own needs. Remember, overdoing it at this stage is okay, be extreme, if necessary.
Click the “Lab” combined channel in the Channels panel. That should return your image to full color.
Adjusting sharpen filters in Lab color can stop the filter from affecting the color in the image. But our image is nearly ruined by the harshness of the grain. Let’s take our tip a step further and create an image that looks more like what we want.
Hold down ALT and click the button in your layers panel. Then pick the paintbrush tool and right click to set it to a soft brush setting. Make sure your foreground color is white, as shown above right.
You’re eliminating everything you just did from your image, then painting back in the areas you want to keep. Edges work best, as shown here in red. By painting in the edges, you give the soft image an illusion of sharpness. This way you can selectively repair the areas that are too blurry and soft, while retaining the soft parts that are missing the grain in the image.
Before.
After. Remember, it’s not possible for a computer to somehow discover image data that isn’t there, so it’s impossible to completely remove the blur. But this technique can help you salvage an image that’s not quite gone over the brink. Make sure you change your image back to RGB before saving it for any web application by going to Image > Mode > RGB Color.
As an alternative to using the Unsharp Mask filter for making adjustments to the sharpness of your image, you can make very fine-tuned adjustments using Adobe Camera Raw or Lightroom. Photoshop users can find it by navigating to File > Open As, then selecting any JPG and using the setting “Camera Raw.” In the Camera Raw program, use the icon to bring up the sharpening and details tools.
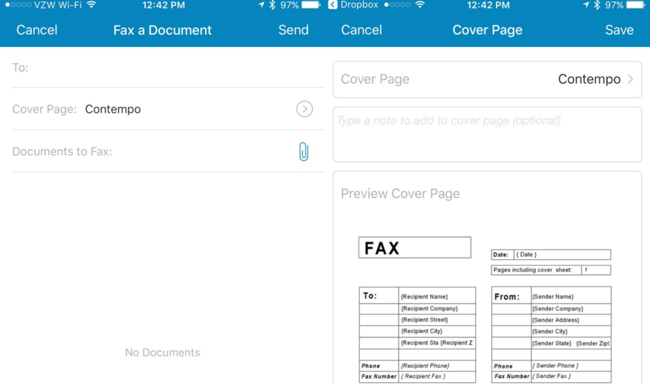
You can sign a PDF document from your phone, tablet, or any other computer and email it off to someone. But some organizations still don’t accept documents via email — you may need to fax documents instead.
No, you can’t use your smartphone’s phone connection as a fax machine or dial-up modem. You’ll need to rely on an app or third-party service that does the faxing for you, just as you would sending the occasional fax from your PC.
Yes, This Will Cost You
You won’t find an app that lets you send an unlimited number of faxes for free. Every app you’ll find here will cost you money to use regularly. Some apps may let you send a handful of pages for free, but that’s it. These services have to maintain phone numbers and interface with the telephone network for you. Your smartphone can’t act as a dial-up modem, so you’re depending on a service’s servers to do the heavy lifting.
But, although this will cost you, it can save you money and be more convenient than the alternative. The alternative is paying to use fax machines at a store, or purchasing your own fax machine and hooking it up to a telephone landline. Both will likely be significantly more expensive if you just need to send a few faxes.
This method also lets you do everything entirely electronically. You can sign and fill in PDF documents on your phone and fax them. Or, use your phone’s camera to scan paper documents and fax them.
iPhone or Android Apps
Search for “fax” on the App Store and you’ll find quite a few options, but none of the apps are actually free, and the few that do provide a few free fax pages are usually limited to just a handful of pages before they start charging you.
But there’s a bigger problem — the vast majority of the time when you need to fax something, you’re faxing a document that contains very personal information — it’s health care and government that tend to require faxing things, after all, and they are also dealing with your personal information.
You should not trust just anybody with handling your personal information in a fax. So we’ve got some recommendations for you.
If you are going to be sending sensitive faxes all the time, or you work for a company and you’re trying to choose a service, RingCentral Fax, which is partially owned by Cisco and AT&T, is probably the best choice for your needs, especially since they have a lot of great security features and support for multiple users with separate fax lines.
They also have a really slick mobile app that’s probably one of the nicest ways to deal with faxing, or you can send faxes through email instead. It has all the other features you can imagine, including integrations with Outlook, Google Drive, Dropbox, Box, and you can even get a toll-free number. It also has a lot of security features that would be useful for businesses or people that are transmitting secure information.
Of course, if you just want to send a few faxes, you can sign up for one of their cheap plans that start under $7 per month… and then just cancel after a month or two.
Occasional User:
If you just want to send a few faxes every now and then, you can also choose eFax, which is well known as the company that basically invented faxing digitally. They have a nice mobile app that lets you both send and receive faxes.
If you just need to send the occasional fax, we also recommend MyFax, which lets you send up to 10 free pages without having to pay. This doesn’t sound like much, but it’s more pages per month than most people have to fax per year. If you do need to send more pages each month, you can upgrade to a regular plan.
Both of these providers are reputable and owned by the same large company that has been doing this for years. It’s not some fly-by-night operation. They might not have all the security features that RingCentral does, but you don’t need to worry about who has your personal information.
Faxing Over Email
If you’re using Windows Phone, Blackberry, a Fire Tablet, or some other operating system, you can always sign up for RingCentral, eFax, or MyFax and then use their website to send the fax — or you can use their fax by email feature.
Wi-Fi calling allows your smartphone to place and receive phone calls, as well as send and receive SMS messages over Wi-Fi instead of the cellular network. Your phone will seamlessly hand off to the cellular network when you move out of Wi-FI range.
Android phones have supported this for longer than the iPhone has, but often just with customized Android devices purchased from the cellular carrier itself. There are also other Wi-Fi calling solutions you can use, including Google Hangouts, Google Voice, and Skype.
Enable Android’s Wi-Fi Calling Support
This feature is now integrated into the latest versions of Android in a more standard way. One day, you’ll hopefully be able to get any Android phone and enable Wi-Fi calling on any cellular carrier’s network if that carrier supports it, just as you can with iPhones.
If Wi-Fi calling is an option, you should find it in a standard place. Open the Settings app on your Android phone and tap the “More” or “More Settings” button under Wireless & network.
You’ll see a “Wi-Fi Calling” option here — activate it to enable the feature. If you don’t want to use Wi-FI calling, you can disable it from here, too.
This option won’t appear unless you’re using a phone with Wi-Fi calling support and are connected to a cellular network that works with it. But this is a quick way to check if you can currently use Wi-Fi calling. This option should hopefully become more standardized and widely available in the future.
As this is Android, it’s possible that your cellular carrier’s customizations — or the manufacturer’s customizations — have put a “Wi-Fi calling” option in a different place in the interface. You may need to search for the name of your smartphone, “Wi-FI calling”, and possibly the name of your cellular carrier.
Use an App Instead
Don’t see the “Wi-Fi calling” option there? Your cellular carrier may not offer this feature, or it may not work with your specific device. But there are other solutions you can use it you want to call and text from Wi-Fi.
Google’s Hangouts Dialer app will allow you to place phone calls from a Wi-Fi network. Most calls to the US and Canada are free, so this is an easy way to place calls to the US and Canada from a Wi-Fi network. If you don’t have a Google Voice account, the recipient will see one of Google’s seemingly random phone numbers appear on their caller ID.
If you’re in the US, you might want to sign up for Google Voice. This will give you a dedicated phone number, and you can receive and place phone calls and participate in SMS conversations over Wi-Fi using it. Unlike some competitors, this is completely free — as long as you’re communicating with someone in the US or Canada.
Other solutions include Microsoft’s Skype app. It can be used for traditional phone calls and SMS messages all over the world, although that will cost you some money. It’s not free in the USA, as Google Voice is.
Of course, for communication, other apps that let you place audio calls and send text messages without relying on traditional phone numbers can also work. For example, you could have audio and text conversations with Google Hangouts, Skype, WhatsApp, Facebook Messenger, and others. These all natively work over Wi-Fi or a cellular data connection, so you can use them even when you don’t have a cellular signal. The above solutions are only really necessary if you want to send and receive phone calls and text messages from phone numbers.
Wi-Fi calling allows your iPhone to place and receive phone calls and text messages over a Wi-Fi network. If you have a weak cellular signal but a solid Wi-Fi signal, your iPhone will automatically switch over and route calls and texts via Wi-Fi.
Apple added support for Wi-Fi calling to the iPhone with iOS 8, and it’s now supported on many carriers. In the US, AT&T, MetroPCS, Sprint, T-Mobile, Verizon, and Vodafone support it. You can only use this if your cellular carrier supports it.
What You Need to Know
This is disabled by default, so you’ll have to enable it before it will do anything. Once you’ve enabled it, it will “just work” and your phone will automatically switch to Wi-Fi when necessary. You’ll see this indicated in the status bar–for example, it will say “T-Mobile Wi-Fi” rather than “T-Mobile LTE” if you’re using T-Mobile and your phone is currently connected to Wi-Fi rather than the LTE cellular network. Dial a number or send a text message in the normal way while “Wi-Fi” appears in your status bar and it will connect over the Wi-Fi connection instead of the cellular one.
It’ll automatically switch between cellular and Wi-Fi networks as you move out of an area covered by Wi-Fi, so you don’t have to do anything different or even think about it.
This only works if your carrier has enabled the necessary support on their end. The carrier has to be able to automatically route calls and texts to you over the Internet.
What You’ll Need
You’ll just need two things to use this feature:
A carrier that supports Wi-Fi calling: In the US, AT&T, MetroPCS, Sprint, T-Mobile, Verizon, and Vodafone offer this feature. It’s also supported by various other cellular carriers around the world. Consult Apple’s official list of cellular carriers that support Wi-Fi calling to see if your carrier offers this feature.
An iPhone 5c or newer: Older iPhones don’t support this. You’ll need an iPhone 5c, 5s, 6, 6s, or a newer model to use this feature.
How to Enable Wi-Fi Calling
To enable Wi-Fi calling, open the Settings app on your iPhone, scroll down, and tap Phone. Tap “Wi-Fi Calling” under Calls and activate the “Wi-Fi Calling on This iPhone” slider.
You should also tap “Update Emergency Address” and ensure your carrier has a correct address. If you ever dial 911 over a Wi-Fi network, the emergency responders will see your call associated with the emergency address you enter here.
If you ever encounter a problem with Wi-Fi calling, you can visit this screen again and disable it with a quick tap.
Using Wi-Fi Calling Along With Continuity
Wi-Fi calling doesn’t usually work with the Continuity feature. You won’t be able to place or receive calls on your Mac or another iOS device like an iPad if you enable Wi-Fi calling.
Apple is slowly rectifying this. In the USA, only AT&T, T-Mobile, and Sprint allow you to use standard Continuity features along with Wi-Fi calling. Consult that map of carriers and check if the “Wi-Fi Calling on supported iCloud-connected devices” feature is offered by your carrier.
You can enable this feature from the Phone screen in the Settings app. Under the Wi-Fi calling option on the Phone screen, tap “Calls on Other Devices.” Tap “Add Wi-Fi Calling For Other Devices” and other devices signed in with your iCloud account will be able to place and receive calls normally even with Wi-Fi calling enabled. Carriers will have to go out of their way to enable this, and this option is currently offered by only a few carriers.
Wi-Fi calling isn’t a whizz-bang feature you’ll notice a lot after you enable it, but it makes your iPhone work much better in areas with low cellular reception but a solid Wi-Fi signal.
Microsoft desperately wants you to use its Edge web browser and Bing search engine. In fact, Microsoft will literally pay you to use it. Microsoft pays in Amazon gift certificates, which are as good as cash if you’re a frequent Amazon shopper.
If you used Bing Rewards in the past, you’ll be familiar with this. The program has been rebranded “Microsoft Rewards” and also rewards you for using Microsoft Edge. It’s still only available to US residents.
Here’s how it works.
Microsoft Is Giving Away $5 Amazon Gift Cards
Rewards programs are only interesting if they have good rewards. So let’s look at what Microsoft offers. You can purchase sweepstakes tickets for a chance at winning Microsoft products like the Surface Book and Xbox One S. You can also redeem rewards like a Windows Store gift card, Xbox gift card, and Skype credits. The most interesting options are lower down on the page: $5 gift cards for Amazon.com, Starbucks, and GameStop.
If you’re a frequent Amazon.com shopper, a $5 gift card is just as good as $5 cash. That $5 becomes part of your Amazon gift card balance and you can use it on anything–it won’t even expire. Microsoft’s rewards program would be much less interesting without this reward.
You Can Earn at Least $10 in Amazon Credit Every Month
A $5 Amazon.com gift card costs 5250 points. You can earn up to 150 points per day from searching with Bing.com on your PC (5 points per search), 100 points per day from searching Bing on your phone (5 points per search), and 150 points per month from actively browsing with Microsoft Edge (5 points per hour).
There are also other bonus offers–when we wrote this, there were 170 points extra worth of bonus offers in the Rewards dashboard. Microsoft offers a new batch of bonuses once per day, too. These bonus offers just require you to search for specific things on Bing and visit other Microsoft websites, like MSN.
Initially, you can only earn 50 points per day from Bing searches on your PC. You’ll need to earn 500 points each month to get a “Level 2” account that lets you earn 250 points per day.
So let’s do some quick math. At thirty days in a month, you can earn roughly 12750 points per month without spending a dime. That would leave you enough points to buy you $10 of free Amazon credit with some points left over. That’s about $12.14 of Amazon credit you could earn per month. You probably won’t max this out every month–but you could still easily earn $5 or $10 of Amazon credit every month.
The only downside? Well, as we said…you have to use Edge and Bing. But for some, that may not be a huge issue.
How to Start Earning Rewards
To get started, head to the Microsoft Rewards website and opt into the program. When you’re signed into your Microsoft account and searching in Bing, you’ll see a point tracker that helps you earn points. You’ll earn them by searching and clicking the bonus offers.
To earn points for searching from mobile, you’ll need to search with Bing on your phone and be logged into your Microsoft account in the mobile browser you’re searching with.
To earn points for using Edge, you’ll have to use the Microsoft Edge browser on Windows 10 and be signed into Windows with the same Microsoft account you use for the Rewards program. Microsoft explains how rewards for using Edge work.
If you stay signed in and just use Edge and Bing, you’ll naturally earn points just for searching and browsing normally. You can also earn more rewards from doing the special offers that are easily accessible from Bing.com, but you don’t even have to do that.
Is Microsoft Rewards Worth It?
If you’re happy with Bing and Edge for your searching and browsing, this program is basically free money–money you can only spend on Amazon, of course. If you can’t give up Google and Chrome, the promise of some free Amazon credit may not be enough to tempt you.
But Edge isn’t mandatory–you can earn most of the points from just searching with Bing in Google Chrome, Firefox, or whatever other browser you prefer.
I’ve personally dabbled with Bing Rewards in the past and was able to get about $10 each month in free Amazon.com credit. I can confirm that Microsoft does indeed pay out.
Ultimately, I went back to using Google because it was better for more obscure, technical searches. But, if you’re happy with Bing, Microsoft’s rewards program will give you free stuff with no real downside.
Want something a little more ephemeral than iMessage’s “Invisible Ink” allows for? Confide helps you send self destructing messages that are viewed once and then gone forever.
How Confide Works in iMessage
As we highlighted in our iOS 10 features overview and then dove into with our guide on iMessage apps, iMessage now has an app ecosystem that’s like a miniature version of the iOS App Store. App developers can create standalone and helper apps that inject additional functionality right into iMessage. It can be as frivolous as stickers or as useful as enhancing your messages with additional encryption.
Confide, the company behind the already popular standalone iOS private messaging app of the same name, naturally jumped on the chance to integrate their app directly into iMessage. Now, instead of using a separate app to fire back encrypted, self-destructing, and screenshot proof messages, you can do so right inside iMessage. Let’s take a look at how to enhance iMessage with Confide.
So why use Confide instead of the new Invisible Ink effect built into iMessage? As much fun as the Invisible Ink feature is, it’s not really any sort of security, it’s really more of a fun little parlor trick–if you send an Invisible Ink message to someone without iOS 10, for example, the message isn’t obfuscated. It’s just sent in plain text with the addendum “(Sent with Invisible Ink)” added on. If you send someone a Confide message and they don’t have Confide to decode it, however, they see nothing. That’s good.
There’s only one downside: Both you and your recipient have to have the Confide app installed. If they don’t, they’ll get a prompt to install it right from your message, though, so it isn’t a huge deal.
How to Install Confide
Confide is free-as-in-beer for personal use, unless you crave the “Retract” feature–a premium feature reserved for Confide Plus members (a $1.99 upgrade) that allows you to retract a message you’ve sent, destroying it before the recipient can read it.
To install Confide, simply visit the App Store in iMessage and search for it. First, tap the Apps icon.
Then select the Additional Apps icon within the resulting menu, like so.
Within that submenu, click on the “+” Store icon to hop into the actual App Store.
Within the store, tap on the magnifying glass to search.
Search for “Confide” and then tap the “Get” button within the app to download it.
Now it’s time to start sending encrypted self-destructing messages.
Send a Message: Now You See It, Now You Don’t
To send your first Confide message, tape on the Apps icon again and swipe right until you see the Confide app, as seen below. The first time you’ll have a little splash screen, dismiss it by clicking “Get Started”
On the next screen you’ll have the meat of the app, the ability to send an self-destructing text message or photo. Select text to keep things simple for the first round.
Enter the message you wish to send and hit continue. Then click the send arrow on your message in iMessage.
It’s a bit clunky, we’ll admit, to hit send twice, but Confide is functioning as an iMessage app that attaches its payload to the message. As an aside, if you find that you and your secretive chat buddy love the features of Confide but want to streamline your Confide experience, you can always use the standalone Confide app (which is installed alongside the iMessage app).
The message appears to you as an iMessage attachment.
On the recipients end it looks identical (unless they don’t have Confide installed, in which case they’ll get the iMessage attachment plus a little link they can click on to install Confide).
In this case, my buddy replied with his own Confide message. Here’s what it looks like–just tap on it to open it.
Then you swipe your finger across it to reveal it.
Whatever the message or image is, enjoy it at this moment because once you close the message, it’ll disappear forever. The next time you try to open it, you’ll see this error:
A marker will remain in the flow of the iMessage conversation indicating that a Confide message was sent (or received), but it will be inaccessible to both parties. Confide is the perfect upgrade for folks looking to reach beyond the showmanship of the Invisible Ink feature and enjoy truly hidden messages that self destruct upon reading.
Backing up your text messages from your Android phone to your Gmail account is so simple, there’s no reason to not back them up and make them search-friendly in the process. Read on to see how you can turn your Gmail account into an SMS vault.
Prerequisites:
It’s easy to lose your text messages. Everything from switching phones to fumble fingers can drop your messages in front of the digital reaper—just last night I managed to accidentally delete a massive SMS thread when I really only intended to delete a single message that refused to send.
Backing up your SMS messages to your Gmail account is so simple, however, there’s no good reason not to do it. For this tutorial you’ll need three things:
Your Android phone
A free copy of SMS Backup+ from the Google Play Store
NOTE: Technically, you can dig around the advanced settings of SMS Backup+ to reconfigure it to work with any IMAP-enabled email server. However, since it was designed to work with Gmail and works so well with Gmail’s search, threading, and starring functionality, we’re not going to mess with a good thing.
Step One: Configure Your Gmail Account for IMAP Access
SMS Backup+ requires IMAP access to your Gmail account to function. Let’s take a moment and hop over to the Gmail account we’re planning on using with the application and check the status.
Login to your Gmail account and navigate to Settings –> Forwarding and POP/IMAP. Check Enable IMAP. Scroll down and click Save Changes. That’s the only configuration you’ll need to do within your Gmail account.
Step Two: Install and Configure SMS Backup+
With our Gmail account IMAP features toggled on, it’s time to install SMS Backup+. Hit up the Google Play Store and download the app. After the application is installed, it’s time to get configuring. Launch the application. The first screen you’ll see will look like the following:
The first step is to set up the connection to your Gmail account. Tap “Connect”. The Account Picker on your Android phone will launch, and you’ll be prompted to choose the Gmail account you want to use for backing up your messages.
Choose your account and grant the requested permissions. You’ll be prompted to begin a backup immediately or skip the initial backup.
Click “Backup”. We didn’t come all this way not to back things up! If you hit Skip, then all the messages on your phone will be flagged as already backed up and will be ignored.
The backup process will start, and depending on how many messages you have, will take anywhere from a minute to a half hour (or longer!) to complete. It clips along at about a message per second.
You don’t even have to wait until the process is finished to jump over to the Gmail account and check the progress. Log in to your Gmail account from a web browser. You’ll see a new label in the sidebar: “SMS”. Click on it.
Success! SMS Backup+ automatically backs up your SMS messages as well as your MMS messages. Not only are all of our text messages there but the pictures we’ve sent back and forth are backup up to Gmail along with the messages. Now that we’ve got everything humming along, let’s look at some advanced options.
Step Three (Optional): Turn On Automatic Backups
If you do nothing else before leaving this tutorial, you need to turn on the automatic backup feature. Leaving things up to manual backup in a surefire way to forget. From the main screen, tap “Auto backup” to turn it on, and then tap on “Auto backup settings” to configure the frequency. The default configuration is a bit aggressive. You may wish to, as we did, decrease the frequency of backups and even set it to only backup one Wi-Fi if you’re backing up a lot of MMS and don’t want to burn through your mobile data quota.
After you’ve set up the automatic backup, return to the main screen and head into Advanced Settings. There, you can change the settings for backing up, restoring, and notifications. Under “Backup”, there are some useful settings you may wish to toggle, include turning off MMS backup (again, to save on data consumption), and creating a whitelist of contacts you want backed up (instead of the default where every single message is backed up).
There isn’t much to look at under the Restore settings, but you can take advantage of a handy Gmail-centric trick. When SMS Backup+ stores your messages in Gmail it creates a thread for each contact. You can tell SMS Backup+ to only restore the contacts with starred threads which allows you to quickly select which conversations are important enough to restore via the star system in Gmail.
There you have it! All your text messages (including multimedia attachments) are backed up within Gmail where you can easily search them and restore them to your handset should the need arise.
A new version of the Apple’s desktop operating system is here, and with it comes a whole slew of interesting new features. Here are some of the best to watch out for.
Perhaps the biggest change coming to OS X is that it isn’t OS X anymore. Now, it’s called macOS, and this version will be named Sierra. As updates go, this one introduces quite a few new features, but it’s hardly what we’d consider revolutionary.
Still, it’s a worthwhile update. Since the release of the public beta in early July, we’ve had time to play around with it for some time and have liked what we’ve seen so far. Apple’s flagship desktop OS continues its long tradition of gradually improving or evolving. It’s not going to shift any paradigms, but that’s okay, we like it just the way it’s going.
So, without further ado, let’s discuss these features in more detail–and show you how to get them set up.
Hey Siri! Where You Been?
While the steadfast digital assistant has made its way onto the rest of Apple’s platforms–iPhone/iPad, Watch, and Apple TV–it has remained conspicuously absent from Macs, until now. Siri will now be part of macOS, and it’s about time.
If you’re expecting the same old same old from Siri however, that’s an appraisal that may need some retooling. Siri isn’t going to be as simple on macOS as it is on iOS and the other platforms. Siri will have a lot more jobs to do than simply checking the weather or creating a reminder. macOS is, after all, a much more complex and multi-headed beast than its mobile and TV counterparts.
If Siri works as intended, it will have to find files and parse for more complex commands than “text Mom” or “remind me to pick up my dry cleaning.” Some of the things you might ask Siri to do include the usual requests for the weather report and movies nearby, as well as more file-centric commands such as:
Show me files edited on July 15
Show me text files modified on July 15
Show me Notes I created yesterday
Show me the reminders on my DO IT!! list
Show me photos taken between July 13 and July 18
Show me every document tagged with How-to Geek
Whether or not the addition of Siri to macOS will get people to talk to their computers, remains to be seen, but for those of us who do use Siri a great deal on their iPhones and other Apple devices, this is a welcome addition that is long overdue.
Copy and Paste Between macOS and iOS
Continuity is already a must-have feature set, allowing anyone with a Mac and iPhone or iPad to seamlessly share tasks between the two. For example, you can take calls or texts on your Mac, or start an e-mail on your Mac and finish it on your iPhone, or if you’re reading a webpage on one device, transfer it to another, exactly where you left off. And it works exactly as intended.
In an attempt to refine this even further, Apple is now adding a universal clipboard, meaning that if you copy a block of text on your Mac, you can paste on your iPhone, and vice-versa, which is a much-needed refinement that we’re happy to see.
Apple Pay Comes to Safari
Another seemingly small but significant addition to macOS will be the ability to use Apple Pay directly from your computer.
If you’re using Safari and you’re on a website that supports Apple Pay, you can simply use your iPhone or Watch to pay. Talk about convenient: you will no longer need to enter your pay credentials, just pick up your iPhone and use Touch ID or tap your Watch. It should be pretty simple to use, but if you run into any issues, our guide to Apple Pay on Sierra will show you the way.
Unlock Your Mac, Hands Free
Speaking of Touch ID, while it seems like we’ll have to do without it on our Macs for the time being, but you can unlock your Mac now without entering a password as long as you have your Watch on. macOS Sierra introduces hands-free auto-unlock. It requires watchOS 3, and it’s a great time-saver.
Desktop and Documents Move to iCloud
While you could just move your Documents folder to cloud storage, such as Dropbox or OneDrive, it’s not seamless from Mac to Mac. You still have to change your Documents folder’s location on all your other Macs.
Then there’s your desktop, which is different from Mac to Mac, and doesn’t work very well on the average cloud-based solution.
Apple’s solution is just to move it all to iCloud, which is perfect (provided you have enough iCloud storage). Now, your desktop will be the same on all your Macs, as will your documents folder.
The nice thing about this new feature is you’ll be able to access all your files on any computer using iCloud.com, as well as from your iOS devices, on Windows using the iCloud application, and any Macs you have connected to your iCloud account (provided they’re running macOS Sierra).
Just head to the Apple menu in the upper left-hand corner of your screen, then go to About This Mac, click on the Storage tab, and click Manage. Head to “iCloud Drive” in the left sidebar to turn this feature on.
This feature will definitely streamline document and desktop sharing because whatever changes you make on one Mac will automatically propagate to your other Macs. Just make sure you upgrade your iCloud, because the standard 5GB will probably not be nearly enough if you keep a lot files in those two areas.
Optimized Storage Frees Up Space on Your Hard Drive
The idea behind Optimized Storage is to save space and avoid low storage warnings. Optimized storage will move an assortment of files that you no longer use to iCloud, and delete others, clearing up much-needed local storage.
What kind of files? It could be old screenshots, full resolution photos, old documents, unused fonts, and much more.
Optimized storage will also automatically delete files that you no longer use such as cache files, event logs, and anything that’s been in your trash for more than 30 days.
Unlike with the previously mentioned desktop and documents folders, you apparently won’t need to buy more iCloud storage as this won’t count against your allotment, which should make this feature a veritable no-brainer. Here’s how each of these features work, and how to set them up.
Messaging Gets an Overhaul
Messages has gotten a massive overhaul in iOS, and to a lesser extent, in macOS. Still, it’s a noteworthy enough change to merit a mention. Apple rolled out Messages feature after feature at its WWDC event, and while much of it seemed maybe a tad overkill, there were nevertheless some cool, new items of note.
As we said, it won’t have as much going for it as its iOS cousin, but it will still need to be compatible with whatever is thrown at it. For example, in iOS you will be able to make messages appear as if they’re growing in size to simulate loudness, or you can send a message that is obscured until you wipe it away to reveal its contents. You will be able to receive these messages on macOS, but you won’t be able to send them.
One thing you will be able to send are super-sized emoji that are three times the emoji that appear alongside text, though it appears you are limited to only three emoji before it reverts to normal size. Also, you can only send them as standalone emoji. Emoji sent alongside text will appear normal sized.
Another useful feature that will make its way into macOS Messages are Tapbacks. In a nutshell, Tapbacks will allow you to send quick replies to messages without having to type out an actual response. Think of them as the Messages’ equivalent of the Facebook Like. Just right-click on a message to give it a heart, thumbs up, or thumbs down.
Finally, Messages will also support rich links, which means that when someone sends you a URL, it won’t appear as a simple text link but rather as a picture with the article’s title.
While Messages for macOS won’t be as feature-rich (or bloated, depending on your feelings) as the iOS version, it will have enough of the good stuff to make it a worthy upgrade.
Picture-in-Picture Videos
This is a simple addition and it will require you to watch videos using Safari’s HTML 5 video player, but it’s nevertheless pretty nifty.
The picture-in-picture feature can already be found on iPads as of iOS 9. On the Mac, it isn’t quite as useful, but still decently handy, especially if you’re watching the big game and trying to get some work done. Videos can be pinned to any corner of the screen and scaled from about 1/16 to 1/4 of the screen.
Sites like YouTube will still need to integrate this feature, though ESPN and Vimeo already have it.
Create Memories from Your Photos
The Photos app is getting more and more like Google Photos with each successive iteration. In this latest update, the big new feature is dubbed Memories, and it works by grouping images together that fit certain criteria whether it’s people, travel, place, and more.
The Photos app will also bring new, enhanced facial recognition, letting you find more pictures of the people you care about, along with new search features that more intelligently search for photos by objects or scenes. Finally, Photos will add mapping to its bag of tricks, meaning you can now browse photos by location provided they were geo-tagged when they were taken.
There’s obviously a lot for Mac users to like about this new release, especially with the addition of features like Siri, iCloud Desktop and Documents, Optimized Storage, and other time-saving features like auto-unlock and Apple Pay. You can download macOS Sierra now, for free, in the Mac App Store.
There’s no doubt that a dash cam can really come in handy in your car–not just to record meteors and flying cars, but more practical events like collisions and aggressive driving. But instead of buying one, you can just use equipment you already have and a freely available app.
By now, everyone probably has an old smartphone stashed away in a desk drawer. Wouldn’t it be nice if you could put that device to good use? Today we’re going to talk about how to set up and use your old smartphone as a dash cam, not only saving you money, but giving you a cool project to boot.
How to Set Up the Hardware
Aside from your old smartphone, you will need a charging cable long enough to reach the power outlet in your vehicle, as well as a dashboard or window mount. This setup works the same as it did when we showed you how to create time lapse driving videos using your iPhone.
The cable shouldn’t be difficult to come by, since most people have one or two spare ones lying around. The mount is easily bought from any electronics store or Amazon, which carries an abundance for around $20-$25.
In our time lapse article, however, we made no bones about using your current smartphone to do this. When performing the dash cam arrangement, it is best if you have a device that you won’t need to take off the mount or otherwise use to call, text, or play music. (Though if you do, be sure to pull over first.)
Once you’ve gathered the necessities, place your mount on the dashboard or windshield in such a way that it captures the best view of the road ahead.
You want to mount your smartphone-turned-dash-cam in such a way that it is pointed down the middle of the hood and records equal parts of the car’s right and left sides.
You may not be able to capture as much of the road (150 degrees or more) as many dedicated dash cams, so simply do your best to ensure you’re getting as much as possible.
Make sure the phone is plugged in at all times. You don’t want to run out of battery at some critical moment, plus most older devices have batteries that have begun to decline and therefore don’t last as long as newer ones.
Finally, once mounted, make sure the device is secure and tightened down. It might shift while you’re in motion, so check it occasionally and adjust it (after stopping the car or volunteering a passenger) so that it’s always pointed in the right place.
What to Look for in a Dash Cam App
When it comes to the software, you have a lot of options. These so-called blackbox apps come with a long list of features, but we need something that records continuously, tracks our location and estimated speed, date, time, and adjustable video quality.
This last bit is important because any dash cam, whether it’s a smartphone or a dedicated dash cam device, you need to know that you won’t run out of memory and not be able to record anymore. Unless your old smartphone has heaps of extra storage space, lowering the video quality can help you get a lot more recording time.
On the other hand, too low of video quality might give you unusable results, so it’s a matter of finding a happy medium. Changing the recording time can help with this problem. If your device has a smallish capacity, then you can keep the recording time low and simply loop over the previous recording each time.
Don’t forget also that this is a smartphone we’re talking about, so if you’re short on storage space, you can always delete apps, photos, and other stuff, or just reset it to factory condition (or get a bigger SD card, if your phone supports it.) Whatever the case, you have options, especially if your device will allow you to expand the storage.
That said, we have a few recommendations of our own, but feel free to look around if these don’t work for you.
For Android: AutoBoy Dash Cam – Blackbox
If you have an old Android smartphone you’re no longer using, we recommend using something like Autoboy Dash Cam – Blackbox or Autoguard Dash Cam – Blackbox. Unsurprisingly, there are quite a few dash cam apps in the Play Store, but these two are free and among the most highly rated.
AutoBoy has a clean, smart interface and it’s very easy to use. Let’s have a look at just some of the many settings. Under the General settings, you’ll be able to turn on the shock sensor, which will measure the impact of a collision, and change the unit settings from kilometers per hour to miles.
Another unique feature is emergency auto dial, which will dial an emergency contact number (for example: 911).
Checking out the recording settings, you can adjust the recording time and maximum storage allotment, which is 10GB by default.
Another important setting you might want to consider is video quality. The lower the quality, the more recordings you can fit into your storage allotment.
We could go on and on about the settings, as there are quite a few but if you decide to use AutoBoy Dash Cam, feel free to peruse them yourself.
For iPhone: DashCam
If you’re using an old iPhone, then the choice is simple: DashCam. DashCam includes all the necessary features we need, including–but not limited to–speed, location, and loop recording.
DashCam is among a selection of several other viable choices in the App Store, but it’s the only one that appears to have any ratings behind it and it’s most recent version has garnered highly favorable reviews.
DashCam is really simple to use, while also being very powerful. The settings aren’t exactly voluminous, but there are some very essential things you should know about. For one, DashCam has loop recording option, which will keep recording over previously recorded video. That is, unless you have auto save enabled–in which case, loop recordings will automatically saved.
Note, you can also switch between high and low video resolution. Remember, you will get more recordings the lower the resolution.
Be sure to scroll through the rest of the settings and adjust anything that applies to you.
Whether using an Android device or iPhone, what you use for your dash cam software is completely up to you. You’re encouraged to experiment with several apps and decide which one works best.
The Downside: Heat and Thieves
While using your old smartphone as a dash cam is easy and frugal, there are downsides. The one that ranks above them all is heat.
Leaving a relatively delicate electronic device in a locked car can mean a quick death for it. Many modern higher-end dedicated dash cams come with better heat resistance to mitigate this problem. If you decide to go the smartphone route, then your only real solution is to take your dash cam smartphone with you when you leave the car unattended for long periods.
Taking your newly repurposed smartphone with you may seem a pain, but it beats having your car broken into by thieves looking to score. It’s one thing to forget your device on the car seat or center console, where it might be missed by someone casually casing a parking lot, but it’s quite another to leave it hanging off your dash mount in plain view.
Again, many dedicated dash cam devices are made to fit discretely on your dash and thus circumvent this problem, so that’s another thing to consider.
That said, if you’re not budgeted for an actual dash cam, you simply want to experiment, or you’re just keen on this kind of project, then your old unused smartphone could finally have a new lease on life.
In this step by step guide, we will show you how to install and configure VMware vCenter Server 6.0 on Windows Server 2012 and 2016.
Prerequisites:
A Virtual or Physical Machine running Windows Server 2012 or 2016 on it
VMware vCenter Server 6.0 Setup (Download it from www.vmware.com) if you don't have one
Double click the Autorun.exe to start the installation process.
Choose the vCenter Server for Windows & Click Install.
Click Next.
Accept the License Agreement & Click Next to proceed.
At this point you have to choose the Deployment Type
Embedded Deployment: You can use the vCenter Server with Embedded Platform Service Controller.
External Deployment: You can Install only Platform Service Controller or You can only install the vCenter Server which will require the already Installed Platform Service Controller.
But in our case we are deploying the fresh, we don’t have any existing infrastructure so we will choose the first Option & Click Next to proceed.
Here you will have to provide the System Network Name which will be used to access the vCenter Server from vSphere Client or Webclient. You can provide the Hostname or You can Provide the IP address which should be static.
If you already have the Single Sign-on you can directly connect to join vCenter Single Sign-On or you can create the new vCenter Single Sign-On by providing the below details:
Domain Name
vCenter Single Sign-On user name
vCenter Single Sign-On password
Confirm password
Site Name
Click Next to proceed.
Use the Local Windows Account or Specify the User Service Account. We will be using the Windows Local System Account. Click Next to proceed.
Use the embedded Database vPostgres or Provide the external Database Details. Since I am working in lab so we will be using the Embedded vPostgres Database.
Click Next to proceed.
It is recommended to use the default Ports for best practices but if you want change any port of vCenter Server, you are free. Click Next to proceed.
Change the Storage Location or leave it default & Click Next to proceed.
Review the entire setting and make sure all the setting are correct. Click Install to start the installation.
Installation started.
Installation completed.
Open the vSphere web client or just click Finish to close the dialog box.
You can’t run Windows apps on your iPad or iPhone, but if you have a Pro or Enterprise edition of Windows, you can remotely access your PC using Windows Remote Desktop. Here’s how to get it set up.
There are a lot of ways to remotely access your computer from iOS, and you can read about all your options here. Remote Desktop, while not as quick to set up as something like TeamViewer, gives a really smooth experience that’s well worth the work if you have a mostly-Windows household. So, we’ll be using the Remote Desktop server built into Windows Pro and Enterprise and the Microsoft Remote Desktop client for iOS 8 or later.
If you can’t use Remote Desktop, though you have other choices. If you’re just helping someone troubleshoot their computer remotely and don’t need continued access–or if they only have a Windows Home edition–you can use Windows 10’s new Quick Assist feature (or the Remote Assistance feature on older Windows versions). Or if you need a more fully-featured remote access program that supports any edition of Windows (and other operating systems), you might take a look at TeamViewer and other remote support tools.
With that in mind, let’s look at setting up Remote Desktop on iOS.
Set Up Your Windows PC for Remote Desktop Connections
If you have decided to use Windows Remote Desktop, the first step is getting it set up on the PC you want to control from remote devices (if you haven’t already). Again, you’ll need to be running a Pro, Business, or Enterprise version of Windows for this to work. Home and other versions can work as a Remote Desktop client for connecting to another machine, but not as a server.
First, access the System Properties dialog. How you get there differs a bit in each version of Windows. In Windows 8 or 10, hit Start and search for “Allow remote connections to this computer.” In Windows 7, hit Start, right-click “Computer,” and then choose “Properties.” No matter what version you’re using, though, the System Properties dialog will look the same.
Once there, switch to the “Remote” tab, and then select the “Allow remote connections to this computer” option.
When you’ve got Remote Desktop turned on, you should be able to connect to that computer remotely from any device connected to your local network using the instructions in the next section.
Install and Set Up Microsoft Remote Desktop on Your iOS Device
Now that you have Remote Desktop configured on the PC to which you want to connect, it’s time to turn your attention to the iOS device from which you want to connect. You’ll first need to download and install Microsoft Remote Desktop. When that’s gone, go ahead and fire it up.
The first thing you’ll see is a lonely little screen waiting for a new connection to be added. Do that by tapping the “Add” button at the top right.
We’re going to be adding a connection to a PC, so tap the “Desktop” option. If you’re working with a company that provides remote access to your work PC, they may have you use the “Remote Resources” or “Azure RemoteApp” options instead, depending on how they have things set up.
When you add a new desktop PC, you can type the PC’s full name or use the IP address. If you’re connecting over a local network, you can use either the name or the IP address. If you’re connecting over the Internet, you’ll need to use whatever public IP address is exposed to the Internet for your local network. Type the name or IP address and then tap “Done.”
If you want, you can tap “User Account” and add your Windows user name and password so that you don’t have to enter it each time you connect to the PC. If you’d prefer the security of having to enter your credentials each time, just leave that option alone. Tap “Additional Options” to do a little further configuration.
The “Additional Options” page lets you control a few things:
Type a friendly name if you used an IP address or your PC has a name that’s not easily identifiable. This friendly name is used only in the Remote Desktop app.
If you have a more sophisticated local network with multiple subnets, you can configure a gateway device to which all Remote Desktop requests are sent. You’ll need to know the IP address of that gateway.
You can configure sounds made by the PC to play on your iOS device, the PC itself, or to make no sound at all while you’re connecting remotely.
If you’re a left-handed user and the PC to which you’re connecting has the mouse buttons swapped, the “Swap Mouse Buttons” switch forces Remote Desktop to respect that.
The “Admin Mode” option applies only to administrators logging into a Windows server that also functions as a terminal server. If that doesn’t apply to you, just leave it turned off.
When you’re done configuring options, tap “Desktop” and then tap “Save” to save your new connection.
After you create a connection, it will appear in the main “Remote Desktop” window. Right after you’ve created it, the connection will look blank. After you’ve used it, the connection will contain a thumbnail image captured the last time you connected. Just tap the connection to start it up.
Assuming you’ve got Remote Desktop configured properly on your PC, you should connect right away. If you see a screen telling you that the PC is not verified, it’s nothing to worry about. Your desktop PC likely isn’t set up to supply proper authentication credentials. As long as you know you’re connecting to your PC, you’re good to go. Tap “Accept” to continue with the connection. Optionally, you can also turn on the “Don’t as me again for connection to this computer” option if you’d rather not see the message again.
When you’ve connected to your PC, you should be in pretty familiar territory. You can interact with your PC pretty much the same way as if you were using it directly. You will notice a few options on a menu at the top of the screen. The “Zoom” button on the left just lets you get a closer look at what you’re doing.
The “Keyboard” button on the right opens an on-screen keyboard. While in Remote Desktop, you can’t use the regular iOS or third-party keyboards. Instead, you’ll use a keyboard provided by Remote Desktop. The one little change you’ll need to get used to is that the keyboard doesn’t pop up automatically the way it does in iOS. You’ll need to tap the button to show the keyboard and tap it again when you’re done using it and want to see the rest of the screen.
Tap the middle button on that menu to open a few Remote Desktop options. On the left, you can switch between connections if you have multiple connections set up or even add a new connection on the fly. On the right, the “Home” button takes you back to the Remote Desktop app home screen without closing the remote connection. The “End Session” button closes the remote connection. And the “Mouse Pointer” button toggles between letting you interact with the remote PC by touch (the default) or an actual mouse pointer you move around on the screen.
That’s pretty much all there is to using a Remote Desktop connection from your iOS device. Getting Remote Desktop set up in the first place is the trickier part, especially if you need to connect over the Internet. Once that’s done, using the Remote Desktop app in iOS to connect to and control your PC is pretty straightforward.
Have you ever wanted to change the status bar on your Android phone or tablet? Maybe you wanted to change the position of the clock, add a battery percentage, or just get a different look. Whatever your reason, there’s a simple way to customize your status bar–and it doesn’t even require root access. This is possible thanks to an app called Material Status Bar, which you can download for free from the Google Play Store.
Step One: Install Material Status Bar and Grant It Permissions
Download and install the app from the Play Store, find it in your app drawer and open it. You’ll be prompted to grant the app some pretty far-reaching permissions, but they’re necessary for the app to work.
The three things you’ll have to toggle within Android’s settings are Accessibility, Notifications, and Write. The app will give you shortcuts to all three. First off, tap on Accessibility.
On that screen, tap Material Status Bar.
It will double-check to make sure you want to grant Material Status Bar that permission. Tap OK.
Next, use your back button to return to the Material Status Bar app and select Notifications. Toggle on the switch in the upper right and then tap allow.
And finally, return back to the app again using your back button and select Write. Toggle on the switch in the upper right.
You’ve made it! You successfully set up the app. Now let’s play around with it.
Step Two: Customize the Status Bar
The main menu of the app has a few options, so let’s run through them. But first, to activate the app, make sure the toggle in the upper right corner is turned on, as shown below.
Under Theme, you have four options: Lollipop, Gradient, Dark Gradient, and Flat. By default, it’s set to Lollipop, which is what you’re seeing above. However, I’m a big fan of the flat theme, which looks like this:
It automatically matches the status bar to the exact same color as the action bar (that’s what Google calls the solid color bar at the top of most apps). If it fails to pick the right color for an app, or you just what something a little different, you can set custom colors for every individual app under App List.
You can also take a screenshot of any app and use Color Picker to pull colors directly from it.
The Transparent Status Bar option is intended solely for your home screen, and it only works if you have a static (non-scrolling) home screen image. My scrolling home screen threw it off a little bit, as you can see:
It also can’t do a transparent status bar for any other apps. While most apps don’t use a transparent status bar, some–like Google Maps–will lose their transparency and use your default color option.
If you swipe in from the left, or tap the three-line icon in the upper left, you can access several more menus.
Under Customize, you can make a few more little tweaks that I’ve found really useful, like setting a center clock and showing a battery percentage.
Under the Notification Panel menu, you can change how the notification panel looks when you pull down from the status bar.
There’s not a whole lot to work with here, given that there are only three themes that are very slight variations on each other. Here’s one of them:
Pre-Nougat versions of Android generally require one swipe down to see notifications and a second swipe down to reveal the Quick Settings. Material Status Bar, however, takes a more Samsung-like approach by having a horizontally-scrolling Quick Settings panel visible at all times.
You can also change how the Heads Up notifications function in this app, including the ability to have them appear at the bottom of the screen or just slightly lower so they don’t cover the status bar. The only two “styles” available are dark or light.
And if you ever move to a new device, flash a new ROM, or have to reset your current device for some reason, you can easily make a backup of the app’s settings and restore them at any time.
If you have a long list of custom app colors, this could be a huge time saver.
Step Three: Get Rid of Ads with the Paid Version (Optional)
Material Status Bar has both a free version and a $1.50 Pro version. The free version, which I tested, is perfectly functional. The most annoying aspect is the rather frequent full-screen ads, but they only happen while you’re in the app. And since you can just set up the app once and then never open it again, they’re really not much of a bother.
The two major reasons you might want to upgrade to the Pro version are: the ability to use your stock notification panel with Material Status Bar, and access to more notification panel themes. Obviously, it removes ads too.
Here’s what one of those alternative themes looks like:
So if you’re unhappy with how the notification panel functions in the free version, it might be worth the mere $1.50 to spring for the Pro version.
And that’s all there is to it! With this little app, you can have a gorgeous, customizable Material Design status bar.
If this wasn’t exactly what you were looking for, you might want to try rooting your device to get some deeper customization, like the ability to have an Android Nougat-style notification panel. And regardless of what tweak you go for, you can always add some app shortcuts into your notification panel.
They say that the best camera is the one you have with you, and more often than not, that camera is attached to your smartphone. Grabbing quick images and videos is easier than it’s ever been, but sometimes you hit that record button a little too early and get 34 seconds of fluff before the good stuff. Here’s how to fix that.
Just a couple of short years ago, trimming videos on a mobile device was more of a pain than anything, especially since it was a little different on every phone. Today, thanks to Google’s Photos app, not only is trimming videos quick and easy, but it’s also the same across the board, regardless of which device you’re using. Nice.
To get started, you’ll need to fire up the Photos app. This should be pre-installed on essentially every modern Android phone, so if you haven’t been using it, you’re missing out on some good stuff—like automatic backups. If you don’t have it, you can download it for free from Google Play.
If this is your first run with the Photos app, you’ll have to first set up the Back Up & Sync option. It’s toggled to “on” by default (which I personally recommend leaving on), so if you’re good with all the details, just hit “Done.” Now, onward to the actual video trimming part.
Go ahead and open the video you’d like to trim. See that little pencil icon at the bottom? That’s your button. Tap that little guy.
If this happens to be an older video and you’ve been using Photos for a while to back up your stuff, you may have to re-download it before the pencil shows up. To do that, just tap the three-button menu in the top right and select “Download.”
The edit menu is stupid-simple, with an easy-to-use selection tool for trimming, and a button to rotate the video. That’s pretty much all there is to it—highlight the section of video you’d like to keep, then tap the Save button in the top right. You can also hit the play button in the center of the video to check your selection before trimming, just to make sure it’s perfect.
Once the video has been trimmed, it will automatically save. The old video isn’t altered in any way, but instead a new video file is created. You don’t have to name it or anything—everything is handled automatically.
And that’s all there is to it. See, wasn’t that easier than you expected? No, no, don’t thank me—thank Google.
Android has always done notifications consistently well over its various iterations. In Android Lollipop and Marshmallow, notifications have gotten even better, giving users specific, granular control over notifications for every application installed on your device.
While this post focuses specifically on Lollipop (Android 5.x) and Marshmallow (Android 6.x), Nougat (Android 7.x) takes notification control even further.
Manage Notifications from the Lock Screen
Starting with Lollipop, notifications are still accessible from the status bar, but they’ve also moved front-and-center to the lock screen. You can double-tap on a specific notification to open the app (you’ll have to unlock your device first), or swipe them away from the lock screen just like you would in the old pull-down drawer.
You can also expand your notifications by pressing and pulling down. In some apps, this will give you a more detailed look at the notification, while others (like music or video apps) will give you playback controls.
Tapping the bottom-right “clear notifications” button still makes everything go away.
Customize Notifications from Android’s Settings
Aside from this new functionality, Lollipop incorporated some really solid, new notifications options. If you swipe down from the status bar, then press the gear icon at the top, you can quickly open general settings.
When the settings open, tap “Sound & notification.”
The resulting page has four options under the “Notification” heading. The Pulse Notification Light setting is self-explanatory: it will flash an LED light on your phone whenever you have a notification. In addition, you don’t need to worry about Notification Access settings–an app will prompt you if it ever needs them.
If you tap on “When device is locked,” however, you see three options. By default, both Lollipop and Marshmallow will show all notification content on your lock screen.
You can completely disable lock screen notifications by tapping “Don’t show notifications at all.” This lets you restore a bit of privacy from technology’s creep–no one can see your emails and text messages just by looking at your lock screen.
Tap “Hide sensitive notification content” and you will no longer be able to see what’s playing on Pandora, what people are saying in instant messages and texts, who is sending you e-mail, and more. It’s a transparent privacy feature, allowing the device to notify you of things that need your attention without revealing what it says or who wrote it.
For reference, here’s a normal set of lock screen notifications:
and here are those same notifications with “Hide Sensitive Notification Content” turned on:
Turn Off Notifications, App by App
If an app is regularly sending notifications you don’t want to see, head to that app’s settings and see if there’s an option to turn them off. This is, usually, the best way to stop an app from sending you notifications.
Unfortunately, some applications are insistent about getting your attention. Facebook Messenger’s notifications, for example, can’t be turned off–they can only be muted for up to 24 hours.
Android Lollipop brought a little sanity and reassurance into this field by introducing the ability to block notifications from any app. This setting is also available on Marshmallow.
When you tap “App notifications” on the Notification Settings screen, you are presented with a scrollable list of all your installed applications. If we scroll to the aforementioned Messenger app, we can show you how this works. It’s worth mentioning that while Lollipop breaks the list up into alphabetic sections, Marshmallow eliminates the subheads in lieu of a simple alphabetized list.
You can make fine-tuned adjustments on how an app bugs you. You can completely block notifications, so it exists on our device without constantly reminding you of that fact. And, you’re also able to mark these notifications as “sensitive” and/or “priority.”
Sensitivity settings let us force some apps to hide their content on the lock screen, so if you actually want to see who is e-mailing, you can, but if you don’t want to see text or Messenger previews, you can specifically assign them to hide their content.
Priority interruptions pertain to what applications can notify you when Do Not Disturb is on. If an app is marked as priority, it’ll come through if you have Do Not Disturb set to “Priority Only”.
In Marshmallow, this section also includes an option to “Allow peeking.” This feature was introduced in Android 6.0 and allows a notification to pop up on top of other apps so you can quickly check it without leaving the foreground applications.
Finally, some apps may have a settings gear in the upper-right corner of its App Notifications window. This will take you to the notification settings within that app.
Marshmallow’s Ace in the Hole
Marshmallow also has one trick up its sleeve that you won’t find on Lollipop when it comes to notifications.
When you get an annoying or otherwise bothersome app and need to silence it quickly, just long-press it and tap the “i” bubble. Boom: you’re immediately taken to that app’s notification settings, where you can block it for good.
Android’s current notification settings add a great deal of flexibility over the way it alerts you across the entire system. You no longer have to open each app and then open its preferences for notification settings. You can still do that, but Lollipop’s inclusion of app notification settings means that you have systematic control over everything.
If you have an Android phone, though, you don’t have to deal with it. There are actually a few different ways to go about blocking numbers on Android, and we’re going to talk about a few of the easiest ones today.
Block Numbers Right From the Dialer in Android 6.0 (Marshmallow) and Up
If you’re on a phone that already has the latest version of Android (Marshmallow), then we have good news: call blocking is just a few taps away. This is a long-requested feature that Google finally brought to the table starting with Android 6.0.
The easiest way to do this is to long-press the number in your call log, then select “Block number.”
Unfortunately, that only works on stock Android, so if you have a Samsung Galaxy device (or other non-stock phone), you’ll have to use the slightly more convoluted process: go directly to the call blocking list. The good news is that accessing the call block list is basically the same on every device, though the menus may be named slightly different things—for example, on stock Nexus devices, you tap the three-dot overflow button to access the dialer’s menu, where you’ll tap “more” on Samsung phones to get to the same place.
So, with that in mind, go ahead and jump into the dailer (or the “phone app” as it’s often referred to). Once there, tap the three-dot menu in the top-right (again, on Samsung phones it reads “more”).
Choose “Settings,” then the “Call blocking” option.
This is where you’ll add the numbers of callers you’d like to ignore. Simply tap the “Add number” or “Block list” option, and key in whatever the number is. You can also choose a contact here, assuming you’ve saved the number of the annoying caller.
When someone from this number calls you, the phone will auto-block it. No ringing, no notification. Nothing. This raises the question: if someone calls and the phone doesn’t ring, did they ever really call at all?
Automatically Send Calls to Voicemail in All Versions of Android
If you’re on an older version of Android that doesn’t have automatic call blocking, there’s another option: automatically send calls to voicemail. This method also works on stock devices running Marshmallow, if you’d prefer not to block calls entirely, but it’s not available on new Samsung phones like the S7 or S7 Edge.
Since Google decided that it makes sense to have two apps that can handle contacts (the dialer and Contacts app), there are two different ways to get this done. Regardless of which app you’d rather use, the first thing you’ll need to do is navigate to the contact you want to ignore, then edit their entry in your address book.
Once you’re in the “edit” menu, tap the three-dot overflow button in the top right. In this menu, there’s an option that reads “All calls to voicemail.” Tick that box.
The biggest difference between this option and auto-block is that it’s universal for the contact. So if you have two numbers listed for the same person, it will send both of them to voicemail; with the blocking feature, you can just block one but allow the other to get through.
The result here is identical to the blocking feature: no call, no notification (unless they leave a voicemail, of course). It’s almost as if they never called at all. Spooky.
Block Suspected Scammers and Spammers with Mr. Number
If you’re looking for what’s arguably the smartest ways to block calls on your Android phone, look not further than Mr. Number. This is an incredibly full-featured app, but we’re just going to focus on its call-blocking capabilities. Once you get in on the block action, though, you should definitely explore the app a bit more. It’s neat.
If you’re just looking to block all telemarketer or spam calls, Mr. Number can actually this automatically. It has three types of auto-blocking: scam/fraud, suspected spam, and hidden numbers. Each of those categories can be toggled individually, too. It can also block individual numbers.
To enable these features, the first thing you’ll need to do is (of course), install Mr. Number. I shouldn’t have to say that, but I’m doing it anyway. For completeness.
Once the app is installed, open it and tap the overflow button in the top right corner, then select “Settings.”
In the Settings menu, there’s a section titled “Call Blocking.” That’s what you’re looking for. Tap the “Blocking Enabled” button. It may also read “Blocking Disabled” if you just installed the app.
In this menu, you can choose to block specific numbers, or toggle the aforementioned categories. There are actually several automated options here: Scam or Fraud, Suspected Spam, Hidden numbers, International Numbers, and Not in my Contacts. You can control each of these as needed.
Alternatively, you can just tap the “Numbers on my block list” option to add specific numbers. Just tap the plus sign in the bottom right to open the blocking menu. You can choose from a few different options: a number, a contact, numbers that begin with specific digits, or recent calls or texts. That’s crazy-granular control. You can block an entire area code if you want!
When someone on your block list tries to call (regardless of you entered the number manually or it’s part of the auto-blocking feature), the phone will ring for about half a second or so before Mr. Number can kick in. Once it does, however, it’ll send the caller to voicemail and leave a notification letting you know that it blocked a number. You can then tap the notification to read more information about the number, including comments left by other users as to what the nature of the call was. Neat, right?
Block Calls with Google Voice
If you’re a Google Voice user, you have the ability to block calls from your Google Voice settings. Google Voice will play a message saying the number has been disconnected, so this may even fool telemarketers and other annoying callers into removing you from their spam lists.
Just log in to your Google Voice account online, locate the recent caller you want to block, click the More link, and select Block caller.
See if Your Carrier Can Help
Carriers have the ability to block calls, but they often don’t make it easy. Like almost every other service they offer, it will probably cost you additional money. Some carriers may help you block calls if you contact them, some may direct you to their paid services, and some may say it isn’t possible. This all varies from carrier to carrier, so you’ll need to check your carrier’s website, or call them and ask what services they offer.
Spam calls are annoying and intrusive, not to mention they waste your time. Fraudulent calls can be scary—oftentimes they sound really official, which can lead unknowing users to actually turn over personal data (or worse!). Fortunately, there are solutions across the board—whether you want to keep spammers at bay or block your ex from blowing your phone up (metaphorically, not literally; unfortunately there’s not an app for that).


 Visual Comparison of SET and Traditional Teaming
 Sample Networking Meter


 button in your layers panel. Then pick the paintbrush tool and right click to set it to a soft brush setting. Make sure your foreground color is white, as shown above right.


 icon to bring up the sharpening and details tools.