This guide will walk you through the steps to deploy and configure vCenter Server Appliance 6.5 with embedded platform service controller.
Go to "vCSA-setup-directory\vcsa-ui-installer\win32" and Click on installer.exe to begin the deployment wizard.
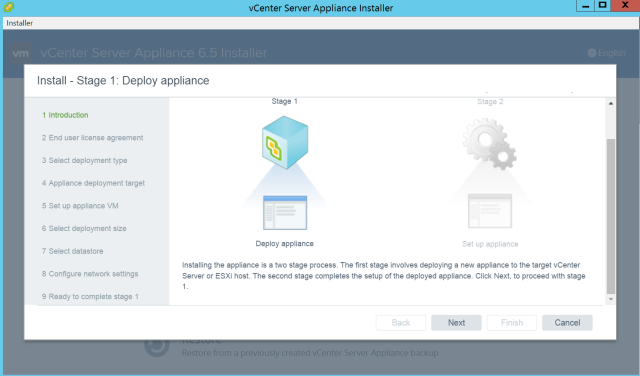
Click Install to start the installation wizard.

The deployment wizard showing you that there are two steps involved in the installation. The first one will deploy a vCenter Server Appliance and in the 2nd step we will be configuring it.
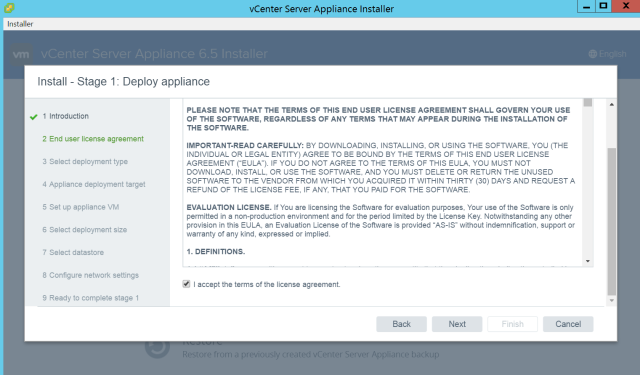
Accept EULA and Click Next.
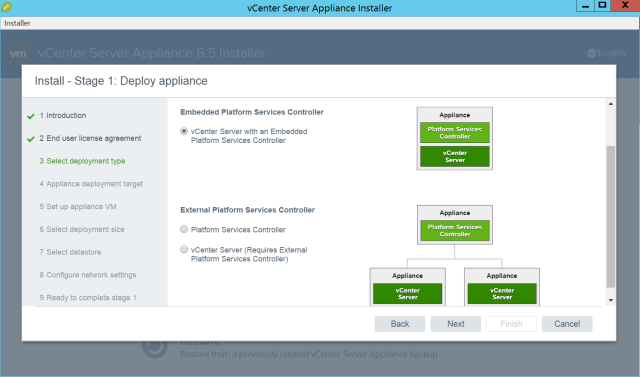
The below deployment type prompts you to choose whichever suits your environment. If you don't know much about available deployment types and its requirements, you may consider read the official documentation available on VMware website. I'll be going with the first option "vCenter Server with an Embedded Platform Services Controller". Click Next
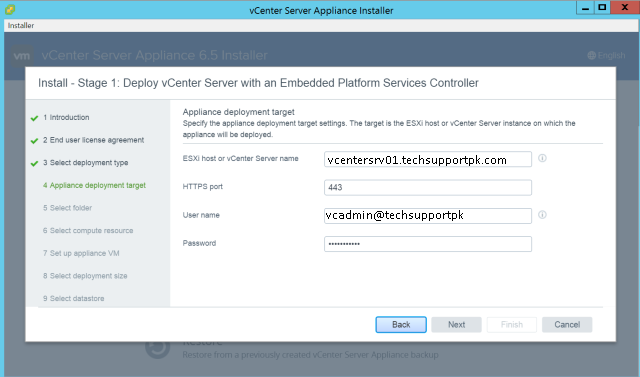
Now, choose the target for vCenter Appliance deployment. You can either choose ESXi host as target or any existing vCenter Server. In our case, we already have a Windows based vCenter Server 6.5 installed earlier and that is our target.
Note: If you select ESXi host as target, provide username root and yourpassword of ESXi host. If you select vCenter then you can choose a Windows account that have access to vCenter Server.
Click Yes on Certificate Warning window.

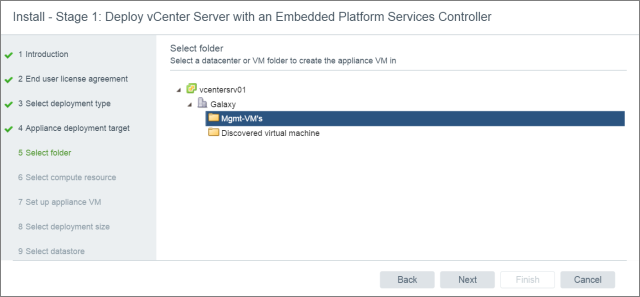
Select the appropriate folder where you want to deploy vCSA 6.5 and Click next.
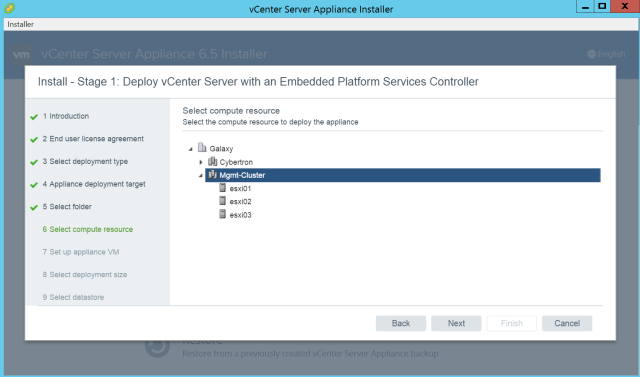
Chose cluster/host where vCSA will be deployed and Click next.
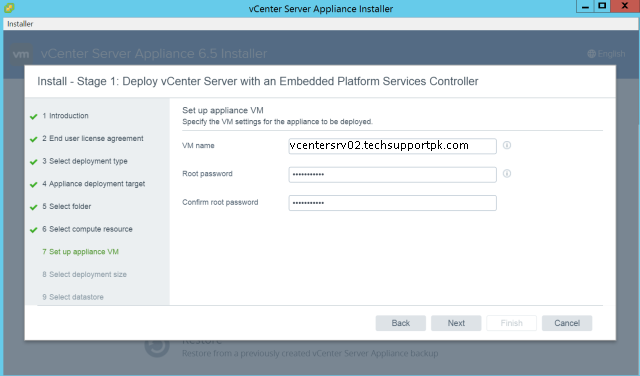
Provide VM name for the vCenter Appliance and root password.
Select the sizing of the vCenter Appliance according to your environment.

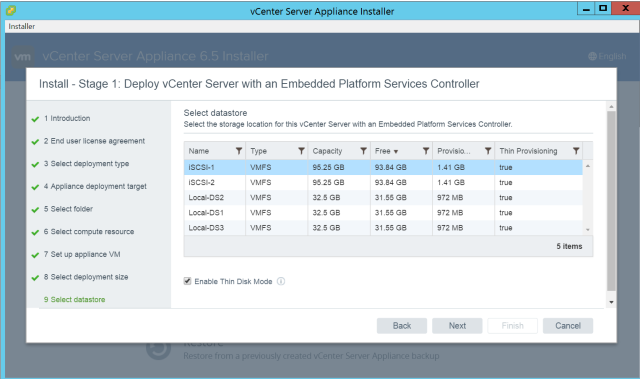
Select the destination datastore where appliance will be deployed and Click Next. I recommend using thin provisioned mode by ticking the box “Enable Thin Disk mode’
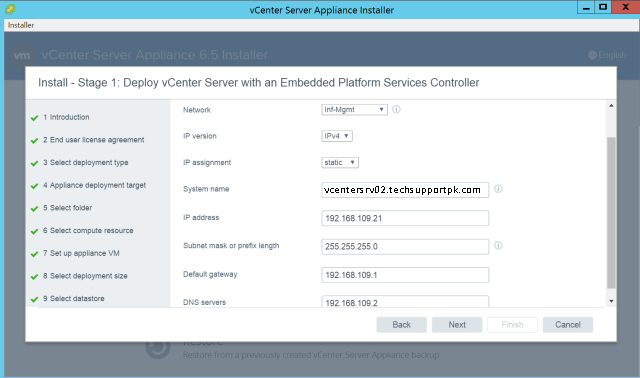
The following step is very important and must be defined correctly according to your environment. It can cause any failure during installation upon invalid configuration.
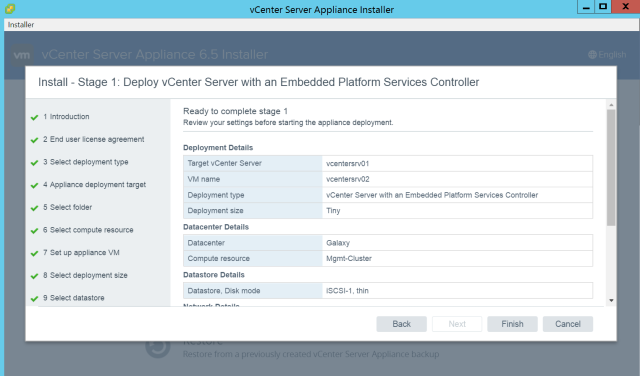
At this point, review your settings and Click Finish to begin the deployment process.
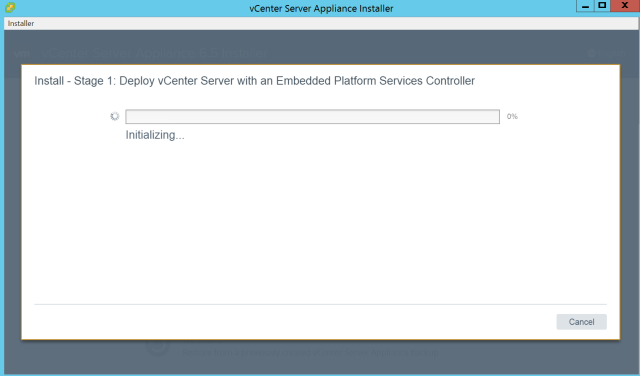
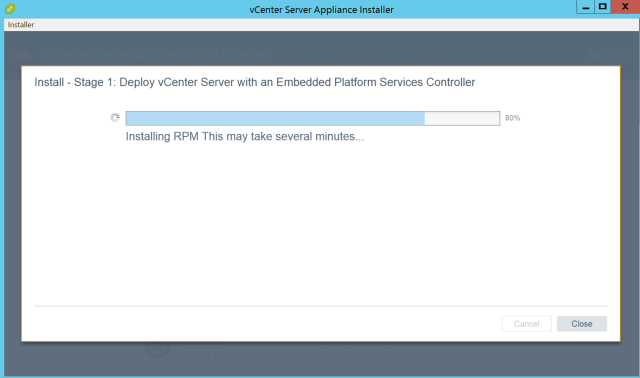
The wizard will take few minutes to complete first stage of installation
Yeah, 80% completed :-)
If you have chose existing vCenter Server as target in earlier step, you can watch the deployment progress there too.

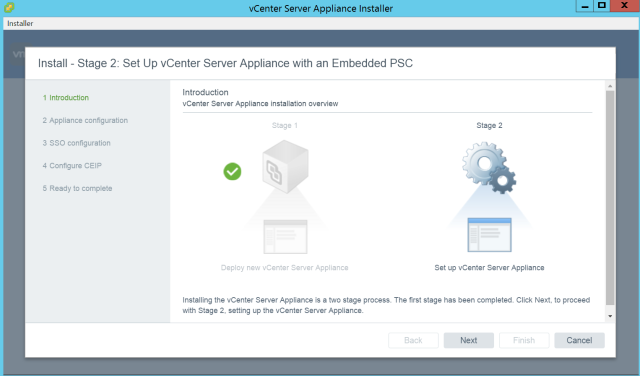
Stage 1 is completed. Click Continue to begin 2nd stage of deployment.

Click Next to start with Stage 2 of deployment.
The first option appears in Stage 2 is to configure NTP settings for the vCenter Appliance and enable SSH access.

Here we need to define the SSO domain name, the SSO password and the Site name for the appliance.

If you would like to enable Client Experience Improvement Program, tick the option, otherwise you can skip and proceed to next.

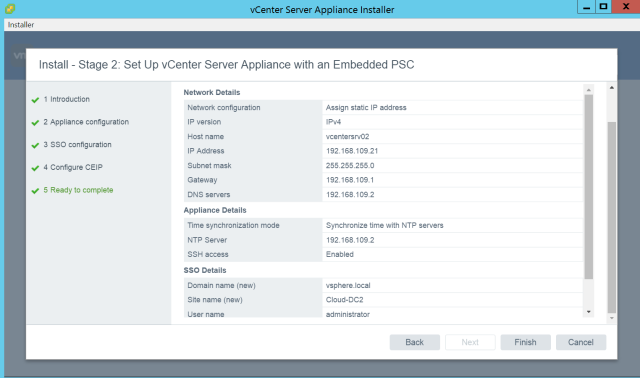
On Ready to Complete window, review your settings and Click Finish to begin the Stage 2 of deployment process.
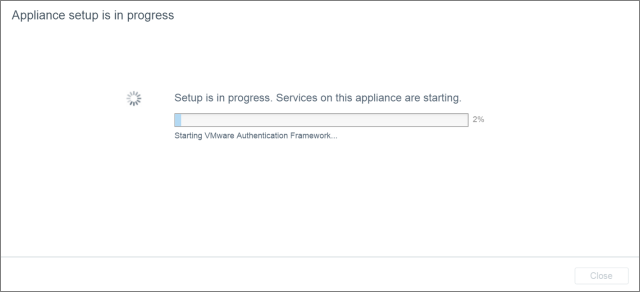
Verify your settings. Click OK to start the appliance configuration process.

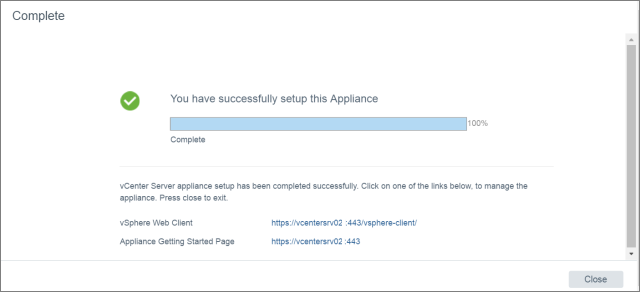
This wizard will take few minutes to complete the configuration process.
Now Click close.
You can manage the your vCenter Appliance by visiting the url https://vcsa_fqdn:443/vsphere-client/
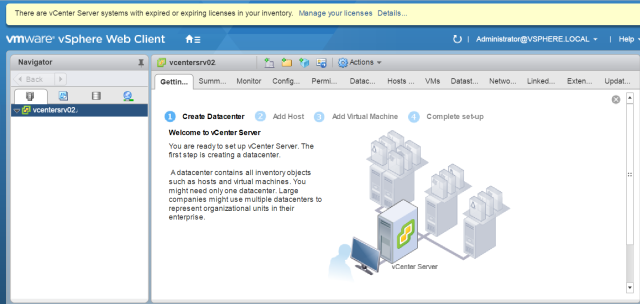
Login by providing username@sso_domain_name and password

Once you logged in, the following window will show you a warning message that your vCenter Server needs to be licensed. You can assign the license straightaway or can dismiss the message if your are planning to use vCenter in evaluation mode and will apply license later.
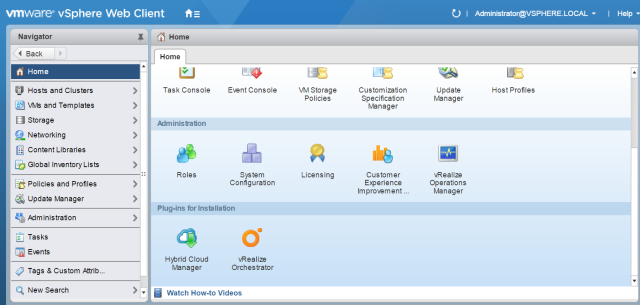
The next thing you need to configure is to make vCSA part of your organization's domain so that the domain users (vsphere admins) can access vCenter using their own credentials. You can accomplish this by clicking on “System Configuration” within the home page as shown in image:
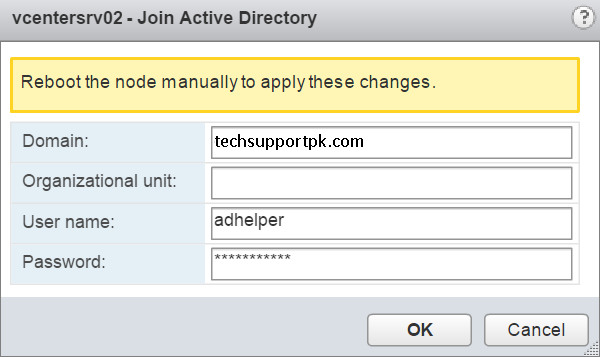
Select Nodes and select your vCSA and click on Manage tab. Under Settings, Select Active Directory. Click on Join to provide your domain information.

Provide your domain name and a username vCSA will be attached to. The username is preferred to be a service account. Wizard informs you that a reboot is required adding vCSA to domain for changes to take effect.
Now, right click on the vCenter in the lef pane of the screen and select reboot.
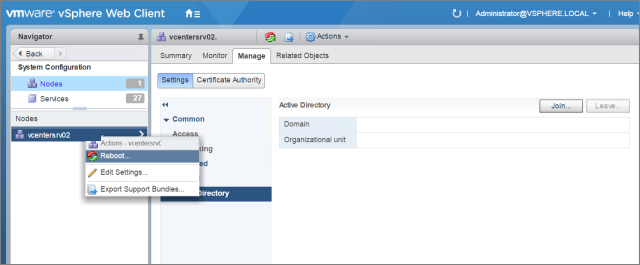
If you want to keep record, you can provide a reason of rebooting the appliance.

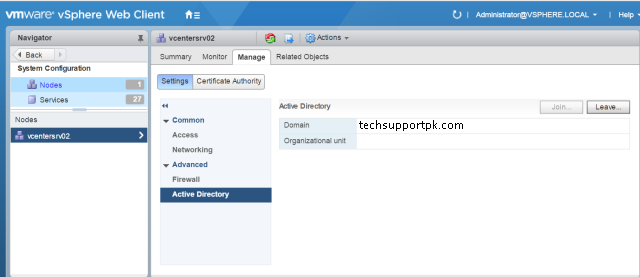
Once reboot of appliance completed, you can verify that it has now joined to the domain.
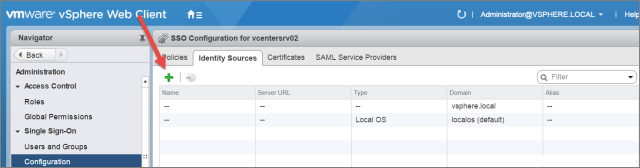
Wait, still you can not login to vCSA using your Active directory account. We have to configure bit more.
From home screen, navigate to Administration > Configuration. Click on green ‘+’ button to add an identity source.
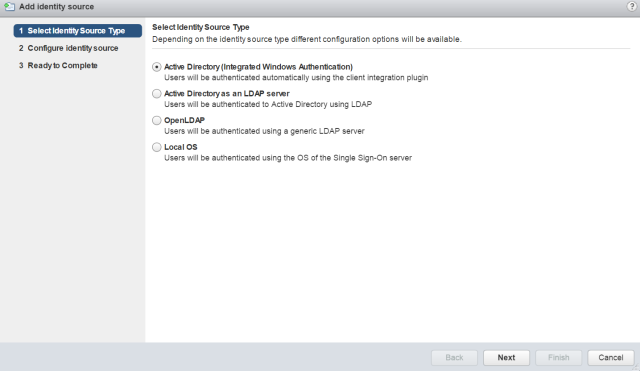
Select the identity source type. We have Windows active directory domain.
Enter the domain name here, Click use machine account and Click Next.

Click Finish to complete adding identity source.

Now go to Global Permissions Click + button to provide access to your domain users on this vCSA instance.

Click Add to start adding the user(s) and assign appropriate role to the user.

Now you can login to vCSA using the AD account which you have added in the above step.
Conclusion
We have completed the installation and configuration of the vCenter Server Appliance 6.5 with embedded platform of service controller (PSC). In the next part of this article, we will show you how to deploy and configure vCenter Server Appliance 6.5 with external PSC.