This guide will walk you through the steps to configure vCenter Server 6.5 high availability (HA). vCenter HA can be configured either with an embedded PSC or with an external PSC. For instance, if you decided to configure vCenter HA with an external PSC, then it is recommended practice to place it behind a load balancer for failure protection in case of Platform Services Controller fail.
Related Articles:
Prerequisites
- An instance of already Deployed vCenter Server Appliance.
- Separate datastores to deploy all three nodes. (recommended)
- At the least three ESXi hosts to set up VCHA
- A public IP Address that will be used to connect to the active node. (Should have been configured during the installation of the vCenter Appliance).
- Three private IP addresses (One IP per node) for replication and internal communication called the internal cluster network.
- Separate port group for vCenter HA network. When you configure vCenter 6.5 HA, 2nd vNIC will get added (eth1) during the configuration. This network is used for internal communication between the vCenter HA nodes.
Network Configuration
Before proceeding with deployment, make sure networking has been setup properly. VMware recommends to have a separate network configured for vCenter HA traffic. You need to add a port group to each ESXi host, and add a new virtual NIC (eth1) to the vCenter Server Appliance that later becomes the Active node.
VCHA Network Requirements
- The vCenter HA network IP addresses for the Active, Passive, and Witness nodes must be static and map to FQDNs.
- The vCenter HA network must be on a different subnet than the management network. The three nodes can be on the same subnet or on different subnets.
- Network latency between the Active, Passive, and Witness nodes must be less than 10 milliseconds.
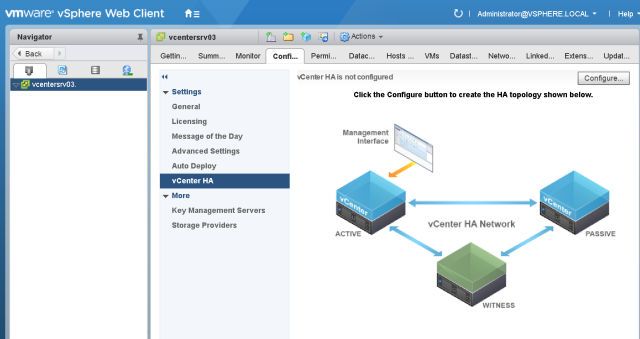
1. To begin with the configuration of vCenter HA, you need to login into the vCSA Appliance and select vCenter from top. Navigate to Configuration > vCenter HA and Click Configure.
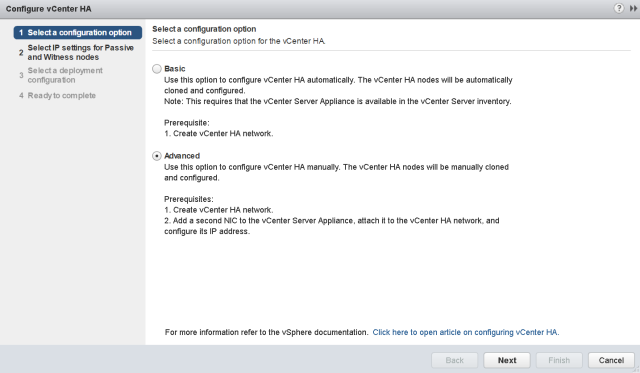
2. Here you have two choices, either go with Basic or Advanced option. I am going with Advanced, Click Next
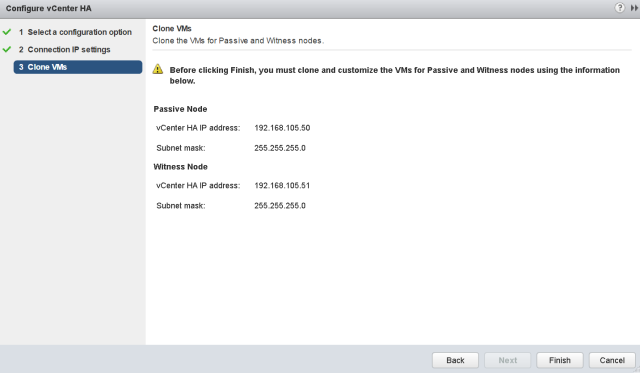
3. Provide the IP Address for Passive Node and Witness node. Click Next
Note: This IP must be in different subnet than your management network to which first NIC of vCSA is connected.

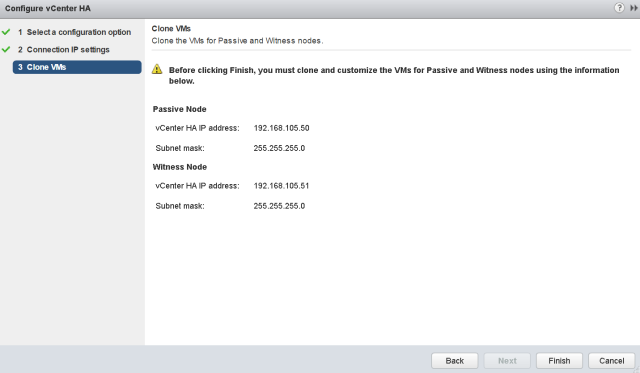
4. On the VM clone screen, do not Click Finish. Keep this window opened until remaining steps are completed.
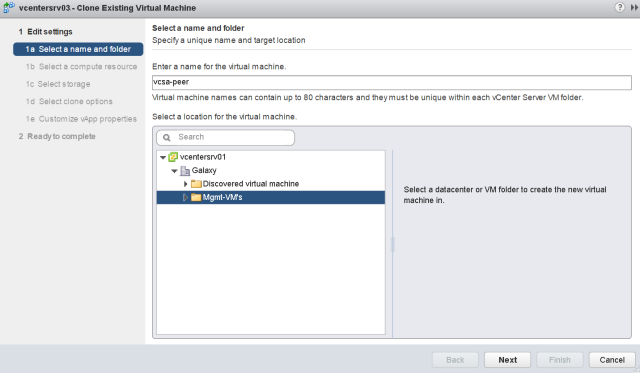
5. Go back to the management of vCenter Server and choose the vCSA appliance. Create a clone of this VM.

6. Choose appropriate destination where you want to deploy the cloned VM and Click Next.
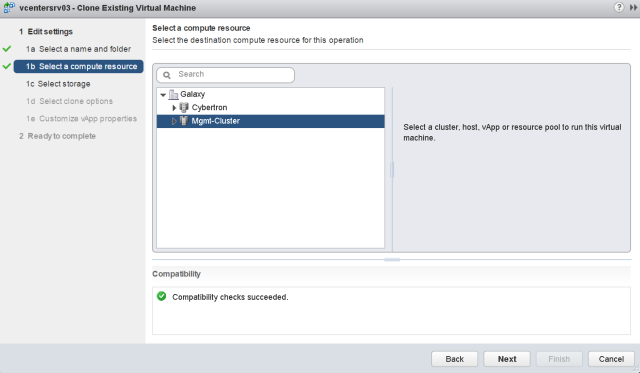
7. Select the cluster/host where you want to deploy the clone. You can choose individual ESXi host for deployment or leave the selection to cluster if you have a DRS enabled cluster.
8. Select destination datastore for cloned VM. Its recommended practice to keep Active, passive and Witness nodes on different datastores.

9. On the following window, tick mark ‘Customize the operating system’ and ‘Power on virtual machine after creation’ option. Click Next

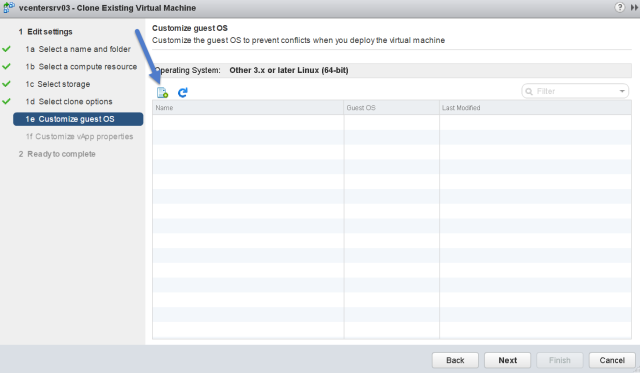
10. On customize guest os screen, click the + button to create a new guest os customization specification template.
11. Provide a name for the template and Click Next.

12. On the following screen, provide the same hostname which you had set on vCSA that is going to be active Node. Also provide the domain name same as Active vCSA node.

13. Make sure the timezone is consistent with the Active node.

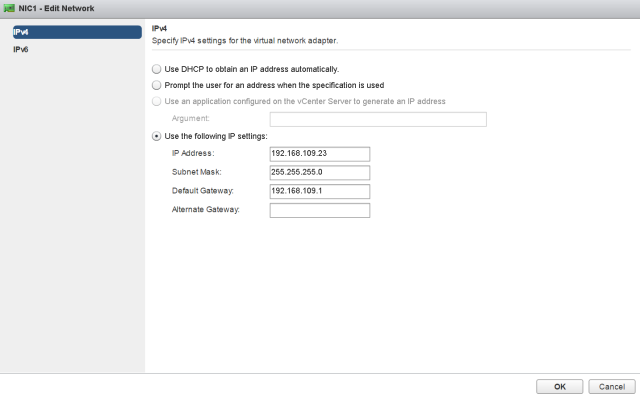
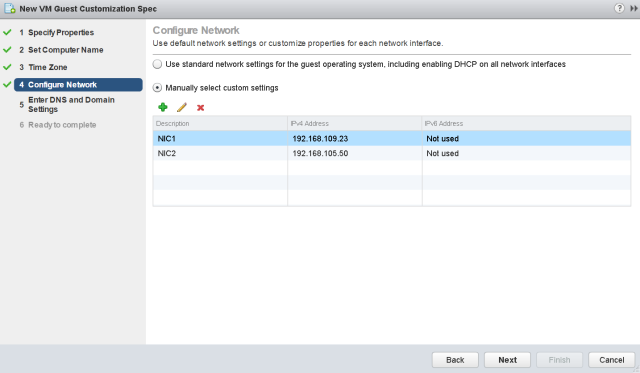
14. On Configure Network screen, choose “Manually select custom settings’. Select NIC1 and click on pencil button to edit the settings.
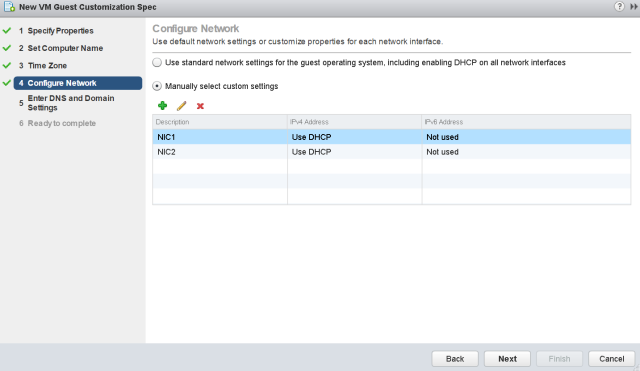
15. Select IPv4 and choose 3rd option. Provide the IP information for the passive node. You should provide the same IP address here which you have set on management NIC (eth0) of the Active vCSA node.
If you set different IP address here, the VCHA deployment will fail.
16. For NIC2 of the passive node, enter the same IP address which you had provided in step 3.
Do not enter any gateway IP for NIC2

17. Click Next when are done with the configuration of both NIC cards for passive node.
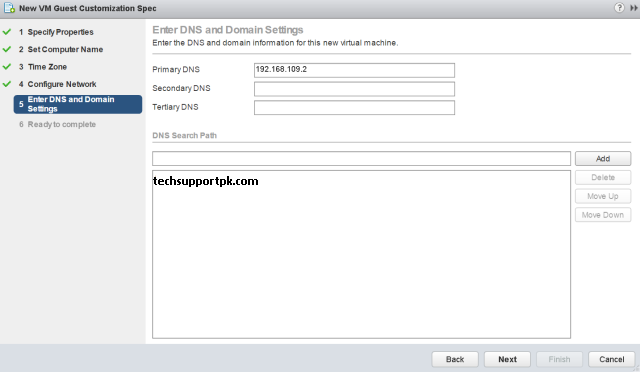
18. Under DNS settings, enter Primary DNS server and in search path provide your domain name and Click Next.
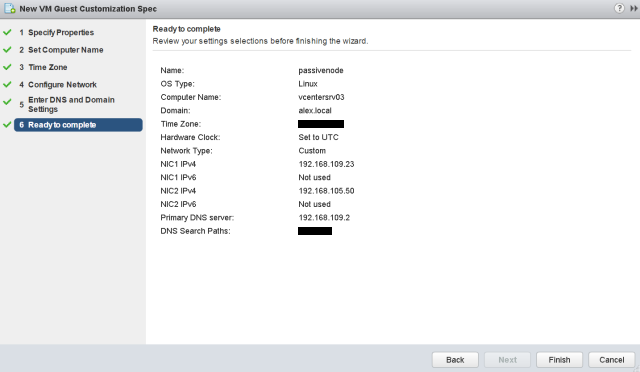
19. On ready to complete screen , review your settings and Click Finish.
20. Now under the customize guest os screen you can see the newly created customization specification template. Select that and Click Next.
The cloned VM will take the values which you have already provided in above steps from this template.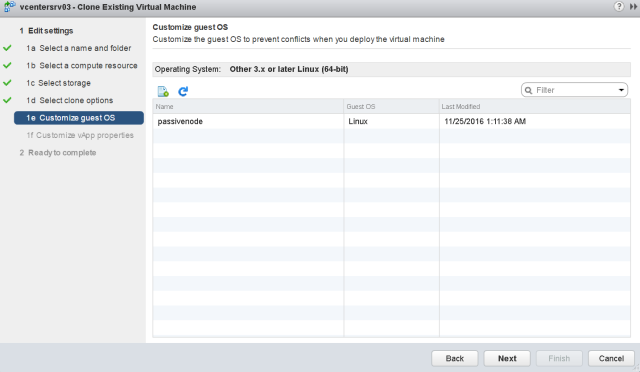
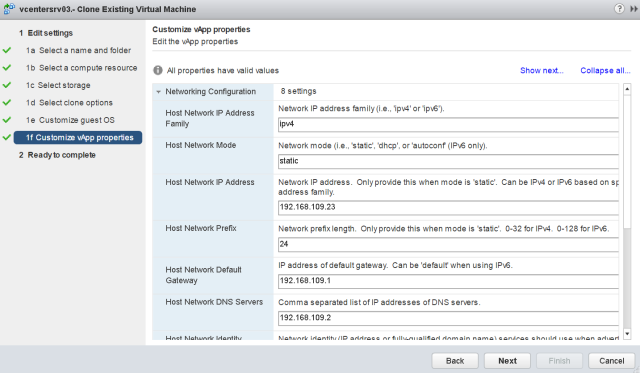
21. Under customize vApp properties, review the values that is going to be applied on the cloned VM and Click next.
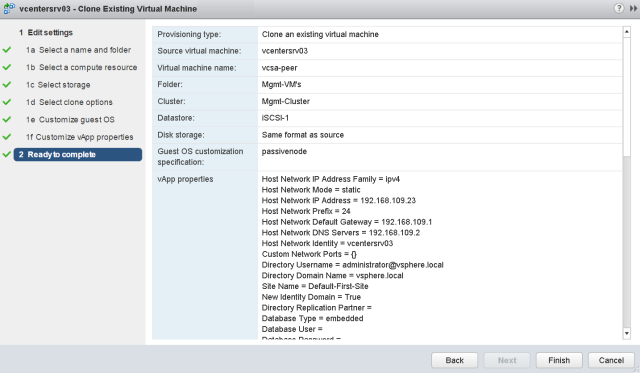
22. On ready to complete screen, verify the values again because this is the best chance to modify any values that you might have provided wrong. Once you Click Finish and realize that you have missed something, then again creating a clone is the only option.
Click Finish.
23. Repeat Steps 5-22 for witness node.
24. Once both Passive and Witness node have been deployed and are up and running, go back to Active vCSA where you have to finish the HA configuration which you paused in step 4.
25. Now you will see the message on vCenter HA screen that “vCenter HA is being configured”
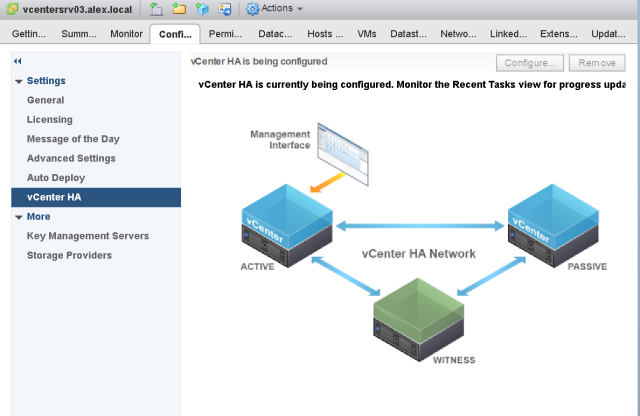
26. Under Tasks, you can monitor the status of configuration. You will see a new HA cluster being configured which comprises of your Active Node, Passive Node and Witness node.
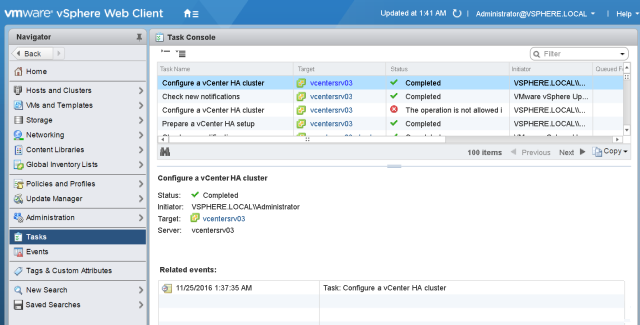
27. Once the configuration is completed, You can see the message that vCenter HA is enabled and also can see the status of Active, passive and Witness node here.
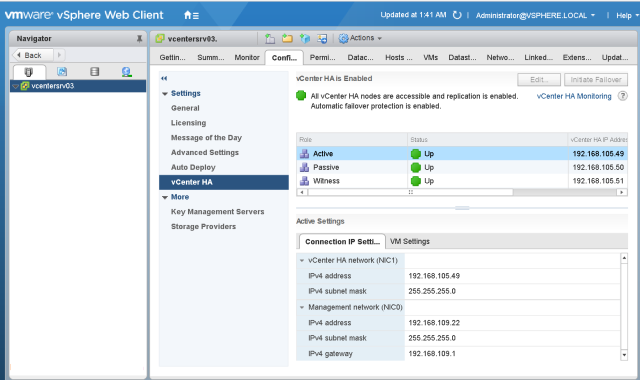
28. Clicking on vCenter HA monitoring, will take you to the monitoring tab where you can see more details about VCHA like replication status etc. You can also monitor tasks and events or if there are any issues with VCHA configuration.

Conclusion
We have completed the configuration of vCenter Server 6.5 High Availability.


