Quantcast
Channel: Tech Support
Viewing all 880 articles
Browse latest View live

How to Configure Exchange Server Journaling Rules Using PowerShell

$
0
0

In this article we are going to discuss a long standing Exchange Server feature, journaling, and how it can be managed through PowerShell.


Although it is possible to perform basic Exchange Server management through the GUI, more and more admins are turning to PowerShell for Exchange Server management. This can be attributed to factors such as the transition to the public cloud and also to the fact that many Exchange Server management functions are not exposed through the GUI. Given the ever increasing use of PowerShell (and the Exchange Management Shell), I thought that it might be fun to take a look at a long standing Exchange Server feature, journaling, and how it can be managed through PowerShell.

Exchange Server journaling comes in two different flavors. Standard journaling records all of the messages that are sent to or from mailboxes within a specific mailbox database. Premium journaling is more granular in scope. It allows an administrator to create journal rules in an effort to journal specific messages. Premium journal rules can be based on recipient or on scope (internal, external, etc.). It is worth noting that the use of premium journaling requires Exchange Enterprise client access licenses.

Before you can enable journaling, you will need a journal mailbox. This mailbox acts as a repository for the messages that are journaled. Keep in mind that Office 365 mailboxes cannot be used as journal mailboxes. It is also important to disable quotas for journal mailboxes and to determine exactly how your journal mailbox will be used. Depending on your organization’s security requirements, it may be possible to configure a single journal mailbox to accommodate all of your journal rules, but you also have the option of using a separate journal mailbox for each rule. For the purposes of this article, I have created an Exchange Server mailbox named Journal that will act as my journal mailbox.

If you are performing standard journaling, then using the Exchange Management Shell to manage the journal couldn’t be easier. After all, standard journaling captures all of the messages sent to or from the mailboxes within a database. As such, there is really nothing to configure beyond simply turning journaling on or off. Here is how the process works.

If you look at the figure below, you will notice that I have started out by entering the Get-MailboxDatabase cmdlet into the Exchange Management Shell. Although this cmdlet isn’t technically a requirement, I entered the cmdlet so that you could see the names of my mailbox databases. As you can see in the figure, I have several mailbox databases, so for demonstration purposes, I am going to enable journaling on the database named DB1.

 
The Get-MailboxDatabase cmdlet lists the mailbox databases.

Enabling journaling for a mailbox database is simply a matter of using the Set-MailboxDatabase cmdlet to associate a journal mailbox with the database. The syntax for this command is:

Set-MailboxDatabase -Identity -JournalRecipient

You can see what this process looks like in the next figure.

 
You can enable standard journaling by associating a journal mailbox with a database.

One thing that I want to be sure to point out is that the terminology used here can be a bit confusing. Notice in the command above that I used the -JournalRecipient parameter to specify the journal mailbox. When it comes to standard journaling, Microsoft seems to use the terms Journal Mailbox and Journal Recipient interchangeably (at least in some cases). When it comes to premium journaling however, the term Journal Recipient takes on a completely different meaning, as I will explain later on.


If at any point you want to disable journaling, you can do so by setting the journal mailbox to $Null. You can see how this works in the next figure. Notice in the figure that I am using the Get-MailboxDatabase cmdlet to verify that journaling has been enabled, and then disabled.

 
You can disable journaling by setting the journal recipient to $Null.

Things work a little bit differently if you want to use premium journaling. Remember, premium journaling is based around the use of journal rules. There are four components to each journal rule. Those components include:
  • Journal Rule Name – This is just a friendly name that helps the administrator to differentiate between one journal rule and the next.
  • Journal Recipient – The journal recipient defines whose messages will be journaled. You can journal a specific user’s messages, or you can base the journal recipient on group membership.
  • Journal Rule Scope – The journal rule scope defines the type of messages that you are capturing. You can capture messages sent internally, messages sent to or received from external recipients, or both.
  • Journal Mailbox – This is the mailbox that will store the journaled messages.
The basic syntax used for creating a premium journal rule is as follows:

New-JournalRule -Name -JournalEmailAddress -Recipient -Scope

This syntax is fairly simple, but there are a few things that you need to pay attention to. First, you will notice that we are using a completely different cmdlet than was used for standard journaling. Standard journaling involved the use of Set-MailboxDatabase, while premium journaling uses New-JournalRule instead.

Another thing that you need to know is that the Recipient parameter is optional. If you omit the Recipient parameter, then the rule will apply to all recipients.


Finally, the Scope parameter is also optional. If you omit the scope, then the rule will apply to all messages, internal and external. This is referred to as a global scope. The valid scope types that you can specify within the command are Global, Internal, and External.

The figure below shows an example of creating a journal rule. As you can see in the figure, I have used the Get-JournalRule cmdlet to confirm the rule’s existence. Notice that there are two rules listed. One of these rules is enabled and the other is disabled. A journal rule does not take effect until you enable it by using the Enable-JournalRule cmdlet. You can disable a journal rule if necessary by entering the Disable-JournalRule cmdlet.

 
You must enable a journal rule prior to using it.

As you can see, Exchange makes it easy to configure journaling through the Exchange Management Shell. Keep in mind however, that if you choose to use premium journaling, then you will need the appropriate licenses.

How to Restore Mailbox Database in Exchange 2016

$
0
0

There are different ways to recover mailbox database. You can recover the volume where databases are stored or you can recover single database instead of recovering all available database. Similarly, you also have option of recovering standalone Exchange server. You can use Windows Server Backup to restore mailbox database in Exchange 2016.


Restore Mailbox Database in Exchange 2016

Scenario: Exchange server is working fine, but for some reason the databases doesn’t mount. After digging a little bit, you find that the drive where mailbox databases are stored have crashed. Here we can recover all mailbox databases from the backup. You can use this method if the volume where database were stored have now crashed. This method is also used if Exchange server have just been recovered using /RecoverServer switch. 

In the scenario, we have Exchange server (MBG-EX01) with two databases in D drive and transaction logs in E drive. The D drive has failed and is replaced with fresh new drive. Now we need to recover database to this new D drive from the old backup. The latest full backup ran by Windows Server Backup is stored in backup drive.

Log on to MBG-EX01. Open Windows Server Backup application.

 
Right-click Local Backup and click Recover.


Choose the location where backup is stored. In this case it is stored in this server in backup drive. Choose This server and click Next.


Choose available backup. You can see the details of the backup as shown above. The date, time, location status and recoverable items. You can click on recoverable items link to view details of recoverable items.


As you see above selected portion is two different mailbox database. You can verify by type following cmdlets in EMS.

[PS] C:\Windows\system32>Get-MailboxDatabase | fl name, guid
Name : Mailbox Database 2095368010
Guid : 6eb8962a-778f-4b24-a254-1be7e60d1986

Name : DB01
Guid : 3917761b-6267-4379-9ce9-efe045ebc03a

In the Select Backup Date page, select the available backup above and click Next.


In the Select Recovery Type page, choose Applications and click Next. You can also choose Volumes which will recover the drive. But with applications you have option of roll forward.


In the Select Application page, select Exchange. You can click View Details to view database information as shown above. These two databases will be restored. By default Exchange server will try to roll forward by committing all uncommitted transaction logs. Remember we have transactions logs in E drive, we are recovering D drive. So after the failure of D drive, new emails are stuck in transaction logs in E drive. So to let these emails go to mailboxes we need to roll forward the application database. So uncheck the option and click Next.


In Specify Recovery Options page, choose recover to original location option. Click Next.


Review the confirmation page. Click Recover.


The recovery progress will begin. Click close after it is completed. Now let’s verify if the database is mounted. Get-MailboxDatabaseCopyStatus can be used to know about database status as shown below.

[PS] C:\Windows\system32>Get-MailboxDatabaseCopyStatus | fl name, status, contentindexstate
Name : Mailbox Database 2095368010\MBG-EX01 Status : Mounted ContentIndexState : Healthy Name : DB01\MBG-EX01 Status : Mounted ContentIndexState : Healthy

As you can see above the database is mounted and is healthy. In this way you can recover mailbox database using Windows Server Backup application.

How to Deploy Application with EMCO Remote Installer

$
0
0
EMCO Remote Installer is an easy-to-use application deployment tool for small- and mid-sized organizations that you can also use to inventory the applications in your network.


Contents:

  • Intro
  • User interface
  • Installing software
  • Uninstalling software
  • Software inventory
  • Conclusion

EMCO’s application deployment solution is available as a free and a pro version. This review is about Remote Installer Professional 4, and I will just talk about Remote Installer when I refer to the pro version.

 
EMCO Remote Installer Professional

Introduction

Many software deployment solutions need to be deployed themselves before you can start using them to deploy applications. Not so with Remote Installer. All you have to do is install the tool on your PC, which costs you a second or two, and two or three seconds later you have already installed your first application on a remote PC.

Remote Installer has an agent and, although this is not required, you can deploy it to all machines in your network. When you first install an application on a PC, Remote Installer will automatically push its agent, the Remote Installer Service, to the remote machine. When I first deployed applications with the tool, I didn’t even notice this process. This is what I call “automation.” Note that the Remote Installer Service doesn’t have to run on remote PCs if you just want to inventory installed applications.

User interface

When you first launch Remote Installer, you might be overcome by all its panes, bars, and icons. But the appearance is deceiving. Remote Installer is equipped with a flat learning curve. The complex appearance stems from the fact that the UI is highly customizable. Many controls have duplicates, which means that there are often multiple ways to accomplish a task.

The point about this design is that it makes the user interface highly customizable. You can simply remove the panes and icons you don’t use. You can also move panes to different locations or undock them from the main application window. And, if you don’t like the tool’s colors, you can choose from various different skins.

Even though Remote Installer is simple and intuitive to use, I recommend skimming through all the panes before you begin working with the tool because this will allow you to adapt the tool to your work style.

Let’s have quick look at the different areas of Remote Installer. At the top is the Quick Access Toolbar. As with Microsoft Office, you put your most important shortcuts there. Below is the Ribbon with two tabs: the Installer tab and the Application tab.

 
Quick Access and Ribbon

The main purpose of the Application tab is to customize Remote Installer. If you closed one of the tool’s panes, this is the place where you can bring it back. I found the Reset Workspace function useful. If you get lost with all your customizations, you can use this icon to reset everything to its original state.

The Installer tab contains all the icons you need to install software or scan your network. I stopped using this toolbar after a while because most of the functions can also be accessed by right-clicking objects. As with Microsoft Office, you can minimize the Ribbon to get more space for the rest of the panes.

The Network pane on the left displays all the machines in your network. Remote Installer recognizes Active Directory containers, but you can also work with custom groupings.

 
Network pane

The main area is the pane at the center of the application. It has four tabs. The Welcome tab is helpful when you try the tool for the first time. The Software Inventory tab shows all the applications that Remote Installer found in your network. The contents of this pane depends on the computers you selected in the Network pane. If you select a single machine, you’ll only see its installed applications.

The next tab has two areas and lists all your software deployment tasks. One area is reserved for the calendar of the scheduled tasks, and the second area shows all your tasks in a table.

The Inventory Snapshots tab is useful if you need information about the applications that have been installed in the past on the PCs in your network.

 
Center pane

Below the main area are four tabs with information about the previous results or ongoing tasks. You have a customizable table with data about the machines in your network, the Task Execution Results with troubleshooting advice, the Application Log with information on previous events, and Operations Management, which displays data about currently running tasks.

 
Application log


Installing software

Before you can deploy applications, you have to scan your network. Remote Installer will find computers that are offline if you have an Active Directory domain. You can also import computers from a text file or add machines manually, for instance by specifying an IP range. The latter is useful if you don’t have an Active Directory and you want to manage machines in remote subnets.

 
Adding machines manually

Remote Installer offers various ways to deploy applications. The easiest way is Quick Install, where you only have to select the machines and the setup file and, a mouse click later, your application is running on the remote computers. You can use any type of installation program; however, working with the MSI format (Windows Installer) is recommended because this format offers standardized options for silent installs. If you have a setup program in a different format, you might consider converting it first with EMCO’s MSI Package Builder.

In particular, if you use the other options (described below) for deploying applications, you will appreciate the functionality that the Windows Installer provides. The other three installation options are similar in functionality. The difference between Install Now and New Task is that Remote Installer will save all your settings as a task with the latter option. This allows you to later repeat a modified version of the task. You can also copy one or multiple tasks into a new task, which enables you to combine multiple deployment configurations into one task. The fourth option is Scheduled Tasks, which lets you run tasks at specific times and configure recurrences.

After you specify the installer file, the task generation wizard asks you if your setup file is a generic package or a multi-platform package. Remote Installer can distinguish between 32-bit and 64-bit targets. This allows you to add the 32-bit and the 64-bit version of an MSI file to a task. Remote Installer then assigns the correct setup program for each machine automatically.

 
Adding a multi-platform package

Next, you can configure the restart behavior—that is, whether to restart the computer automatically after the installation, to ask the user before the restart, or to not reboot the computer at all.

On the next screen, you define various advanced settings. You can add MST files (MSI Transformers), which allows you to modify an MSI-based installation. For instance, you could determine which components of an application are installed or add a license key. Remote Installer also supports Windows Installer properties, which enables you to configure the deployed application. For example, you could disable the program’s auto update feature.

As you might know, Windows Installer logs various types of information during the installation process. This can be useful if you have to troubleshoot a failed installation. You can easily configure which of these logs to activate and store in Remote Installer’s database. And, last but not least, the tool supports actions such as modifying the Registry or running a PowerShell script before or after the installation process.


Adding actions

On the last screen of the task creation wizard, you will be asked whether you want to deploy your application only to available computers or expand the scope to computers that are currently marked offline in Remote Installer. In the latter case, Remote Installer can scan the network first before it starts with the deployment process. You can also add machines manually or import computers from a file at this point.

What Remote Installer can’t do, however, is deploy programs to machines that are offline. This means the tool is unable to automatically recognize when a machine comes online to start a missed deployment job.

Uninstalling software

Of course, you can also uninstall software with Remote Installer. The options are comparable to the installation procedures. Essentially, you just have to choose the machines and an application in the inventory database. It is worth noting that you can also uninstall applications that you didn’t install with Remote Installer. In that case, you have to provide the corresponding setup file. You can also uninstall software updates with the help of MSP files.

 
Smart Uninstall

In addition, Remote Installer enables you to repair applications. The advantage over just reinstalling a malfunctioning application is that the user settings will usually stay untouched. Using the repair method will ensure that missing files and Registry settings will be deployed to the remote machines.

Software inventory

Remote Installer doesn’t update its software inventory database after an installation or uninstallation task. Thus, if you want to know the present status of your PCs, you have to manually rescan your network. However, this is not really a big deal in a small network if you use the tool’s Quick Scan feature (which scans only the machines that are already in the database) because it only takes a couple of seconds to rescan a machine.


Software inventory

Other than this little shortcoming, I like Remote Installer’s software inventory capabilities. You get all the information you need about the publisher, installation date, version, bitness, etc. By selecting the machines that interest you, you can get an overview of the installed applications on these computers. Remote Installer also allows you to easily access previous states by choosing an older snapshot, and you can compare snapshots to display the changes that have been made to selected machines.

Convert EXE to MSI with EMCO MSI Package Builder 6

Version 6 of EMCO MSI Package Builder includes Windows 10 MSI compatibility and a streamlined UI, and it makes driver/application deployment much easier. In December, EMCO offers a 20% discount.
Even as Microsoft pushes the modern app, most applications still use legacy executables or packaged MSIs for installation. If you manage any number of Windows clients, you should be familiar with packaging and deploying MSIs. Being able to quickly take an EXE, convert it to an MSI, and deploy it with Group Policy (or another application) is one skill that can save you a ton of time. Having the ability to customize MSIs allows you to deploy applications tailored for your environment.

By using EMCO MSI Package Builder, you can easily edit existing packages or convert an EXE into a deployable MSI. The newly updated EMCO MSI Package Builder 6 brings three big features and dozens of smaller improvements. With this update, we have an easy method to control driver installations in MSIs, a simple and powerful UI design, and full Windows 10 MSI compatibility.

EMCO MSI Package Builder comes in two flavors: a Professional edition and an Enterprise edition. The Professional edition includes an easy-to-use visual MSI editor and can do live monitoring of repackaging. The Enterprise edition is designed for complex installations or conversions. It includes more powerful change monitoring tools that include the ability to create services, customize environment variables, and control driver installations.

Deploying windows drivers when installing an MSI

Managing applications that also install drivers has always been more difficult than it should be. Applications, such as external video cards or interactive white boards, frequently need to install several drivers during installation.

The Enterprise edition of EMCO MSI Package Builder can track and package driver installations in a monitoring scenario. When a monitored package includes drivers, be sure to accept any trust prompts and to not reboot after the installation completes. When the installer is done and EMCO MSI Package Builder has generated the MSI content, you should see your installed drivers under the Drivers category.

 
Installing multiple drivers with a custom MSI

Packages that require drivers can also be installed manually. To do this, create a new package and navigate to the Drivers section. If your driver includes just an INF, select New Basic Driver. Likely, your driver will have a multitude of files that are needed. If so, choose New Driver Package. From here, you can choose your driver files, set your security catalog, and decide on the driver installation mode. I love having the ability to deploy and manage drivers with applications!

 
This driver package includes an INF, a CAT, and a SYS file.

As a side tip, you can pull these extracted files out of c:\windows\System32\DriverStore\FileRepository\ on a machine that has your application installed on it.

Windows 10 MSI best practices and an improved UI

One of the things I like best about EMCO MSI Package Builder is that MSIs are packaged to industry best practices. The rules for package creation are kept updated for the latest Windows operating systems. Version 6 includes full compatibility support for Windows 10.

If you are new to repackaging applications (or haven’t set up a reference VM in a while), the Repackage Installation Wizard provides guidance on proper machine configuration.

 
MSI repackaging best practices for reference machines

EMCO MSI Package Builder will also check certain configurations on startup. For example, it will not let a package be created if the logged-on user uses folder redirection. However, as a best practice, your reference machine should not be domain joined and the logged-on user should have no non-standard configurations set on it.

If you have ever worked with the old table-based MSI editing tool, Orca, you will appreciate the logical design that EMCO MSI Package Builder uses. Each core component of the MSI is separated out. If you need to add a file to the MSI, you do it in a single step (not the 3+ steps that tools such as Orca require).

This simplicity holds true across the new UI. Where possible, hierarchical views are shown instead of the flat tables that you may be used to. This makes finding and editing specific settings so much easier. Wizards, such as change monitoring, have been streamlined as well. Simplification doesn’t come at a loss of features, however. Advanced settings are still available in any of the wizards or in package creation.

EMCO MSI Package Builder continues to get better with each release. Version 6 brought several great new features and dozens of small improvements. In this review, we focused specifically on driver deployments, best practices, and the improved UI.

Conclusion

Remote Installer is designed to be used by a single admin. This means it has no separate backend application and no independent console, so that multiple admins could work simultaneously. The tool allows you to store its database on a network share; in theory, this means that multiple admins can use Remote Installer from their desktops. However, they should not work with the tool at the same time because this can cause conflicts. Also note that the Remote Installer console must be running when a scheduled task is supposed to run. However, if you start the tool after a missed scheduled task, Remote Installer will inform you and allow you to start the corresponding task manually.

Just to be clear, Remote Installer is no competitor to Microsoft’s Configuration Manager or comparable complex system management solutions for large enterprises that require you to rummage through a couple of books until your first application is deployed. Remote Installer is the kind of tool that a single admin uses to push out applications quickly in a small network, say, with fewer than 200 machines. As you saw in this review, Remote Installer is much more flexible than Group Policy software deployment.

Another plus of Remote Installer is its pricing, which is very competitive. A site license for an unlimited number of nodes costs just $299. This makes the tool worth considering even if you already have an enterprise software deployment solution that is a bit sluggish. This enables you to deploy an application that is needed immediately on a user’s desktop, without delay and with instant feedback about the success of the installation.

How to Use Remote Desktop Manager Enterprise 10

$
0
0
Remote Desktop Manager 10 is one of the most feature-rich and the most powerful remote management tools I know. Aside from helping you organize your Remote Desktop connections, it supports a plethora of protocols and even allows you to administer virtualization solutions and cloud environments.


Contents

  •     Remote Connections sessions
  •     Virtualization sessions
  •     Cloud Explorer sessions
  •     Other sessions
  •     Password management
  •     Data sources
  •     Conclusion
Notice that there are two versions of Remote Desktop Manager. The previous Standard edition has become the Free edition, whereas the version I tested for this review is the Enterprise edition. If you want to know which of the features discussed here are available in the Free edition, check out this comparison table. In this article, I use the abbreviation “RDM” to refer to the Enterprise edition.

 
Remote Desktop Manager 10

RDM has so many features that I can only scratch the surface with this article. Devolutions, the maker of Remote Desktop Manager, had essentially the same problem that Microsoft had with Office. Namely, how could they pack as many features as possible into one interface without overwhelming users? The answer is the new customizable user interface that counts like MS Office on Ribbons. What I like most about RDM is that it integrates many third-party applications like VPN solutions, password managers, and numerous remote management tools.

RDM distinguishes between four different types of sessions: Remote Connections, Virtualization, Cloud Explorer, and Other.

Remote Connections sessions

Remote Desktop is only one of many remote connections protocols that RDM supports. Here is the complete list: Apple Remote Desktop, Citrix (Web), Citrix ICA/HDX, DameWare Mini Remote Control, FTP/FTPS/SFTP/SCP, RD Gateway, HP Remote Graphics Receiver, Intel AMT (KVM), LogMeIn, Microsoft Remote Desktop, PC Anywhere, Radmin, Remote Assistance, ScreenConnect, TeamViewer, Telnet/SSH/RAW/rLogin, VNC, VPN, Web Browser (http/https), and X Window.


Remote Connections

HTTP is perhaps an unusual protocol for a Remote Desktop manager. The Web Browser allows you to specify a URL and your favorite web browser that RDM will launch when you open the corresponding session. Many applications can be managed remotely through a web interface, and RDM’s aim is to integrate any thinkable remote control solution into one tool.


Remote Desktop session

The point is that you can organize all your remote management solutions in folders and store detailed information about them in RDM’s database. Also, in many cases, RDM becomes the shell for your remote connections. Thus, when you open a Web Browser session, RDM can load the corresponding web interface in one of its tabs. In addition, you can manage all your credentials at a central place. I will say more about the powerful credential management features below.

Virtualization sessions

RDM supports the most prominent virtualization solutions: AWS Console, Azure Console, Hyper-V Console, Oracle VirtualBox, Virtual Server, Virtual PC, VMware (Player, Workstation, vSphere), VMware Console, VMware Remote Console, Windows Virtual PC, and XenServer Console.

 
Virtualization sessions

Not all the Virtualization sessions are about remote management. For instance, if you have VirtualBox installed on your PC, you can easily add a particular VirtualBox machine to your RDM Sessions database. You can then start the virtual machine from the RDM interface. However, in the RDM version I tested (10.0.15), the virtual machine will be launched in a separate VirtualBox window and not in one of RDM’s tabs.

I also tested the AWS Console feature. It enables you to perform some basic management tasks for EC2 instances in Amazon’s cloud. For example, you can view the status of instances and start or stop instances.

 
AWS Console session

Of course, RDM can’t replace Amazon’s cloud console. However, AWS integration is quite useful for another purpose. You can directly connect to instances and create new RDM sessions from the list of severs in RDM’s AWS Console.

If Linux runs in the instance, RDM will launch an SSH session. If you Quick Connect to a Windows server, a Remote Desktop session will be opened. If you have remote servers in one of the above virtualization solutions, you can quickly add them as entries to RDM. The main advantage over Quick Connect is that you work with RDM’s credential management and can place the servers in your RDM folder structure for easy access.

Cloud Explorer sessions

You can also use RDM to connect to various cloud drives. These are the supported cloud providers: Amazon S3 Explorer, Azure Storage Explorer, Azure Table Storage Explorer, Dropbox Explorer, and OneDrive Explorer.

In my test, I connected to Microsoft OneDrive. RDM opened a Windows Explorer–like interface that consists of four panes. The panes on the left show the folder structure of the local PC and the files of the selected folder. In the upper right pane, RDM displays the folder structure of the cloud drive, and below you get a list of the corresponding files. You can easily copy files between local and cloud drive with drag and drop.

 
OneDrive session

Of course, for some of the cloud storages, you can also do this in Windows Explorer. However, as mentioned above, the main point about RDM is to have all your remote connections in one coherent interface. This means that you access the files in your S3 storage in the same way as your files in Dropbox or on a Linux server via SCP.

Other sessions

To categorize remote connection types is not easy, and some connections don’t fit in any category. The Other Sessions category includes the following: Active Directory Console, Command Line, Data Report, Database, Inventory Report, Play List, PowerShell, SNMP Report, Spiceworks, Terminal Server Console, and Windows Explorer.

The Active Directory Console is new to Remote Desktop Manager 10. You can perform some basic Active Directory management tasks such as resetting user passwords, but the main point about this session type is that it allows you to import computers from Active Directory to the RDM interface. With a few clicks, you have all computers from a certain group or container imported in RDM. This can save you a lot of configuration time if you have many computers to manage.

 
Importing computer list from Active Directory

Password management

If you have only one account to manage your servers, you are lucky. I just counted. I have more than 100 different passwords in KeePass. And I store only the ones I use frequently there.

RDM’s password management capabilities are amazing. It has its own credential manager, but it also supports any password manager I know. Even Outlook can be used. You can leverage these third-party tools in two ways: You can either import the accounts into the RDM database, or you can integrate the third-party password manager in RDM.

 
RDM credential manager

In my test, I integrated a KeePass database. RDM automatically finds the database, but you can configure any KDBX file. In the RDM entry for which you want to use KeePass, you select the account from the KeePass database that you want to use for this remote connection. When you later connect to this server, and if you already opened KeePass, RDM will read the credentials right from the KeePass database. If you have yet to open KeePass, RDM will launch the password manager, and you have to enter your master password in the KeePass UI.


KeePass as credential source

For every RDM entry, you can work with a different authentication method. An RDM entry can also inherit its credentials from other RDM entries. You can work with the Windows credentials of the local machine, and you can use your personal or the RDM credential repository. The cool thing about a central repository is that you can configure it in a way that doesn’t reveal the passwords to admins. Therefore, with RDM, admins can manage servers without knowing the administrator password.

Data sources

This brings me to my next topic: RDM is a real team player. As with most of RDM’s features, you have a variety of choices where you store the RDM database. You can work with your own local database, but you can also share the database with other admins. These are the supported data sources: Remote Desktop Manager Online, SQLite, XML, Amazon S3, Dropbox, FTP, MariaDB, Microsoft Access, Microsoft SQL Server/SQL Azure, MySQL, Remote Desktop Manager Server, SFTP, and Web.

 
Data sources

Remote Desktop Manager Online is Devolution’s cloud storage for your RDM database, and Remote Desktop Manager Server is a data source that you can install on your own servers. RDM allows you to work with multiple databases, but not simultaneously. You can configure RDM to prompt you at start-up for the data source.

How to Monitor and Minimize Your Cellular Data Usage on iPhone

$
0
0
 
Unlimited cellular data is tough to avail. Keep an eye on how much data you’re using to avoid paying overage fees or having your data speed throttled down to a trickle for the rest of your billing cycle. In an ideal world, you wouldn’t have to micromanage any of this stuff. But we don’t all live in that world yet, and there are many ways to reduce the data your phone uses.


How to Check Your Data Usage

Before anything else, you need to check your data usage. If you don’t know what your typical usage looks like, you have no idea how mildly or severely you need to modify your data consumption patterns.

You can get a rough estimate of your data usage using your cellular service calculator app, but the best thing to do is actually check your usage over the past few months.
 
Unlimited cellular data is tough to avail. Keep an eye on how much data you’re using to avoid paying overage fees or having your data speed throttled down to a trickle for the rest of your billing cycle. In an ideal world, you wouldn’t have to micromanage any of this stuff. But we don’t all live in that world yet, and there are many ways to reduce the data your phone uses.


How to Check Your Data Usage

Before anything else, you need to check your data usage. If you don’t know what your typical usage looks like, you have no idea how mildly or severely you need to modify your data consumption patterns.

You can get a rough estimate of your data usage using your cellular service calculator app, but the best thing to do is actually check your usage over the past few months.

The easiest way to check past data usage is to log into the web portal of your cellular provider (or check your paper bills) and look at what your data usage is. If you’re routinely coming in way under your data cap, you may wish to contact your provider and see if you can switch to a less expensive data plan. If you’re coming close to the data cap or exceeding it, you will definitely want to keep reading.


You can also check recent cellular data usage on your iPhone. Head to Settings > Cellular. Scroll down and you’ll see an amount of data displayed under “Cellular Data Usage” for the “Current Period.”

This screen is very confusing, so don’t panic if you see a very high number! This period doesn’t automatically reset every month, so the data usage you see displayed here may be a total from many months. This amount only resets when you scroll to the bottom of this screen and tap the “Reset Statistics” option. Scroll down and you’ll see when you last reset the statistics.

If you want this screen to show a running total for your current cellular billing period, you’ll need to visit this screen on the day your new billing period opens every month and reset the statistics that day. There’s no way to have it automatically reset on a schedule every month. Yes, it’s a very inconvenient design.


How to Keep Your Data Use in Check

So now that you know how much you’re using, you probably want to know how to make that number smaller. Here are a few tips for restricting your data usage on iOS.

Monitor and Restrict Data Usage, App by App

Check the amount of cellular data used by your apps for the period since you’ve reset them on the Settings > Cellular screen. This will tell you exactly which apps are using that data–either while you’re using them, or in the background. Be sure to scroll down to the bottom to see the amount of data used by the “System Services” built into iOS.

A lot of those apps may have their own built-in settings to restrict data usage–so open them up and see what their settings offer.

For example, you can prevent the App Store from automatically downloading content and updates while your iPhone is on cellular data, forcing it to wait until you’re connected to a Wi-Fi network. Head to Settings > iTunes & App Stores and disable the “Use Cellular Data” option if you’d like to do this.

If you use the built-in Podcasts app, you can tell it to only download new episodes on Wi-Fi. Head to Settings > Podcasts and enable the “Only Download on Wi-Fi” option.


Many other apps (like Facebook) have their own options for minimizing what they do with cellular data and waiting for Wi-Fi networks. To find these options, you’ll generally need to open the specific app you want to configure, find its settings screen, and look for options that help you control when the app uses data.

If an app doesn’t have those settings, though, you can restrict its data usage from that Settings > Cellular screen. Just flip the switch next to an app, as shown below. Apps you disable here will still be allowed to use Wi-Fi networks, but not cellular data. Open the app while you only have a cellular data connection and it will behave as if it’s offline.


You’ll also see how much data is used by “Wi-Fi Assist” at the bottom of the Cellular screen. This feature causes your iPhone to avoid using Wi-Fi and use cellular data if you’re connected to a Wi-Fi network that isn’t working well. If you’re not careful and have a limited data plan, Wi-Fi Assist could eat through that data. You can disable Wi-FI Assist from this screen, if you like.

Disable Background App Refresh

Since iOS 7, Apple has allowed apps to automatically update and download content in the background. This feature is convenient, but can harm battery life and cause apps to use cellular data in the background, even while you’re not actively using them. Disable background app refresh and an app will only use data when you open it, not in the background.

To control which apps can do this, head to Settings > General > Background App Refresh. If you don’t want an app refreshing in the background, disable the toggle next to it. If you don’t want any apps using data in the background, disable the “Background App Refresh” slider at the top of the screen entirely.


Disabling push notifications can also save a bit of data, although push notifications are rather tiny.

Disable Mail, Contacts, and Calendar Sync

By default, your iPhone will automatically grab new emails, contacts, and calendar events from the internet. If you use a Google account, it’s regularly checking the servers for new information.

If you’d rather check your email on your own schedule, you can. Head to Settings > Mail > Accounts > Fetch New Data. You can adjust options here to get new emails and other data “manually.” Your phone won’t download new emails until you open the Mail app.


Cache Data Offline Whenever You Can

Prepare ahead of time, and you won’t need to use quite as much data. For example, rather than streaming music in an app like Spotify (or other music services), download those music files for offline use using Spotify’s built-in offline features. Rather than stream podcasts, download them on Wi-Fi before you leave your home. If you have Amazon Prime or YouTube Red, you can download videos from Amazon or YouTube to your phone and watch them offline.

If you need maps, tell Google Maps to cache maps for your local area offline and possibly even provide offline navigation instructions, saving you the need to download map data. Think about what you need to do on your phone and figure out if there’s a way to have your phone download the relevant data ahead of time.


Disable Cellular Data Completely

For an extreme solution, you can head to the Cellular screen and toggle the Cellular Data switch at the top to Off. You won’t be able to use cellular data again until you re-enable it. This may be a good solution if you need to use cellular data only rarely, or if you’re nearing the end of the month and you want to avoid potential overage charges.

You can also disable cellular data while roaming from here. Tap “Cellular Data Options” and you can choose to disable “Data Roaming”, if you like. Your iPhone won’t use data on potentially costly roaming networks when you’re traveling, and will only use data when connected to your carrier’s own network.


You don’t have to perform all of these tips, but each of them can help you stretch that data allowance. Reduce wasted data and you can use the rest for things you actually care about.
ustify;">

The easiest way to check past data usage is to log into the web portal of your cellular provider (or check your paper bills) and look at what your data usage is. If you’re routinely coming in way under your data cap, you may wish to contact your provider and see if you can switch to a less expensive data plan. If you’re coming close to the data cap or exceeding it, you will definitely want to keep reading.


You can also check recent cellular data usage on your iPhone. Head to Settings > Cellular. Scroll down and you’ll see an amount of data displayed under “Cellular Data Usage” for the “Current Period.”

This screen is very confusing, so don’t panic if you see a very high number! This period doesn’t automatically reset every month, so the data usage you see displayed here may be a total from many months. This amount only resets when you scroll to the bottom of this screen and tap the “Reset Statistics” option. Scroll down and you’ll see when you last reset the statistics.

If you want this screen to show a running total for your current cellular billing period, you’ll need to visit this screen on the day your new billing period opens every month and reset the statistics that day. There’s no way to have it automatically reset on a schedule every month. Yes, it’s a very inconvenient design.


How to Keep Your Data Use in Check

So now that you know how much you’re using, you probably want to know how to make that number smaller. Here are a few tips for restricting your data usage on iOS.

Monitor and Restrict Data Usage, App by App

Check the amount of cellular data used by your apps for the period since you’ve reset them on the Settings > Cellular screen. This will tell you exactly which apps are using that data–either while you’re using them, or in the background. Be sure to scroll down to the bottom to see the amount of data used by the “System Services” built into iOS.

A lot of those apps may have their own built-in settings to restrict data usage–so open them up and see what their settings offer.

For example, you can prevent the App Store from automatically downloading content and updates while your iPhone is on cellular data, forcing it to wait until you’re connected to a Wi-Fi network. Head to Settings > iTunes & App Stores and disable the “Use Cellular Data” option if you’d like to do this.

If you use the built-in Podcasts app, you can tell it to only download new episodes on Wi-Fi. Head to Settings > Podcasts and enable the “Only Download on Wi-Fi” option.


Many other apps (like Facebook) have their own options for minimizing what they do with cellular data and waiting for Wi-Fi networks. To find these options, you’ll generally need to open the specific app you want to configure, find its settings screen, and look for options that help you control when the app uses data.

If an app doesn’t have those settings, though, you can restrict its data usage from that Settings > Cellular screen. Just flip the switch next to an app, as shown below. Apps you disable here will still be allowed to use Wi-Fi networks, but not cellular data. Open the app while you only have a cellular data connection and it will behave as if it’s offline.


You’ll also see how much data is used by “Wi-Fi Assist” at the bottom of the Cellular screen. This feature causes your iPhone to avoid using Wi-Fi and use cellular data if you’re connected to a Wi-Fi network that isn’t working well. If you’re not careful and have a limited data plan, Wi-Fi Assist could eat through that data. You can disable Wi-FI Assist from this screen, if you like.

Disable Background App Refresh

Since iOS 7, Apple has allowed apps to automatically update and download content in the background. This feature is convenient, but can harm battery life and cause apps to use cellular data in the background, even while you’re not actively using them. Disable background app refresh and an app will only use data when you open it, not in the background.

To control which apps can do this, head to Settings > General > Background App Refresh. If you don’t want an app refreshing in the background, disable the toggle next to it. If you don’t want any apps using data in the background, disable the “Background App Refresh” slider at the top of the screen entirely.


Disabling push notifications can also save a bit of data, although push notifications are rather tiny.

Disable Mail, Contacts, and Calendar Sync

By default, your iPhone will automatically grab new emails, contacts, and calendar events from the internet. If you use a Google account, it’s regularly checking the servers for new information.

If you’d rather check your email on your own schedule, you can. Head to Settings > Mail > Accounts > Fetch New Data. You can adjust options here to get new emails and other data “manually.” Your phone won’t download new emails until you open the Mail app.


Cache Data Offline Whenever You Can

Prepare ahead of time, and you won’t need to use quite as much data. For example, rather than streaming music in an app like Spotify (or other music services), download those music files for offline use using Spotify’s built-in offline features. Rather than stream podcasts, download them on Wi-Fi before you leave your home. If you have Amazon Prime or YouTube Red, you can download videos from Amazon or YouTube to your phone and watch them offline.

If you need maps, tell Google Maps to cache maps for your local area offline and possibly even provide offline navigation instructions, saving you the need to download map data. Think about what you need to do on your phone and figure out if there’s a way to have your phone download the relevant data ahead of time.


Disable Cellular Data Completely

For an extreme solution, you can head to the Cellular screen and toggle the Cellular Data switch at the top to Off. You won’t be able to use cellular data again until you re-enable it. This may be a good solution if you need to use cellular data only rarely, or if you’re nearing the end of the month and you want to avoid potential overage charges.

You can also disable cellular data while roaming from here. Tap “Cellular Data Options” and you can choose to disable “Data Roaming”, if you like. Your iPhone won’t use data on potentially costly roaming networks when you’re traveling, and will only use data when connected to your carrier’s own network.


You don’t have to perform all of these tips, but each of them can help you stretch that data allowance. Reduce wasted data and you can use the rest for things you actually care about.

How to Customize and Install Office 2016

$
0
0
Before deploying Office 2016 to client systems, most organizations will want to customize their installation to align with their unique business needs and use cases. In this article, I’ll cover how to customize the Windows Installer–based version of Office 2016 and fully remove Office 2013. I’ll also describe some of the settings you may want to consider for your install.


Contents:

  •     Customize the install
  •     Install the customized Office 2016
  •     Remove Office 2013 (if necessary)
  •     Additional customization options to consider
If you’re deploying Microsoft Office 2016 to client systems, you’ll first need to build an MSP file using the Office Customization Toolkit (OCT) for OS deployment and use automated software deployment solutions such as System Center Configuration Manager.

Customize the install

To begin, you’ll need a copy of the Microsoft Office 2016 ISO image (Windows Installer version, not the App-V version), as well as the Office Customization Toolkit (which also includes the Office 2016 Administrative Templates).  Extract both the ISO and the contents of the ADMX/OCT download. 

For my lab environment, I have a software file share on a file server, and I’ve created separate x86 and x64 folders inside my Office_2016 folder to store both installers. The network share and file permissions are configured so that Domain Computers have Read access and IT users have Full Control, but your permissions may vary based on your environment and software installation solution.

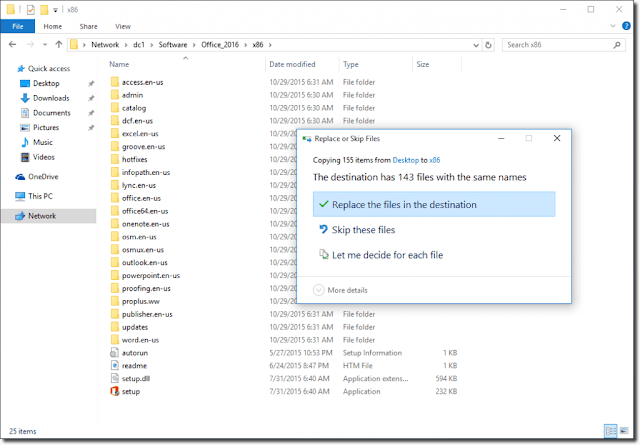
Copy the “admin” folder from the Office Customization Tool download into the folder where you’ve saved the Office 2016 install files. (In this tutorial, we’ll be using the x86 installer in a folder of that same name, but the process is the same for the x64 installer.) When you’re prompted, overwrite the files that are in the destination folder.

 
Copying the updated admin folder to the Office 2016 install files

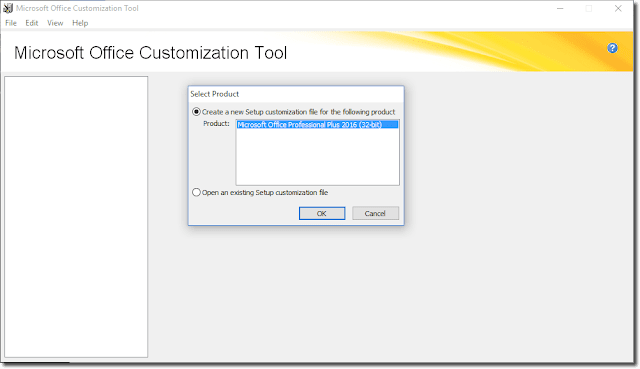
Next, you’ll need to open a command prompt and run setup.exe /admin to run the Office Customization Tool. When the OCT opens, leave the default Create a new Setup customization file for the following product option selected and click OK.


Creating a new Setup customization file for Office 2016

There are three main areas that you’ll definitely want to customize for your organization’s Office 2016 installation, at a minimum, inside the Setup section. Start by setting your organization name in the Install Location and Organization Name section.

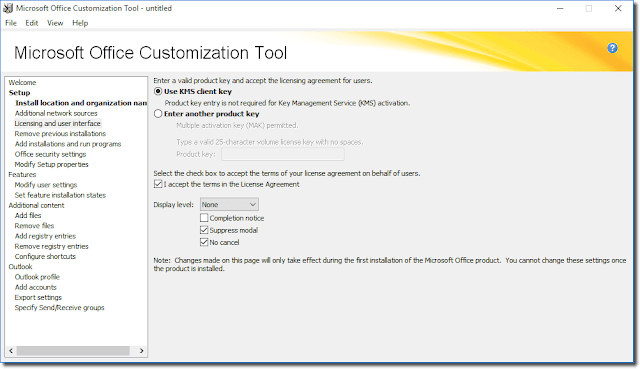
Next, go to the Licensing and User Interface section. Most organizations with a licensing agreement will probably leave the default Use KMS client key option, but you can set a MAK key here if necessary.

Select the I accept the terms in the License Agreement check box so that end users won’t see the license agreement when Office is installed. Last, set the display level to None and select the Suppress modal and No cancel check boxes. Leave the Completion notice check box cleared. These options will give you a silent installation without a final confirmation.


etting the product key, license agreement, and display level for Office 2016

Next, go to the Remove Previous Installations section. Here you can choose which previous versions of Office applications are uninstalled when Office 2016 is installed. I’ve had some unexpected results in the past when using the Default Setup behavior. So, I usually configure all of the applications to be removed unless I need to leave certain applications installed on the client system.

Removing previous Office installations when installing Office 2016

Once you’re done with your customization, click File and then Save and save your MSP file to the same network share where you’ve saved the Office 2016 installer. I usually like to put it in the root of the same folder as the installer.

Install the customized Office 2016

To install Office 2016 using the MSP file, you’ll need to run setup.exe with the /adminfile switch. Your command should end up looking something like this:

\\fileserver\software\Office_2016\x86\setup.exe /adminfile \\fileserver\software\Office_2016\x86\Office_2016.MSP


Installing Office 2016 using the /adminfile switch and an MSP file
 

Remove Office 2013

Depending on which components of Office 2013 were previously installed on a client system, you may still need to run an uninstall to remove Office 2013 completely. To do this, you’ll need the setup.exe and install files for Office 2013.

Create a new text file called SilentUninstallConfig.xml in the \Office_2013\ProPlus.WW\ folder with the following text (if the file already exists, make the following edits to the file):


Running the following command will remove the remnants of Office 2013:

\\fileserver\software\Office_2013\setup.exe /uninstall ProPlus /config \\fileserver\software\Office_2013\ProPlus.WW\SilentUninstallConfig.xml


Additional customization options to consider

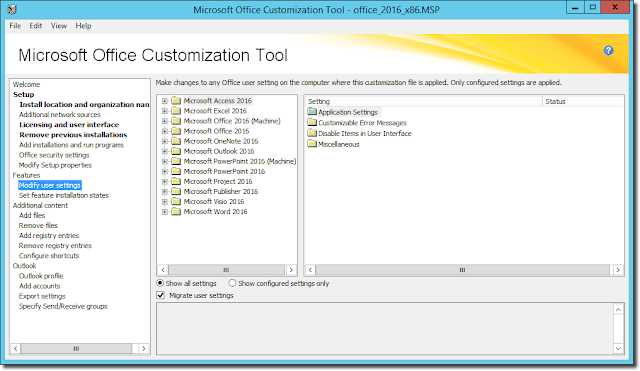
In addition to the settings I’ve already covered, you can also pre-configure a number of user settings when Office is installed on a computer. These settings are included in the Group Policy ADMX files, but they can be useful if you don’t want to manage Office with Group Policy or if you need a pre-configured build for non-managed systems.

There are quite a few settings in Features > Modify User Settings, but following are a few you might want to consider for your installation.

 
Modify User Settings section in the Office 2016 Office Customization Tool

ApplicationSub-SectionSetting NameNotes
Microsoft Office 2016Privacy > Trust CenterDisable Opt-in Wizard on first runWhen set to Enabled, suppresses a dialog end users don’t need to see
Microsoft Office 2016Privacy > Trust CenterEnable Customer Experience Improvement ProgramEnables/disables Customer Experience Program; some organizations don’t want their PCs participating
Microsoft Office 2016Privacy > Trust CenterSend Office FeedbackAllows/prevents end users from sending feedback to Microsoft about Office; some organizations don’t want their PCs participating
Microsoft Office 2016Privacy > Trust CenterAllow including screenshot with Office FeedbackAllows/prevents PC from sending screenshots with Office Feedback
Microsoft Office 2016Services > FaxDisable Internet Fax featureDisables Internet Faxing in Office apps
Microsoft Office 2016MiscellaneousShow OneDrive Sign InShows/removes option to sign into OneDrive
Microsoft Office 2016MiscellaneousControl BloggingPrevents end users from using Office apps to post to blogging platforms
Microsoft Office 2016MiscellaneousBlock signing into OfficeBlocks/allows signing into Office (consumer) and Office 365 services; Org ID only only allows Office 365 access and blocks OneDrive consumer access
Microsoft Office 2016First RunDisable First Run movieWhen set to Enabled, suppresses a dialog end users don’t need to see
Microsoft Office 2016First RunDisable Office First Run on application bootWhen set to Enabled, suppresses a dialog end users don’t need to see

How to Configure Site to Site IPSec VPN Tunnel in Cisco IOS Router

$
0
0
IPSec VPN is a security feature that allow you to create secure communication  link (also called VPN Tunnel) between two different networks located at different sites. Cisco IOS routers can be used to setup VPN tunnel between two sites. Traffic like data, voice, video, etc. can be securely transmitted through the VPN tunnel. In this article, I will show you the steps to Configure Site to Site IPSec VPN Tunnel in Cisco IOS Router.


Configure Site to Site IPSec VPN Tunnel in Cisco IOS Router

Diagram below shows our simple scenario. The two sites have static public IP address as shown in the diagram. R1 is configured with 70.54.241.1/24 and R2 is configured with 199.88.212.2/24 IP address. As of now, both routers have very basic setup like, IP addresses, NAT Overload, default route, hostnames, SSH logins, etc.

 
There are two phases in IPSec configuration called Phase 1 and Phase 2. Let’s start the configuration with R1. Before you start configuring the IPSec VPN, make sure both routers can reach each other. I have already verified that both routers can ping each other so let’s start the VPN configuration.

Step 1. Configuring IPSec Phase 1 (ISAKMP Policy)

R1(config)#crypto isakmp policy 5
R1(config-isakmp)#hash sha
R1(config-isakmp)#authentication pre-share
R1(config-isakmp)#group 2
R1(config-isakmp)#lifetime 86400
R1(config-isakmp)#encryption 3des
R1(config-isakmp)#exit
R1(config)#crypto isakmp key cisco@123 address 199.88.212.2

Step 2. Configuring IPSec Phase 2 (Transform Set)

R1(config)#crypto ipsec transform-set MY-SET esp-aes 128 esp-md5-hmac
R1(cfg-crypto-trans)#crypto ipsec security-association lifetime seconds 3600

Step 3. Configuring Extended ACL for interesting traffic.

R1(config)#ip access-list extended VPN-TRAFFIC
R1(config-ext-nacl)#permit ip 192.168.1.0 0.0.0.255 192.168.2.0 0.0.0.255


This ACL defines the interesting traffic that needs to go through the VPN tunnel. Here, traffic originating from 192.168.1.0 network to 192.168.2.0 network will go via VPN tunnel. This ACL will be used in Step 4 in Crypto Map.

Step 4. Configure Crypto Map.

R1(config)#crypto map IPSEC-SITE-TO-SITE-VPN 10 ipsec-isakmp 
% NOTE: This new crypto map will remain disabled until a 
peer and a valid access list have been configured.
R1(config-crypto-map)#match address VPN-TRAFFIC
R1(config-crypto-map)#set peer 199.88.212.2
R1(config-crypto-map)#set transform-set MY-SET


Step 5. Apply Crypto Map to outgoing interface of R1.

R1(config)#int fa0/0
R1(config-if)#crypto map IPSEC-SITE-TO-SITE-VPN
*Mar  1 05:43:51.114: %CRYPTO-6-ISAKMP_ON_OFF: ISAKMP is ON


Step 6. Exclude VPN traffic from NAT Overload.

R1(config)#ip access-list extended 101
R1(config-ext-nacl)#deny ip 192.168.1.0 0.0.0.255 192.168.2.0 0.0.0.255
R1(config-ext-nacl)#permit ip 192.168.1.0 0.0.0.255 any
R1(config-ext-nacl)#exit
R1(config)#ip nat inside source list 101 interface FastEthernet0/0 overload

Above ACL 101 will exclude interesting traffic from NAT.
Now, repeat same steps in R2.

Step 1. Configuring IPSec Phase 1 (ISAKMP Policy)

R2(config)#crypto isakmp policy 5
R2(config-isakmp)#hash sha
R2(config-isakmp)#authentication pre-share
R2(config-isakmp)#group 2
R2(config-isakmp)#lifetime 86400
R2(config-isakmp)#encryption 3des
R2(config-isakmp)#exit
R2(config)#crypto isakmp key cisco@123 address 70.54.241.2


Step 2. Configuring IPSec Phase 2 (Transform Set)

R2(config)#crypto ipsec transform-set MY-SET esp-aes 128 esp-md5-hmac
R2(cfg-crypto-trans)#crypto ipsec security-association lifetime seconds 3600


Step 3. Configuring Extended ACL for interesting traffic.

R2(config)#ip access-list extended VPN-TRAFFIC
R2(config-ext-nacl)#permit ip  192.168.2.0 0.0.0.255 192.168.1.0 0.0.0.255


Step 4. Configure Crypto Map.

R2(config)#crypto map IPSEC-SITE-TO-SITE-VPN 10 ipsec-isakmp
% NOTE: This new crypto map will remain disabled until a peer
        and a valid access list have been configured.
R2(config-crypto-map)#match address VPN-TRAFFIC
R2(config-crypto-map)#set peer 70.54.241.2
R2(config-crypto-map)#set transform-set MY-SET


Step 5. Apply Crypto Map to outgoing interface

R2(config)#int fa0/1
R2(config-if)#crypto map IPSEC-SITE-TO-SITE-VPN
*Mar 1 19:16:14.231: %CRYPTO-6-ISAKMP_ON_OFF: ISAKMP is ON


Step 6. Exclude VPN traffic from NAT Overload.

R1(config)#ip access-list extended 101
R1(config-ext-nacl)#deny ip 192.168.2.0 0.0.0.255 192.168.1.0 0.0.0.255
R1(config-ext-nacl)#permit ip 192.168.2.0 0.0.0.255 any
R1(config-ext-nacl)#exit
R1(config)#ip nat inside source list 101 interface FastEthernet0/1 overload


Verification and testing.
To test the VPN connection let’s ping from R1 to PC2.

R1#ping 192.168.2.1 source 192.168.1.254

Type escape sequence to abort.
Sending 5, 100-byte ICMP Echos to 192.168.2.1, timeout is 2 seconds:
Packet sent with a source address of 192.168.1.254
!!!!!
Success rate is 100 percent (5/5), round-trip min/avg/max = 52/54/56 ms


As you can see, the ping from R1 to PC2 is successful. Don’t forget to ping from inside IP address while testing the VPN tunnel from the router. You can also ping from PC1 to PC2.

To verify the IPSec Phase 1 connection, type show crypto isakmp sa as shown below.

R1#show crypto isakmp sa
dst             src             state          conn-id slot status
70.54.241.2     199.88.212.2    QM_IDLE              1    0 ACTIVE

To verify IPSec Phase 2 connection, type show crypto ipsec sa as shown below.

R1#show crypto ipsec sa

interface: FastEthernet0/0
    Crypto map tag: IPSEC-SITE-TO-SITE-VPN, local addr 70.54.241.2

   protected vrf: (none)
   local  ident (addr/mask/prot/port): (192.168.1.0/255.255.255.0/0/0)
   remote ident (addr/mask/prot/port): (192.168.2.0/255.255.255.0/0/0)
   current_peer 199.88.212.2 port 500
     PERMIT, flags={origin_is_acl,}
    #pkts encaps: 9, #pkts encrypt: 9, #pkts digest: 9
    #pkts decaps: 9, #pkts decrypt: 9, #pkts verify: 9
    #pkts compressed: 0, #pkts decompressed: 0
    #pkts not compressed: 0, #pkts compr. failed: 0
    #pkts not decompressed: 0, #pkts decompress failed: 0
    #send errors 16, #recv errors 0

     local crypto endpt.: 70.54.241.2, remote crypto endpt.: 199.88.212.2
     path mtu 1500, ip mtu 1500, ip mtu idb FastEthernet0/0
     current outbound spi: 0xD41CAB1(222415537)

     inbound esp sas:
      spi: 0x9530FB4E(2503015246)
        transform: esp-aes esp-md5-hmac ,

You can also view active IPSec sessions using show crypto session command as shown below.

R1#show crypto session
Crypto session current status

Interface: FastEthernet0/0
Session status: UP-ACTIVE
Peer: 199.88.212.2 port 500
  IKE SA: local 70.54.241.2/500 remote 199.88.212.2/500 Active
  IPSEC FLOW: permit ip 192.168.1.0/255.255.255.0 192.168.2.0/255.255.255.0
        Active SAs: 2, origin: crypto map


We  have done configuring Site to Site IPSec VPN tunnel in Cisco IOS Router.

How to Stop Windows 10 Asking Password When Resuming From Sleep

$
0
0

In this Windows 10 guide, we'll walk you through the steps to stop your computer from asking you to enter a password after resuming from sleep using the Settings app, Group Policy Editor, and Command Prompt.


Windows 10 offers a number of features to keep your computer and data secure. One way the operating system protects your device from unauthorized access is by keeping it locked on certain events, including when waking up from sleep.

Although entering a password to unlock your device after resuming from sleep can keep things more secure, if you use your computer at home, and you're the only person using it, a password prompt at wake up can simply be an inconvenient extra step (unless you have something to hide).

Fortunately, Windows 10 offers at least three ways to disable the password prompt after resuming from sleep to help you quickly get to your desktop. 

How to skip password prompt after sleep using Settings

  • Open Settings.
  • Click on Accounts.
  • Click on Sign-in options.
  • Under "Require sign-in," choose Never from the drop-down menu to complete the task.

Once you completed the steps, you'll no longer be required to enter a password after waking up Windows 10 from sleep.

To go back to the previous option, follow the same steps, but on step 4, make sure to select the When PC wakes up from sleep option.

How to skip password prompt after sleep using Group Policy

While the Settings app makes it super easy to change whether or not to skip entering the password when waking up your computer, if you use a laptop, you only get one option. You can't choose to stop requiring a password when your device is running on battery or plugged in individually.

If you're running Windows 10 Pro, you can use the Group Policy Editor to stop the operating system from requiring a password when your laptop is running on battery or plugged in.
  • Use the Windows key + R keyboard shortcut to open the Run command.
  • Type gpedit.msc and click OK to open the Local Group Policy Editor.
  • Browse the following path:Computer Configuration > Administrative Templates > System > Power Management > Sleep Settings
  • Double-click the policy you want to enforce: Require a password when a computer wakes (on battery) or Require a password when a computer wakes (Plugged in).


  • Check the Disable option in the top-left corner.
  • Click Apply.
  • Click OK to complete the task.


After completing the steps, depending on what you picked, your computer will bypass the Sign-in screen and go straight to the desktop when resuming from sleep.

If you want to revert the changes, simply follow the same steps, but this time on step 5 select the option Not configured.

How to skip password prompt after sleep using Command Prompt

If you're running Windows 10 Home, you won't have access to the Local Group Policy Editor, as it's only available on business variants of the operating system, including Windows 10 Pro, Enterprise, and Education, but you can still get the same result using Command Prompt.

To disable the require sign-in option when Windows 10 wakes up, do the following:

Use the Windows key + X keyboard shortcut to open the Power User menu, and select Command Prompt (admin).

If you want to disable the sign-in option while your device is running on battery, type the following command and press Enter:

powercfg /SETDCVALUEINDEX SCHEME_CURRENT SUB_NONE CONSOLELOCK 0

If you want to disable the sign-in option while your device is plugged in, type the following command and press Enter:

powercfg /SETACVALUEINDEX SCHEME_CURRENT SUB_NONE CONSOLELOCK 0


To enable the require sign-in option when Windows 10 wakes up, do the following:
  1. Use the Windows key + X keyboard shortcut to open the Power User menu, and select Command Prompt (admin).
  2. If you want to enable the sign-in option while your device is running on battery, type the following command and press Enter:
    powercfg /SETDCVALUEINDEX SCHEME_CURRENT SUB_NONE CONSOLELOCK 1
    If you want to disable the sign-in option while your device is plugged in, type the following command and press Enter:
    powercfg /SETACVALUEINDEX SCHEME_CURRENT SUB_NONE CONSOLELOCK 1


Conclusion

Note that in previous versions of the operating system you were able to change the sign-on option on wakeup using Control Panel, but now it's not longer the case. Microsoft continues to move forward migrating features and options from Control Panel to the Settings app, and the "Require a password on wakeup" is one of many options that has been deprecated from the latest version of Windows 10.

It's worth pointing out that removing the option the password requirement while resuming from wake up will also prevent Windows 10 from requiring a password after resuming from hibernation.

How to Install Oracle Enterprise Manager Cloud Control 13c Release 2 (13.2.0.0) on Oracle Linux 6 and 7

$
0
0


The purpose of this article is to perform installation of Oracle Enterprise Manager Cloud Control 13c Release 2 (13.2.0.0) on Oracle Linux 6 and 7. (x86_64).


Contents:

  • Software
  • OS Installation
  • Database Installation (Software-Only)
  • Repository Database Creation Using Template
  • Cloud Control 13c Installation
  • Startup/Shutdown 


Prerequisites:

Download the following if you don't have already.
There are two templates available. In this article I will be using the one for the Multitenant architecture, but there is one for the non-CDB architecture also.

OS Installation

Install Oracle Linux (OL) in the same way you would for a regular Oracle Database installation.

During this installation I used a virtual machine with 10G RAM and 100G disk space. The swap size was set at 8G, the firewall was disabled and SELinux was set to permissive.

Database Installation (Software-Only)

For this installation you will need 12.1.0.2 for the repository database.

Do a software-only installation, as we will be using the template to create the repository database.

The installation documentation says the following packages are necessary for the cloud control installation. If you have performed the database installation as described in one of the above articles, most of these prerequisites will already have been met.

# OL6 and OL7
yum install make -y
yum install binutils -y
yum install gcc -y
yum install libaio -y
yum install glibc-common -y
yum install libstdc++ -y
yum install libXtst -y
yum install sysstat -y
yum install glibc -y
yum install glibc-devel -y
yum install glibc-devel.i686 -y

The database software installation is now complete.


Repository Database Creation Using Template

In this article, we are going to use the repository template to create the repository database. If you are creating the database manually, remember to check all the prerequisites here, some of which include the following.
  • Database version 12.1.0.2 Enterprise Edition.
  • You can use a Non-CDB database, or a PDB.
  • The OPTIMIZER_ADAPTIVE_FEATURES initialization parameter should be set to FALSE.
  • Character set AL32UTF8.
The template includes all the relevant database settings, but make sure the character set is selected during the creation, as described below.

Unzip the repository template under the ORACLE_HOME
$ cd $ORACLE_HOME/assistants/dbca/templates
$ unzip /tmp/12.1.0.2.0_Database_Template_with_cdbpdb_for_EM13_2_0_0_0_Linux_x64.zip

Start the Database Configuration Assistant (DBCA) and create a new database using the template.
$ dbca
 
Select the "Create Database" option and click the "Next" button.


Select the "Advanced Mode" option and click the "Next" button.

Select the template for the appropriate size of EM installation you need. In this case I've used the small option. Click the "Next" button.

Enter the Global Database Name and SID, then click the "Next" button.

Make sure both the "Configure Enterprise Manager (EM) Database Express" and "Register with Enterprise Manager (EM) Cloud Control" options are unchecked, then click the "Next" button.

Enter the database credentials, then click the "Next" button.

Enter the listener details and click the the "Next" button.

Choose the preferred location for the database files, then click the "Next" button.

Accept the default settings and click on the "Next" button.

Amend the memory settings as desired, click on the "Character Sets" tab and select the "AL32UTF8" option and click the "Next" button. In this case I'm accepting the memory defaults.

Click the "Next" button to create the database.

If you are happy with the summary information, click the "Finish" button.

Wait while the database is created.

Once the database creation is complete, click the "Close" button.

Edit the contents of the "/etc/oratab" file, making sure the database can be started and stopped using the dbstart and dbshut commands.

emrepcdb:/u01/app/oracle/product/12.1.0.2/db_1:Y

Make sure the "empdbrepos" pluggable database is open and has its state saved, so it opened automatically when the instance starts. It should already be open, so the first command will produce and error.
 
export ORACLE_SID=emrepcdb

sqlplus / as sysdba <


Cloud Control 13c Installation

Make the following directories to hold the management server and agent. There are some restrictions on the possible path lengths, so don't make the directory structure too deep, especially for Windows installations.

$ mkdir -p /u01/app/oracle/middleware
$ mkdir -p /u01/app/oracle/agent
Start the installation by running the "em13200_linux64.bin" file.

$ chmod u+x em13200_linux64.bin
$ ./em13200_linux64.bin

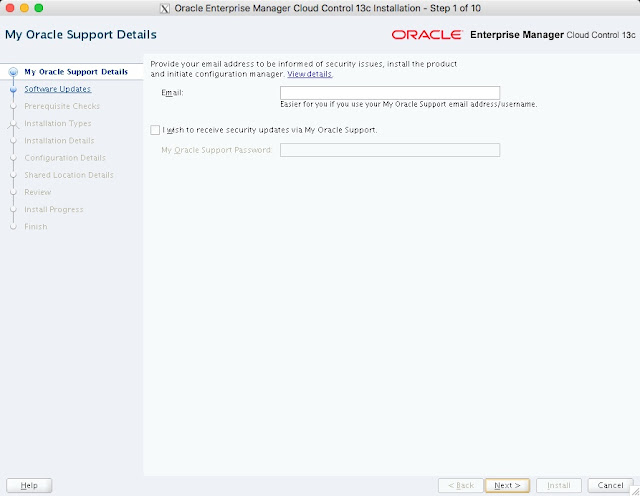
If you wish to receive support information, enter the required details, or uncheck the security updates checkbox and click the "Next" button. Click the "Yes" button the subsequent warning dialog.


If you wish to check for updates, enter the required details, or check the "Skip" option and click the "Next" button. 
 

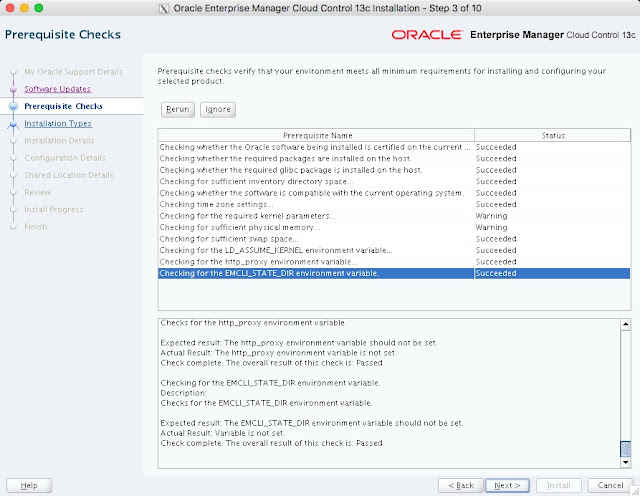
If you have performed the prerequisites as described, the installation should pass all prerequisite checks. Click the "Next" button. In this case I got a warning on the kernel parameters because my "ip_local_port_range" was larger than the required range. I also got a warning about the physical memory, as I was using a VM with less than the recommended memory. I ignored both by clicking the "Ignore" button, then the "Next" button.
 

Select the "Create a new Enterprise Manager System" and "Simple" options, then click the "Next" button.
 

Enter the middleware and agent locations, then click the "Next" button.


Enter the administrator password and database repository details, then click the "Next" button. If you are using the Multitenant template the PDB name will be "empdbrepos". If your database uses a domain, the PDB name will be "empdprepos.your.domain".


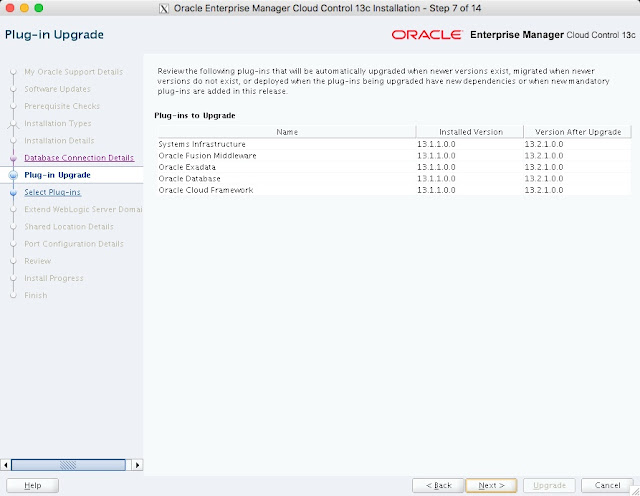
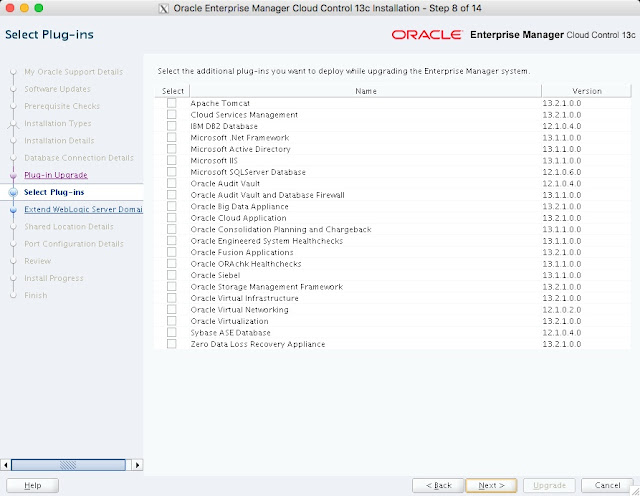
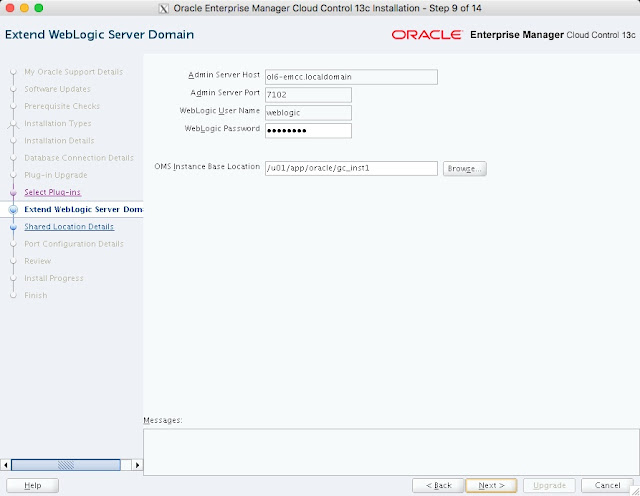
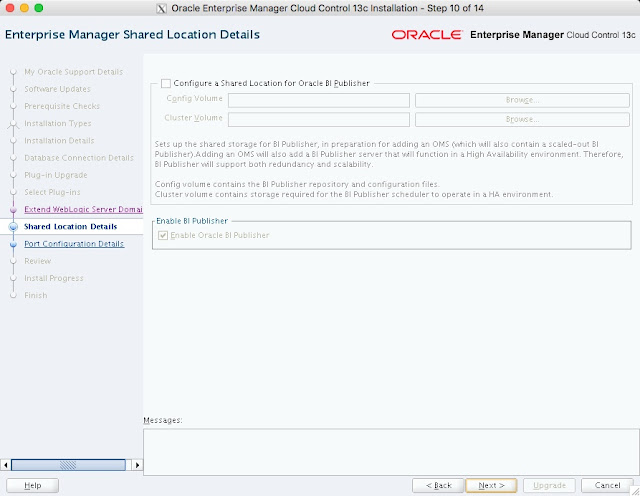
Enter a location for the software library. If you are using multiple management servers, you will need to configure shared storage for BI Publisher. For this installation I unchecked the "Configure a Shared Location for Oracle BI Publisher" option, but left the "Enable Oracle BI Publisher" option checked. Click the "Next" button.


If you are happy with the review information, click the "Install" button.


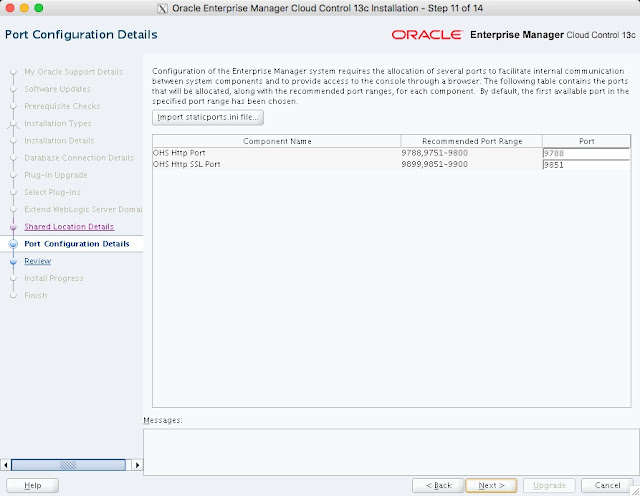
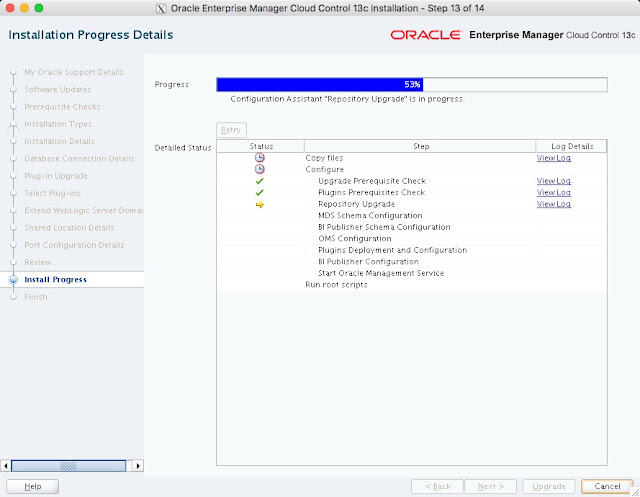
Wait while the installation and configuration take place. Notice the "Repository Out Of Box Configuration" step. If we had not used the database template, this would read "Repository Configuration" and the contents of the repository would be created from scratch.


When prompted, run the root scripts, then click the "OK" button.


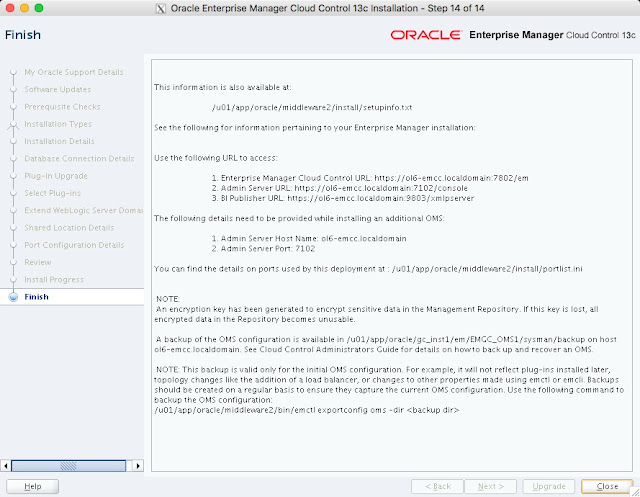
Make note of the URLs, then click the "Close" button to exit the installer. A copy of this information is available in the "/u01/app/oracle/middleware/install/setupinfo.txt" file.


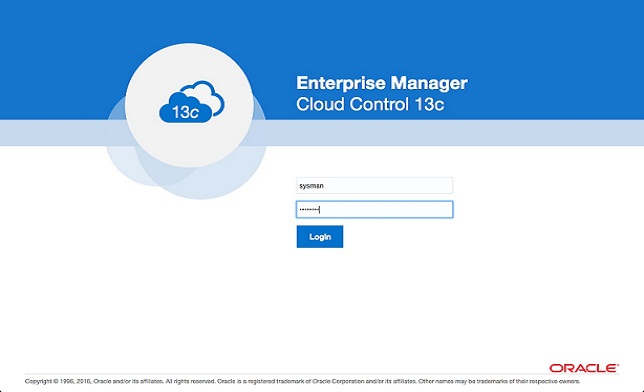
The login screen is available from a browser using the URL provided in the previous screen ("https://ol7-emcc.localdomain:7803/em"). Log in with the username "sysman" and the password you specified during your installation.


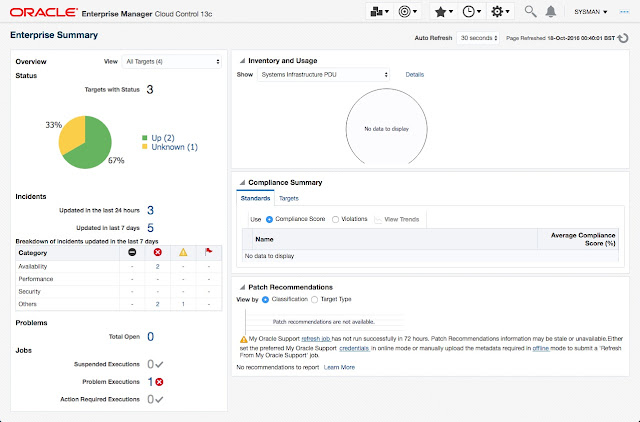
Once logged in, you are presented with a with the "Accessibility Preference" screen. Click the "Save and Continue" button and you are presented with the the "License Agreement" screen. Click the "I Accept" button and you are presented with the homepage selector screen. On the right side of the screen it lists the post-installation setup tasks you need to work through. Select the desired homepage (I chose Summary).


You are presented with the selected screen as the console homepage.


Startup/Shutdown

Cloud Control is set to auto-start using the "gcstartup" service. The "/etc/oragchomelist" file contains the items that will be started by the system.

/u01/app/oracle/middleware
/u01/app/oracle/agent/agent_13.2.0.0.0:/u01/app/oracle/agent/agent_inst

On a simple installation the default auto-start will cause a problem as Cloud Control will attempt to start before the database has started. The service can be disabled by commenting out (using #) all the contents of the "/etc/oragchomelist" file to prevent the auto-start and use start/stop scripts described below.

If the start/stop needs to be automated, you can do it in the usual way using Linux service that calls your start/stop scripts that include the database management.

Use the following commands to turn on all components installed by this article.

#!/bin/bash
export ORACLE_HOME=/u01/app/oracle/product/12.1.0.2/db_1
export OMS_HOME=/u01/app/oracle/middleware
export AGENT_HOME=/u01/app/oracle/agent/agent_inst

# Start everything
$ORACLE_HOME/bin/dbstart $ORACLE_HOME

$OMS_HOME/bin/emctl start oms

$AGENT_HOME/bin/emctl start agent
Use the following commands to turn off all components installed by this article.

#!/bin/bash
export ORACLE_HOME=/u01/app/oracle/product/12.1.0.2/db_1
export OMS_HOME=/u01/app/oracle/middleware
export AGENT_HOME=/u01/app/oracle/agent/agent_inst

# Stop everything
$OMS_HOME/bin/emctl stop oms -all

$AGENT_HOME/bin/emctl stop agent

$ORACLE_HOME/bin/dbshut $ORACLE_HOME

Oracle Enterprise Manager Cloud Control 13c Post Installation Setup Tasks


Setup Software Library

Your software library should be set up as part of your installation in 13c, but if for some reason you needed to do it post-installation, you would do the following.
  • Create a directory to use as the software library.
    $ mkdir -p /u01/app/oracle/swlib
  • Navigate to the "Software Library: Administration" screen using the menu at the top-right of the screen (Setup > Provisioning and Patching > Software Library).
  • Select the storage type of "OMS Shared File System".
  • Click the "+ Add" button.
  • Enter a name and location of the file system for the software library. Once you've selected the appropriate values, click the "OK" button.
  • The software library is now configured.


Set My Oracle Support (MOS) Credentials

  • Navigate to the "My Oracle Support Preferred Credentials" screen using the menu at the top-right of the screen (Setup > My Oracle Support > Set Credentials...).
  • Enter the credentials and click the "Apply" button.


Download Additional Agents

  • Navigate to the "Self Update" screen using the menu at the top-right of the screen (Setup > Extensibility > Self Update).
  • Click on the "Check Updates" button and "OK" on the subsequent message dialog.
  • Click on the "Agent Software" link.
  • Highlight the agent of interest and click the "Download" button. Select the download schedule and click the "Select" button. Click the "OK" button on the confirmation dialog.
  • Click the refresh button on the top-right of the screen until the download is complete and the status changes to "Downloaded".
  • Highlight the newly downloaded software and click the "Apply" button, followed by the "OK" button on the two following message dialogs.
  • When the status changes to "Applied", the agent software is ready for installation on a target.


Install an Agent on a Target Host

  • Navigate to the "Add Targets Manually" screen using the menu at the top-right of the screen (Setup > Add Target > Add Targets Manually).
  • Click the "Install Agent on Host" button.
  • Click the "+ Add" button.
  • Enter the host and platform, then click the "Next" button.
  • Enter the installation details and click the "Next" button.
    Installation Base Directory  : /u01/app/oracle/product/agent13c
    Instance Directory : /u01/app/oracle/product/agent13c/agent_inst (default)
    Named Credential : (click the "+" button and add the credentials of the "oracle" user)
    Privileged Delegation Setting: (leave blank)
    Port : 3872
    If you are installing the agent on a HP Service Guard package, remember to set the "Additional Parameters" to point at the package-specific inventory location and override the machine name with the package name. For example.
    INVENTORY_LOCATION=/u07/app/oraInventory ORACLE_HOSTNAME=my-package.example.com
  • Check the information on the review screen and click the "Deploy Agent" button.
  • Wait while the installation takes place. The "Add Host Status" page refreshes every 30 seconds.
  • When the installation completes, run the specified "root.sh" script and click the "Done" button.
  • The host will now be visible on the "Targets > Hosts" screen.


Discover Targets on Host

  • Navigate to the "Add Targets Manually" screen using the menu at the top-right of the screen (Setup > Add Target > Add Targets Manually).
  • Click the "Add Using Guided Process" button, select the target types to be discovered (eg. Oracle Database, Listener and Automatic Storage Manager) and click the "Add ..." button.
  • Select the host name and click the "Next" button.
  • Click the "Configure" icon for any discovered targets and enter the required details. If you are using HP Service Guard, remember to only select and configure targets belonging to the package. By default, the agent will discover all targets on the physical machine.
  • When all the configuration steps are complete, click the "Next" button, followed by the "Save" button, then finally the "Close" button.
  • The targets will now be listed on the relevant target screen (Targets > Databases).


Add Administrator Users

  • Navigate to the "Administrators" screen using the menu at the top-right of the screen (Setup > Security > Administrators).
  • Select the "Enterprise Manager Repository" and click the "Next" button.
  • Enter the username/password details and check the "Super Administrator" checkbox, then click the "Review" button.
  • Click the "Finish" button.


Notifications

There are several areas to consider when configuring and diagnosing notification issues.
  • Make sure the SMTP server is registered in the "Setup > Notifications > Mail Servers" screen.
  • Check the "Setup > Incidents > Incident Rules" screen. Make sure the relevant incident rules are enabled. Create any new rules you need.
  • Subscribe to any rules you want to be notified about. To do this, highlight the rule, then do "Actions > Email > E-mail Me".
  • Make sure your email is setup in the "Enterprise Manager Password & Email" screen, from the menu below your username on the top right of the screen.


Disable BI Publisher

From 13c onward, I would suggest configuring BI Publisher during the installation/upgrade, so if you need it in future it is ready to go. Having said that, if you currently don't need it, you can switch it off to reduce resource usage and improve startup speed.

The BI Publisher will be started automatically during the startup process of the Enterprise Manager 13c. You don’t like the BI Publisher or you don’t use it? Save the resources, speed up your startup process, disable it. The password of the database repository owner SYSMAN is required.

Verify the Status – the BI Publisher is up and running

[oracle@solothurn ~]$ export OMS_HOME=/u00/app/oracle/product/oms13cr1
[oracle@solothurn ~]$ $OMS_HOME/bin/emctl status oms
Oracle Enterprise Manager Cloud Control 13c Release 1
Copyright (c) 1996, 2015 Oracle Corporation.  All rights reserved.
WebTier is Up
Oracle Management Server is Up
JVMD Engine is Up
BI Publisher Server is Up


Disable the BI Publisher

[oracle@solothurn ~]$ $OMS_HOME/bin/emctl config oms -disable_bip
Oracle Enterprise Manager Cloud Control 13c Release 1
Copyright (c) 1996, 2015 Oracle Corporation.  All rights reserved.
Enter Enterprise Manager Root (SYSMAN) Password :
Stopping BI Publisher Server...
BI Publisher Server Successfully Stopped
BI Publisher Server is Down
BI Publisher has been disabled on this host and will not be started with the 'emctl start oms' or 'emctl start oms -bip_only' commands.
Overall result of operations: SUCCESS


Verify the Status again

If you want to enable the BI Publisher again, the command is listed below the emctl output.

[oracle@solothurn ~]$ $OMS_HOME/bin/emctl status oms
Oracle Enterprise Manager Cloud Control 13c Release 1
Copyright (c) 1996, 2015 Oracle Corporation.  All rights reserved.
WebTier is Up
Oracle Management Server is Up
JVMD Engine is Up
BI Publisher Server is Down
BI Publisher is disabled, to enable BI Publisher on this host, use the 'emctl config oms -enable_bip' command


Timing

I have tested the start of the Oracle Enterprise Manager in my local virtual machine environment (VMWare Workstation,15GB Memory, 4 Cores, SSD) with and without the BI Publisher. The difference:
BI Publisher enabled – 4 Minutes and 18 Seconds

[oracle@solothurn ~]$ time $OMS_HOME/bin/emctl start oms
Oracle Enterprise Manager Cloud Control 13c Release 1
Copyright (c) 1996, 2015 Oracle Corporation.  All rights reserved.
Starting Oracle Management Server...
WebTier Successfully Started
Oracle Management Server Successfully Started
Oracle Management Server is Up
JVMD Engine is Up
Starting BI Publisher Server ...
BI Publisher Server Successfully Started
BI Publisher Server is Up

real    4m18.322s
user    0m21.835s
sys     0m2.206s


BI Publisher disabled – 3 Minutes and 6 Seconds

[oracle@solothurn ~]$ time $OMS_HOME/bin/emctl start oms
Oracle Enterprise Manager Cloud Control 13c Release 1
Copyright (c) 1996, 2015 Oracle Corporation.  All rights reserved.
Starting Oracle Management Server...
WebTier Successfully Started
Oracle Management Server Successfully Started
Oracle Management Server is Up
JVMD Engine is Up

real    3m6.834s
user    0m11.907s
sys     0m1.323s


Alter Page Timeout

After moving to Oracle Enterprise Manager Cloud Control 12c, one of the annoyances I soon discovered was this message “The page has expired. Click OK to continue”.

When you’re not actively using the console, it doesn’t take long before the message appears, which is especially annoying when you have the performance monitoring pages running in the background!
According to Oracle it’s a new security feature within the EM12c console:

To prevent unauthorized access to the Cloud Control console, Enterprise Manager will automatically log you out of the Cloud Control console when there is no activity for a predefined period of time. For example, if you leave your browser open and leave your office, this default behavior prevents unauthorized users from using your Enterprise Manager administrator account. But with today’s browser behavior all that really happens is the page reloads after you click OK anyway.

So, here’s how you disable it:

export OMS_HOME=/u01/app/oracle/middleware/oms12c/oms
cd $OMS_HOME/bin

Disable the feature altogether with ‘-1’ value (it’s null by default), or enter another value (minutes) if for some reason you want to increase it:

./emctl set property -name oracle.sysman.eml.maxInactiveTime -value -1 -sysman_pwd sysman_password

Restart your OMS(es) to reflect the changes:

./emctl stop oms
./emctl start oms

In the example above, we uses the value "-1" which represents unlimited, but you can always use an alternative value.

How to Connect Oracle Enterprise Manager 13cR2 with the Oracle Database Backup Service

$
0
0

In Oracle Enterprise Manager 13cR1, it was the first time when the Oracle Database Backup Service was integrated . In Release 2 the configuration menu was extended, a storage container can be defined now e.g. for a better organization and overview of the backups. This article shows you how to configure the Oracle Database Backup Service in Enterprise Manager 13cR2 and how to prepare a database for a cloud backup. All you need is the Oracle Database Backup Service, a trial works too.


Enter your domain and login information. Optional: Set a backup container. A backup container is an organiziation unit like a subdirectory on a server.


Configure the Database

Select the database which you want to backup to the Oracle cloud from the database target page. Configure Oracle Cloud Backup Service.


The first time when you run the configuration, you need to enter your host credentials for the host where the database is running which you want to configure. Use the username which has installed the database software, or you can use a named credential. Be sure that the server where the backup has to be configured has access to the internet.

After submit, a deployment procedure configures the Oracle Database Backup Service on the server. The Oracle Database Backup Service module will be installed on server.


The deployment procedure copies the tape library for the Oracle Database Backup Service into the $ORACLE_HOME/lib and creates a wallet in $ORACLE_HOME/dbs/opc with the cloud certificates. Bot components are required to use the service.

oracle@kestenholz:/u00/app/oracle/product/12.1.0.2/dbhome_1/lib/ [rdbms12102] lr libopc.so
-rwxr-----. 1 oracle oinstall 72062283 Oct 10 08:53 libopc.so


oracle@kestenholz:/u00/app/oracle/product/12.1.0.2/dbhome_1/dbs/opc/ [EMREPO] lr
total 4
-rw-rw-rw-. 1 oracle oinstall    0 Oct 10 08:53 cwallet.sso.lck
-rwxr-x---. 1 oracle oinstall 3101 Oct 10 08:53 cwallet.sso

The EM13c view after the successful deployment. To verify the configuration, press the Test Oracle Cloud Backup Button.


All backups into the Oracle Cloud have to be encrypted, the test run too.


Backup test succeeded.


Execute  RMAN Backup

Now you are able to backup an Oracle database with RMAN into the Oracle Cloud. Schedule a backup.


Schedule a customized backup


On the backup settings page, scroll down to set the encryption mode. You can choose between the wallet and the password method. As reminder, database backups with target Oracle Cloud have to be encrypted locally. Otherwise the backup job fails. Activate the checkbox for the password method and set/confirm the password. Next.


Select the Oracle Cloud as destination. Below you can see the used RMAN parameter. Oracle uses the file libopc.so like a tape driver. Next.


Schedule the execution. Next.


Now you can submit the job or use the syntax in the RMAN script box.


set encryption on for all tablespaces algorithm 'AES128' identified by '%PASSWORD' only;
backup device type sbt tag '%TAG' database;
backup device type sbt tag '%TAG' archivelog all not backed up;
run {
allocate channel oem_backup_sbt1 type 'SBT_TAPE' format '%d_%U' parms "SBT_LIBRARY=/u00/app/oracle/product/12.1.0.2/dbhome_1/lib/libopc.so ENV=(OPC_HOST=https://.storage.oraclecloud.com/v1/Storage-, OPC_WALLET='LOCATION=file:/u00/app/oracle/product/12.1.0.2/dbhome_1/dbs/opc CREDENTIAL_ALIAS=martin.berger@trivadis.com_')" maxpiecesize 1000 G;
backup tag '%TAG' current controlfile;
release channel oem_backup_sbt1;
}

The Backup Management Page shows the Oracle Cloud as Media


Conclusion

The Oracle Database Backup Service is fully integrated in the Oracle Enterprise Manager 13c and it works fine. The EM deploys you  the Oracle backup module on the target servers, once deployed, the configuration can be used for every other database which runs on the same target host as configured.

Data Guard “CORRUPTION DETECTED: in redo blocks starting at block” issues [Resolved]

$
0
0

One of my customers Cloud hosted environments (IaaS) has an Oracle 11.2.0.4 Data Guard (physical standby) setup on Windows.  Recently, the standby database started logging the following errors in it’s alert log: This article will show you the procedure to fix Data Guard “CORRUPTION DETECTED: in redo blocks starting at block” issues.


Fri June 06 08:51:16 2016
RFS[1085]: Assigned to RFS process 8996
RFS[1085]: Opened log for thread 1 sequence 72899 dbid -2002036753 branch 876434118
CORRUPTION DETECTED: In redo blocks starting at block 135169count 2048 for thread 1 sequence 72899
Deleted Oracle managed file H:\FAST_RECOVERY_AREA\SNAPF\ARCHIVELOG\2016_06_03\O1_MF_1_72899_CMC1VNVP_.ARC
RFS[1085]: Possible network disconnect with primary database

The logs were being transported across from the primary site, but the media recovery process was reporting corrupt blocks when trying to apply the archive redo log files, and so recovery stalled.

Validating the archive logs at the primary site showed us that the files were indeed valid at the source (primary):

rman target /
validate archivelog sequence 72899;
...
List of Archived Logs
=====================
Thrd Seq     Status Blocks Failing Blocks Examined Name
---- ------- ------ -------------- --------------- ---------------
1    72899   OK     0              350165          H:\FAST_RECOVERY_AREA\SNAPF\ARCHIVELOG\2016_06_03\O1_MF_1_72899_CM3533SG_.ARC
Finished validate at 03-JUN-16

Attempting a dump of the log file contents would also demonstrate whether or not the log file was valid:

ALTER SYSTEM DUMP LOGFILE 'H:\FAST_RECOVERY_AREA\SNAPF\ARCHIVELOG\2016_06_03\O1_MF_1_72899_CM3533SG_.ARC';

So we know the logs are clean and intact at the primary site, which would suggest that something in the log transport process was corrupting the logs.  Further, manually copying the files across, and re-registering would resolve the problem, until the next error occurred (not a sustainable work around):

ALTER DATABASE REGISTER LOGFILE 'H:\FAST_RECOVERY_AREA\SNAPF\ARCHIVELOG\2016_06_03\O1_MF_1_72899_CM3533SG_.ARC';

Oracle were quite helpful in suggesting we check the firewall(s) to ensure the follow features were disabled:

    SQLNet fixup protocol
    Deep Packet Inspection (DPI)
    SQLNet packet inspection
    SQL Fixup
    SQL ALG (Juniper firewall)
    Oracle DB-control component DOS


After further investigation, it would seem that the Cisco switches being used between our primary and standby sites had “SQL*Net inspection enabled” by default (deep packet inspection).  As a result, because we were using the default 1521 listener port, packets were being scanned and reaching the standby site in a malformed/corrupted state.

Disable this feature wasn’t so straight forward unfortunately, so as a work around (and to avoid other 1521 port scanning protocols interfering), I opted to change the Data Guard listener port instead from 1521 to 1528 by adding another listener service:

SID_LIST_LISTENER =
 (SID_LIST =
 (SID_DESC =
 (SID_NAME = CLRExtProc)
 (ORACLE_HOME = E:\app\oracle\product\11.2.0.4)
 (PROGRAM = extproc)
 (ENVS = "EXTPROC_DLLS=ONLY:E:\app\oracle\product\11.2.0.4\bin\oraclr11.dll")
 )
 )

LISTENER =
 (DESCRIPTION_LIST =
 (DESCRIPTION =
 (ADDRESS = (PROTOCOL = TCP)(HOST = win02-stby.vbox)(PORT = 1521))
 )
 )

ADR_BASE_LISTENER = E:\app\oracle

# DG listener created to use port 1528, following SQL*Net packet inspection issues
SID_LIST_LISTENER_DG =
 (SID_LIST =
 (SID_DESC =
 (GLOBAL_DBNAME = DATAMARTF_DGMGRL) # Data Guard Manager
 (ORACLE_HOME = E:\app\oracle\product\11.2.0.4)
 (SID_NAME = SNAPF)
 )
 (SID_DESC =
 (GLOBAL_DBNAME = SNAPF) # Data Guard Broker Process
 (ORACLE_HOME = E:\app\oracle\product\11.2.0.4)
 (SID_NAME = SNAPF)
 )
 )

LISTENER_DG =
 (DESCRIPTION_LIST =
 (DESCRIPTION =
 (ADDRESS = (PROTOCOL = TCP)(HOST = win02-stby.vbox)(PORT = 1528))
 )
 )

ADR_BASE_LISTENER_DG = E:\app\oracle


After starting up the new LISTENER_DG service, the corruption issues disappeared.

NOTE: Don’t forget to change the port number at your primary site for your Data Guard TNS entries.

How to Upgrade Oracle Enterprise Manager Cloud Control 13c Release 1 (13cR1) to 13c Release 2 (13cR2)

$
0
0

This article will show you a simple upgrade of Enterprise Manager Cloud Control 13c Release 1 (13cR1) to 13c Release 2 (13cR2). Each upgrade potentially requires additional steps, so this article is not meant as a replacement for reading the documentation.


  • Software
  • Prerequisites
  • Cloud Control 13c Installation and Upgrade
  • Agent Upgrade
  • Startup/Shutdown


Software

Download the following software:

Prerequisites

Make sure the privileges for the DBMS_RANDOM package are as described in the documentation. This should already be done as it was a requirement for the 13.1 installation, but it's worth checking.

export ORACLE_SID=emrep
export ORAENV_ASK=NO
. oraenv
export ORAENV_ASK=YES

sqlplus / as sysdba

GRANT EXECUTE ON dbms_random TO dbsnmp;
GRANT EXECUTE ON dbms_random TO sysman;
REVOKE EXECUTE ON dbms_random FROM public;

Make sure there are no invalid objects in the repository database.
 
SELECT owner, object_name, object_type
FROM dba_objects
WHERE status = 'INVALID'
AND owner IN ('SYS', 'SYSTEM', 'SYSMAN', 'MGMT_VIEW', 'DBSNMP', 'SYSMAN_MDS');

If you have any, recompile them using the following commands. Only pick the schemas that have invalid objects though.

EXEC UTL_RECOMP.recomp_serial('SYS');
EXEC UTL_RECOMP.recomp_serial('DBSNMP');
EXEC UTL_RECOMP.recomp_serial('SYSMAN');

Copy the emkey using the following commands, adjust as required. You will have to enter the Cloud Control sysman password.

$ export OMS_HOME=/u01/app/oracle/middleware
$ $OMS_HOME/bin/emctl config emkey -copy_to_repos
Oracle Enterprise Manager Cloud Control 13c Release 1
Copyright (c) 1996, 2015 Oracle Corporation.  All rights reserved.
Enter Enterprise Manager Root (SYSMAN) Password :
The EMKey has been copied to the Management Repository. This operation will cause the EMKey to become unsecure.
After the required operation has been completed, secure the EMKey by running "emctl config emkey -remove_from_repos".
$

$ $OMS_HOME/bin/emctl status emkey
Oracle Enterprise Manager Cloud Control 13c Release 1
Copyright (c) 1996, 2015 Oracle Corporation.  All rights reserved.
Enter Enterprise Manager Root (SYSMAN) Password :
The EMKey  is configured properly, but is not secure. Secure the EMKey by running "emctl config emkey -remove_from_repos".
$


Stop the OMS and the agent.
 
export OMS_HOME=/u01/app/oracle/middleware
export AGENT_HOME=/u01/app/oracle/agent/agent_inst

$OMS_HOME/bin/emctl stop oms -all
$AGENT_HOME/bin/emctl stop agent

Create a directory for the new installation.
 
$ mkdir -p /u01/app/oracle/middleware2

Backup your repository. In my case, Cloud Control runs on a VM, so a database backup was performed, as well as a whole VM backup.

For clarity, my starting 13cR1 installation had the following details.

HOSTNAME  : ol6-emcc.localdomain
DB Version: 12.1.0.2
ORACLE_SID: emrep
PORT : 1521
URL : https://ol6-emcc.localdomain:7802/em


Cloud Control 12c Installation and Upgrade

Run the installer.
 
$ chmod u+x em13200_linux64.bin
$ ./em13200_linux64.bin

If you wish to receive support information, enter the required details, or uncheck the security updates checkbox and click the "Next" button. Click the "Yes" button the subsequent warning dialog.


If you wish to check for updates, enter the required details, or check the "Skip" option and click the "Next" button.


If you have performed the prerequisites as described, the installation should pass all prerequisite checks. Click the "Next" button. In this case I got a warning on the kernel parameters because my "ip_local_port_range" was larger than the required range and the basic memory check failure. I ignored them by clicking the "Ignore" button, then the "Next" button.


Select the "Upgrade an existing Enterprise Manager System" option. Select the "One-System Upgrade" option. Select the OMS to be upgraded, then click the "Next" button.


Enter the new middleware home location, I used "/u01/app/oracle/middleware2", then click the "Next" button.


Enter the passwords for the SYS and SYSMAN users and check both the check boxes, then click the "Next" button. 


I got seven separate warning dialogs. In all cases I ignored them by clicking the "OK" or "Yes" button as appropriate:

Warning-1

Warning-2

Warning-3

Warning-4

Warning-5

Warning-6


If you are happy with the plug-in upgrade information, click the "Next" button.


Select any additional plug-ins you want to deploy, then click the "Next" button.


Enter the WebLogic details, then click the "Next" button. Just add a number on to the end of the OMS Instance Base Location specified by default. I used "/u01/app/oracle/gc_inst1".


This is a simple installation, using just a single OMS, so I don't need a shared location for BI Publisher. As a result, I unchecked the "Configure a Shared Location for Oracle BI Publisher", but I left the "Enable Oracle BI Publisher" option checked. If you plan to use a multiple OMS setup, then configure shared storage, like NFS, and put the relevant paths in here. Click the "Next" button.


Accept the default ports by clicking the "Next" button.


If you are happy with the review information, click the "Upgrade" button.


Wait while the installation and configuration take place.


When prompted, run the root scripts, then click the "OK" button.


Make note of the URLs, then click the "Close" button to exit the installer. A copy of this information is available in the "/u01/app/oracle/middleware2/install/setupinfo.txt" file.


Start the original agent. We will upgrade that in the next section.
 
$ export AGENT_HOME=/u01/app/oracle/agent/agent_inst
$ $AGENT_HOME/bin/emctl start agent

The login screen is available from a browser using the URL provided in the previous screen ("https://ol6-emcc.localdomain:7802/em"). Log in with the username "sysman" and the password you specified during your installation.


Once logged in, you are presented with a with the "Accessibility Preference" screen. Click the "Save and Continue" button and you are presented with the the "License Agreement" screen. Click the "I Accept" button and you are presented with the homepage selector screen. On the right side of the screen it lists the post-installation setup tasks you need to work through. I have these documented in a separate article. Select the desired homepage (I chose Summary).


You are presented with the selected screen as the console homepage.


It may take some time for all targets to be seen as up.


Agent Upgrade

Navigate to "Setup (cog icon) > Manage Cloud Control > Upgrade Agents".


Click the "+ Add" button, highlight any agents to upgrade, then click the "OK" button.


When you are happy with your selection, click the "Submit" button.


If you do not have "root" access or sudo configured to allow you to run the root scripts, click the "OK" on the warning message. The root scripts can be run after the installation completes.


Wait while the upgrade takes place.


If you need to run any root scripts manually, do so now. They are located in the agent home on each monitored machines (AGENT_HOME/agent_13.2.0.0.0/root.sh).

The main body of the upgrade is now complete.

Navigate to the "Post Upgrade Tasks" screen (Setup > Manage Cloud Control > Post Upgrade Tasks). Highlight each of the tasks in the list and click the "Start" button. This just performs some final data migration.


Startup/Shutdown

Cloud Control is set to auto-start using the "gcstartup" service. The "/etc/oragchomelist" file contains the items that will be started by the system. After the upgrade, it may list both OMS installations. If you want to use this auto-start, you will need to amend the contents of the file to make sure it is consistent with the new installation.

/u01/app/oracle/middleware2
/u01/app/oracle/agent12c/agent_13.2.0.0.0:/u01/app/oracle/agent/agent_inst

The path to the agent is the same as that from the previous installation. If you included a version number in the agent home, this may look a little strange.

On a simple installation the default auto-start will cause a problem as Cloud Control will attempt to start before the database has started. The service can be disabled by commenting out (using #) all the contents of the "/etc/oragchomelist" file to prevent the auto-start and use start/stop scripts described below.

If the start/stop needs to be automated, you can do it in the usual way using Linux service that calls your start/stop scripts that include the database management.

Use the following commands to turn on all components installed by this article. If you have a startup/shutdown script, remember to amend it to take account of the new paths.

#!/bin/bash
export ORACLE_HOME=/u01/app/oracle/product/12.1.0.2/db_1
export OMS_HOME=/u01/app/oracle/middleware2
export AGENT_HOME=/u01/app/oracle/agent/agent_inst

# Start everything
$ORACLE_HOME/bin/dbstart $ORACLE_HOME

$OMS_HOME/bin/emctl start oms

$AGENT_HOME/bin/emctl start agent
Use the following commands to turn off all components installed by this article.

#!/bin/bash
export ORACLE_HOME=/u01/app/oracle/product/12.1.0.2/db_1
export OMS_HOME=/u01/app/oracle/middleware2
export AGENT_HOME=/u01/app/oracle/agent/agent_inst

# Stop everything
$OMS_HOME/bin/emctl stop oms -all

$AGENT_HOME/bin/emctl stop agent

$ORACLE_HOME/bin/dbshut $ORACLE_HOME

That's all for now.

How to Apply Patch 23094292: WLS Patch Set Update 12.1.3.0.160719 - Enterprise Manager 13cR2

$
0
0

The purpose of this article is to apply Weblogic patch set update in an Enterprise Manager 13cR2 environment running on a Oracle Linux server. Our latest enterprise manager 13cR2 installation showed me that there is a patch for the Weblogic environment available. 


This patch was released in July 2016: Patch Patch 23094292: WLS PATCH SET UPDATE 12.1.3.0.160719. This patchset has included 157 fixes and is a generic one. The patch is marked in My Oracle Support as recommended. OPatch has no to be updated. This patch is not an online patch, you have to shut down your running Enterprise Manager 13cR2 server.


Prepare Patch Set Update on Enterprise Manager 13c Server

The patch file has to be extracted. I have copied to file to my EM13cR2 server stage directory /u00/app/oracle/stage.

[oracle@webuser ~]$ cd /u00/app/oracle/stage/
[oracle@webuser stage]$ ll
total 32560
-rw-r--r--. 1 oracle oinstall 33340052 Oct 17 12:51 p23094292_121300_Generic.zip
[oracle@webuser stage]$ unzip p23094292_121300_Generic.zip


Set ORACLE_HOME

Set the ORACLE_HOME variable to the directory where the Oracle Enterprise Manager 13cR2 is located. In my example the EM13cR2 is installed in directory /u00/app/oracle/product/em13cr2.

[oracle@webuser stage]$ export ORACLE_HOME=/u00/app/oracle/product/em13cr2

Stop running Oracle Enterprise Manager 13c

[oracle@webuser stage]$ $ORACLE_HOME/bin/emctl stop oms -all

Apply Patch 23094292: WLS PATCH SET UPDATE 12.1.3.0.160719

Go to the extracted patch set directory:

[oracle@webuser ~]$ cd /u00/app/oracle/stage/23094292

Apply the patch:

[oracle@webuser 23094292]$ $ORACLE_HOME/OPatch/opatch apply
Oracle Interim Patch Installer version 13.8.0.0.0
Copyright (c) 2016, Oracle Corporation.  All rights reserved.


Oracle Home       : /u00/app/oracle/product/em13cr2
Central Inventory : /u00/app/oraInventory
   from           : /u00/app/oracle/product/em13cr2/oraInst.loc
OPatch version    : 13.8.0.0.0
OUI version       : 13.8.0.0.0
Log file location : /u00/app/oracle/product/em13cr2/cfgtoollogs/opatch/23094292_Oct_17_2016_13_02_45/apply2016-10-17_13-02-42PM_1.log


OPatch detects the Middleware Home as "/u00/app/oracle/product/em13cr2"

Verifying environment and performing prerequisite checks...

Conflicts/Supersets for each patch are:

Patch : 23094292

        Bug Superset of 21252292
        Super set bugs are:
        21252292

        Bug Superset of 21243471
        Super set bugs are:
        20613957, 19883023, 19703527

        Bug Superset of 20758863
        Super set bugs are:
        20758863

        Bug Superset of 19953516
        Super set bugs are:
        19953516

        Bug Superset of 19879223
        Super set bugs are:
        19879223

        Bug Superset of 19730967
        Super set bugs are:
        19730967

        Bug Superset of 18836900
        Super set bugs are:
        18836900


Patches [   21252292   21243471   20758863   19953516   19879223   19730967   18836900 ] will be rolled back.

OPatch continues with these patches:   23094292

Do you want to proceed? [y|n]
y
User Responded with: Y
All checks passed.

Please shutdown Oracle instances running out of this ORACLE_HOME on the local system.
(Oracle Home = '/u00/app/oracle/product/em13cr2')


Is the local system ready for patching? [y|n]
y
User Responded with: Y
Backing up files...
Applying interim patch '23094292' to OH '/u00/app/oracle/product/em13cr2'
Rolling back interim patch '21252292' from OH '/u00/app/oracle/product/em13cr2'

Patching component oracle.wls.libraries, 12.1.3.0.0...

Patching component oracle.wls.libraries, 12.1.3.0.0...
RollbackSession removing interim patch '21252292' from inventory
Rolling back interim patch '21243471' from OH '/u00/app/oracle/product/em13cr2'

Patching component oracle.wls.libraries, 12.1.3.0.0...

Patching component oracle.wls.libraries, 12.1.3.0.0...
RollbackSession removing interim patch '21243471' from inventory
Rolling back interim patch '20758863' from OH '/u00/app/oracle/product/em13cr2'

Patching component oracle.wls.libraries, 12.1.3.0.0...

Patching component oracle.wls.libraries, 12.1.3.0.0...
RollbackSession removing interim patch '20758863' from inventory
Rolling back interim patch '19953516' from OH '/u00/app/oracle/product/em13cr2'

Patching component oracle.wls.workshop.code.completion.support, 12.1.3.0.0...

Patching component oracle.wls.workshop.code.completion.support, 12.1.3.0.0...

Patching component oracle.wls.libraries, 12.1.3.0.0...

Patching component oracle.wls.libraries, 12.1.3.0.0...

Patching component oracle.wls.clients, 12.1.3.0.0...

Patching component oracle.wls.clients, 12.1.3.0.0...
RollbackSession removing interim patch '19953516' from inventory
Rolling back interim patch '19879223' from OH '/u00/app/oracle/product/em13cr2'

Patching component oracle.wls.libraries, 12.1.3.0.0...

Patching component oracle.wls.libraries, 12.1.3.0.0...
RollbackSession removing interim patch '19879223' from inventory
Rolling back interim patch '19730967' from OH '/u00/app/oracle/product/em13cr2'

Patching component oracle.wls.libraries, 12.1.3.0.0...
RollbackSession removing interim patch '19730967' from inventory
Rolling back interim patch '18836900' from OH '/u00/app/oracle/product/em13cr2'

Patching component oracle.wls.libraries, 12.1.3.0.0...
RollbackSession removing interim patch '18836900' from inventory


OPatch back to application of the patch '23094292' after auto-rollback.


Patching component oracle.wls.workshop.code.completion.support, 12.1.3.0.0...

Patching component oracle.wls.workshop.code.completion.support, 12.1.3.0.0...

Patching component oracle.wls.shared.with.cam, 12.1.3.0.0...

Patching component oracle.wls.shared.with.cam, 12.1.3.0.0...

Patching component oracle.wls.libraries.mod, 12.1.3.0.0...

Patching component oracle.wls.libraries.mod, 12.1.3.0.0...

Patching component oracle.wls.admin.console.en, 12.1.3.0.0...

Patching component oracle.wls.admin.console.en, 12.1.3.0.0...

Patching component oracle.wls.core.app.server, 12.1.3.0.0...

Patching component oracle.wls.core.app.server, 12.1.3.0.0...

Patching component oracle.webservices.wls, 12.1.3.0.0...

Patching component oracle.webservices.wls, 12.1.3.0.0...

Patching component oracle.wls.clients, 12.1.3.0.0...

Patching component oracle.wls.clients, 12.1.3.0.0...

Patching component oracle.wls.server.shared.with.core.engine, 12.1.3.0.0...

Patching component oracle.wls.server.shared.with.core.engine, 12.1.3.0.0...

Patching component oracle.wls.libraries, 12.1.3.0.0...

Patching component oracle.wls.libraries, 12.1.3.0.0...
Patch 23094292 successfully applied.
OPatch Session completed with warnings.
Log file location: /u00/app/oracle/product/em13cr2/cfgtoollogs/opatch/23094292_Oct_17_2016_13_02_45/apply2016-10-17_13-02-42PM_1.log

OPatch completed with warnings.


You can ignore the warning message, it’s because OPatch has to rollback a previous installed patch.

Start Oracle Enterprise Manager 13c

[oracle@webuser 23094292]$ $ORACLE_HOME/bin/emctl start oms


Conclusion

The patches which were released for Weblogic / Enterprise Manager before, the installation was very smooth. There were no problems and the Enterprise Manager 13cR2 started well after the patch apply.

How to Configure IPSec VPN With Dynamic IP in Cisco IOS Router

$
0
0

Cisco IOS routers can be used to setup IPSec VPN tunnel between two sites. In this article, I will show you the steps to Configure IPSec VPN With Dynamic IP in Cisco IOS Router. This VPN configuration is different from Site to Site IPSec VPN with static IP address on both ends.


Configure IPSec VPN With Dynamic IP in Cisco IOS Router

The scenario below shows two routers R1 and R2 where R2 is getting dynamic public IP address from ISP. R1 is configured with static IP address of 70.54.241.1/24 as shown below. Both routers have very basic setup like, IP addresses, NAT Overload, default route, hostnames, SSH logins, etc.


There are two phases in IPSec configuration called Phase 1 and Phase 2. Let’s start the configuration with R1. Before you start configuring the IPSec VPN, make sure both routers can ping each other. I have already verified that both routers can ping each other so let’s start the VPN configuration.

Step 1. Configuring IPSec Phase 1 (ISAKMP Policy)

R1(config)#crypto isakmp policy 5 
R1(config-isakmp)#hash sha
R1(config-isakmp)#authentication pre-share
R1(config-isakmp)#group 2
R1(config-isakmp)#lifetime 86400
R1(config-isakmp)#encryption 3des
R1(config-isakmp)#exit
R1(config)#crypto isakmp key cisco@123 address 0.0.0.0 0.0.0.0


Step 2. Configuring IPSec Phase 2 (Transform Set)

R1(config)#crypto ipsec transform-set MY-SET esp-aes 128 esp-md5-hmac
R1(cfg-crypto-trans)#crypto ipsec security-association lifetime seconds 3600

Step 3. Configuring Extended ACL for interesting traffic.

R1(config)#ip access-list extended VPN-TRAFFIC
R1(config-ext-nacl)#permit ip 192.168.1.0 0.0.0.255 192.168.2.0 0.0.0.255


This ACL defines the interesting traffic that needs to go through the VPN tunnel. Here, traffic originating from 192.168.1.0 network to 192.168.2.0 network will go via VPN tunnel. This ACL will be used in Step 4 in Crypto Map. Note: – The interesting traffic must be initiated from PC2 for the VPN to come UP.

Step 4. Configure Dynamic Crypto Map.

R1(config)#crypto map MY-CRYPTO-MAP 10 ipsec-isakmp dynamic IPSEC-SITE-TO-SITE-VPN

Above command creates a crypto map that will be used under the interface configuration.
R1(config)#crypto dynamic-map IPSEC-SITE-TO-SITE-VPN 10
R1(config-crypto-map)#set security-association lifetime seconds 86400
R1(config-crypto-map)#set transform-set MY-SET
R1(config-crypto-map)#match address VPN-TRAFFIC


Above configuration creates a dynamic crypto map named IPSEC-SITE-TO-SITE-VPN with sequence number 10. If you have more than one remote site with dynamic IP address then you can configure additional dynamic map with different sequence number, say 20. For example, crypto dynamic-map IPSEC-SITE-TO-SITE-VPN 20.

Step 5. Apply Crypto Map to outgoing interface of R1.

R1(config)#int fa0/0
R1(config-if)#crypto map MY-CRYPTO-MAP
*Mar 1 01:09:24.447: %CRYPTO-6-ISAKMP_ON_OFF: ISAKMP is ON


Step 6. Exclude VPN traffic from NAT Overload.

R1(config)#ip access-list extended 101
R1(config-ext-nacl)#deny ip 192.168.1.0 0.0.0.255 192.168.2.0 0.0.0.255
R1(config-ext-nacl)#permit ip 192.168.1.0 0.0.0.255 any
R1(config-ext-nacl)#exit
R1(config)#ip nat inside source list 101 interface FastEthernet0/0 overload


Above ACL 101 will exclude interesting traffic from NAT.

Configuring R2.


Step 1. Configuring IPSec Phase 1 (ISAKMP Policy)

R2(config)#crypto isakmp policy 5
R2(config-isakmp)#hash sha
R2(config-isakmp)#authentication pre-share
R2(config-isakmp)#group 2
R2(config-isakmp)#lifetime 86400
R2(config-isakmp)#encryption 3des
R2(config-isakmp)#exit
R2(config)#crypto isakmp key cisco@123 address 70.54.241.2


Step 2. Configuring IPSec Phase 2 (Transform Set)

R2(config)#crypto ipsec transform-set MY-SET esp-aes 128 esp-md5-hmac
R2(cfg-crypto-trans)#crypto ipsec security-association lifetime seconds 3600


Step 3. Configuring Extended ACL for interesting traffic.

R2(config)#ip access-list extended VPN-TRAFFIC
R2(config-ext-nacl)#permit ip 192.168.2.0 0.0.0.255 192.168.1.0 0.0.0.255


Step 4. Configure Crypto Map.

R2(config)#crypto map MY-MAP 10 ipsec-isakmp
% NOTE: This new crypto map will remain disabled until a peer
and a valid access list have been configured.
R2(config-crypto-map)# set peer 70.54.241.2
R2(config-crypto-map)# set transform-set MY-SET
R2(config-crypto-map)# match address VPN-TRAFFIC


Step 5. Apply Crypto Map to outgoing interface

R2(config)#int fa0/1
R2(config-if)#crypto map MY-MAP
*Mar 1 19:16:14.231: %CRYPTO-6-ISAKMP_ON_OFF: ISAKMP is ON


Step 6. Exclude VPN traffic from NAT Overload.

R1(config)#ip access-list extended 101
R1(config-ext-nacl)#deny ip 192.168.2.0 0.0.0.255 192.168.1.0 0.0.0.255
R1(config-ext-nacl)#permit ip 192.168.2.0 0.0.0.255 any
R1(config-ext-nacl)#exit
R1(config)#ip nat inside source list 101 interface FastEthernet0/1 overload


Verification and testing.

To test the VPN connection let’s ping from R1 to PC2.

R1#ping 192.168.2.1 source 192.168.1.254

Type escape sequence to abort.
Sending 5, 100-byte ICMP Echos to 192.168.2.1, timeout is 2 seconds:
Packet sent with a source address of 192.168.1.254
!!!!!
Success rate is 100 percent (5/5), round-trip min/avg/max = 52/54/56 ms


As you can see, the ping from R1 to PC2 is successful. Don’t forget to ping from inside IP address while testing the VPN tunnel from the router. You can also ping from PC1 to PC2.

To verify the IPSec Phase 1 connection, type show crypto isakmp sa as shown below.

R1(config)#do show crypto isa sa
dst src state conn-id slot status
199.88.212.2 70.54.241.2 QM_IDLE 1 0 ACTIVE


To verify IPSec Phase 2 connection, type show crypto ipsec sa as shown below.

R1#show crypto ipsec sa
interface: FastEthernet0/0
Crypto map tag: MY-CRYPTO-MAP, local addr 70.54.241.2

protected vrf: (none)
local ident (addr/mask/prot/port): (192.168.1.0/255.255.255.0/0/0)
remote ident (addr/mask/prot/port): (192.168.2.0/255.255.255.0/0/0)
current_peer 199.88.212.2 port 500
PERMIT, flags={}
#pkts encaps: 4, #pkts encrypt: 4, #pkts digest: 4
#pkts decaps: 4, #pkts decrypt: 4, #pkts verify: 4
#pkts compressed: 0, #pkts decompressed: 0
#pkts not compressed: 0, #pkts compr. failed: 0
#pkts not decompressed: 0, #pkts decompress failed: 0
#send errors 0, #recv errors 0

local crypto endpt.: 70.54.241.2, remote crypto endpt.: 199.88.212.2
path mtu 1500, ip mtu 1500, ip mtu idb FastEthernet0/0
current outbound spi: 0xB015532F(2954187567)


This is how you configure IPSec VPN With Dynamic IP in Cisco IOS Router.

Create a Composite PowerShell DSC Resource

$
0
0
The composite resource allows you to create a single PowerShell DSC configuration with references to several "non-composite" resources and share it across multiple machines.


Desired State Configuration (DSC) is an amazing technology. It’s an efficient and convenient way to define what a system should look like and run a configuration. This magic is built upon resources that are combined to form configurations. Microsoft provides lots of built-in resources, such as WindowsFeature, File, Registry, and so on. Administrators can also create custom resources, as well. Even though DSC resources are useful by themselves, managing them efficiently can quickly become problematic if an administrator needs to apply the same set of resources across different machines.

For example, if an administrator needs to ensure that a Windows feature and a particular file exist on more than one server, they would have to duplicate the same configuration multiple times. This can lead to things like fat-finger syndrome and become a major hassle when the configuration needs to be changed. If the same configuration is applied to many different servers, each instance of that configuration will have to be modified. This isn’t a good situation to be in.

A solution to this shared configuration problem is to create a composite resource. A composite resource is a way to create a single configuration and share it across multiple machines. Creating a composite resource is essentially creating a single DSC configuration with references to several “non-composite” resources, like normal. However, it is then wrapped up in a way that DSC can see it as a single DSC resource. Machines are none the wiser that your composite resource actually is a group of multiple resources together.

To demonstrate creating a composite resource, I’ll be using PowerShell v5. It’s possible to do this with v4, but v5 makes things a little easier. I’ll be creating a composite resource to represent my default server configuration. A composite resource lives in a module, so I’ll create that first. I’ll call it DefaultConfiguration, since I might want to add other default resources in this module later.

I’ll first create the module that will hold the resource. Unlike other “regular” modules, you don’t need a PSM1. You actually just need a PSD1 manifest. I’ll create the module folder and the manifest.

$parentModulePath = 'C:\Program Files\WindowsPowerShell\Modules\DefaultConfiguration'
mkdir $parentModulePath
New-ModuleManifest  -RootModule DefaultConfiguration –Path "$parentModulePath\DefaultConfiguration.psd1"

Next, I’ll need to create a subfolder called DSCResources. It will contain one or more composite resources that will exist inside of the DefaultConfiguration module. Here I’ll need to create both the PSM1 (providing the resource itself) and a manifest (PSD1) for each resource.

$resourceModulePath = "$parentModulePath\DSCResources\DefaultServer"
mkdir "$parentModulePath\DSCResources"
mkdir $resourceModulePath
New-ModuleManifest  -RootModule 'DefaultServer.schema.psm1'–Path "$resourceModulePath\DefaultServer.psd1"
Add-Content –Path "$resourceModulePath\DefaultServer.schema.psm1"–Value ''

Note: The module name must end in schema.psm1. This designates the module as a composite resource.

Now that I have the file structure laid out, I’ll now create the resource itself. You’ll find that this is just like creating a typical configuration; there’s nothing special here. I’ll just create one to add a Windows feature and create a text file somewhere as an example.

configuration DefaultServer {
    WindowsFeature 'InstallGUI'
    {
        Ensure = 'Present'
        Name = 'Server-Gui-Shell'
    }
    File 'SomeFile' {
        DestinationPath = 'C:\SomeFile.txt'
        Contents = 'something here'
        Ensure = 'Present'
    }   
}
I’ll save this to “$resourceModulePath\DefaultServer.psm1.” Notice that I don’t have a Node statement at the top as is normally required. This is the major difference with a typical DSC configuration and a configuration that will be used to build a resource.

Now that I have created a module and composite resource, I can now simply apply this as a standard DSC resource. Below I’ve built a configuration for my MEMBERSRV1 and have copied my composite resource to that server.

configuration SpecificServerConfiguration {
    Node 'MEMBERSRV1' {
        DefaultServer {
        }
    }
}
You can see that I don’t have any properties to define under DefaultServer. That’s because I didn’t have any parameters on the configuration I built earlier. I’ll save this to C:\MEMBERSRV1_Config.ps1.

I’ll now ensure that my composite resource shows up on MEMBERSRV1.
Invoke-Command –ComputerName MEMBERSRV1 –ScriptBlock {Get-DscResource –Name DefaultServer } 

 
The composite resource shows up on MEMBERSRV1

Great! It’s showing up. I’ll now create the MOF and run the configuration on MEMBERSRV1. If all goes well, it should apply the composite configuration.

. C:\MEMBERSRV1_Config.ps1
SpecificServerConfiguration


The composite configuration applied


Start-DscConfigurationManager –Path .\SpecificServerConfiguration –ComputerName MEMBERSRV1 –Wait -Verbose


End result

Credit: Adam Bertram

How to Encrypt RMAN Backups for the Oracle Cloud with a Keystore

$
0
0

The Oracle RMAN backup encryption is necessary if you want to backup your database into the Oracle cloud. In Oracle 12c, you have three methods available to encrypt an Oracle RMAN backup:


  • with a passphrase
  • with a master encryption key
  • hybrid with a passphrase and an encryption key
In this article, we will walk you through the steps to configure your database environment with a master encryption key and a keystore. I have been using the same procedure to Backup and Recovery into the Oracle cloud. And in the cloud, I don’t like to type in passwords manually for every action or write passwords in backup and restore scripts.

Configure SQLNET.ora in $TNS_ADMIN to use a Keystore

ENCRYPTION_WALLET_LOCATION =
   (SOURCE =
     (METHOD = FILE)
     (METHOD_DATA =
       (DIRECTORY = /u00/app/oracle/network/wallet)
     )
    )

Create Keystore as SYSDBA

SQL> ADMINISTER KEY MANAGEMENT CREATE KEYSTORE '/u00/app/oracle/network/wallet' IDENTIFIED BY "my#wallet16"; 

Open Keystore

SQL> ADMINISTER KEY MANAGEMENT SET KEYSTORE OPEN IDENTIFIED BY "my#wallet16"; 

The status is set to OPEN_NO_MASTER_KEY.

SQL> SELECT wrl_parameter, wallet_type, status
  2  FROM v$encryption_wallet;

WRL_PARAMETER                       WALLET_TYPE     STATUS
----------------------------------- --------------- --------------------
/u00/app/oracle/network/wallet/     PASSWORD        OPEN_NO_MASTER_KEY


Set Master Key

Now the master key has to defined. When you have already defined a wallet earlier and deleted the keys,  you have to set the undocumented parameter to set the master key again. Otherwise you get an ORA-28374: typed master key not found in wallet error. See Master Note For Transparent Data Encryption ( TDE ) (Doc ID 1228046.1) for further information.

SQL> ALTER SYSTEM SET "_db_discard_lost_masterkey"=true;
SQL> ADMINISTER KEY MANAGEMENT SET KEY IDENTIFIED BY "my#wallet16" WITH BACKUP USING 'master_key_1';


Now the status is set to OPEN.

SQL> SELECT wrl_parameter, wallet_type, status
  2  FROM v$encryption_wallet;

WRL_PARAMETER                       WALLET_TYPE     STATUS
----------------------------------- --------------- --------------------
/u00/app/oracle/network/wallet/     PASSWORD        OPEN


Activate Auto Login

SQL> ADMINISTER KEY MANAGEMENT CREATE AUTO_LOGIN KEYSTORE FROM KEYSTORE '/u00/app/oracle/network/wallet' IDENTIFIED BY "my#wallet16"; 

Restart Database

SQL> SHUTDOWN IMMEDIATE
SQL> STARTUP


Verify if the keystore is available and WALLET_TYPE is AUTOLOGIN.

SQL> SELECT wrl_parameter, wallet_type, status
  2  FROM v$encryption_wallet;

WRL_PARAMETER                       WALLET_TYPE     STATUS
----------------------------------- --------------- --------------------
/u00/app/oracle/network/wallet/     AUTOLOGIN       OPEN


Configure RMAN for Encryption

RMAN> CONFIGURE ENCRYPTION FOR DATABASE ON; 


RMAN Backup Test

A simple RMAN controlfile backup into the Oracle cloud.

RUN { 
 allocate channel t1 type 'sbt_tape' parms='SBT_LIBRARY=libopc.so, SBT_PARMS=(OPC_PFILE=/u00/app/oracle/admin/TVDCRM01/opc_config/opcTVDCRM01.ora)'; 
 backup current controlfile; 
 release channel t1; 
}


Error message if you want to backup into the Oracle cloud and the encryption is not configured correctly:

RMAN-00571: ===========================================================
RMAN-00569: =============== ERROR MESSAGE STACK FOLLOWS ===============
RMAN-00571: ===========================================================
RMAN-03009: failure of backup command on t1 channel at 08/09/2016 11:26:27
ORA-27030: skgfwrt: sbtwrite2 returned error
ORA-19511: non RMAN, but media manager or vendor specific failure, error text:
   KBHS-01602: backup piece 65rcqiir_1_1 is not encrypted


Backup Verification in V$BACKUP_PIECE – Column ENCRYPTED

SQL> SELECT start_time,handle,substr(media,1,30),encrypted
  2  FROM v$backup_piece;

START_TIME         HANDLE                                   SUBSTR(MEDIA,1,30)                  ENC
------------------ ---------------------------------------- ----------------------------------- ---
09-AUG-16          c-1792016933-20160809-01                 storage-a418767.storage.oracle      YES


How to Configure Dynamic "Remote Access" VPN in Juniper SRX

$
0
0
Dynamic VPN or Remote Access VPN is a feature available in branch series SRX. By default, branch series SRX gateways come pre-installed with two dynamic VPN licenses. So by default, only two remote users can have dynamic VPN simultaneously. You can purchase additional license for more dynamic VPN users. 


Dynamic VPN is used by users from Internet to access the corporate LANs. The required VPN client for user’s machine can be downloaded from SRX’s web interface and is automatically installed. When the user logs into the SRX’s dynamic VPN web page, the VPN session on user’s PC is initiated and required VPN client is automatically downloaded without user interaction. 

You can also manually download and install JunOS Pulse which is a VPN client application. In this article, I will show you the steps to configure Dynamic (Remote Access) VPN in Juniper SRX.


Configure Dynamic (Remote Access) VPN in Juniper SRX

To view the existing license information, type show system license command as shown below. As you can see the number of dynamic-vpn installed license is 2 and the expiry is permanent.


The diagram below is our scenario for dynamic access VPN. Here, 10.0.0.0/24 is the protected network. We have Active Directory Domain Controller in the network. We want users to be able to access this protected network from the Internet.


Step 1. Configure Dynamic VPN Users and IP Address Pool

set access profile Dynamic-XAuth client Jed firewall-user password P@ssw0rd
set access profile Dynamic-XAuth client Steve firewall-user password P@ssw0rd
set access profile Dynamic-XAuth address-assignment pool Dynamic-VPN-Pool

set access address-assignment pool Dynamic-VPN-Pool family inet network 192.168.1.0/24
set access address-assignment pool Dynamic-VPN-Pool family inet xauth-attributes primary-dns 10.0.0.10/32

set access firewall-authentication web-authentication default-profile Dynamic-XAuth

Step 2. Configure IPSec Phase 1

set security ike proposal Dynamic-VPN-P1-Proposal description “Dynamic P1 Proposal”
set security ike proposal Dynamic-VPN-P1-Proposal authentication-method pre-shared-keys
set security ike proposal Dynamic-VPN-P1-Proposal dh-group group2
set security ike proposal Dynamic-VPN-P1-Proposal authentication-algorithm sha1
set security ike proposal Dynamic-VPN-P1-Proposal encryption-algorithm 3des-cbc
set security ike proposal Dynamic-VPN-P1-Proposal lifetime-seconds 1200

set security ike policy Dynamic-VPN-P2-Policy mode aggressive
set security ike policy Dynamic-VPN-P2-Policy description “Dynamic P2 Policy”
set security ike policy Dynamic-VPN-P2-Policy proposals Dynamic-VPN-P1-Proposal
set security ike policy Dynamic-VPN-P2-Policy pre-shared-key ascii-text test@123

set security ike gateway Dynamic-VPN-P1-Gateway ike-policy Dynamic-VPN-P2-Policy
set security ike gateway Dynamic-VPN-P1-Gateway dynamic hostname mustbegeek.com
set security ike gateway Dynamic-VPN-P1-Gateway dynamic ike-user-type shared-ike-id
set security ike gateway Dynamic-VPN-P1-Gateway external-interface ge-0/0/0.0
set security ike gateway Dynamic-VPN-P1-Gateway xauth access-profile Dynamic-XAuth

Step 3. Configure IPSec Phase 2

set security ipsec proposal Dynamic-P2-Proposal description Dynamic-VPN-P2-Proposal
set security ipsec proposal Dynamic-P2-Proposal protocol esp
set security ipsec proposal Dynamic-P2-Proposal authentication-algorithm hmac-sha1-96
set security ipsec proposal Dynamic-P2-Proposal encryption-algorithm aes-256-cbc
set security ipsec proposal Dynamic-P2-Proposal lifetime-seconds 3600

set security ipsec policy Dynamic-P2-Policy perfect-forward-secrecy keys group5
set security ipsec policy Dynamic-P2-Policy proposals Dynamic-P2-Proposal

set security ipsec vpn Dynamic-VPN ike gateway Dynamic-VPN-P1-Gateway
set security ipsec vpn Dynamic-VPN ike ipsec-policy Dynamic-P2-Policy
set security ipsec vpn Dynamic-VPN establish-tunnels immediately

Step 4. Configure Dynamic VPN Parameters

set security dynamic-vpn force-upgrade
set security dynamic-vpn access-profile Dynamic-XAuth
set security dynamic-vpn clients all remote-protected-resources 10.0.0.0/24
set security dynamic-vpn clients all remote-exceptions 0.0.0.0/0
set security dynamic-vpn clients all ipsec-vpn Dynamic-VPN
set security dynamic-vpn clients all user Jed
set security dynamic-vpn clients all user Steve

Step 5. Configure Security Policy

set security policies from-zone untrust to-zone trust policy Dynamic-VPN match source-address any
set security policies from-zone untrust to-zone trust policy Dynamic-VPN match destination-address any
set security policies from-zone untrust to-zone trust policy Dynamic-VPN match application any
set security policies from-zone untrust to-zone trust policy Dynamic-VPN then permit tunnel ipsec-vpn Dynamic-VPN

Step 6. Verifying IPSec Connection

root@SRX240> show security dynamic-vpn users

root@SRX240> show security dynamic-vpn client version

root@SRX240> show security ike active-peer

root@SRX240> show security ike security-associations

root@SRX240> show security ipsec security-associations

You can download and install JunOS Pulse client application on user PCs. JunOS Pulse is a VPN client from Juniper. Users out on the internet can use this tool to connect to VPN. To use this tool, click Add (+) button. Uner type, choose SRX. Then type name of the connection. Type IP address or domain name of the SRX device. And then, click Add button.


After creating a new connection, click Connect button. The client will now attempt to connect.


Click Connect again on certificate warning. Now type username and password to connect to VPN.


This is how you can configure dynamic VPN in Juniper SRX and use JunOS Pulse to connect to VPN.

How to Update Multiple SQL Server Systems at Once with PowerShell Script

$
0
0


In this article, I'll show you the steps to create a script in PowerShell that will allow you to update multiple SQL servers at once with a single command.


Patches (service packs and cumulative updates) are periodically released from Microsoft. Judging by the importance of the data contained in databases, it’s critical that these servers are patched ASAP. How do you install service packs and cumulative updates on SQL servers today? Are you still going to download.microsoft.com, downloading the bits, extracting them, transferring the bits to each SQL server, opening up remote desktop and executing the update manually? If so, there’s a better way:

Update-SqlServerComputerName'SERVER1','SERVER2','SERVER3'ServicePack LatestCumulativeUpdate Latest

This requires a bit of planning and work. Lucky for you, I’ve already done that! To get started, we’ll need to create more than just a single Update-SqlServer function. Since we’ll be installing service packs and cumulative updates, we’ll need at least three different functions. In fact, we’ll end up with a lot of various functions. Remember that it’s always better to build smaller functions so they can be used as building blocks to create the tool.

The SQL Server update tool (Update-SqlServer) we’ll be creating will consist of a total of seven custom functions along with some helper functions. We’re going big time here!

  • Install-SqlServerCumulativeUpdate
    • Get-SQLServerVersion
    • Find-SqlServerCumulativeUpdateInstaller
    • Get-LatestSqlServerCumulativeUpdateVersion
  • Install-SqlServerServicePack
    • Get-SQLServerVersion
    • Find-SqlServerServicePackInstaller
    • Get-LatestSqlServerServicePackVersion
Since there are so many functions, I’m going to emphasize the flow of this tool rather than diving into the code. If you want to grab the code for this tool, feel free to download it from my Github repository.

For this tool to work, you must prepare the service packs and cumulative updates ahead of time and ensure they all follow a standard naming convention.  Here’s how mine are arranged and the schema the tool expects:

 
The service packs and cumulative updates

You can see that I have folders structured like this: Microsoft/SQL/<2012>/Updates. I also have service pack 1 for download as well as CU5 for SP1 and CU12 for RTM. As long as you follow the same naming convention, this tool will allow you to select whatever service pack and cumulative update you’d like to install.2012>

Once all of the installers have been downloaded, I then use a CSV file called sqlserverversions.csv that exists in the same folder as my SqlUpdater.ps1 script. This is where I keep track of all of the available service packs and cumulative updates for each version. I use this in the tool as a way to define the “latest” SPs and CUs for every version.


sqlserverversions.csv file

This CSV will need to be updated periodically when new SPs and CUs are released for the latest SQL Server version.'

That’s it for the ancillary files needed. Let’s get into some code.

The primary function is Update-SqlServer. This function is simply a wrapper function for both Install-SqlServerServicePack and Install-SqlServerCumulativeUpdate. As you can see below, Update-SqlServer has a few parameters; ComputerName which indicates the server to install the update on, the service pack and cumulative update defaulting to the latest (remember that CSV file?) and an optional Credential if you need to use alternate credentials.

functionUpdate-SqlServer
{
    [CmdletBinding()]
param
(
        [Parameter(Mandatory)]
        [ValidateNotNull0rEmpty()]
        [string]$ComputerName,
        [Parameter()]
        [ValidateNotNull0rEmpty()]
        [ValidateSet(1,2,3,4,5,Latest)]
[string]$ServicePack=Latest,
        [Parameter()]
        [ValidateNotNull0rEmpty()]
        [ValidateSet(1,2,3,4,5,6,7,8,9,10,11,12,13,Latest)]
        [string]$CumulativeUpdate=Latest,
        [Parameter()]
        [ValidateNotNull0rEmpty()]
        [pscredential]$Credential
)
}


As you can see above, Update-SqlServer has a few parameters: ComputerName, which indicates the server on which to install the update; the service pack and cumulative update, which defaults to the latest (remember that CSV file?); and an optional Credential if you need to use alternate credentials.

Let’s say that you need to install the latest SP and CU on a SQL Server. If so, you’d run Update-SqlServer like this:

Update-SqlServerComputerName'SERVER1'ServicePack LatestCumulativeUpdate Latest

This will kick off the following flow:
  1. Find the version of SQL Server that’s installed on SERVER1.
  2. Find the latest SP for that version in the CSV file.
  3. Find the appropriate installer in the shared UNC path.
  4. Install the service pack.
  5. (Repeat for the CU)
The only thing that must be done for this to work seamlessly is to ensure that the standard naming convention is followed for the installers and that each version’s CSV exists. Otherwise, it should work great! However, no code is perfect, so feel free to try it out and let me know how it works.

How to Uninstall Tamper-Protected Sophos Antivirus with PowerShell

$
0
0

The Sophos Antivirus Endpoint tamper protection feature prevents even administrators from uninstalling the product. In this article, I will show you how to uninstall Sophos Antivirus with PowerShell.


Several events can lead to this situation:
  1. The company changes ownership.
  2. The company purchases a new AV product.
  3. The tamper protection password cannot be obtained.
  4. The previous AV administrators can’t remove tamper protection due to a domain change.
  5. The company removes tamper protection from a large portion of administered endpoints, but it still needs to remove tamper protection from a number of outlying systems and notebooks.
While Sophos does provide some assistance with removal via a script here, it includes the caveat:

"Note: If enabled, the Sophos Tamper Protection policy must be disabled on the endpoints involved before attempting to uninstall any component of Sophos Endpoint Security and Control. See article 119175 for more information".

Following the article link, we arrive at the dreaded FAQ:

"How can I disable tamper protection?
Normally you would only disable tamper protection if you wanted to make a change to the local Sophos configuration or uninstall an existing Sophos product. The instructions for this are given below. However, if you are not the administrator who installed it and who has the password, you will need to obtain the password before you can carry out the procedure".

To make things a little less painful, we can script those processes. There are a number of prerequisites to complete the removal, so we’ll break them down into individual steps.
  1. You must stop AV system services.
  2. You must replace the hashed tamper-protection password stored in the machine.xml file with a known-good password hash.
  3. You must start AV services.
  4. You must add the currently logged-in administrator to the local “SophosAdministrator” security group.
  5. You must open the application, manually authenticate the tamper-protection user, and then disable tamper protection altogether.
  6. Now run the component uninstallers.
Before writing code, either build a virtual machine (VM) and take a snapshot, or use something like Clonezilla to take an image of the test system’s hard drive. If things go wrong or a script makes a temporary change, we can easily revert to a clean sample. I find that when building scripts, PowerShell ISE is irreplaceable, because we can walk through each step and test separate statements in individual tabs.

Starting with system services, let’s stop only those services that need stopping. Since we don’t know what the system refers to these services as, we first need to get a list of service names that PowerShell can use.

Get-Service *SAV*, *Sophos* | Format-Table -Wrap -AutoSize

That provides us with the service names:

 
Get-Service with wildcards

To stop these services with PowerShell, we use the Get-Service cmdlet, and stop only those services that are actually running:

Get-Service SAVService,'Sophos Agent',SAVAdminService | where {$_.status -eq 'running'} | Stop-Service -force

To replace the unknown/bad-password hash from the machine.xml file located in C:\ProgramData\Sophos\Sophos Anti-Virus\Config\ , we use the Get-Content/Replace/Set-Content command:

(Get-Content 'C:\ProgramData\Sophos\Sophos Anti-Virus\Config\machine.xml').Replace('8EXXXXXXXXXXXXXXXXXXXXX1AD02', 'E8F97FBA9104D1EA5047948E6DFB67FACD9F5B73') | Set-Content 'C:\ProgramData\Sophos\Sophos Anti-Virus\Config\machine.xml'

The hashed value E8F97FBA9104D1EA5047948E6DFB67FACD9F5B73 is equivalent to the value ‘password’, which is all lowercase, not including quotes. When we save this into our machine.xml file, it essentially replaces the old password secret with the new password and will allow us to authenticate and disable tamper protection.

We now need to start our services again to go into the application and disable tamper protection manually, but before we do that, we need to be a member of the local SophosAdministrator security group. Thanks to this post about how to add a domain user to a local group, we can programmatically add our account into this group with the following commands:

$ComputerName = Read-Host "Computer name:"
$Group = 'SophosAdministrator'
$domain = 'name.domain.com'
$user = 'domainusername'
([ADSI]"WinNT://$ComputerName/$Group,group").psbase.Invoke("Add",([ADSI]"WinNT://$domain/$user").path)


Once we add the account, we can disable the tamper-protection feature. Let’s print a message and have PowerShell tell the user who is running the script about what to do next. We’ll have the user hit ENTER to confirm using a Read-Host cmdlet. A great thing about PowerShell is that we only need to place our message in quotes for it to be printed to the screen.

 
User interaction message


Following the message, we want to be nice and open the Sophos Endpoint AV Console for the user. Use the call operator (&) to open the .exe.

& 'C:\Program Files (x86)\Sophos\Sophos Anti-Virus\SAVmain.exe'

Now We have the user confirm that the tamper protection has been disabled with a Yes/No message box.

Add-Type -AssemblyName PresentationCore,PresentationFramework
$ButtonType = [System.Windows.MessageBoxButton]::YesNo
$MessageIcon = [System.Windows.MessageBoxImage]::Warning
$MessageBody = "Tamper-Proof has been disabled and it's ok to continue?"
$MessageTitle = "Confirm to Continue Sophos Uninstall"
$Result = [System.Windows.MessageBox]::Show($MessageBody,$MessageTitle,$ButtonType,$MessageIcon)
Write-Host "$Result has been selected, continuing Sophos Uninstall"

 
Confirmation dialog box

Now that our prerequisites are out of the way, we can finally uninstall the different Sophos Endpoint components. According to Sophos, it’s important to stop the AutoUpdate service first.

#Stop the Sophos AutoUpdate service prior to uninstall
Get-Service 'Sophos AutoUpdate Service' | where {$_.status -eq 'running'} | Stop-Service -force


Next, we’ll want to call a batch file script from PowerShell to run the uninstallers. I wanted to run a batch file from a PowerShell script, because testing and running msiexec.exe inside of PowerShell is overly complicated. Also, having a separate batch file allows me more flexibility. Again, it’s easy to run the batch .bat script using the “&” operand. But, before we run our .msiexec.exe commands, Sophos recommends that we stop the Sophos AutoUpdate Service.

Get-Service 'Sophos AutoUpdate Service' | where {$_.status -eq 'running'} | Stop-Service -force
#Run application uninstallers in correct order according to Sophos Docs.
#Silent uninstall, suppress Reboot, and create log file.
#https://www.sophos.com/en-us/support/knowledgebase/109668.aspx
& 'c:\Admin\SAV-msi-uninstall.bat'


The .bat file contains the following lines that uninstall the Sophos components in a particular order as defined by the Sophos article linked earlier. The commands are silent; they suppress a reboot and send a verbose log to the default Windows\Logs directory. At the end, we include a 15-second delayed system restart command.

msiexec.exe /X {66967E5F-43E8-4402-87A4-04685EE5C2CB} /qn REBOOT=SUPPRESS /L*v %windir%\Logs\Uninstall_SAV_Log.txt
msiexec.exe /X {1093B57D-A613-47F3-90CF-0FD5C5DCFFE6} /qn REBOOT=SUPPRESS /L*v %windir%\Logs\Uninstall_SAV_Log.txt
msiexec.exe /X {09863DA9-7A9B-4430-9561-E04D178D7017} /qn REBOOT=SUPPRESS /L*v %windir%\Logs\Uninstall_SAV_Log.txt
msiexec.exe /X {FED1005D-CBC8-45D5-A288-FFC7BB304121} /qn REBOOT=SUPPRESS /L*v %windir%\Logs\Uninstall_SAV_Log.txt
msiexec.exe /X {BCF53039-A7FC-4C79-A3E3-437AE28FD918} /qn REBOOT=SUPPRESS /L*v %windir%\Logs\Uninstall_SAV_Log.txt
shutdown /r /t 15

Finally, we copy our RemoveSophosWithTamperEnabled.ps1 file, SAV-msi-uninstall.bat file, and readme.txt into a single folder. The readme.txt file has the following instructions for running the scripts.
  • Copy RemoveSophosWithTamperEnabled.ps1 and .bat scripts to c:\Admin
  • Open PowerShell as Administrator
  • Run the command:
Set-ExecutionPolicy RemoteSigned
  • Run the command: 
& 'C:\admin\RemoveSophosWithTamperEnabled.ps1' 
  • Follow the instructions and you’re done!


While it may not be the most efficient and elegant script, it does bring the uninstall time down significantly, removes potential mistakes during uninstallation, and teaches us a few things about PowerShell.

Below is the final script in full. I like to include hyperlinks for sources of code that I did not write explicitly in the comments preceding the command.
<#
.SYNOPSIS
Powershell script to uninstall Sophos AV that with enabled tamper-proof password without having access to the password. The computer can be in a different AD domain.
#>

#Stop AV services before modifying .xml file only if service is running

Get-Service SAVService,'Sophos Agent',SAVAdminService | where {$_.status -eq 'running'} | Stop-Service -force

#Replace default tamper-proof user password hash with known password hash that is equal to 'password'.
#https://community.sophos.com/products/free-antivirus-tools-for-desktops/f/17/t/9776

(Get-Content 'C:\ProgramData\Sophos\Sophos Anti-Virus\Config\machine.xml').Replace('8E8A6A6DB780D559929D042743DC97BCF6D1AD02', 'E8F97FBA9104D1EA5047948E6DFB67FACD9F5B73') | Set-Content 'C:\ProgramData\Sophos\Sophos Anti-Virus\Config\machine.xml'

#Start AV services in order to run uninstall

get-service SAVService,'Sophos Agent',SAVAdminService | Foreach { start-service $_.name -passthru}

#Get the computer name and add admin user account to SophosAdministrator local computer group
$ComputerName = Read-Host "Computer name:"
$Group = 'SophosAdministrator'
$domain = 'contoso.domain.com'
$user = 'admin_username'
([ADSI]"WinNT://$ComputerName/$Group,group").psbase.Invoke("Add",([ADSI]"WinNT://$domain/$user").path)

#Need to open Sophos AV, manually remove tamper protection

"Open Sophos Endpoint AV, go to the Configure menu -> Authenticate User -> enter the password 'password' and then go into 'Configure Tamper Protection' and uncheck 'Enable Tamper Protection'. Be sure to close the Sophos AV Console window after disabling Tamper-Protect."
Read-Host "Press ENTER to continue"

#Open Sophos Endpoint AV Console for the user. Use the call operator (&) to open the .exe

& 'C:\Program Files (x86)\Sophos\Sophos Anti-Virus\SAVmain.exe'

#Prompt user to confirm tamper protection has been disabled.
#https://4sysops.com/archives/how-to-display-a-pop-up-message-box-with-powershell/

Add-Type -AssemblyName PresentationCore,PresentationFramework
$ButtonType = [System.Windows.MessageBoxButton]::YesNo
$MessageIcon = [System.Windows.MessageBoxImage]::Warning
$MessageBody = "Tamper-Proof has been disabled and it's ok to continue?"
$MessageTitle = "Confirm to Continue Sophos Uninstall"

$Result = [System.Windows.MessageBox]::Show($MessageBody,$MessageTitle,$ButtonType,$MessageIcon)

Write-Host "$Result has been selected, continuing Sophos Uninstall"

#Stop the Sophos AutoUpdate service prior to uninstall

Get-Service 'Sophos AutoUpdate Service' | where {$_.status -eq 'running'} | Stop-Service -force

#Run application uninstallers in correct order according to Sophos Docs
#Silent uninstall, suppress reboot, and create log file
#https://www.sophos.com/en-us/support/knowledgebase/109668.aspx

& 'c:\Admin\SAV-msi-uninstall.bat'

Improvements in Active Directory Federation Services Windows Server 2016

$
0
0
Active Directory Federation Services (AD FS) is an ID technology, and as identity is now such a crucial piece of the security puzzle in this cloudy world, AD FS has numerous improvements to offer in 2016.


Contents:

  •     Eliminate passwords
  •     Application authentication
  •     Administration
  •     Customization
  •     Upgrade
  •     Conclusion
A note about version numbering: AD FS in Windows Server 2012 R2 is sometimes called 3.0, but never in Microsoft official documentation. (There it’s called AD FS Windows Server 2012 R2.) Similarly, this isn’t AD FS 4.0 but AD FS in Windows Server 2016. This confusion arose because there was an AD FS 2.0 that you could download and add to Windows Server 2008. 

Eliminate Passwords:

One big theme in this release is the elimination of passwords as an authentication mechanism, particularly in extranet access scenarios. There are three options for achieving this.

One way this can be achieved is by using the new Azure Multi Factor Authentication (MFA) adapter for AD FS. In the past, you needed to have an MFA server on premises (which is still supported), but now it’s simply a matter of configuring the adapter in AD FS. Once it is configured, users use the mobile app to sign in. You can configure it to use just a username and a One-Time Password (OTP) in the authenticator app or use the app as a secondary means of authentication alongside either username/password, smartcard, or user/device certificate. The authenticator app is available for all mobile platforms.

Azure MFA adapter

The second option is using Windows Hello for Business. This approach uses modern biometric hardware and has been available for consumers since the release of Surface Pro 4/Surface Book. (I use my face to login to the PC on which I’m writing this article all the time—it works great.) Today, if you want to use it with your business AD/AD FS infrastructure, you need to have Azure AD as well. Support for on-premises-only organizations is coming soon.

The third way to minimize password usage is through AD FS support for MDM-reported compliant devices. In the past, the criteria for devices that you could use were: is known, is authenticated, and is managed. The addition of is compliant made it easier to build claims rules that provide access while maintaining security. Combining AD FS with Azure Active Directory (AAD) device registration provides a good foundation for conditional access scenarios. In other words, “you can access sensitive corporate data if your device is known to us AND it is compliant with our policies.”

 
AD FS console

Application authentication:

AD FS now fully supports the OAuth standard, as well as OpenID Connect. As a matter of fact, AD FS in Windows Server 2016 has been certified by OpenID.

While enhancements in standards support are mostly of interest to developers rather than IT Pros, one good improvement is application groups. Today many applications and services are decomposed into smaller parts, several of which may need authentication services. By using an application group, you can tie these entities together into one logical construct rather than having to create individual, dependent party trusts for each part.

Another big improvement is SAML 2.0 interoperability, which allows you to import groups of trusts. In Technical Preview 5, if there was a non-compliant part in a metadata document, an import would fail with an error. In the RTM version, it will continue the import and simply skip the non-compliant part.

Administration:

Earlier versions of AD FS were a consultant’s dream. Each phase of policy processing—authentication, authorization and claims issuing—had to be configured independently using the claims rule language. The 2016 version now offers Access Control Policy Templates as an alternative. The old model is still there, but you can’t mix them; it’s one or the other.

You can either use the built-in templates that cover the most common scenarios or create custom templates. If you modify a custom template later, the changes will automatically apply to all parts based on that template. Templates can also be parameterized, which means you have to specify values when using the template. For instance, the template Permit specific group requires you to define to which group it applies each time you use it.

You can also use IP address ranges in claims rules without having to resort to regular expressions to define the scope.

Administrative role separation is also improved, as a specific group can be assigned as AD FS service administrators, and the built-in server administrators group isn’t automatically composed of AD FS administrators. You also don’t need to be a domain administrator to deploy AD FS, as long the DKM container for the keys and the permissions for the AD FS service account have been created.

Most production deployments use multiple AD FS servers in a farm. However, a single server deployment is often preferred, especially in smaller environments. For backup of the complete configuration for a single server or for lab scenarios in which you need a copy of a production setup, the free AD FS Rapid Restore Tool can be used with AD FS in Windows Server 2012, 2012 R2, and 2016.


Access Control Policy Templates

Customization:

It turns out that many service providers use AD FS to provide authentication as a service and need to customize login pages for individual applications, something that’s now possible.

Audit logging in previous AD FS incarnations is notoriously chatty, with multiple entries for a single request. This has led to most environments turning off auditing altogether. The new version is less chatty and more streamlined. A basic auditing level is enabled by default, and each request will generate a maximum of five events (less in my testing) with relevant information in the logs.

Also new in 2016 is the ability to authenticate users stored in any LDAP v3 compliant directory, including domains in untrusted forests and SQL Server. Each connection is stored in a local claims provider trust. Be aware that only forms-based authentication is available for LDAP-stored users; certificate-based and integrated Windows authentication is not available.

Also new is the ability to send password expiration claims to applications so that Office 365 applications can notify the user when their passwords are about to expire.


Upgrade:

Previous versions weren’t exactly upgrade friendly. They required the building of a parallel infrastructure and exporting and importing configurations. Taking a leaf out of Hyper-V and clustering rolling upgrades in Windows Server 2016, AD FS introduces the Farm Behavior Level (FBL) feature. This means you can add 2016 nodes to an existing Windows Server 2012 R2 AD FS farm and they will work as normal 2012 R2 nodes. 

Once you have replaced all nodes in the farm with 2016-based nodes, you can raise the FBL to unlock the new features in 2016. Be aware that you won’t be able to test the new features until you unlock the features. So, if you need to perform a proof-of-concept test, you’ll have to set up a separate lab environment for that.

Conclusion:

There are a lot of welcome improvements in this version of AD FS, especially for extranet access scenarios. A lot of them are based on user feedback, which seems to be the overall theme for Windows Server 2016. The smooth upgrade path should also entice administrators. AD FS has grown up considerably over the last few versions. If the last time you saw it was back in the 2008 timeframe, it’s time to take another look; it’s a lot easier to deploy and use.
Viewing all 880 articles
Browse latest View live


<script src="https://jsc.adskeeper.com/r/s/rssing.com.1596347.js" async> </script>