Quantcast
Channel: Tech Support
Viewing all 880 articles
Browse latest View live

Everything you need to know about the iPhone 6 and iPhone 6 Plus

$
0
0

Following months of rumors and speculation, Apple took the wraps off its highly-anticipated iPhone 6 and iPhone 6 Plus at its product event on Tuesday afternoon. Advertised as “bigger than bigger,” the iPhone 6 models received a design overhaul, improved
hardware specifications under the hood, an entirely new mobile payments platform and several new features.


The refresh was not as groundbreaking as, say, the jump between the iPhone 3GS and iPhone 4, but less incremental than the iPhone 5 compared to the iPhone 5s. Ahead, we take a comprehensive look at the two new smartphones based on several categories: design, display, camera, battery, connectivity, payments, software, storage, colors, specifications and onwards.

Design

In a nutshell, the iPhone 6 is larger than its predecessor featuring an all-new design. The standard iPhone 6 has a 4.7-inch display, while the iPhone 6 Plus packs a 5.5-inch screen. In terms of screen size, the iPhone can now compete head to head with Android-based smartphones that long ago eclipsed the 3.5-inch to 4-inch mark of the iPhone 5s and below. For those that have considered the iPhone to be too small, that is no longer a valid excuse.

The new smartphones are also noticeably thinner, with the iPhone 6 measuring in at 6.9 mm and the iPhone 6 Plus a hairline bulkier at 7.1 mm. To achieve this design, which looks along the lines of a fifth-generation iPod touch, the iPhone 6 has a seamless transition between glass and metal like newer iPads, iMacs and other Apple products. The handset is made with a combination of anodized aluminum, stainless steel and glass.


Retina HD Display

When Apple introduced the iPhone 4 in 2010, it was the first smartphone to feature a Retina display. That is the company’s fancy marketing term to describe any device with a high-resolution screen. Four years later, the iPhone 6 and iPhone 6 Plus have become the first smartphones to feature Retina HD displays. The difference: even higher resolutions.


The standard 4.7-inch model has a resolution of 1,334 × 750 pixels, which is density of 326 PPI. Meanwhile, the larger 5.5-inch model becomes the first iPhone to be 1080p with a full 1,920 × 1,080 pixels resolution and 401 PPI. Both resolutions definitely raise the bar over the iPhone 5s, which measures at 1,136 × 640 pixels, but only catch up to the numerous 1080p screens that are available on Android-based smartphones and other competing devices.

The all-new Retina HD Display packs a lot of innovation, including a full sRGB color standard, higher contrast and so-called incredible brightness and white balance. To achieve higher contrast, Apple developed an advanced process of photo alignment that involves using UV light to precisely position the display’s liquid crystals so they lay exactly where they should. The end result is a better viewing experience, with deeper blacks and sharper text.

A wider viewing angle is the result of dual-domain pixels that enable color accuracy from corner to corner, and an improved polarizer provides you with a clearer view of your iPhone’s display when you’re wearing sunglasses. The four main components of a Retina HD Display, pictured from top to bottom in the image above, are the glass, polarizer, IPS display and backlight. Together, the hardware promises to provide the best viewing experience on iPhone to date.

The Retina HD Display also has an innovative new feature called Display Zoom lets you choose between a standard view or zoom view depending on what you want to see. With a higher resolution screen, the ability to scale the Home screen or apps makes a lot of sense. Last, there is a Landscape view on iPhone 6 Plus that allows you to view the Home screen and several stock apps in a new dimension — just like an iPad in landscape orientation.

A8 Chip


A larger screen calls for a more powerful processor. The new Apple A8 chip features second-generation 64-bit desktop-class architecture and an advanced 20-nanometer process to deliver performance up to 50 times faster, and with up to 50 percent more energy efficiency, than the original iPhone. Accompanied by a new M8 motion coprocessor, graphics performance is also up to 84 times faster than the original iPhone.


The A8 chip uses an advanced 20-nanometer process. It is 13% smaller, but delivers 25 percent improved performance with up to 50 percent more energy efficiency than the A7 chip, which powers iPhone 5s.
Apple details the following about the M8 Motion Coprocessor:
“When you’re in motion, the M8 motion coprocessor continuously measures data from the accelerometer, compass, gyroscope, and a new barometer. This offloads work from the A8 chip for improved power efficiency. And now those sensors do even more, measuring your steps, distance, and elevation changes.”
The new iSight camera on iPhone 6 and iPhone 6 Plus, which is elaborated on in more detail in the next section, features an Apple-designed video encoder and image signal processor built into the A8 chip. This bring support for advanced camera and video features, like new Focus Pixels, better face detection, continuous autofocus, and enhanced noise reduction. Capturing and shooting higher-quality photos and videos should be easier.

For an improved graphics performance, Apple has introduced a new technology called Metal that allows developers to create immersive, console-style games on iPhone. Metal is optimized to allow the CPU and GPU to work in unison to deliver graphics and complex visual effects, making the feeling of most games you play much more realistic. Based on the demo of Vainglory from Super Evil Games earlier this week, I am excited to see what else is possible.

Cameras


The world’s most popular camera is now even better with the iPhone 6 and iPhone 6 Plus, both of which feature an improved 8-megapixel iSight rear-facing camera that packs a long list of new features: focus pixels, face detection, exposure control, 1080p HD at 60 FPS and slo-mo video at 240 FPS, time-lapse videos, continuous autofocus, cinematic video stabilization and, exclusive to the iPhone 6 Plus, optical image stabilization.
  • Focus Pixels: Focus pixels are enabled through Apple’s new image signal processor. These pixels provide the sensor with more information about your image, leading to better and faster autofocus that can even be seen in preview.
  • Optical Image Stabilization: Apple has added optical image stabilization exclusively to the 5.5-inch iPhone 6 Plus that the company describes as working with the Apple A8 processor, gyroscope and M8 motion coprocessor to measure motion data and provide precise lens movement to compensate for hand shake in lower light. The fusion of long- and short-exposure images helps to reduce the subject motion, and a unique integration of hardware and software promises to deliver beautiful low-light photos.
  • Face Detection: The new iSight camera has the ability to recognize faces faster and more accurately, including those far away in the distance or in a crowd. The result is better portrait and group shots, with improved blink and smile detection and a selection of faces in burst mode for capturing your best shots.
  • Exposure Control: This feature enables you to lighten or darken a photo or video in the preview pane with a simple slide. You can go up to four f-stops in either direction.


  • 1080p HD at 60 FPS and Slo-Mo Video at 240 FPS: When you shoot HD video on the iPhone 6, there is an option of recording at 60 frames per second. With faster frame rates, you can capture more action in each second and create sharper images that translate to more true-to-life video. Likewise, there is an option to shoot HD video at 120 fps or 240 fps in 720p in slow motion — full videos or parts.
  • Time-Lapse Videos: iOS 8 enables iPhone users to create time-lapse videos that will snap photos at dynamically selected intervals. When they are stitched together, they create these still videos that have a very cool effect. Just set your iPhone where you want to shoot, and swipe to select the time-lapse mode. Tap the record button and film for 30 minutes or even 30 hours.
  • Continuous Autofocus: The new iPhone 6 includes continuous autofocus in video, which is described as an advanced optical feature that makes use of Apple’s new Focus Pixels technology to ensure that shots remain sharp and stay that way while you’re recording — even if subjects or objects move. Faster autofocus means fewer inadvertent focus changes as well.
  • Cinematic Video Stabilization: You are running down the street with your iPhone in your right hand, trying to record a video of something while you’re on the go. When you play it back later, the entire video is shaky because you were moving. That’s what cinematic video stabilization aims to fix, by keeping your shots steady and as smooth as gliding through the scene on a rig.
Apple has also improved the front-facing FaceTime HD camera on the iPhone 6 and iPhone 6 Plus with a larger aperture and all-new sensor technology for capturing 81 percent more light. The front-facing camera also has improved face detection and an all-new burst mode for taking up to 10 photos per second. Additionally, the FaceTime HD camera features exposure control, improved HDR photos and video and a timer mode.

Battery

While the iPhone 6 and iPhone 6 Plus have larger screens than their predecessors, battery life on the smartphones has not been impacted. In fact, Apple claims that battery life on the iPhone 6 and iPhone 6 Plus either matches or outperforms that of the iPhone 5s and below based on several categories: audio, HD video, Wi-Fi browsing, LTE browsing, 3G browsing, 3G talk and standby time.

The chart below provides a side-by-side comparison of battery life on the iPhone 6 and iPhone 6 Plus. On a single charge, the iPhone 6 gets up to 50 hours of audio playback, up to 11 hours of HD video playback, up to 11 hours of Wi-Fi browsing, up to 10 hours of LTE browsing, up to 10 hours of 3G browsing, up to 14 hours of 3G talk and up to 10 days or 250 hours of standby time.


Meanwhile, the iPhone 6 Plus has a larger battery capacity and, therefore, gets up to 80 hours of audio playback, up to 14 hours of HD video playback, up to 12 hours of Wi-Fi browsing, up to 12 hours of LTE browsing, up to 12 hours of 3G browsing, up to 24 hours of 3G talk and up to 16 days or 384 hours of standby time. The actual capacity of the lithium-ion batteries has not yet been confirmed.

Early reports suggest that the iPhone 6 has a 1,810 mAh battery capacity and the iPhone 6 Plus has a 2,915 mAh battery capacity, although proper device teardowns will still have to be carried out before those numbers can be confirmed. Comparatively, the iPhone 5s has a 1,560 mAh battery that gets up to 40 hours of audio playback, up to 10 hours of video playback, up to 10 hours of Wi-Fi browsing, up to 10 hours of LTE browsing, up to 8 hours of 3G browsing and up to 250 hours standby time.

Connectivity


iPhone 6 and iPhone 6 Plus have improved wireless connectivity for faster LTE download speeds of up to 150 Mbps. Apple claims that iPhone 6 users can experience faster download and upload speeds for browsing the web, streaming music, making video calls and more. The smartphones also support Voice over LTE, or VoLTE, enabling wideband high-quality calls that are crisp and clear sounding.

iPhone 6 has up to 20 LTE bands, more than any other smartphone and seven more than the iPhone 5s specifically. This allows the iPhone 6 to connect to more high-speed LTE networks in more areas, convenient for travelers that are data roaming or those that live in international countries. Plus, with simultaneous voice and LTE data, you can keep browsing on iPhone 6 while you are talking.

With new support for 802.11ac, there is also up to three times faster Wi-Fi on the iPhone 6 over the 802.11n technologies used on previous iPhones. A new feature allows you to initiate calls over Wi-Fi using your own phone number, and your call can seamlessly transition to VoLTE once you go out of range of your Wi-Fi connection. When you’re traveling between your house, car, work, airport or so forth, this feature is ideal.
  • Model A1549 (GSM) and Model A1522 (GSM): UMTS/HSPA+/DC-HSDPA (850, 900, 1700/2100, 1900, 2100 MHz), GSM/EDGE (850, 900, 1800, 1900 MHz), LTE (Bands 1, 2, 3, 4, 5, 7, 8, 13, 17, 18, 19, 20, 25, 26, 28, 29)
  • Model A1549 (CDMA) and Model A1522 (CDMA): CDMA EV-DO Rev. A and Rev. B (800, 1700/2100, 1900, 2100 MHz), UMTS/HSPA+/DC-HSDPA (850, 900, 1700/2100, 1900, 2100 MHz), GSM/EDGE (850, 900, 1800, 1900 MHz), LTE (Bands 1, 2, 3, 4, 5, 7, 8, 13, 17, 18, 19, 20, 25, 26, 28, 29)
  • Model A1586 and Model A1524: CDMA EV-DO Rev. A and Rev. B (800, 1700/2100, 1900, 2100 MHz), UMTS/HSPA+/DC-HSDPA (850, 900, 1700/2100, 1900, 2100 MHz), TD-SCDMA 1900 (F), 2000 (A), GSM/EDGE (850, 900, 1800, 1900 MHz), FDD-LTE (Bands 1, 2, 3, 4, 5, 7, 8, 13, 17, 18, 19, 20, 25, 26, 28, 29), TD-LTE (Bands 38, 39, 40, 41)

Apple Pay, the new mobile payments platform, is powered by the NFC chip on the iPhone 6 and iPhone 6 Plus. When you want to make a payment, simply hold your iPhone near the point-of-sale system and verify you are the card holder by scanning your thumb with Touch ID.  The system stores your credit card info in an encrypted and secure fashion, with the help of Touch ID and the new A8 chip. Apple Pay also supports the iPhone 5, iPhone 5c and iPhone 5s when paired with an Apple Watch.

Apple Pay


The service is deeply integrated with Passbook, enabling one-touch checkout with no card number entry, typing an address or signing a receipt required. Forget about carrying credit and debit cards in your wallet and simply use your iPhone for payments at over 220,000 participating stores in the United States. Apple Pay partners include Macy’s, McDonald’s, Bloomingdale’s, Whole Food Markets, Petco, Staples, Target and more, but notably absent are Best Buy and Walmart. Apple is expected to Apple Pay in October.

Storage and Colors


iPhone 6 and iPhone 6 Plus are available in 16 GB, 64 GB and 128 GB storage capacities, with three colors to choose from: space gray, silver and gold.

Apps


iPhone 6 and iPhone 6 Plus come with several built-in apps right out of the box, and Apple also offers a selection of free apps that can be downloaded through the App Store.
  • Built-in Apps: Camera, Photos, Health, Messages, Phone, FaceTime, Mail, Music, Passbook, Safari, Maps, Siri, Calendar, iTunes Store, App Store, Notes, Contacts, iBooks, Game Center, Weather, Reminders, Voice Memos, Clock, Videos, Stocks, Calculator, Newsstand, Compass, Podcasts
  • Free Apps from Apple: iMovie, Pages, Keynote, Numbers, iTunes U, GarageBand, Apple Store, Trailers, Remote, Find My iPhone, Find My Friends

Tech Specifications


  • iPhone 6 measures 5.44 inches x 2.64 inches x 0.27 inches (138.1mm x 67.0 mm x 6.9 mm) and the iPhone 6 Plus measures 6.22 inches x 3.06 inches x 0.28 inches (158.1 mm x 77.8 mm x 7.1 mm)
  • iPhone 6 weighs 4.55 ounces (129 grams) and iPhone 6 Plus weighs 6.07 ounces (172 grams)
  • iPhone 6 has Retina HD Display with 1334-by-750 pixel resolution at 326 PPI and 1400:1 contrast ratio, while the iPhone 6 Plus has Retina HD Display with 1920-by-1080 pixel resolution at 401 PPI and 1300:1 contrast ratio
  • iPhone 6 screens have 500 cd/m2 max brightness and full sRGB standard
  • Fingerprint-resistant oleophobic coating on the screen
  • New 8-megapixel iSight camera with 1.5µ pixels and ƒ/2.2 aperture
  • Assisted GPS and GLONASS, digital compass and iBeacon microlocation
  • Audio formats supported: AAC (8 to 320 Kbps), Protected AAC (from iTunes Store), HE-AAC, MP3 (8 to 320 Kbps), MP3 VBR, Audible (formats 2, 3, 4, Audible Enhanced Audio, AAX, and AAX+), Apple Lossless, AIFF, and WAV
  • Video formats supported: H.264 video up to 1080p, 60 frames per second, High Profile level 4.2 with AAC-LC audio up to 160 Kbps, 48kHz, stereo audio in .m4v, .mp4, and .mov file formats; MPEG-4 video up to 2.5 Mbps, 640 by 480 pixels, 30 frames per second, Simple Profile with AAC-LC audio up to 160 Kbps per channel, 48kHz, stereo audio in .m4v, .mp4, and .mov file formats; Motion JPEG (M-JPEG) up to 35 Mbps, 1280 by 720 pixels, 30 frames per second, audio in ulaw, PCM stereo audio in .avi file format
  • 3.5-mm headphone jack
  • Barometer, three-axis gyro and accelerometer
  • Proximity sensor and ambient light sensor

Availability

iPhone 6 and iPhone 6 Plus pre-orders began on September 12th ahead of a public release on September 19th in the the United States, France, Hong Kong, Canada, Germany, Singapore, the United Kingdom, Australia and Japan. Apple plans to launch the smartphones in 115 countries by the end of this year.

iPhone 6 and iPhone 6 Plus will launch in a second wave of countries on September 26th, including Switzerland, Italy, New Zealand, Sweden, Netherlands, Spain, Denmark, Ireland, Norway, Luxembourg, Russia, Austria, Turkey, Finland, Taiwan, Belgium, Portugal. The United Arab Emirates will begin selling the iPhone 6 on September 27th.

How to update Jailbroken iPhone or iPad to iOS 8

$
0
0

If you’ve a jailbroken iPhone, iPad or iPod touch, and trying to update it to iOS 8 using OTA update, then you are probably seeing the “Checking for Update” screen as you can see above.

The issue is expected behaviour with jailbroken devices, as most modern jailbreaks like evasi0n and Pangu disable OTA updates to ensure jailbreakers don’t accidentally install the update.

So the only option jailbreakers have is that you have to update your device using iTunes. You can follow these simple instructions to update your iOS device to iOS 8:

Note: Upgrading your device you will end up losing your jailbreak, and the installed jailbreak tweaks.
The iOS 8 update is available as a free upgrade for the following iOS devices:
  • iPhone 5s, iPhone 5c, iPhone 5 and iPhone 4s
  • iPad Air, iPad 4, iPad 3 and iPad 2
  • Retina iPad mini, 1st gen iPad mini
  • 5th generation iPod touch 


How to install iOS 8 update using iTunes:

Before you plug in your iOS device. take a moment to make sure you are using the latest version of iTunes. Click on iTunes in the menu bar and then click  on “Check for Updates..”.
Once iTunes is all squared away, it’s time to turn your attention to your iOS device and follow these instructions:

Step 1: Connect your iOS device to your computer using an USB cable. Wait for iTunes to open and connect to your device.

Step 2: Click on device button to the left of the iTunes Store button in the top right corner in iTunes.

Step 3: Click on the “Check for Update” . If the iOS 8 update is available it will automatically download and update your device to iOS 8.


Step 4: You will get a popup message informing you the new update is available. Click on Download and Update button. If it says iOS 7.1.2 is the latest version then download the appropriate firmware file using download links provided in step 5.


Step 5: Skip this step if you iOS 8.0 was available in Step 4.
Download the firmware file for your device using the download links provided below [Note the download file could be as big as 1.7 GB]:

Note: If you’re downloading the firmware file using Safari then ensure that auto unzip feature is disabled or use Chrome or Firefox.

Note: You will be able to find the model number starting with at the back of your device.

Step 7: If you get a popup message informing you that iTunes will update your iPhone/iPad/iPod touch to iOS 8.0 and will verify with Apple. Click on the Update button.

Step 8: It will then show you the release notes for iOS 8. Click on the Next button. Then click on the Agree button for the terms and conditions.

Step 9: iTunes will now download the firmware file (which can take a long time depending on your internet connection as it can be as big as 2.1GB). After downloading the file, it will process it, extract the software, prepare the device for software update, and install the update.

Step 10: Do not disconnect your device until the update has finished. It can take a few minutes. Your device will be updated to iOS 8.0 and reboot once or twice during the process. You will see while Hello screen after it is successfully update.

How to downgrade from iOS 8 to iOS 7.1.2

$
0
0

If you had accidentally upgraded your iPhone, iPad or iPod touch to iOS 8 or don’t like it or are finding performance issues on older iOS devices and want to downgrade back to iOS 7.1.2, then the good news is that you can downgrade as Apple seems to be still signing the iOS 7.1.2 firmware file.


Important points to note:
  • You will be able to downgrade back only to iOS 7.1.2
  • It is important to take a backup of your iOS device to iCloud or using iTunes.
  • Please note that when you downgrade back to iOS 7.1.2, you will be able to restore back to iOS 7.x.x compatible backup and not the iOS 8 backup to avoid compatibility issues.
  • Apple doesn’t recommend downgrading so please proceed at your own risk.
Please follow these simple instructions to downgrade to iOS 6:

Download the appropriate iOS 7.1.2 firmware file for your device.

  • Connect the device running iOS 8 to your computer.
  • Launch iTunes and select the iOS device from the top right corner, to the left of the iTunes Store button.
  • Hold the Alt/Option key in Mac or Shift Key in Windows on your keyboard and click on the Restore iPhone/iPad/iPod touch button in iTunes. Important please read: Alternatively, you can also click on the Check for Update option, instead of restoring. We were able to successfully downgrade from iOS 8 to iOS 7.1.2 using this step, but we are not sure what issue it can have on the data. So it is probably a good idea to use the Restore method, though it will be more time consuming. If you

  • If you’ve Find My iPhone enabled then it will prompt you to turn it off before restoring your iPhone/iPad or iPod touch.
  • Select the ipsw file you had downloaded earlier.
  • iTunes will inform that it will erase and restore your iOS device to iOS 7.1.2 and will verify the restore with Apple.
  • Click Restore.
  • iTunes should now restore your iOS device to iOS 7.1.2.
  • After a restore, the iOS device will restart. You should then see “Slide to set up”. Follow the steps in the iOS Setup Assistant.
  • You can then restore your device from a backup if required.
That’s it. You should now be successfully downgraded to iOS 7.1.2. It may prompt you to activate your device.

Please note that Apple can stop signing iOS 7.1.2 firmware files any moment so downgrade back to iOS 7.1.2 as soon as possible. You won’t be able to downgrade back to iOS 7.1.2 once Apple stops signing the firmware file.

How to fix iOS 8 battery life problems

$
0
0

The problem with iPhone, iPAD battery life issues is that it is very subjective as it is based on your usage pattern, so it is difficult to pin point what exactly is causing a problem. Check out these tips to see if they help in fixing the battery life problem on your device:


1. Battery usage

Prior to iOS 8, you had to depend on apps like Normal to identify apps that could be draining your device’s battery life, but Apple has added the naming and shaming feature in iOS 8 itself, which gives you a break down of battery usage by apps. Follow these instructions to identify the battery hogs, and also find out what you should do next.

How to find battery usage in iOS 8

  • Launch the Settings app
  • Tap on General
  • Tap on Usage
  • Tap on Battery Usage


This will show you all the apps and internal services like Home & Lock screen that are consuming battery on your iPhone. By default it shows you the battery hogs in the last 24 hours. You can also check the battery hogs in the last 7 days by tapping on the Last 7 Days tab as you can see in the screenshot above.

Identifying battery hogs

The battery usage provides you information about how much battery is consumed by various apps and services on your device. It is important to mention here that an app with a high percentage battery usage does not necessarily mean it is a battery hog. It could be because you were using it a lot, or if it was running in the background to upload or download content.

The apps that should be a concern are ones that show up on top of power consumption list even though you haven’t been using them. iOS 8 will also tell you what activity that could have resulted in battery consumption such as Background activity in case of the Mail app in the screenshot above.

What next

If you’ve identified an app that is draining battery life on your device, here are some of the things you can do to extend your iPhone’s battery life, especially if it is third-party app:
  • If you can live without the app then the best thing to do is delete the app.
  • While iOS takes care of suspending apps in the background, it’s likely that some apps wake up in the background to fetch content off the network. You may want to force close apps like VoIP, navigation and streaming audio apps if you’re not using them as they’re know to drain battery life. It is important to note here that you should only close apps that you don’t want to use. It is a not a good practice to force close all apps, as that could have an adverse impact on battery life. Force close an app by double pressing the home button scrolling through the apps to find the one you want to close, and swiping up to close it.

  • If you want to use the app, then you should seriously look at disabling Location Services (Settings > Privacy > Location Services) and Background app refresh (Settings > General > Background App Refresh) features for the app as they can end up consuming battery life. We will cover it more detail next.

2. Location Services

When we install apps, they prompt us to give them access to various things such location etc., and we tend to blindly say yes. However, apps using location services can have a major impact on battery life. So you may want to review which apps should have access to your device’s location.

The best way to approach this is to first disable location services for all the apps. You can disable location services via the Settings app and navigating to Privacy > Location Services. After you’ve disabled location services for all apps, you identify which apps such as navigation apps should use location services and enabled them individually. But read further to find out how to use a new iOS 8 feature.

Use Location Only While Using the app

In iOS 8, Apple has added a new setting in Location Services called While Using the App, which means that the app will only use location services when you’re using the app, and won’t use it all the time. This can be useful for apps like the App Store, which don’t need to be using location services all the time.

You can see which applications have recently used location services by going to Settings > Privacy > Location Services. Apps that recently used your location have an compass like indicator next them. Tap on the app, you should see the While Using the App, tap on it if you want the app to use location services only while using the app. This will ensure that the app will access your location only when it or one of its features are visible on the screen. As you can see below, iOS 8 also tells you the the App Store app is using location services to “find relevant apps nearby”.


Please note that this feature is available for stock apps and third-party apps like Google’s iOS app, however we expect third-party apps to offer this feature when they’re optimized for iOS 8.
If you’ve accidentally disabled location services for an app that needs to use it, don’t worry, it will prompt you to give access to Location Services when you launch it.

3. Background App Refresh

Apple added smarter multitasking in iOS 7 that lets apps fetch content in the background. Although Apple has a lot of optimizations in place to ensure that battery consumption is minimal, it’s possible that battery life of older iOS devices takes a hit due to this feature. To disable Background App Refresh go to Settings > General > Background App Refresh > and turn it off for apps like Facebook or other apps that don’t absolutely need to be updated all the time. Background App Refresh is a great feature, but you don’t need it for every app.


4. General Tips

Please note that the tips under section are to highlight areas where you could disable things that are not applicable to you so you can maximize battery life. We are not recommending or advising you to disable features just for battery life, as then there would be no point in using smartphones like the iPhone.

Notification Center Widgets

The Today tab in Notification Center includes features such as Today Summary, Tomorrow Summary, Stocks widget and any other third-party Notification Center widget you may have added. You should review the list and remove the widgets that you don’t want to ensure they don’t consume battery life unnecessarily as some of them could be using Location services.

Swipe down from the top edge of the screen to access Notification Center. Then tap on the Today tab, scroll down and tap on Edit button. Tap on the red - button to remove the widget from the Notification Center.

Turn off Dynamic Wallpapers

Dynamic wallpapers were a new addition to iOS 7 that bring subtle animations to the home and the lock screen. Unfortunately, the animations take up CPU cycles and consume more battery. So if you have set a dynamic wallpaper, and you’re having battery issues, go to Settings > Wallpaper > Choose Wallpaper where you can go to either Stills or your set an image from your photo library as your wallpaper.


Disable Motion effects, parallax

Apple added a number of animations and physics-based effects to the interface in iOS 7 to help users understand the layered elements in the UI. Some of these effects even access gyroscopic data, which contributes further to battery drain. You can disable these motion effects by going to Settings > General > Accessibility > Reduce Motion and turn on the switch.

Disable App Store’s automatic updates

App Store automatic installs app updates in the background, but if you’re not too keen on updating all your apps, you can turn this off by going to Settings > iTunes and App Store > scroll down to the Automatic Downloads section and turn off the “Updates” switch. While you’re there, you can also tell iOS to not use cellular data for automatic downloads and iTunes Match streaming.


Disable unwanted indexing in Spotlight search

Spotlight searches a lot of types of content like Applications, Contacts, Music, Podcasts, Mails, Events etc., when you might use it only for contacts, applications and music. So uncheck the type of content you don’t want to search by going to Settings > General > Spotlight Search.


Turn off Push Notifications

If you receive a lot of push notifications, your battery can take a hit, so make sure you turn off push for apps that you don’t frequently by navigating to Settings > Notifications > Scroll down to the Include section to see the list of apps and tap on any of them to turn notifications off.

Turn Off LTE/4G

If you live or work in an area that has poor or no LTE coverage, then turn off LTE (Settings -> General -> Cellular -> Enable LTE/Enable 4G).

Other tips

  • If you hardly use Bluetooth then turn it off (Settings -> General -> Bluetooth)
  • Set Auto-Lock interval so that your iPhone will turn off more quickly after a period of inactivity. To set the auto-Lock interval, launch the Settings app, tap on General and then Auto-Lock and set the auto-lock interval to either 1, 2, 3, 4 or 5 minutes.
  • You’re probably aware that using Wi-Fi drains iPhone’s battery, but perhaps you didn’t know that one of the most intensive processes that iPhone’s Wi-Fi chip has to do is search for available network. So if this happens in regular intervals, it’s going to have a noticeable impact on your battery. To disable this feature, launch the Settings app, tap on Wi-Fi, and tap on the On/Off toggle for Ask to Join Networks to disable it. Please note that by disabling this feature, your iPhone will join known Wi-Fi networks automatically, but you will have to manually select a network if no known networks are available. Note: It is disabled by default.
  • Dimming the screen helps to extend battery life. You can either lower the default screen brightness based on your preference or turn on Auto-Brightness to allow the screen to adjust its brightness based on current lighting conditions. Launch the Settings app, scroll down and tap on Brightness & Wallpaper and set Auto-Brightness to On. Note: Apple enables it by default.
  • Turn off Location services for the following System System services: Diagnostics & Usage, Setting Time Zone, Location Based iAds (Settings -> Privacy -> Location Services -> System Services).

5. Troubleshooting

Restart/Reset Your iPhone

Hold down the Sleep/Wake button and the Home button at the same time for at least ten seconds, until the Apple logo appears.

Resetting Network Settings 

Reset network settings by tapping Settings -> General -> Reset -> Reset Network Settings. This will reset all network settings, including passwords, VPN, and APN settings.

Battery Maintenance

Apple advices users to go through at least one charge cycle per month (charging the battery to 100% and then completely running it down). So if you haven’t done it already, it may be a good time to do it. Power cycling your device helps in recalibrating the battery indicator more accurately.

6. Restore iPhone as New

This is not ideal but the last resort. If you’ve setup your iPhone by restoring from backup then the battery life problems could be due to some issue with the backup. Try to restore your iPhone (Settings -> General -> Reset -> Erase All Content And Settings) and set it up as a new iPhone (not from the backup). But before you erase all the contents and settings, take a backup of your iPhone using iTunes or iCloud, or selectively take a backup of your photos and videos using Dropbox or Google+.


How to Protect your Server Against the Shellshock Bash Vulnerability

$
0
0
On September 24, 2014, a GNU Bash vulnerability, referred to as Shellshock or the "Bash Bug", was disclosed. In short, the vulnerability allows remote attackers to execute arbitrary code given certain conditions, by passing strings of code following environment variable assignments. Because of Bash's ubiquitous status amongst Linux, BSD, and Mac OS X distributions, many computers are vulnerable to Shellshock; all unpatched Bash versions between 1.14 through 4.3 (i.e. all releases until now) are at risk.

The Shellshock vulnerability can be exploited on systems that are running Services or applications that allow unauthorized remote users to assign Bash environment variables. Examples of exploitable systems include the following:
  • Apache HTTP Servers that use CGI scripts (via mod_cgi and mod_cgid) that are written in Bash or launch to Bash subshells
  • Certain DHCP clients
  • OpenSSH servers that use the ForceCommand capability
  • Various network-exposed services that use Bash
A detailed description of the bug can be found at CVE-2014-6271 and CVE-2014-7169.
Because the Shellshock vulnerability is very widespread--even more so than the OpenSSL Heartbleed bug--and particularly easy to exploit, it is highly recommended that affected systems are properly updated to fix or mitigate the vulnerability as soon as possible. We will show you how to test if your machines are vulnerable and, if they are, how to update Bash to remove the vulnerability.

Note:(Sept. 25, 2014 - 6:00pm EST) At the time of writing, only an "incomplete fix" for the vulnerability has been released. As such, it is recommended to update your machines that run Bash immediately, and check back for updates and a complete fix.

Check System Vulnerability

On each of your systems that run Bash, you may check for Shellshock vulnerability by running the following command at the bash prompt:

env VAR='() { :;}; echo Bash is vulnerable!' bash -c "echo Bash Test"

If you see output that looks like the following, your version of Bash is safe:
bash: warning: VAR: ignoring function definition attempt
bash: error importing function definition for `VAR'
Bash Test

If you see "Bash is vulnerable!" as part of your output, you need to update your Bash. The echo Bash is vulnerable! part of the command represents where a remote attacker could inject malicious code, following a function definition within an environment variable assignment. Read on to learn how to update Bash and fix the vulnerability.

Test Remote Sites

You may use this link to test specific websites and CGI scripts: 'ShellShock' Bash Vulnerability CVE-2014-6271 Test Tool.

Fix Vulnerability: Update Bash

The easiest way to fix the vulnerability is to use your default package manager to update the version of Bash. The following subsections cover updating Bash on various Linux distributions, including Ubuntu, Debian, CentOS, Red Hat, and Fedora.

Note:(Sept. 25, 2014 - 6:00pm EST) At the time of writing, only an "incomplete fix" for the vulnerability has been released. As such, it is recommended to update your machines that run Bash immediately, and check back for updates and a complete fix.

APT-GET: Ubuntu / Debian

Update Bash to the latest version available via apt-get:
sudo apt-get update && sudo apt-get install --only-upgrade bash
Now run check your system vulnerability again by running the command in the previous section.

YUM: CentOS / Red Hat / Fedora

Update Bash to the latest version available via the yum:
sudo yum update bash
Now run check your system vulnerability again by running the command in the previous section.
 

Conclusion

Be sure to update all of your affected servers to the latest version of Bash!

Building and Deploying Nagios on Oracle Solaris 11

$
0
0
Nagios is a popular open source system, network, and infrastructure monitoring application. Nagios offers monitoring and alerting services for servers, switches, applications, and services.  

This article will take you through the steps of building Nagios 4.0.2 from source code on an Oracle Solaris 11 system, creating an Oracle Solaris Service Management Facility manifest for the Nagios service, and creating an Oracle Solaris 11 Image Packaging System package that can be installed using a single Oracle Solaris 11 command on any system running Oracle Solaris 11.


Note: It does not matter if the system is x64- or SPARC-based, and the procedures should work with all versions of Oracle Solaris 11 (for example, Oracle Solaris 11 and Oracle Solaris 11.1).

Prerequisites

Familiarity with administering Oracle Solaris 11 systems, including using the Image Packaging System, is an advantage.

Summary of the Tasks

This article is divided into a number of different sections that cover many of the basic administration tasks. Each main section is independent of the others.


  • Building Nagios Core
  • Generating a Service Management Facility Manifest for Nagios
  • Creating a Package Manifest
  • Publishing and Installing a Package

Building Nagios Core

You can build Nagios Core using either the GNU compiler or Oracle Solaris Studio. This article describes both way of doing it, so you can choose one of them to build Nagios Core.

Preparing for the Build Process

Before we start building Nagios, we need to install some required packages and finish some preparation for the building process.

First, since various components of Nagios require the PHP application, you need to install PHP on your system:
 
root@solaris:~# pkg install web/php-53 apache-php53

To use the Nagios diagram feature, the Graphics Draw Library package is needed. If the Graphics Draw Library is not installed on your system, use the following command to install it on your system:
 
root@solaris:~# pkg install gd

We will use a compiler to quickly install Nagios into a PROTO area. A PROTO area is essentially an isolated location in the file system that allows you to easily collect the executables, libraries, documentation, and any other accompanying files into a package.

Please download the latest stable release of Nagios Core. In this article, we will use version 4.0.2.
Untar the downloaded file, which creates the following directory structure:
 
root@solaris:~# tar -zxf nagios-4.0.2.tar.gz
root@solaris:~# mv nagios-4.0.2 nagios
root@solaris:~# cd nagios
root@solaris:~/nagios# ls
base functions Makefile.in subst.in
cgi html mkpackage t
Changelog include module t-tap
common indent-all.sh nagios.spec tap
config.guess indent.sh OutputTrap.pm THANKS
config.sub install-sh p1.pl tools
configure INSTALLING pkg update-version
configure.in LEGAL pkginfo.in UPGRADING
contrib LICENSE README xdata
daemon-init.in make-tarball sample-config

Create a PROTO area that we will use to compile Nagios into:
 
root@solaris:~/nagios# mkdir ../PROTO

Now choose one of the following ways to compile and build Nagios Core—using Oracle Solaris Studio OR using the GNU compiler (gcc)—and use the corresponding procedure below. The Nagios configuration file will automatically detect which compiler you are using. If you have gcc already installed in your system, use that method.

Building Nagios Core Using Oracle Solaris Studio

If Oracle Solaris Studio is not installed on your system, you need to install it now.

First, go to http://pkg-register.oracle.com/ to obtain a certificate for Oracle Solaris Studio. Select Request Certificates and sign in to your My Oracle Support account. Choose Oracle Solaris Studio and click Submit. Follow the instruction to get your key and certificate for the solarisstudio publisher. Then follow the instructions on the website or run the following command to set up the solarisstudio publisher:
 
root@solaris:~# pkg set-publisher \
-k /var/pkg/ssl/Oracle_Solaris_Studio.key.pem \
-c /var/pkg/ssl/Oracle_Solaris_Studio.certificate.pem \
-G '*' -g https://pkg.oracle.com/solarisstudio/release solarisstudio

After setting up the solarisstudio publisher, install Oracle Solaris Studio 12.3 on your system:
root@solaris:~# pkg install solarisstudio-123

We will use gnu-make to build Nagios, so if you don't have gnu-make on your system, install it now:
root@solaris:~# pkg install gnu-make

To make sure you use gnu-make and Oracle Solaris Studio, change the system path for the building process:
root@solaris:~# export PATH=$PATH:/usr/gnu/bin:/opt/solarisstudio12.3/bin/

Now that all the required packages have been installed, we can build Nagios version 4.0.2 of Nagios Core.
Nagios Core uses the standard configure command to check its environment, so run the command, as shown in Listing 1.
 
root@solaris:~/nagios# ./configure
checking for a BSD-compatible install... /usr/gnu/bin/install -c
checking build system type... sparc-sun-solaris2.11
checking host system type... sparc-sun-solaris2.11
checking for gcc... no
checking for cc... cc
checking for C compiler default output file name... a.out
checking whether the C compiler works... yes
checking whether we are cross compiling... no
checking for suffix of executables...
checking for suffix of object files... o
checking whether we are using the GNU C compiler... no
checking whether cc accepts -g... yes
checking for cc option to accept ISO C89... none needed
checking whether make sets $(MAKE)... yes
checking for strip... /usr/bin/strip
....
*** Configuration summary for nagios 4.0.2 11-25-2013 ***:

General Options:
-------------------------
Nagios executable: nagios
Nagios user/group: nagios,nagios
Command user/group: nagios,nagios
Embedded Perl: no
Event Broker: yes
Install ${prefix}: /usr/local/nagios
Lock file: ${prefix}/var/nagios.lock
Check result directory: ${prefix}/var/spool/checkresults
Init directory: /etc/init.d
Apache conf.d directory: /etc/httpd/conf.d
Mail program: /usr/bin/mail
Host OS: solaris2.11
IOBroker Method: poll

Web Interface Options:
------------------------
HTML URL: http://localhost/nagios/
CGI URL: http://localhost/nagios/cgi-bin/
Traceroute (used by WAP): /usr/sbin/traceroute
Listing 1
Review the options shown in Listing 1 for accuracy.
Before we can compile Nagios, there are a couple of source file changes that need to be made since this version of Nagios defines a structure (struct comment) that conflicts with a system structure of the same name in /usr/include/sys/pwd.h. Perform the following steps to fix this issue.
  1. Add the following line as line 28 of the ./worker/ping/worker-ping.c file:

    #include 
  2. Comment out the following line (line 144) in the ./include/config.h file:

    //#include 
  3. Change the following line (line 27) in the ./base/utils.c file from this:

    #include "../include/comments.h"

    To this:
    #include 
  4. Change the following line (line 14) in the ./base/Makefile file from this:

    CFLAGS=-Wall -I.. -g -DHAVE_CONFIG_H -DNSCORE

    To this:
    CFLAGS=-I.. -g -DHAVE_CONFIG_H -DNSCORE
  5. Change the following line (line 29) in the ./cgi/Makefile file from this:

    CFLAGS=-Wall -I.. -g -O2 -DHAVE_CONFIG_H -DNSCGI

    To this:
    CFLAGS=-I.. -g -O2 -DHAVE_CONFIG_H -DNSCGI -I/usr/include/gd2
Then run the following command to compile Nagios:
root@solaris:~/nagios# make all
cd ./base && make
make[1]: Entering directory `/root/projectNagios/nagios/base'
make -C ../lib
make[2]: Entering directory `/root/projectNagios/nagios/lib'
cc -g -DHAVE_CONFIG_H -c squeue.c -o squeue.o
cc -g -DHAVE_CONFIG_H -c kvvec.c -o kvvec.o
cc -g -DHAVE_CONFIG_H -c iocache.c -o iocache.o
....

Once everything has compiled, use the make install, make install-commandmode, and make install-config targets to install the compiled binaries and sample configuration into our PROTO area using the DESTDIR command-line substitution, as shown in Listing 2. In order for this to be successfully completed, we need to first create the nagios user and nagios group. Use the useradd(1M) and groupadd(1M) commands to quickly do this, as shown in Listing 2.
root@solaris:~/nagios# groupadd nagios
root@solaris:~/nagios# useradd -g nagios nagios
root@solaris:~/nagios# make install DESTDIR=/root/PROTO
cd ./base && make install
make[1]: Entering directory `/root/projectNagios/nagios/base'
make install-basic
make[2]: Entering directory `/root/projectNagios/nagios/base'
/usr/gnu/bin/install -c -m 775 -o nagios -g nagios -d
/root/PROTO/usr/local/nagios/bin
/usr/gnu/bin/install -c -m 774 -o nagios -g nagios nagios
/root/PROTO/usr/local/nagios/bin
/usr/gnu/bin/install -c -m 774 -o nagios -g nagios nagiostats
/root/PROTO/usr/local/nagios/bin
....
make install-config
- This installs sample config files in /root/PROTO/usr/local/nagios/etc

make[1]: Leaving directory `/root/projectNagios/nagios'

root@solaris:~/nagios# make install-commandmode DESTDIR=/root/PROTO
/usr/gnu/bin/install -c -m 775 -o nagios -g nagios -d /root/PROTO/usr/local/nagios/var/rw
chmod g+s /root/PROTO/usr/local/nagios/var/rw

*** External command directory configured ***

root@solaris:~/nagios# make install-config DESTDIR=/root/PROTO
/usr/gnu/bin/install -c -m 775 -o nagios -g nagios -d
/root/PROTO/usr/local/nagios/etc
/usr/gnu/bin/install -c -m 775 -o nagios -g nagios -d
/root/PROTO/usr/local/nagios/etc/objects
/usr/gnu/bin/install -c -b -m 664 -o nagios -g nagios sample-config/nagios.cfg
/root/PROTO/usr/local/nagios/etc/nagios.cfg
/usr/gnu/bin/install -c -b -m 664 -o nagios -g nagios sample-config/cgi.cfg
/root/PROTO/usr/local/nagios/etc/cgi.cfg
....
*** Config files installed ***

Remember, these are *SAMPLE* config files. You'll need to read
the documentation for more information on how to actually define
services, hosts, etc. to fit your particular needs.
Listing 2
Now add the following lines to PROTO/local/nagios/etc/cgi.cfg to get the correct authorization for Nagios:
default_user_name=nagiosadmin
authorized_for_system_information=nagiosadmin
authorized_for_system_commands=nagiosadmin
authorized_for_configuration_information=nagiosadmin
authorized_for_all_hosts=nagiosadmin
authorized_for_all_host_commands=nagiosadmin
authorized_for_all_services=nagiosadmin
authorized_for_all_service_commands=nagiosadmin

Building Nagios Core Using the GNU Compiler

Nagios can also be built using the GNU C compiler (gcc). If gcc is not installed on you system, install it now, as shown in Listing 3.
root@solaris:~# pkg search -p gcc

PACKAGE PUBLISHER
pkg:/developer/gcc-3@3.4.3-0.175.1.0.0.24.0 solaris
pkg:/developer/gcc-45@4.5.2-0.175.1.0.0.24.0 solaris
pkg:/library/gc@7.2-0.175.1.0.0.17.0 solaris
pkg:/system/library/gcc-3-runtime@3.4.3-0.175.1.0.0.24.0 solaris
pkg:/system/library/gcc-45-runtime@4.5.2-0.175.1.0.0.24.0 solaris
Listing 3
There might be multiple versions of gcc in your repositories, as shown in Listing 3. In the following example, we are going to install the latest version, 4.5.2:
root@solaris:~# pkg install gcc-45

With the all the required packages installed, we can now build Nagios. We are working with version 4.0.2 of Nagios.
Nagios uses the standard configure command to check its environment, so run the command, as shown in Listing 4.
root@solaris:~/nagios# ./configure
checking for a BSD-compatible install... /usr/bin/ginstall -c
checking build system type... i386-pc-solaris2.11
checking host system type... i386-pc-solaris2.11
checking for gcc... gcc
checking for C compiler default output file name... a.out
checking whether the C compiler works... yes
checking whether we are cross compiling... no
checking for suffix of executables...
checking for suffix of object files... o
checking whether we are using the GNU C compiler... yes
checking whether gcc accepts -g... yes
checking for gcc option to accept ANSI C... none needed
....
*** Configuration summary for nagios 4.0.2 11-25-2013 ***:

General Options:
-------------------------
Nagios executable: nagios
Nagios user/group: nagios,nagios
Command user/group: nagios,nagios
Embedded Perl: no
Event Broker: yes
Install ${prefix}: /usr/local/nagios
Lock file: ${prefix}/var/nagios.lock
Check result directory: ${prefix}/var/spool/checkresults
Init directory: /etc/init.d
Apache conf.d directory: /etc/httpd/conf.d
Mail program: /usr/bin/mail
Host OS: solaris2.11
IOBroker Method: poll

Web Interface Options:
------------------------
HTML URL: http://localhost/nagios/
CGI URL: http://localhost/nagios/cgi-bin/
Traceroute (used by WAP): /usr/sbin/traceroute
Listing 4
Review the options shown in Listing 4 for accuracy.
Before we can start compiling Nagios, there are a couple of source file changes that need to be made, since this version of Nagios defines a structure (struct comment) that conflicts with a system structure of the same name in /usr/include/sys/pwd.h. Perform the following steps to fix this issue.
  1. Add the following line as line 28 of the ./worker/ping/worker-ping.c file:

    #include 
  2. Comment out the following line (line 144) in the ./include/config.h file:

    //#include 
  3. Change the following line (line 27) in the ./base/utils.c file from this:

    #include "../include/comments.h"

    To this:
    #include 
  4. Change the following line (line 29) in the ./cgi/Makefile file from this:

    CFLAGS=-Wall -I.. -g -O2 -DHAVE_CONFIG_H -DNSCGI

    To this:
    CFLAGS=-Wall -I.. -g -O2 -DHAVE_CONFIG_H -DNSCGI -I/usr/include/gd2
Then run the following command to compile Nagios:
root@solaris:~/nagios# gmake all
cd ./base && gmake
gmake[1]: Entering directory `/root/nagios/base'
gcc -Wall -g -O2 -DHAVE_CONFIG_H -DNSCORE -c -o broker.o broker.c
gcc -Wall -g -O2 -DHAVE_CONFIG_H -DNSCORE -c -o nebmods.o nebmods.c
gcc -Wall -g -O2 -DHAVE_CONFIG_H -DNSCORE -c -o ../common/shared.o ../common/shared.c
gcc -Wall -g -O2 -DHAVE_CONFIG_H -DNSCORE -c -o checks.o checks.c
gcc -Wall -g -O2 -DHAVE_CONFIG_H -DNSCORE -c -o config.o config.c
...

Once everything has compiled, use the gmake install, gmake install-commandmode, and gmake install-config targets to install the compiled binaries and sample configuration into our PROTO area using the DESTDIR command-line substitution, as shown in Listing 5. In order for this to be successfully completed, we need to first create the nagios user and nagios group. Use the useradd(1M) and groupadd(1M) commands to quickly do this, as shown in Listing 5.
root@solaris:~/nagios# groupadd nagios
root@solaris:~/nagios# useradd -g nagios nagios
root@solaris:~/nagios# gmake install DESTDIR=/root/PROTO
cd ./base && gmake install
gmake[1]: Entering directory `/root/nagios/base'
gmake install-basic
gmake[2]: Entering directory `/root/nagios/base'
/usr/bin/ginstall -c -m 775 -o nagios -g nagios -d /root/PROTO/usr/local/nagios/bin
/usr/bin/ginstall -c -m 774 -o nagios -g nagios nagios
/root/PROTO/usr/local/nagios/bin
/usr/bin/ginstall -c -m 774 -o nagios -g nagios nagiostats
/root/PROTO/usr/local/nagios/bin
....
make install-config
- This installs sample config files in /root/PROTO/usr/local/nagios/etc

gmake[1]: Leaving directory `/root/nagios'

root@solaris:~/nagios# gmake install-commandmode DESTDIR=/root/PROTO
/usr/bin/ginstall -c -m 775 -o nagios -g nagios -d
/root/PROTO/usr/local/nagios/var/rw
chmod g+s /root/PROTO/usr/local/nagios/var/rw

*** External command directory configured ***

root@solaris:~/nagios# gmake install-config DESTDIR=/root/PROTO
/usr/bin/ginstall -c -m 775 -o nagios -g nagios -d /root/PROTO/usr/local/nagios/etc
/usr/bin/ginstall -c -m 775 -o nagios -g nagios -d
/root/PROTO/usr/local/nagios/etc/objects
/usr/bin/ginstall -c -b -m 664 -o nagios -g nagios sample-config/nagios.cfg
/root/PROTO/usr/local/nagios/etc/nagios.cfg
/usr/bin/ginstall -c -b -m 664 -o nagios -g nagios sample-config/cgi.cfg
/root/PROTO/usr/local/nagios/etc/cgi.cfg
....
*** Config files installed ***

Remember, these are *SAMPLE* config files. You'll need to read the documentation for
more information on how to actually define services, hosts, etc. to fit your
particular needs.
Listing 5
Now add the following lines to PROTO/local/nagios/etc/cgi.cfg to get the correct authorization for Nagios:
default_user_name=nagiosadmin
authorized_for_system_information=nagiosadmin
authorized_for_system_commands=nagiosadmin
authorized_for_configuration_information=nagiosadmin
authorized_for_all_hosts=nagiosadmin
authorized_for_all_host_commands=nagiosadmin
authorized_for_all_services=nagiosadmin
authorized_for_all_service_commands=nagiosadmin

Building Nagios Plugins

The next step is to build the Nagios plugins in our /root/PROTO area. You may choose to create a separate package for the plugins, but for simplicity, we will create a single package that has Nagios Core and the plugins.
root@solaris:~# wget https://www.nagios-plugins.org/download/nagios-plugins-1.5.tar.gz
root@solaris:~# tar -zxf nagios-plugins-1.5.tar.gz
root@solaris:~# cd nagios-plugins-1.5

For this particular version of the plugins, we have to modify the ./configure file and change line 18226 to the following:
elif $PATH_TO_SWAP -l 2>/dev/null | egrep -i "^swapfile +dev + swaplo +blocks +free">/dev/null

Then run the following command:
root@solaris: ~/nagios-plugins-1.5# ./configure

Now install the plugins into our PROTO area:
root@solaris: ~/nagios-plugins-1.5# gmake install DESTDIR=/root/PROTO


Generating a Service Management Facility Manifest for Nagios

Service Management Facility manifests are used to describe a service, its configuration, and how it can be started, and stopped.
Service Management Facility manifests are XML-based files that are usually located in /lib/svc/manifest. While we could write a Service Management Facility manifest manually, we will use the svcbundle(1M) command to generate a simple one for us.
The svcbundle command allows administrators to create, and optionally install, a manifest or system profile for common scenarios. As a result, svcbundle makes a number of simple assumptions—which are detailed in the man page—to deal with these common scenarios, including automatically starting this service by default. We can create a Service Management Facility manifest as follows:
root@solaris:~# mkdir -p PROTO/lib/svc/manifest/site
root@solaris:~# cd PROTO/lib/svc/manifest/site
root@solaris:~# svcbundle -o nagios.xml \
-s service-name=application/nagios \
-s start-method="/usr/local/nagios/bin/nagios /usr/local/nagios/etc/nagios.cfg"
root@solaris:~# cat nagios.xml


Creating a Package Manifest

Behind each package is a package manifest that describes how the package is assembled. It contains information such as the package name, its version, package dependencies, and a list of files, directories, links, and other package contents.

Generating a Package Manifest for Nagios

We will need to create a package manifest for our Nagios package as part of the publishing process to the repository.
You can take a look at a typical package manifest by using the pkg contents command with the -m option, as follows:
root@solaris:~/nagios# pkg contents -m gzip
set name=pkg.fmri value=pkg://solaris/compress/gzip@1.4,5.11-0.175.1.0.0.24.0:20120904T170603Z
set name=org.opensolaris.consolidation value=userland
set name=pkg.summary value="GNU Zip (gzip)"
set name=pkg.description value="The GNU Zip (gzip) compression utility"
set name=info.source-url value=ftp://ftp.gnu.org/gnu/gzip/gzip-1.4.tar.gz
set name=info.classification value="org.opensolaris.category.2008:Applications/System Utilities"
set name=info.upstream-url value=http://www.gnu.org/software/gzip/
set name=org.opensolaris.arc-caseid value=PSARC/2000/488
set name=variant.arch value=i386 value=sparc
depend fmri=pkg:/system/library@0.5.11-0.175.1.0.0.23.0 type=require
depend fmri=pkg:/shell/bash@4.1.9-0.175.1.0.0.23.0 type=require
dir group=sys mode=0755 owner=root path=usr
dir group=bin mode=0755 owner=root path=usr/bin
dir group=sys mode=0755 owner=root path=usr/share
....
signature 235c7674d821032ae3eeda280c7837d1f1f4fdb5 algorithm=rsa-sha256
chain="8e422c1bb80b05f08f7a849f3d7ae90a976e048e
754665e03bd28ef63b05a416073eb6d649624781"
chain.chashes="083e40bb50e6964834ebfd3c66b8720b46028068
f85dabbb0d56b37de3c3de98663dd8f27a12ff8e" chain.csizes="1273 1326" chain.sizes="1773
2061" chash=05654e46fc5cac3b9b9bd11c39512bc92bc85089 pkg.csize=1281 pkg.size=1753
value=41df24b2bc4fe0cc705642f7bcad54f8d96017d919865d12da22bbb42ab451b2d1e28c50c0d2b5a
52b1e49e2732aeae9296216a3418c57fab6ed68624d492e68b8f8a4c728ec03f823608c2f95437ced3591
a957fc8c9a69fdbb3e5f0e45cf6a74b9341c97d727a60ef1f8be78a91114e378d84b530ae1b6565e15e06
0802f96fdbbea19823f0e2c8e4dc2e5f6f82c6e9b85362c227704ecefc4460fc56dc947af2d8728231383
78e4c1d224012f135281c567ef854b63cc75b43336142a5db78c0544f3e31cd101a347a55c25b77463431
ce65db04f5821fe9e7d5e27718fb9be71373d110ca8eea4a82b5b3571684a6a182910b87e7f65c22d590a
8e6523f9 version=0

Each line defines an action—whether it's setting some metadata about the package such as a name and description, or whether it's specifying files and directories to include in the package. When we create a package manifest for the Nagios package, we'll split the manifest into three different sections.

Creating Package Metadata

The first section is all about creating package metadata. At the start of the package manifest for gzip, we can see a number of lines:
set name=pkg.fmri value=pkg://solaris/compress/gzip@1.4,5.11-0.175.1.0.0.24.0:20120904T170603Z
set name=org.opensolaris.consolidation value=userland
set name=pkg.summary value="GNU Zip (gzip)"
set name=pkg.description value="The GNU Zip (gzip) compression utility"
set name=info.source-url value=ftp://ftp.gnu.org/gnu/gzip/gzip-1.4.tar.gz
set name=info.classification value="org.opensolaris.category.2008:Applications/System Utilities"
set name=info.upstream-url value=http://www.gnu.org/software/gzip/

We need to create similar metadata for Nagios. We'll start by editing a file called nagios.mog and include the lines shown in Listing 6:
set name=pkg.fmri value=nagios@4.0.2,5.11-0
set name=pkg.summary value="Nagios monitoring utility"
set name=pkg.description value="Nagios is a host/service/network monitoring program"
set name=variant.arch value=$(ARCH)
Listing 6
Let's quickly go through the parts of this initial manifest shown in Listing 6. The set action represents a way to set package attributes such as the package version, a summary, and a description. We set the package FMRI (Fault Management Resource Indicator) to nagios@4.0.2,5.11-0, which indicates we're using Nagios 4.0.2 on Oracle Solaris 11 (5.11). Variants are a feature of the Image Packaging System that allows us to package support for multiple architectures in a single package (for example, have a single package for both SPARC and x86). We set variant.arch to a variable that we will substitute in later.

Generating a File and Directory List

The next step will be to look in our PROTO directory and generate a list of files and directories that we wish to include in our package. Fortunately we can automate much of this task with the pkgsend(1) generate command. We will pipe the output through the pkgfmt(1) command to make the output nicer, and then put it into the nagios.p5m.gen file, as shown in Listing 7:
The nagios user, which Nagios is executing under, needs read-write access to the file we are creating by using the touch(1) command in Listing 7. We will set the file ownership and permissions in the manifest.
root@solaris:~# touch PROTO/usr/local/nagios/var/rw/nagios.cmd

root@solaris:~# pkgsend generate PROTO | pkgfmt > nagios.p5m.gen
root@solaris:~# cat nagios.p5m.gen
dir path=usr owner=root group=bin mode=0755
dir path=usr/local owner=root group=bin mode=0755
dir path=usr/local/nagios owner=root group=bin mode=0755
dir path=usr/local/nagios/bin owner=root group=bin mode=0775
file usr/local/nagios/bin/nagios path=usr/local/nagios/bin/nagios owner=root \
group=bin mode=0774
file usr/local/nagios/bin/nagiostats path=usr/local/nagios/bin/nagiostats \
owner=root group=bin mode=0774
dir path=usr/local/nagios/etc owner=root group=bin mode=0775
....
dir path=usr/local/nagios/var/archives owner=root group=bin mode=0775
dir path=usr/local/nagios/var/rw owner=root group=bin mode=0775
file usr/local/nagios/var/rw/nagios.cmd \
path=usr/local/nagios/var/rw/nagios.cmd owner=root group=bin mode=0644
dir path=usr/local/nagios/var/spool owner=root group=bin mode=0755
dir path=usr/local/nagios/var/spool/checkresults owner=root group=bin mode=0775
Listing 7
In Listing 7, we see a few new actions: file and dir. These specify the package contents, plus their user and group ownership and permissions. We need to modify the user and group permissions of /usr/local/nagios/var, /usr/local/nagios/var/rw, and /usr/local/var/spool/checkresults to use the nagios user and group. To do this, edit nagios.p5m.gen and make the following changes to the five lines highlighted in bold:
file usr/local/nagios/bin/nagios path=usr/local/nagios/bin/nagios owner=nagios group=nagios mode=0774
....
dir path=usr/local/nagios/var owner=nagios group=nagios mode=0775
dir path=usr/local/nagios/var/archives owner=root group=root mode=0775
dir path=usr/local/nagios/var/rw owner=nagios group=nagios mode=0775
file usr/local/nagios/var/rw/nagios.cmd \
path=usr/local/nagios/var/rw/nagios.cmd owner=nagios group=nagios mode=0663
dir path=usr/local/nagios/var/spool owner=root group=bin mode=0755
dir path=usr/local/nagios/var/spool/checkresults owner=nagios group=nagios mode=0775

If we were planning on installing Nagios into /usr/bin, good packaging practices for Oracle Solaris 11 encourage that we go through this list and check which directories are being installed by Nagios and which are already provided as part of a default system installation. That list of directories could be dynamically removed from our package manifest, which is known as a transform. In our case, we are planning to install files into /usr, which is already provided by the system. So we need to remove it from our manifest. We can do this by adding the following line to our nagios.mog file to drop this dir action:
 drop>

Let's also add four additional transforms to drop /lib, /lib/svc, /lib/svc/manifest, and /lib/svc/manifest/application since these are system-provided locations, and let's add a new transform to handle our Service Management Facility manifest, as shown in Listing 8:
 drop>
drop>
drop>
drop>
\
default restart_fmri svc:/system/manifest-import:default>
Listing 8
The last transform in Listing 8 finds any file with a .xml extension within the lib/svc/manifest directory and adds an actuator to restart the system/manifest-import service when the package is installed. This registers our Nagios service description with the Service Management Facility service framework.
Now that we have both nagios.mog and nagios.p5m.gen, let's merge them together to form nagios.p5m.mog using the pkgmogrify(1) command. We'll also substitute our architecture type in the $(ARCH) variable, as shown in Listing 9:
root@solaris:~# pkgmogrify -DARCH=`uname -p` nagios.p5m.gen nagios.mog | pkgfmt > nagios.p5m.mog
root@solaris:~# cat nagios.p5m.mog
set name=pkg.fmri value=nagios@4.0.2,5.11-0
set name=pkg.summary value="Nagios monitoring utility"
set name=pkg.description \
value="Nagios is a host/service/network monitoring program"
set name=variant.arch value=sparc
....
dir path=usr/local/nagios/var owner=nagios group=nagios mode=0775
dir path=usr/local/nagios/var/archives owner=root group=bin mode=0775
dir path=usr/local/nagios/var/rw owner=nagios group=nagios mode=0775
file usr/local/nagios/var/rw/nagios.cmd \
path=usr/local/nagios/var/rw/nagios.cmd owner=nagios group=nagios mode=0663
dir path=usr/local/nagios/var/spool owner=root group=bin mode=0755
dir path=usr/local/nagios/var/spool/checkresults owner=nagios group=nagios mode=0775
Listing 9
In Listing 9, you can see that we have merged the two files. Notice that we now have a value of sparc for variant.arch.

Calculating Dependencies for Nagios

The next step is to generate package dependencies for Nagios. The Image Packaging System includes the ability to scan the contents of a package to try to detect what dependencies might exist. It does this by detecting the file type—whether the file is a script or an executable. If it's a script, the Image Packaging System will check the value of the #! statement at the beginning of the script to see whether the script is a Perl, Python, Bash, or other shell script. If the file is an executable, the Image Packaging System will look at the Executable and Linkable Format (ELF) header to see what other libraries are required for successful runtime execution. This is a two-step process, because we then need to make those file dependencies into package dependencies.
Let's first generate the list of file dependencies that Nagios has. We use the pkgdepend(1) generate command, and we pass in the location of our PROTO area, as shown in Listing 10:
root@solaris:~# pkgdepend generate -md PROTO nagios.p5m.mog > nagios.p5m.dep
root@solaris:~# tail nagios.p5m.dep
depend fmri=__TBD pkg.debug.depend.file=libc.so.1 pkg.debug.depend.path=lib
pkg.debug.depend.path=usr/lib pkg.debug.depend.reason=usr/local/nagios/sbin/outages.cgi pkg.debug.depend.type=elf
type=require
depend fmri=__TBD pkg.debug.depend.file=libsocket.so.1 pkg.debug.depend.path=lib
pkg.debug.depend.path=usr/lib pkg.debug.depend.reason=usr/local/nagios/sbin/outages.cgi pkg.debug.depend.type=elf
type=require
depend fmri=__TBD pkg.debug.depend.file=libsocket.so.1 pkg.debug.depend.path=lib
pkg.debug.depend.path=usr/lib pkg.debug.depend.reason=usr/local/nagios/sbin/status.cgi pkg.debug.depend.type=elf
type=require
depend fmri=__TBD pkg.debug.depend.file=libc.so.1 pkg.debug.depend.path=lib
pkg.debug.depend.path=usr/lib pkg.debug.depend.reason=usr/local/nagios/sbin/showlog.cgi pkg.debug.depend.type=elf
type=require
depend fmri=__TBD pkg.debug.depend.file=libc.so.1 pkg.debug.depend.path=lib
pkg.debug.depend.path=usr/lib pkg.debug.depend.reason=usr/local/nagios/bin/nagiostats
pkg.debug.depend.type=elf type=require
depend fmri=__TBD pkg.debug.depend.file=libc.so.1 pkg.debug.depend.path=lib
pkg.debug.depend.path=usr/lib pkg.debug.depend.reason=usr/local/nagios/sbin/config.cgi pkg.debug.depend.type=elf
type=require
depend fmri=__TBD pkg.debug.depend.file=libsocket.so.1 pkg.debug.depend.path=lib
pkg.debug.depend.path=usr/lib pkg.debug.depend.reason=usr/local/nagios/bin/nagiostats pkg.debug.depend.type=elf
type=require
depend fmri=__TBD pkg.debug.depend.file=libm.so.2 pkg.debug.depend.path=lib
pkg.debug.depend.path=usr/lib pkg.debug.depend.reason=usr/local/nagios/bin/nagiostats
pkg.debug.depend.type=elf type=require
depend fmri=__TBD pkg.debug.depend.file=libsocket.so.1 pkg.debug.depend.path=lib
pkg.debug.depend.path=usr/lib pkg.debug.depend.reason=usr/local/nagios/sbin/config.cgi pkg.debug.depend.type=elf
type=require
depend fmri=__TBD pkg.debug.depend.file=libc.so.1 pkg.debug.depend.path=lib
pkg.debug.depend.path=usr/lib pkg.debug.depend.reason=usr/local/nagios/sbin/cmd.cgi
pkg.debug.depend.type=elf type=require
...
Listing 10
In Listing 10, we can see that we have generated a number of lines that start with the depend action. If you look closely, you can see the pkg.debug.depend.file value is libc.so.1 or libsocket.so.1 (in the lines that we printed), which indicates dependencies on shared objects. We can see that all of these dependencies have been found by looking at the ELF header, and we can also see the files that have caused this dependency by looking at the pkg.debug.depend.reason value.
We now need to resolve these dependencies into the packages that they come from. We use the pkgdepend resolve command to do this:
root@solaris:~# pkgdepend resolve -m nagios.p5m.dep
root@solaris:~# tail nagios.p5m.dep.res
file usr/local/nagios/share/stylesheets/trends.css
path=usr/local/nagios/share/stylesheets/trends.css owner=root group=bin mode=0664
dir path=usr/local/nagios/var owner=nagios group=nagios mode=0775
dir path=usr/local/nagios/var/archives owner=root group=bin mode=0775
dir path=usr/local/nagios/var/rw owner=nagios group=nagios mode=0775
file usr/local/nagios/var/rw/nagios.cmd \
path=usr/local/nagios/var/rw/nagios.cmd owner=nagios group=nagios mode=0663
dir path=usr/local/nagios/var/spool owner=root group=bin mode=0755
dir path=usr/local/nagios/var/spool/checkresults owner=nagios group=nagios mode=0775
depend fmri=pkg:/image/library/libjpeg@6.0.2-0.175.0.0.0.0.0 type=require
depend fmri=pkg:/image/library/libpng@1.4.11-0.175.1.0.0.16.0 type=require
depend fmri=pkg:/library/gd@2.0.35-0.175.1.0.0.24.0 type=require
depend fmri=pkg:/library/openldap@2.4.30-0.175.1.14.0.3.0 type=require
depend fmri=pkg:/library/security/openssl@1.0.0.11-0.175.1.7.0.4.0 type=require
depend fmri=pkg:/library/zlib@1.2.3-0.175.1.0.0.24.0 type=require
depend fmri=pkg:/runtime/perl-512@5.12.5-0.175.1.8.0.4.0 type=require
depend fmri=pkg:/shell/ksh93@93.21.0.20110208-0.175.1.15.0.2.0 type=require
depend fmri=pkg:/system/library/math@0.5.11-0.175.1.13.0.4.0 type=require
depend fmri=pkg:/system/library@0.5.11-0.175.1.15.0.4.2 type=require
depend fmri=pkg:/system/linker@0.5.11-0.175.1.13.0.1.2 type=require

The pkgdepend command will not pick up the dependency for PHP and the Apache module for PHP, so we need to add those manually:
depend fmri=pkg:/web/php-53@5.3.14-0.175.1.0.0.24.0 type=require
depend fmri=pkg:/web/server/apache-22/module/apache-php53@5.3.14-0.175.1.0.0.24.0 type=require

At this point, we need to create a nagios user and group as part of the package installation. The Image Packaging System has two such actions for performing that task. Here are the two lines that you need to add to nagios.p5m.dep.res:
group groupname=nagios
user username=nagios group=nagios

We now have our completed final package manifest that we will use during package publication: nagios.p5m.dep.res.

Publishing and Installing a Package

The next step that we will do is to take the compiled Nagios application and the package manifest and publish them to a package repository.

Creating a Package Repository

First, we will create a new ZFS data set to house our repository, and then we will use the pkgrepo create command to create the repository:
root@solaris:~# zfs create rpool/extra-software
root@solaris:~# zfs set mountpoint=/extra-software rpool/extra-software
root@solaris:~# pkgrepo create /extra-software
root@solaris:~# ls /extra-software
pkg5.repository

We need to set the publisher prefix of this repository using the pkgrepo set command:
root@solaris:~# pkgrepo -s /extra-software set publisher/prefix=extra-software

If we want to make this zone/machine the local repository and install on other zones/machines, we need to set up the repository server using the following commands:
root@solaris:~# svccfg -s application/pkg/server setprop \
pkg/inst_root=/extra-software
root@solaris:~# svccfg -s application/pkg/server setprop pkg/port=9001
root@solaris:~# svccfg -s application/pkg/server setprop \
pkg/readonly=false
root@solaris:~# svcadm enable application/pkg/server
root@solaris:~# svcs application/pkg/server
STATE STIME FMRI
online Jan_28 svc:/application/pkg/server:default

Publishing the Package

Now that our repository has been created, let's publish our package. To do this, we use the pkgsend publish command and provide it the location of our repository, our PROTO area, and the final Image Packaging System package manifest.
root@solaris:~# pkgsend -s http://localhost:9001 publish -d PROTO nagios.p5m.dep.res

root@solaris:~# pkgrepo -s http://localhost:9001 refresh
root@solaris:~# pkgrepo -s http://localhost:9001 info
PUBLISHER PACKAGES STATUS UPDATED
extra-software 1 online 2013-08-11T21:01:31.353448Z

Installing the Package

Now that we have published our package, it's a good time to try to install the package on your system. You can either install it on localhost or on any zone that can connect to the localhost zone. You can set the publisher to http://localhost:9001 or to http://ip-address:9001. To do this, you need to add our new repository using the pkg set-publisher command:
root@solaris:~# pkg set-publisher -p http://ip-address-of-the-localrepo:9001

root@solaris:~# pkg publisher
PUBLISHER TYPE STATUS P LOCATION
...
extra-software origin online F http://ip-address:9001/

And finally, use pkg install to install the package:
root@solaris:~# pkg install nagios
Packages to install: 1
Create boot environment: No
Create backup boot environment: No

DOWNLOAD PKGS FILES XFER (MB) SPEED
Completed 1/1 432/432 4.8/4.8 0B/s

PHASE ITEMS
Installing new actions 496/496
Updating package state database Done
Updating image state Done
Creating fast lookup database Done
root@solaris:~# pkg info nagios
Name: nagios
Summary: Nagios monitoring utility
Description: Nagios is a host/service/network monitoring program
State: Installed
Publisher: extra-software
Version: 4.0.2
Build Release: 5.11
Branch: 0
Packaging Date: Wed Jan 29 22:10:54 2014
Size: 11.43 MB
FMRI: pkg://extra-software/nagios@4.0.2,5.11-0:20140129T221054Z

To verify that this package works, we need to do a few things. First, let's configure Apache to be able to know about Nagios. Let's add the following lines to /etc/apache2/2.2/httpd.conf:

ScriptAlias /nagios/cgi-bin "/usr/local/nagios/sbin"
Alias /nagios /usr/local/nagios/share


Options ExecCGI
AllowOverride None
Order allow,deny
Allow from all


Options None
AllowOverride None
Order allow,deny
Allow from all


Also let's enable the Apache service and check that it's online, as shown in Listing 11:
root@solaris:~# svcadm enable apache22
root@solaris:~# svcs apache22
STATE STIME FMRI
online 2:10:22 svc:/network/http:apache22

root@solaris:~# svcs nagios
STATE STIME FMRI
online 1:02:12 svc:/application/nagios:default
Listing 11
In Listing 11, we can see that our Nagios instance is up and running and being managed by the Service Management Facility.

Start a web browser and navigate to http://localhost/nagios; you should see something similar to Figure 1. If you don't see this, check any output from the command line for errors.

 Figure 1. Screen that indicates Nagios was installed

How to Create an Automated Installer Manifest Using a New Interactive Wizard in Oracle Solaris 11.2

$
0
0
The Oracle Solaris 11 Automated Installer provides administrators with a secure, automated, network-based, hands-off method for installing client systems in the data center. Having a fast deployment framework is critical for reliably and repeatedly getting systems online with secure end-to-end application provisioning.

With the Automated Installer, client systems securely boot over the network, find the location of the Automated Installer service, and get matched to a specific set of installation instructions called an Automated Installer manifest. An Automated Installer manifest details how systems—including target disks and their layout, software, and virtualized environments—should get installed. Once matched, a client system then contacts an Oracle Solaris Image Packaging System package repository and installs itself appropriately based on the configuration provided in the Automated Installer manifest, as illustrated in Figure 1.


Figure 1. Illustration of how a client system is installed by the Automated Installer

This article covers a recent addition in Oracle Solaris 11.2 that enables administrators to use an interactive wizard—called the AI Manifest Wizard—to create common Automated Installer manifests for the client systems in their data center and associate the manifests with the Automated Installer install service.

In this article, we will set up an Automated Installer service based on an Oracle Solaris 11.2 image. We will then create a new Automated Installer manifest using the interactive wizard and associate the manifest with the Automated Installer service that we created.

Creating an Automated Installer Service

To start, let's create an Automated Installer service using the installadm create-service command, as shown in Listing 1.
Note: If you have an existing Automated Installer service set up, you do not need to do this step.
root@solaris:~# installadm create-service
OK to use subdir of /export/auto_install to store image? [y|N]: y
0% : Service svc:/network/dns/multicast:default is not online. Installation services will not be advertised via multicast DNS.
0% : Creating service from: pkg:/install-image/solaris-auto-install
0% : Using publisher(s):
0% : solaris: http://pkg.oracle.com/solaris/release
5% : Refreshing Publisher(s)
7% : Startup Phase
15% : Planning Phase
61% : Download Phase
90% : Actions Phase
91% : Finalize Phase
91% : Creating i386 service: solaris11_2-i386
91% : Image path: /export/auto_install/solaris11_2-i386
91% : Setting "solaris" publisher URL in default manifest to:
91% : http://pkg.oracle.com/solaris/release
91% : DHCP is not being managed by install server.
91% : SMF Service 'svc:/system/install/server:default' will be enabled
91% : SMF Service 'svc:/network/tftp/udp6:default' will be enabled
91% : Creating default-i386 alias
91% : Setting "solaris" publisher URL in default manifest to:
91% : http://pkg.oracle.com/solaris/release
91% : DHCP is not being managed by install server.
91% : No local DHCP configuration found. This service is the default
91% : alias for all PXE clients. If not already in place, the following should
91% : be added to the DHCP configuration:
91% : Boot server IP: 10.0.0.5
91% : Boot file(s):
91% : bios clients (arch 00:00): default-i386/boot/grub/pxegrub2
91% : uefi clients (arch 00:07): default-i386/boot/grub/grub2netx64.efi
91% :
91% : Note: There is more than one IP address configured for use with AI. Please ensure the above 'Boot server IP' is correct.
91% : SMF Service 'svc:/system/install/server:default' will be enabled
91% : SMF Service 'svc:/network/tftp/udp6:default' will be enabled
100% : Created Service: 'solaris11_2-i386'
100% : Refreshing SMF service svc:/network/tftp/udp6:default
100% : Refreshing SMF service svc:/system/install/server:default
100% : Enabling SMF service svc:/system/install/server:default
100% : Enabling SMF service svc:/network/tftp/udp6:default
100% : Warning: mDNS registry of service 'solaris11_2-i386' could not be verified.
100% : Warning: mDNS registry of service 'default-i386' could not be verified.
Listing 1
A few things happened during the process shown in Listing 1. We created a /export/auto_install directory in which to store boot images and other configuration information for our Automated Installer service, we downloaded a boot image from the Image Packaging System package repository to use for this service, and we enabled some services. This Automated Installer service is currently using the default Automated Installer manifest that installs the solaris-large-server package grouping with default setup options.

Verifying the Service Management Facility Service Is Running

The AI Manifest Wizard is a browser-based, interactive editor that allows administrators to easily create Automated Installer manifests without having to edit XML code. The wizard is made available through the svc:/system/install/server:default Service Management Facility service, and is served up from a web server on port 5555 as long as there are Automated Installer services running.
Let's use the svcs command to verify that the Service Management Facility service is enabled, as shown in Listing 2:
root@solaris:~# svcs install/server
STATE STIME FMRI
online 11:19:42 svc:/system/install/server:default
Listing 2
Now, confirm that the service is running by going to http://192.168.0.113:5555 (the IP address of our Automated Installer server) in your browser.
You can launch the AI Manifest Wizard directly using the /usr/bin/ai-wizard command if you are logged directly into the AI server or you are connected through an SSH session.
We are now ready to create our Automated Installer manifest.

Creating an Automated Installer Manifest

The AI Manifest Wizard itself consists of eight screens that take an administrator through the most frequently modified Automated Installer manifest parameters, such as disk installation, ZFS datasets, Image Packaging System repository configuration, and software selection.

In the first screen, shown in Figure 2, we are presented with a choice of which services we'd like to create a manifest for. For now, let's choose the default-i386 service, which we can see has an alias that corresponds to the service that was created for us named solaris11_2-i386.
Figure 2. AI Manifest Wizard's Welcome screen

Next, the Introduction screen gives us an opportunity to name the Automated Installer manifest and decide whether it's to be used for a bare-metal installation (global zone) or within a virtualized environment (in this case, a non-global zone). If we were going to install an Oracle Solaris kernel zone, we'd choose the manifest for a global zone. Let's choose to keep default as our manifest name and create a manifest for a bare-metal installation, as shown in Figure 3.


Figure 3. Screen for naming the manifest and selecting the type of zone

In the Root Pool screen, shown in Figure 4, we can determine what primary ZFS storage pool will be used for booting the system. By default, our root pool is called rpool and we'll create a boot environment called solaris. The Automated Installer manifest wizard will pick up the configuration based on the install service we've chosen. Because we picked the default-i386 service, we see a lot of the default configuration for a vanilla Oracle Solaris 11 installation. We can also configure the size of the swap and dump devices for our installation, but let's keep the default configuration for now.


Figure 4. Root Pool screen

In the Data Pools screen we can designate that additional ZFS zpools be created. As an example, let's create a zpool called mypool and mount it at /mypool, as shown in Figure 5. We could also choose to mirror this zpool or provide a higher level of redundancy through software-level RAID for ZFS.


Figure 5. Data Pools screen
In the Disks screen, shown in Figure 6, we can determine the target devices on which we will install Oracle Solaris 11. Here, we can explicitly target the boot device (as specified in the boot parameters when we boot a system) for rpool and define other additional characteristics for matching a target device, if required. For example, we might want to ensure that mypool is created only on a disk of a specific size, from a specific vendor, or at a specific device path (for example, in the case of using some shared storage).


Figure 6. Disks screen

In the Repositories screen, we can configure the Image Packaging System package repositories and publishers from which software will be installed. Here, we are presented with two choices for either the Oracle Solaris 11 release repository or support repository, but we can also choose to define our own repository. As shown in Figure 7, in this example, we'll instead be using an Image Packaging System package repository hosted at http://192.168.0.113 (the address of our Automated Installer server), which we created—this is typical of a data center environment where access to Oracle's publicly hosted repositories might be restricted.


Figure 7. Repositories screen

If we had a repository that was hosted behind HTTPS, we would need to provide our SSL certificates and keys for accessing the repository securely. This can be done by clicking Add Details and providing the location of these files. See Figure 8. The SSL certificates and keys for Oracle's hosted Image Packaging System repositories can be downloaded from pkg-register.oracle.com, or they can be generated for local repositories, as detailed in "Configuring HTTPS Repository Access."


Figure 8. IPS Repository Details screen

In the Software screen, shown in Figure 9, we can define what software should be installed on our system. Usually, software configurations are provided using package groups that define what collections of packages should be installed. These package groups correspond to the following Image Packaging System group packages: solaris-large-server (the default for Interactive Text Installer and Automated Installer installations), solaris-small-server (the default for non-global zone installations), and solaris-desktop (the default for Live Media installations). However, we can also choose to install additional packages that might not be included in these group packages.

Let's install the pkg:/system/management/puppet package so that we can control the configuration of our client systems from a centralized Puppet master.


Figure 9. Software screen

The Zones screen allows us to automatically create virtualized environments as part of the installation, which is a unique differentiator for the Automated Installer. As shown in Figure 10, we can provide a zone name and the location of a zone configuration file. This zone configuration file can either be created by hand or exported from an existing zone configuration using the zonecfg export command.


Figure 10. Zones screen

In the final screen, shown in Figure 11, we can review the information that we have provided to the wizard and double-check that everything is correct. If we notice a mistake at any stage, we can simply click the Back button to return to the screen that we need to fix.


Figure 11. Review screen

If desired, we can also preview the XML code (see Figure 12) that will be used for the Automated Installer manifest by clicking the Preview XML button. This feature is especially useful if you're trying to debug an existing manifest that you might have edited by hand previously. You'll notice that the XML code also includes a number of additional parameters that aren't available through the graphical interface. If you are an experienced administrator, you might wish to modify the XML code by hand later if you want to fine-tune your manifest.


Figure 12. Previewing the XML code

Once we are happy with our manifest, we can click the Save button. By default, the Automated Installer manifest will be saved to the browser's download folder. After saving the file, you need to copy it to the Automated Installer server and associate the manifest with the install service. See Figure 13.


Figure 13. Saving the manifest file
For convenience, the AI Manifest Wizard also allows you to save the file directly to the /var/ai/wizard-manifest folder on the Automated Installer server, but this capability is disabled by default. You can use the installadm list command with the -sv option to see the "Wizard Saves to Server?" property, and then you can enable the property using the installadm set-server command with the -z option, as shown in Listing 3.
root@solaris:~# installadm list -sv
AI Server Parameter Value
------------------- -----
Hostname ............... solaris
Architecture ........... i386
Active Networks ........ 10.0.0.5
192.168.0.113
Http Port .............. 5555
Secure Port ............ 5556
Image Path Base Dir .... /export/auto_install
Multi-Homed? ........... yes
Managing DHCP? ......... yes (unconfigured)
DHCP IP Range .......... none
Boot Server ............ none
Web UI Enabled? ........ yes
Wizard Saves to Server? no
Security Enabled? ...... no
Security Key? .......... no
Security Cert .......... none
CA Certificates ........ none
FW Encr Key (AES) ...... none
FW HMAC Key (SHA1) ..... none
Def Client Sec Key? .... no
Def Client Sec Cert .... none
Def Client CA Certs .... none
Def Client FW Encr Key . none
Def Client FW HMAC Key . none
Number of Services ..... 2
Number of Clients ...... 0
Number of Manifests .... 2
Number of Profiles ..... 0
root@solaris:~# installadm set-server -z
Changed Server
Refreshing SMF service svc:/system/install/server:default
root@solaris:~# installadm list -sv
AI Server Parameter Value
------------------- -----
Hostname ............... solaris
Architecture ........... i386
Active Networks ........ 10.0.0.5
192.168.0.113
Http Port .............. 5555
Secure Port ............ 5556
Image Path Base Dir .... /export/auto_install
Multi-Homed? ........... yes
Managing DHCP? ......... yes (unconfigured)
DHCP IP Range .......... none
Boot Server ............ none
Web UI Enabled? ........ yes
Wizard Saves to Server? yes
Security Enabled? ...... no
Security Key? .......... no
Security Cert .......... none
CA Certificates ........ none
FW Encr Key (AES) ...... none
FW HMAC Key (SHA1) ..... none
Def Client Sec Key? .... no
Def Client Sec Cert .... none
Def Client CA Certs .... none
Def Client FW Encr Key . none
Def Client FW HMAC Key . none
Number of Services ..... 2
Number of Clients ...... 0
Number of Manifests .... 2
Number of Profiles ..... 0
Listing 3
Depending on how your Automated Installer service is set up, you might execute the next steps differently. In our case, let's check to see what manifests are associated with our install services using the installadm list command, as shown in Listing 4:
root@solaris:~# installadm list -m
Service Name Manifest Name Type Status Criteria
------------ ------------- ---- ------ --------
default-i386 orig_default derived default none
solaris11_2-i386 orig_default derived default none
Listing 4
In Listing 4, we can see that there's a default manifest called orig_default associated with the Automated Installer service we created. We can change this by using the installadm create-manifest command to associate a new manifest (our generated manifest) for this service and then set it as the default by using the -d option, as shown in Listing 5:
root@solaris:~# installadm create-manifest -d -f /tmp/manifest.xml -m default -n default-i386
Created Manifest: 'default'
Listing 5
Let's check the status of our install services and manifests using the installadm list command, as shown in Listing 6:
root@solaris:~# installadm list
Service Name Status Arch Type Secure Alias Aliases Clients Profiles Manifests
------------ ------ ---- ---- ------ ----- ------- ------- -------- ---------
default-i386 on i386 pkg no yes 0 0 0 2
solaris11_2-i386 on i386 pkg no no 1 0 0 1
root@solaris:~# installadm list -m
Service Name Manifest Name Type Status Criteria
------------ ------------- ---- ------ --------
default-i386 default xml default none
orig_default derived inactive none
solaris11_2-i386 orig_default derived default none
Listing 6
And finally, let's also export our manifest and see whether it matches the manifest that we have created, as shown in Listing 7.
root@solaris:~# installadm export -n default-i386 -m default
---------------------------- manifest: default ----------------------------


facet.locale.*
facet.locale.de
facet.locale.de_DE
facet.locale.en
facet.locale.en_US
facet.locale.es
facet.locale.es_ES
facet.locale.fr
facet.locale.fr_FR
facet.locale.it
facet.locale.it_IT
facet.locale.ja
facet.locale.ja_*
facet.locale.ko
facet.locale.ko_*
facet.locale.pt
facet.locale.pt_BR
facet.locale.zh
facet.locale.zh_CN
facet.locale.zh_TW


pkg:/entire@0.5.11-0.175.2
pkg:/group/system/solaris-large-server
pkg:/system/management/puppet


Listing 7
Automated Installer manifests cover the configuration of the disk target and its layout, software selection, and virtualized environments. Additional system configuration (for users, network configuration, timezones, and so on) can be done using system configuration profiles. These are not managed by the AI Manifest Wizard; instead, they can be created by using the sysconfig tool and then associated to a given installation service.

Summary

The Oracle Solaris 11 Automated Installer provides an excellent foundation for agile provisioning of systems across the data center. For administrators managing such systems, the AI Manifest Wizard provides an easy-to-use interface for authoring Automated Installer manifests that can be used to customize clients that need to be installed.

How To Configure Sensu Monitoring, RabbitMQ, and Redis on Ubuntu 14.04

$
0
0
Sensu is a monitoring tool written in Ruby that uses RabbitMQ as a message broker and Redis for storing data. It is well-suited for monitoring cloud environments.

Sensu connects the output from "check" scripts with "handler" scripts to create a robust monitoring and alert system. Check scripts can run on many nodes, and report on whether a certain condition is met, such as that Apache is running. Handler scripts can take an action like sending an alert email.

Both the "check" scripts and the "handler" scripts run on the Sensu master server, which is responsible for orchestrating check executions among Sensu client servers and processing check results. If a check triggers an event, it is passed to the handler, which will take a specified action.


An example of this is a check that monitors the status of an Apache web server. The check will be run on the Sensu clients. If the check reports a server as down, the Sensu server will pass the event to the handler, which can trigger an action like sending an email or collecting downtime metrics. In this article we will be installing and configuring one Sensu master server and one Sensu client server.

Prerequisites

In order to set up Sensu, you will need:
  • One master node running Ubuntu 14.04. This is the node you will use to view all of the monitoring data.
  • At least one additional node that you want to monitor, running Ubuntu 14.04.
Create a sudo user on each host. First, create the user with the adduser command, replacing the username with the name you want to use.
 
adduser username

This will create the user and the appropriate home directory and group. You will be prompted to set a password for the new user and confirm the password. You will also be prompted to enter the user's information. Confirm the user information to create the user.

Next, grant the user sudo privileges with the visudo command.
visudo

This will open the /etc/sudoers file. In the User privilege specification section add another line for the created user so it looks like this (with your chosen username instead of username):
 
# User privilege specification
root ALL=(ALL:ALL) ALL
username ALL=(ALL:ALL) ALL


Save the file and switch to the new user.
su - username

Update the system packages and upgrade them.
sudo apt-get update && sudo apt-get -y upgrade
 

Step One — Installation on the Master

First, we will set up the Sensu master server. This requires RabbitMQ, Redis, Sensu itself, and the Uchiwa dashboard, along with some supporting software.

Add the RabbitMQ source to the APT source list.
echo "deb http://www.rabbitmq.com/debian/ testing main" | sudo tee -a /etc/apt/sources.list.d/rabbitmq.list
Download and add the signing key for RabbitMQ.
curl -L -o ~/rabbitmq-signing-key-public.asc http://www.rabbitmq.com/rabbitmq-signing-key-public.asc sudo apt-key add ~/rabbitmq-signing-key-public.asc
Install RabbitMQ and Erlang.
sudo apt-get update && sudo apt-get install -y rabbitmq-server erlang-nox

The RabbitMQ service should start automatically. If it doesn't, start it with the following command.
sudo service rabbitmq-server start

Sensu uses SSL for secure communication between its components and RabbitMQ. Although it is possible to use Sensu without SSL, it is highly discouraged. To generate certificates, download Sensu's certificate generator to the /tmp directory and generate the SSL certificates.
cd /tmp && wget http://sensuapp.org/docs/0.13/tools/ssl_certs.tar && tar -xvf ssl_certs.tar cd ssl_certs && ./ssl_certs.sh generate
Create a RabbitMQ SSL directory and copy over the certificates.
sudo mkdir -p /etc/rabbitmq/ssl && sudo cp /tmp/ssl_certs/sensu_ca/cacert.pem /tmp/ssl_certs/server/cert.pem /tmp/ssl_certs/server/key.pem /etc/rabbitmq/ssl
Create and edit the /etc/rabbitmq/rabbitmq.config file.
sudo vi /etc/rabbitmq/rabbitmq.config

Add the following lines to the file. This configures the RabbitMQ SSL listener to listen on port 5671 and to use the generated certificate authority and server certificate. It will also verify the connection and fail if there is no certificate.

[
{rabbit, [
{ssl_listeners, [5671]},
{ssl_options, [{cacertfile,"/etc/rabbitmq/ssl/cacert.pem"},
{certfile,"/etc/rabbitmq/ssl/cert.pem"},
{keyfile,"/etc/rabbitmq/ssl/key.pem"},
{verify,verify_peer},
{fail_if_no_peer_cert,true}]}
]}
].


Restart RabbitMQ.
sudo service rabbitmq-server restart

Create a RabbitMQ virtual host and user for Sensu. Change the password (pass). You'll need this password later when you configure the Sensu server and the clients to be monitored.
sudo rabbitmqctl add_vhost /sensu
sudo rabbitmqctl add_user sensu pass
sudo rabbitmqctl set_permissions -p /sensu sensu ".*"".*"".*"


Install Redis.
sudo apt-get -y install redis-server

The Redis service should start automatically. If it doesn't, start it with the following command. (Note that if Redis is already running you will receive the error: "Starting redis-server: failed.")
sudo service redis-server start

Add the sources and keys to install Sensu.
wget -q http://repos.sensuapp.org/apt/pubkey.gpg -O- | sudo apt-key add - echo "deb http://repos.sensuapp.org/apt sensu main" | sudo tee -a /etc/apt/sources.list.d/sensu.list
Install Sensu and Uchiwa (Uchiwa is the monitoring dashboard).
sudo apt-get update && sudo apt-get install -y sensu uchiwa

Sensu needs the secure connection information to RabbitMQ. Make an SSL directory for Sensu and copy over the generated certs.
sudo mkdir -p /etc/sensu/ssl && sudo cp /tmp/ssl_certs/client/cert.pem /tmp/ssl_certs/client/key.pem /etc/sensu/ssl
Now all of the components for Sensu monitoring are installed.

Step Two — Configuration on the Master

Now we need to configure Sensu. We'll create individual configuration files in the /etc/sensu/conf.d folder for easier readability and management. Unless you've configured the services and components mentioned in the config files on separate machines, you can leave most sample values shown below unchanged. Alternately, /etc/sensu/config.json.example<^> is another example configuration file you can copy and use to configure Sensu.

Create and edit the rabbitmq.json file.
sudo vi /etc/sensu/conf.d/rabbitmq.json

Add the following lines, which will allow Redis to connect securely to the RabbitMQ instance using your SSL certificate. The user and pass should be the ones you set for the RabbitMQ virtual host.
{
"rabbitmq": {
"ssl": {
"cert_chain_file": "/etc/sensu/ssl/cert.pem",
"private_key_file": "/etc/sensu/ssl/key.pem"
},
"host": "localhost",
"port": 5671,
"vhost": "/sensu",
"user": "sensu",
"password": "pass"
}
}


Create and edit the redis.json file.
sudo vi /etc/sensu/conf.d/redis.json

Add the following lines, which include the connection information for Sensu to access the Redis instance.
{
"redis": {
"host": "localhost",
"port": 6379
}
}


Create and edit the api.json file.
sudo vi /etc/sensu/conf.d/api.json

Add the following lines, which include the connection information for Sensu to access the API service.
{
"api": {
"host": "localhost",
"port": 4567
}
}


Create and edit the uchiwa.json file.
sudo vi /etc/sensu/conf.d/uchiwa.json

Add the following lines. These include the connection information for the Uchiwa dashboard to access the Sensu API. You can optionally create a username and password in the uchiwa block for dashboard authentication. If you want the dashboard to be publicly accessible, just leave it as is.
{
"sensu": [
{
"name": "Sensu",
"host": "localhost",
"ssl": false,
"port": 4567,
"path": "",
"timeout": 5000
}
],
"uchiwa": {
"port": 3000,
"stats": 10,
"refresh": 10000
}
}


In this example, we'll have the Sensu master server monitor itself as a client. So, create and edit the client.json file.
sudo vi /etc/sensu/conf.d/client.json

Add the following lines and edit the name value for the Sensu client. This is the name for the server that you will see in the Uchiwa dashboard. The name cannot have spaces or special characters.
 
You can leave the address value as localhost since we are monitoring this server. We will be creating a similar file again later for every client host to be monitored.
{
"client": {
"name": "server",
"address": "localhost",
"subscriptions": [ "ALL" ]
}
}


Enable the Sensu services to start automatically.
sudo update-rc.d sensu-server defaults
sudo update-rc.d sensu-client defaults
sudo update-rc.d sensu-api defaults
sudo update-rc.d uchiwa defaults


Start the Sensu services.
sudo service sensu-server start
sudo service sensu-client start
sudo service sensu-api start
sudo service uchiwa start


At this point, you can access Sensu at http://ip-address:3000.


Step Three — Installation on the Client

You will need to install Sensu on every client machine to be monitored.

While still on the Sensu master server, copy the SSL certificates to the client server's /tmp folder using
SCP. Replace user and IP below with the sudo user and IP address of the client server.
scp /tmp/ssl_certs/client/cert.pem /tmp/ssl_certs/client/key.pem user@ip:/tmp
On the client to be monitored, add the Sensu key and source.
wget -q http://repos.sensuapp.org/apt/pubkey.gpg -O- | sudo apt-key add - echo "deb http://repos.sensuapp.org/apt sensu main" | sudo tee -a /etc/apt/sources.list.d/sensu.list
Install Sensu.
sudo apt-get update && sudo apt-get -y install sensu

You need to provide the client with connection information to RabbitMQ. Make an SSL directory for Sensu and copy the certificates in the /tmp folder that were copied from the Sensu master server.
sudo mkdir -p /etc/sensu/ssl && sudo cp /tmp/cert.pem /tmp/key.pem /etc/sensu/ssl
Create and edit the rabbitmq.json file.
sudo vi /etc/sensu/conf.d/rabbitmq.json

Add the following lines. Edit the host value to use the IP address of the RabbitMQ server; that is, the IP address of the Sensu master server. The user and password values should be the ones you set for the
RabbitMQ virtual host on the Sensu master server.
 
{
"rabbitmq": {
"ssl": {
"cert_chain_file": "/etc/sensu/ssl/cert.pem",
"private_key_file": "/etc/sensu/ssl/key.pem"
},
"host": "1.1.1.1",
"port": 5671,
"vhost": "/sensu",
"user": "sensu",
"password": "pass"
}
}


Provide configuration information for this Sensu server by creating and editing the client.json file.
sudo vi /etc/sensu/conf.d/client.json

Add the following lines. You should edit the name value to what you want this server to be called in the Uchiwa dashboard. The name cannot have spaces or special characters.
 
You can leave the address value set to localhost, since we are monitoring this Sensu client server.
{
"client": {
"name": "client1",
"address": "localhost",
"subscriptions": [ "ALL" ]
}
}


Enable and start the client.
sudo update-rc.d sensu-client defaults

sudo service sensu-client start
You should now see the client on the Clients tab on the Sensu Dashboard.

Step Four — Set Up a Check

Now that Sensu is running we need to add a check on both servers. We're going to create a Ruby script that will check if Apache is running.

If you don't have Apache installed, install it now on both the Sensu master server and the Sensu client server.
sudo apt-get install -y apache2

Apache should be running by default on both servers.

Before installing the sensu-plugin gem, make sure you have all the required libraries. Install the Ruby libraries and the build-essential library on both the Sensu master server and the Sensu client server.
sudo apt-get install -y ruby ruby-dev build-essential

Install the sensu-plugin gem on both the Sensu master server and the Sensu client server.
sudo gem install sensu-plugin

Create a check-apache.rb file in the Sensu plugins folder and modify the file permissions on both the Sensu master server and the Sensu client server.
sudo touch /etc/sensu/plugins/check-apache.rb && sudo chmod 755 /etc/sensu/plugins/check-apache.rb
Edit the check-apache.rb file on both the Sensu master server and the Sensu client server.
sudo vi /etc/sensu/plugins/check-apache.rb

Add the following lines, which script the process of checking Apache.
#!/usr/bin/env ruby

procs = `ps aux`
running = false
procs.each_line do |proc|
running = true if proc.include?('apache2')
end
if running
puts 'OK - Apache daemon is running'
exit 0
else
puts 'WARNING - Apache daemon is NOT running'
exit 1
end


Create and edit the check_apache.json file on only the Sensu master server.
sudo vi /etc/sensu/conf.d/check_apache.json

Add the following lines that will run the script to check Apache every 60 seconds.
{
"checks": {
"apache_check": {
"command": "/etc/sensu/plugins/check-apache.rb",
"interval": 60,
"subscribers": [ "ALL" ]
}
}
}


Restart the Sensu server and API on the Sensu master server.
sudo service sensu-server restart && sudo service sensu-api restart

Restart the Sensu client on the Sensu client server.
sudo service sensu-client restart

After a few minutes, you should see the check appear on the "Checks" tab in the Sensu Dashboard.
Stop the Apache service on either server to test that the script is working.
sudo service apache2 stop

An alert should show up on the Events dashboard after a few minutes. Click on the alert to view more information and to take action such as silencing or resolving it.

In this image, Apache has been stopped on the client server. This is the Clients page.


Start the Apache service to stop the warnings.
sudo service apache2 start
 

Step Five — Set Up a Handler

Handlers can send notification emails or send data to other applications like Graphite based on events. Here, we will create a handler that sends an email if the Apache check fails. Please note that your server needs to be configured to send email.

On the Sensu master server, create and edit the handler_email.json file.
sudo vi /etc/sensu/conf.d/handler_email.json

Add the following lines, replacing email@address.com with the email address where you want to receive notifications. Depending on your mail server setup, it may be easiest to set this to an alias for a user on the Sensu master server. This handler is called "email" and will use the mail utility to send an alert email with the subject "sensu event" to the specified email address.
{
"handlers": {
"email": {
"type": "pipe",
"command": "mail -s 'sensu event'email@address.com"
}
}
}


Edit the check_apache.json.
sudo vi /etc/sensu/conf.d/check_apache.json

Add the new handlers line with the email handler in the apache_check block.

{
"checks": {
"apache_check": {
"command": "/etc/sensu/plugins/check-apache.rb",
"interval": 60,
"handlers": ["default", "email"],
"subscribers": [ "ALL" ]
}
}
}


Restart sensu-api and sensu-server.
sudo service sensu-api restart && sudo service sensu-server restart

Stop the Apache service again to test the email alert. You should get one every 60 seconds.
sudo service apache2 stop

Your email should look somewhat like the following:
 
Return-Path: 
...
Subject: sensu event
To:
...
From: sensu@sensu-master (Sensu Monitoring Framework)

{"id":"481c85c4-485d-4f25-b835-cea5aef02c69","client":{"name":"Sensu-Master-Server","address":"localhost","subscriptions":["ALL"],"version":"0.13.1","timestamp":1411681990},"check":{"command":"/etc/sensu/plugins/check-apache.rb","interval":60,"handlers":["default","email"],"subscribers":["ALL"],"name":"apache_check","issued":1411682001,"executed":1411682001,"duration":0.023,"output":"WARNING - Apache daemon is NOT running\n","status":1,"history ["0","0","0","0","0","0","0","0","0","0","0","0","0","0","0","0","0","0","0","0","1"]},"occurrences":1,"action":"create"}

Start the Apache service again to stop receiving email alerts. 
sudo service apache2 start
 

Conclusion

Sensu is a versatile monitoring tool with its plugins and the custom scripts you can write for it. You can also create handlers to do almost anything with the data. Keep exploring to get it just right for you.

vCloud Automation Center (vCAC 6.0) Installation Part 1 – Overview of vCAC

$
0
0
In this Modern Enterprise environment, Datacenters are occupied by hardware and software components from multiple vendors. Even some companies have hardware from multiple vendors like HP, DELL,Cisco etc and even mutli vendor hypervisors like vSphere, Hyper-V, Cirtix ZEN, Redhat KVM. How do you manage and provision using all this platform. It is real pain of using multiple admin portals to manage and provision.

vCloud Automation Center provides a secure portal where authorized administrators, developers or business users can request new IT services and manage specific cloud and IT resources, while ensuring compliance with business policies. Requests for IT service, including infrastructure, applications, desktops,and many others, are processed through a common service catalog to provide a consistent user experience. 


VMware vCloud Automation Center™ is a cloud management platform that reduces the complexity of provisioning virtual, cloud,and physical machines. VMware vCloud Automation Center (vCAC)™ is used to create and manage a multivendor cloud infrastructure.  Below are the inbuilt  endpoints which are available as part of vCAC 6.0:

Hardware:
  • HP
  • Dell
  • Cisco
Hypervisors:
  • VMware vSphere
  • Microsoft Hyper-V
  • Citrix Xen Server
  • Redhat KVM
Cloud Platforms:
  • vCloud Director
  • vCloud Hybrid Service
  • Amazon Web Services(AWS)
  • OpenStack
  • Windows Azure
Orchestration
  • VMware Orchestrator
Storage Endpoint:
  • Netapp ONTAP
Application Endpoint:
  • vCloud APP Director
Apart from the above list, You will be able to manage various custom endpoints like Active directory. vCloud Automation Center enables IT administrators to extend out-of-the-box capabilities. IT administrators can either integrate these capabilities with existing tools and infrastructure or new IT services by leveraging VMware vCenter Orchestrator library workflows and partner-provided plug-ins.


vCloud Automation Center accelerates the deployment and management of applications and compute services, thereby improving business agility and operational efficiency. The following capabilities empower IT to quickly demonstrate the value of deploying an automated, on-demand cloud infrastructure:

Comprehensive Purpose-Built Functionality
vCloud Automation Center is a purpose-built, enterprise-proven solution for the delivery and ongoing management of private and hybrid cloud services, based on a broad range of deployment use cases from the world’s most demanding environments.

Personalized, Business-Aware Governance
Enable IT administrators to apply their own way of doing business to the cloud without changing organizational processes or policies. Enterprises gain the flexibility needed for business units to have different service levels, policies and automation processes, as appropriate for their needs.

Provision and Manage Application Services
Accelerate application deployment by streamlining the deployment process and by eliminating duplication of work using reusable components and blueprints.

Infrastructure Delivery and Life-Cycle Management
Automates the end-to-end deployment of multi-vendor infrastructure, breaking down internal organizational silos that slow down IT service delivery.

Extensible by Design
vCloud Automation Center provides a full spectrum of extensibility options that empower IT personnel to enable, adapt and extend their cloud to work within their existing IT infrastructure and processes, thereby eliminating expensive service engagements while reducing risk.


 Take a look at the VMware’s Official Video “Introduction to vCloud Automation Center 6.0″

vCloud Automation Center (vCAC 6.0) Installation Part 2 – Components of vCAC

$
0
0
vCloud Automation Center vCAC 6.0 required 3 important components. We should install and configure the below 3 components  and its sub components properly to make use of vCAC website to provision and manage the cloud services along with authoring, administration and governance. ITBM and vCloud Application Director are add-on optional components. ITBM(IT Business Management) helps you to examine the financial data of your infrastructure. vCloud Application Director delivers the application services.


It should be installed and configured in the below order:

1.Identity Appliance– The Identity Appliance is a pre-configured virtual appliance that provides single sign-on for vCloud Automation Center. It is delivered as an open virtualization format (OVF) template. You can also use the SSO services from VMware vCenter Deployment If you are running vSphere 5.5 Update 1

2. vCloud Automation Center Appliance– The vCloud Automation Center Appliance is a pre-configured virtual appliance(OVF) that deploys the vCloud Automation Center Appliance server. It provides the Single portal for self-service provisioning and management of cloud services , as well as authoring,administration and governance. For High Availbality of Portal,you can deploy multiple instances of vCloud Automation Center appliance behind Load balancers

3. Iaas Components Server (Should be installed on Windows Server and MS SQL Database is Mandatory) : Infrastructure as a Service (Iaas)enables the rapid modeling and provisioning of servers and desktops across virtual and physical,private and public, or hybrid cloud infrastructures. Iaas Components of vCAC includes multiple component:


  • IaaS Website
  • Distributed Execution Managers(DEM)
  • Agents
  • Model Manager
  • Manager Service
  • Database
IaaS Website : provides the infrastructure administration and service authoring capabilities to the vCloud Automation Center console. The Website component communicates with the Model Manager, which provides it with updates from the Distributed Execution Manager (DEM), proxy agents and database.

Model Manager : The Model Manager communicates and integrates with external systems and databases. Models included in the Model Manager implement business logic that is executed by a DEM. The ModelManager provides services and utilities for persisting, versioning,securing, and distributing model elements. The Model Manager communicates with a Microsoft SQL Server database, the DEMs, and the console Web site.


Distributed Execution Managers :DEM executes the business logic of custom models, interacting with the IaaS database andexternal databases. Proxy agents – virtualization, integration and WMI agents that communicate with infrastructure resources DEM instances can be deployed in one of two forms:

DEM Orchestrator
  • • Preprocesses workflows, schedules workflows, and monitors DEM Worker instances.
  • • Only one DEM Orchestrator is active at a given time. A standby should be deployed for redundancy.
DEM Worker
  • • Communicates with the external systems
  • • Responsible for executing workflows
Manager Service : The Manager Service coordinates communication between agents,the IaaS database, Active Directory (or LDAP), and SMTP. The Manager Service communicates with the console Web site through the Model Manager.

Agents: Agents, like DEMs, are used to integrate vCloud Automation Center with external systems:
  • Virtualization proxy agents are used to collect data from and provision virtual machines on virtualization hosts, for example, a Hyper-V agent,a vSphere agent, or a Xen agent.
  • Integration agents provide vCloud Automation Center integration with virtual desktop systems, for example, an EPI Windows PowerShell agent, or a VDI Windows PowerShell agent.
  • Windows Management Instrumentation agents enable data collection from Windows machines managed by vCloud Automation Center

vCloud Automation Center (vCAC 6.0) Installation Part 3 – Deploy VMware Identity Appliance

$
0
0
First Step before deploying vCloud automation Center vCAC (6.0) is deploying VMware Identity Appliance.VMware Identity Appliance provides single sign-on (SSO) for vCloud Automation Center. Multiple instances of Identity appliance can be deployed for availability purposes.You can use the SSO services from the VMware vCenter ™deployment, if you are running vSphere 5.5 Update 1. Identity appliance is not a mandatory requirement. 

You can use the existing SSO which should be vSphere 5.5 Update 1.With single sign-on (SSO), Active Directory users who are granted access to the vCloud Automation Center portal can log in l with their AD credentials.The Identity Appliance can be deployed using OVA (Open Virtualization Format).

Ensure you have downloaded  vCAC ID Virtual Appliance (SSO) from VMware Website. Connect your vCenter Server using vSphere Web Client. Right-Click on the Cluster where you want to deploy the vCAC ID appliance and Select “Deploy OVF Template”.  and browse towards the directory of vCAC ID appliance OVA file.


Verify the Product name and Version to ensure you are deploying the appropriate version of VMware Identity Appliance and Click on Next.


Click on “Accept” to accept the end user license agreements and click on Next to continue.


Specify the Name and Location for the Identity Appliance and Click on Next.


Select the  Virtual Disk Format and Datastore location to place the identity appliance. Click on Next.


Select the PortGroup from the Drop-down to connect the network for the identity appliance and Click on Next.


Enter the Below details to customize the deployment properties of Identity appliance and Click on Finish to start the  Identity Appliance deployment.
  • Enter Root Password
  •  Hostname
  • Default Gateway
  • DNS
  • IP Addresss
  • IP NetMask

Once Identity Appliance Deployment is completed. You will be able to see the Identity appliance VM under the specified cluster with IP address and hostname configured during the deployment.


Open the VM Console of the Identity Appliance VM to ensure it is properly booted and note down the URL of the Identity appliance admin page URL. Default URL is https://:5480


Access the Identity appliance Admin Page using the URL https://:5480 “ and Login with root and credentials specified during the OVF deployment.


Click on Admin tab and Select Time Settings. It is recommended to keep your time synced with NTP server.  Enter the Time server details and click on Save Settings.

 
 Click on System and Select the System Time Zone from the drop down and click on Save settings.


Configure the SSO by entering the password for the SSO system domain “vsphere.local” and click on Apply. Ensure that SSO status is changed to “Running”.


In the host settings tab, type FQDN of identity appliance and append SSO port 7444 to host name, In My case, vcac-id.techsupportpk.com:7444and click on Apply.


Generate the Self signed Certificate or import the Signed Certificate. Select General Self Signed Certificate from the Choose Action drop down menu and click on Replace Certificate. Ensure Status is changed to SSL Certificate is replaced successfully.


Configure the Active Directory authentication  under SSO Tab -> Active Directory. Enter the Domain Name , Domain credentials and click on “Join AD Domain” to join the VMware Identity appliance to Active Directory.

 
Thats’it. We are done with configuring VMware Identity Appliance and we are now ready to deploy vCAC appliance. I hope this is informative for you. 

How To Measure MySQL Query Performance with mysqlslap

$
0
0
MySQL comes with a handy little diagnostic tool called mysqlslap that's been around since version 5.1.4. It's a benchmarking tool that can help DBAs and developers load test their database servers.

mysqlslap can emulate a large number of client connections hitting the database server at the same time. The load testing parameters are fully configurable and the results from different test runs can be used to fine-tune database design or hardware resources.

In this article we will learn how to use mysqlslap to load test a MySQL database with some basic queries and see how benchmarking can help us fine-tune those queries. After some basic demonstrations, we will run through a fairly realistic test scenario where we create a copy of an existing database for testing, glean queries from a log, and run the test from a script.


The commands, packages, and files shown in this tutorial were tested on CentOS 7. The concepts remain the same for other distributions.

What size server should I use?

If you're interested in benchmarking a specific database server, you should test on a server with the same specifications and with an exact copy of your database installed. If you want to run through this tutorial for learning purposes and execute every command in it, we recommend at least a 2 GB memory.

As the commands in this tutorial are meant to tax the server, you may find that they time out on a smaller server. The sample output in this tutorial was produced in a variety of ways to optimize the examples for teaching.

Step One — Installing MySQL Community Server on a Test System

We will begin by installing a fresh copy of MySQL Community Server on a test database. You should not run any commands or queries from this tutorial on a production database server.
These tests are meant to stress the test server and could cause lag or downtime on a production server. This tutorial was tested with the following environment:
  • CentOS 7
  • Commands executed by a sudo user
  • 2 GB machine recommended; keep in mind that the benchmark results shown in this tutorial were produced for teaching purposes and do not reflect specific TechSupport benchmarks
First, we will create a directory to hold all the files related to this tutorial. This will help keep things tidy. Navigate into this directory:

sudo mkdir /mysqlslap_tutorial
cd /mysqlslap_tutorial

Next, we will download the MySQL Community Release yum repository. The repository we are downloading is for Red Hat Enterprise Linux 7 which works for CentOS 7:
sudo wget http://dev.mysql.com/get/mysql-community-release-el7-5.noarch.rpm

Next, we can run the rpm -Uvh command to install the repository:
sudo rpm -Uvh mysql-community-release-el7-5.noarch.rpm

Check that the repositories have been installed by looking at the contents of the /etc/yum.repos.d folder:
sudo ls -l /etc/yum.repos.d

The output should look like this:
-rw-r--r--. 1 root root 1612 Jul  4 21:00 CentOS-Base.repo
-rw-r--r--. 1 root root 640 Jul 4 21:00 CentOS-Debuginfo.repo
-rw-r--r--. 1 root root 1331 Jul 4 21:00 CentOS-Sources.repo
-rw-r--r--. 1 root root 156 Jul 4 21:00 CentOS-Vault.repo
-rw-r--r--. 1 root root 1209 Jan 29 2014 mysql-community.repo
-rw-r--r--. 1 root root 1060 Jan 29 2014 mysql-community-source.repo

We can also check that the correct MySQL release is enabled for installation:
sudo yum repolist enabled | grep mysql

In our case, MySQL 5.6 Community Server is what we wanted:
mysql-connectors-community/x86_64       MySQL Connectors Community           10
mysql-tools-community/x86_64 MySQL Tools Community 6
mysql56-community/x86_64 MySQL 5.6 Community Server 64

Install the MySQL Community Server:
sudo yum install mysql-community-server

Once the process completes, let's check the components intalled:
sudo yum list installed | grep mysql

The list should look like this:
mysql-community-client.x86_64      5.6.20-4.el7      @mysql56-community
mysql-community-common.x86_64 5.6.20-4.el7 @mysql56-community
mysql-community-libs.x86_64 5.6.20-4.el7 @mysql56-community
mysql-community-release.noarch el7-5 installed
mysql-community-server.x86_64 5.6.20-4.el7 @mysql56-community

Next we need to make sure the MySQL daemon is running and is starting automatically when the server boots. Check the status of the mysqld daemon.
sudo systemctl status mysqld.service

If it's stopped, it will show this output:
mysqld.service - MySQL Community Server
Loaded: loaded (/usr/lib/systemd/system/mysqld.service; disabled)
Active: inactive (dead)

Start the service:
sudo systemctl start mysqld.service

Make sure it is configured to auto-start at boot time:
sudo systemctl enable mysqld.service

Finally, we have to secure MySQL:
sudo mysql_secure_installation

This will bring up a series of prompts. We'll show the prompts below, with answers you should input in red. At the beginning there is no password for the MySQL root user, so just press Enter.

At the prompts you'll need to provide a new secure root password which you should choose yourself. You should answer y to remove the anonymous database user account, disable the remote root login, reload the privilege tables, etc.:
...
Enter current password for root (enter for none):
OK, successfully used password, moving on...
...
Set root password? [Y/n] y
New password:
Re-enter new password:
Password updated successfully!
Reloading privilege tables..
... Success!
...
Remove anonymous users? [Y/n] y
... Success!
...
Disallow root login remotely? [Y/n] y
... Success!
Remove test database and access to it? [Y/n] y
- Dropping test database...
... Success!
...
Reload privilege tables now? [Y/n] y
... Success!
Cleaning up...

We can now connect to the database and make sure everything is working:
sudo mysql -h localhost -u root -p

Enter the root MySQL password you just set at the prompt. You should see output like the following:
Enter password:
Welcome to the MySQL monitor....

mysql>

At the mysql> prompt, enter the command to view all of your databases:
show databases;

You should see output like the following:
+--------------------+
| Database |
+--------------------+
| information_schema |
| mysql |
| performance_schema |
+--------------------+
3 rows in set (0.00 sec)

Finally, let's create a user account called sysadmin. This account will be used to log in to MySQL instead of the root user. Be sure to replace mypassword with your own password for this user. We will also grant all privileges to this account. At the MySQL prompt, enter these commands:
create user sysadmin identified by 'mypassword';

Output:
Query OK, 0 rows affected (0.00 sec)

Grant the privileges:
grant all on *.* to sysadmin;

Output:
Query OK, 0 rows affected (0.01 sec)

Let's go back to the operating system prompt for now:
quit;

Output:
Bye

Step Two — Installing a Sample Database

Next, we need to install a sample database for testing. This database is called employees and it's freely accessible from the MySQL web site. The database can also be downloaded from Launchpad. The employees database was developed by Patrick Crews and Giuseppe Maxia. The original data was created by Fusheng Wang and Carlo Zaniolo at Siemens Corporate Research.

We are choosing the employees database because it features a large data set. The database structure is simple enough: it's got only six tables; but the data it contains has more than 3,000,000 employee records (the salaries table itself has nearly three million rows). This will help us emulate a more realistic production workload.

First, let's make sure we're in the /mysqlslap_tutorial directory:
cd /mysqlslap_tutorial

Download the latest version of the employees sample database:
sudo wget https://launchpad.net/test-db/employees-db-1/1.0.6/+download/employees_db-full-1.0.6.tar.bz2

Install the bzip2 tool so we can unzip the archive:
sudo yum install bzip2

Unzip the database archive. This will take a minute. We are doing it in two steps here:
sudo bzip2 -dfv employees_db-full-1.0.6.tar.bz2
sudo tar -xf employees_db-full-1.0.6.tar

The contents will be uncompressed into a separate, new directory called employees_db. We need to navigate into this directory to run the query that installs the database. The contents include a README document, a change log, data dumps, and various SQL query files that will create the database structures:
cd employees_db
ls -l

Here's what you should see:
-rw-r--r--. 1 501 games       752 Mar 30  2009 Changelog
-rw-r--r--. 1 501 games 6460 Oct 9 2008 employees_partitioned2.sql
-rw-r--r--. 1 501 games 7624 Feb 6 2009 employees_partitioned3.sql
-rw-r--r--. 1 501 games 5660 Feb 6 2009 employees_partitioned.sql
-rw-r--r--. 1 501 games 3861 Nov 28 2008 employees.sql
-rw-r--r--. 1 501 games 241 Jul 30 2008 load_departments.dump
-rw-r--r--. 1 501 games 13828291 Mar 30 2009 load_dept_emp.dump
-rw-r--r--. 1 501 games 1043 Jul 30 2008 load_dept_manager.dump
-rw-r--r--. 1 501 games 17422825 Jul 30 2008 load_employees.dump
-rw-r--r--. 1 501 games 115848997 Jul 30 2008 load_salaries.dump
-rw-r--r--. 1 501 games 21265449 Jul 30 2008 load_titles.dump
-rw-r--r--. 1 501 games 3889 Mar 30 2009 objects.sql
-rw-r--r--. 1 501 games 2211 Jul 30 2008 README
-rw-r--r--. 1 501 games 4455 Mar 30 2009 test_employees_md5.sql
-rw-r--r--. 1 501 games 4450 Mar 30 2009 test_employees_sha.sql

Run this command to connect to MySQL and run the employees.sql script, which will create the database and load the data:
sudo mysql -h localhost -u sysadmin -p -t < employees.sql

At the prompt, enter the password you created for the sysadmin MySQL user in the previous section.
The process output will look like this. It will take a minute or so to run:
+-----------------------------+
| INFO |
+-----------------------------+
| CREATING DATABASE STRUCTURE |
+-----------------------------+
+------------------------+
| INFO |
+------------------------+
| storage engine: InnoDB |
+------------------------+
+---------------------+
| INFO |
+---------------------+
| LOADING departments |
+---------------------+
+-------------------+
| INFO |
+-------------------+
| LOADING employees |
+-------------------+
+------------------+
| INFO |
+------------------+
| LOADING dept_emp |
+------------------+
+----------------------+
| INFO |
+----------------------+
| LOADING dept_manager |
+----------------------+
+----------------+
| INFO |
+----------------+
| LOADING titles |
+----------------+
+------------------+
| INFO |
+------------------+
| LOADING salaries |
+------------------+

Now you can log into MySQL and run some basic queries to check that the data was imported successfully.
sudo mysql -h localhost -u sysadmin -p

Enter the password for the sysadmin MySQL user.
Check the list of databases for the new employees database:
show databases;

Output:
+--------------------+
| Database |
+--------------------+
| information_schema |
| employees |
| mysql |
| performance_schema |
+--------------------+
4 rows in set (0.01 sec)

Use the employees database:
use employees;

Check the tables in it:
show tables;

Output:
+---------------------+
| Tables_in_employees |
+---------------------+
| departments |
| dept_emp |
| dept_manager |
| employees |
| salaries |
| titles |
+---------------------+
6 rows in set (0.01 sec)

If you want to, you can check the details for each of these tables. We'll just check the information for the titles table:
describe titles;

Output:
+-----------+-------------+------+-----+---------+-------+
| Field | Type | Null | Key | Default | Extra |
+-----------+-------------+------+-----+---------+-------+
| emp_no | int(11) | NO | PRI | NULL | |
| title | varchar(50) | NO | PRI | NULL | |
| from_date | date | NO | PRI | NULL | |
| to_date | date | YES | | NULL | |
+-----------+-------------+------+-----+---------+-------+
4 rows in set (0.01 sec)

Check the number of entries:
mysql> select count(*) from titles;
+----------+
| count(*) |
+----------+
| 443308 |
+----------+
1 row in set (0.14 sec)

Check any of the other data you want. We can now go back to our operating system prompt:
quit;
 

Step Three — Using mysqlslap

We can now start using mysqlslap. mysqlslap can be invoked from a regular shell prompt so there's no need to explicitly log in to MySQL. For this tutorial, though, we will open another terminal connection to our Linux server and start a new MySQL session from there with the sysadmin user we created before, so we can check and update a few things in MySQL more easily. So, we'll have one prompt open with our sudo user, and one prompt logged into MySQL.

Before we get into specific commands for testing, you may want to take a look at this list of the most useful mysqlslap options. This can help you design your own mysqlslap commands later.

OptionWhat it means
--userMySQL username to connect to the database server
--passwordPassword for the user account. It's best to leave it blank in command line
--hostMySQL database server name
--portPort number for connecting to MySQL if the default is not used
--concurrencyThe number of simultaneous client connections mysqlslap will emulate
--iterationsThe number of times the test query will be run
--create-schemaThe database where the query will be run
--queryThe query to execute. This can either be a SQL query string or a path to a SQL script file
--createThe query to create a table. Again, this can be a query string or a path to a SQL file
--delimiterThe delimiter used to separate multiple SQL statements
--engineThe MySQL database engine to use (e.g., InnoDB)
--auto-generate-sqlLets MySQL perform load testing with its own auto-generated SQL command

Use Case: Benchmarking with Auto-generated SQL and Data

We will begin by using mysqlslap's auto-generate-sql feature. When we use auto-generated SQL, mysqlslap will create a separate temporary database - aptly called mysqlslap. This database will have a simple table in it with one integer and one varchar type column populated with sample data. This can be a quick and easy way to check the overall performance of the database server.

We start by testing a single client connection doing one iteration of an auto-generated SQL:
sudo mysqlslap --user=sysadmin --password --host=localhost  --auto-generate-sql --verbose

The output should look like this:
Benchmark
Average number of seconds to run all queries: 0.009 seconds
Minimum number of seconds to run all queries: 0.009 seconds
Maximum number of seconds to run all queries: 0.009 seconds
Number of clients running queries: 1
Average number of queries per client: 0

mysqlslap reports a few benchmarking statistics as shown in the output. It reports the average, minimum, and maximum number of seconds it took to run the query. We can also see that the number of client connections used for this load test was one.

Now try 50 concurrent connections, and have the auto-generated query run 10 times:
sudo mysqlslap --user=sysadmin --password --host=localhost  --concurrency=50 --iterations=10 --auto-generate-sql --verbose

What this command means is that fifty simulated client connections will each throw the same test query at the same time, and this test will be repeated ten times.

The output shows us a marked difference with the increased load:
Benchmark
Average number of seconds to run all queries: 0.197 seconds
Minimum number of seconds to run all queries: 0.168 seconds
Maximum number of seconds to run all queries: 0.399 seconds
Number of clients running queries: 50
Average number of queries per client: 0

Note how the Number of clients running queries: field is now showing a value of 50. The average number of queries per client is zero.

Auto-generated SQL creates a simple table with two fields. In most production environments the table structures will be much larger than that. We can instruct mysqlslap to emulate this by adding additional fields to the test table. To do so, we can make use of two new parameters: --number-char-cols and --number-int-cols. These parameters specify the number of varchar and int types of columns to add to the test table.

In the following example, we are testing with an auto-generated SQL query that runs against a table with 5 numeric columns and 20 character type columns. We are also simulating 50 client connections and we want the test to repeat 100 times:
sudo mysqlslap --user=sysadmin --password --host=localhost  --concurrency=50 --iterations=100 --number-int-cols=5 --number-char-cols=20 --auto-generate-sql --verbose

This one should take a bit longer. While the test is running, we can switch to the other terminal window where we have a MySQL session running and see what's going on. Note that if you wait too long, the test will complete and you won't be able to see the test database.

From the MySQL prompt:
show databases;

Note the mysqlslap database:
+--------------------+
| Database |
+--------------------+
| information_schema |
| employees |
| mysql |
| mysqlslap |
| performance_schema |
+--------------------+
5 rows in set (0.01 sec)

You can check the table in the test database if you want to; it's called t1.
Check your other terminal window again. When the test finishes, you'll find that the performance has slowed down even more with the increased load:
Benchmark
Average number of seconds to run all queries: 0.695 seconds
Minimum number of seconds to run all queries: 0.627 seconds
Maximum number of seconds to run all queries: 1.442 seconds
Number of clients running queries: 50
Average number of queries per client: 0

Go back to your MySQL terminal session. We can see that mysqlslap has dropped its throwaway database. At the MySQL prompt:
show databases;
+--------------------+
| Database |
+--------------------+
| information_schema |
| employees |
| mysql |
| performance_schema |
+--------------------+
4 rows in set (0.00 sec)
 

Use Case: Benchmarking with Custom Queries

Auto-generated SQL is good if you are evaluating the server's physical resources. It's useful when you want to find the level of load a given system can take.

When you want to troubleshoot performance for a specific database-dependent application, however, you'll want to test real queries on real data. These queries might be coming from your web or application server.
For now, we'll assume you know the specific query you want to test. In the next section we'll show you a way to find queries that are running on your server.

We will begin with in-line queries. You can give an in-line query to mysqlslap with the --query option. The SQL statements can't have line breaks in them, and they need to be delimited by semicolons (;). The queries also need to be enclosed in double quotes.

In the following code snippet we are running a simple query against the deptemp table. The `deptemp` table has more than three hundred thousand records. Note how we have specified the employees database with the --create-schema option:
sudo mysqlslap --user=sysadmin --password --host=localhost  --concurrency=50 --iterations=10 --create-schema=employees --query="SELECT * FROM dept_emp;" --verbose

This will take a while to run. You should receive a performance benchmark like this after a minute or two:
Benchmark
Average number of seconds to run all queries: 18.486 seconds
Minimum number of seconds to run all queries: 15.590 seconds
Maximum number of seconds to run all queries: 28.381 seconds
Number of clients running queries: 50
Average number of queries per client: 1

(Note: If this query hangs for more than ten minutes or does not give any output, you should try it again with a lower number for --concurrency and/or --iterations, or try it on a bigger server.)

Next, we will use multiple SQL statements in the --query parameter. In the following example we are terminating each query with a semicolon. mysqlslap knows we are using a number of separate SQL commands because we have specified the --delimiter option:
sudo mysqlslap --user=sysadmin --password --host=localhost  --concurrency=20 --iterations=10 --create-schema=employees --query="SELECT * FROM employees;SELECT * FROM titles;SELECT * FROM dept_emp;SELECT * FROM dept_manager;SELECT * FROM departments;" --delimiter=";" --verbose

This test uses the same number of connections and the same number of iterations. However, the performance was incrementally slower for multiple SELECT statements (averaging 23.8 seconds vs. 18.486 seconds):
Benchmark
Average number of seconds to run all queries: 23.800 seconds
Minimum number of seconds to run all queries: 22.751 seconds
Maximum number of seconds to run all queries: 26.788 seconds
Number of clients running queries: 20
Average number of queries per client: 5

Production SQL statements can be complicated. It's easier to add a complicated SQL statement to a script than to type it out for tests. So, we can instruct mysqlslap to read the query from a script file.

To illustrate this, let's create a script file from the SQL commands. We can use the code snippet below to create such a file:
sudo echo "SELECT * FROM employees;SELECT * FROM titles;SELECT * FROM dept_emp;SELECT * FROM dept_manager;SELECT * FROM departments;"> ~/select_query.sql

sudo cp ~/select_query.sql /mysqlslap_tutorial/
The select_query.sql file now holds all five SELECT statements.

Since this script has multiple queries, we can introduce a new testing concept. mysqlslap can parallelize the queries. We can do this by specifying the number of queries each test client should execute. mysqlslap does this with the --number-of-queries option. So, if we have 50 connections and 1000 queries to run, each client will execute approximately 20 queries each.

Finally, we can also use the --debug-info switch, which will give us an indication of the computing resources used.

In the following code snippet, we are asking mysqlslap to use the script file we just created. We are also specifying the number-of-queries parameter. The process will be repeated twice and we want debugging information in the output:
sudo mysqlslap --user=sysadmin --password --host=localhost  --concurrency=20 --number-of-queries=1000 --create-schema=employees --query="/mysqlslap_tutorial/select_query.sql" --delimiter=";" --verbose --iterations=2 --debug-info

After this command completes, we can see some interesting results:
Benchmark
Average number of seconds to run all queries: 217.151 seconds
Minimum number of seconds to run all queries: 213.368 seconds
Maximum number of seconds to run all queries: 220.934 seconds
Number of clients running queries: 20
Average number of queries per client: 50


User time 58.16, System time 18.31
Maximum resident set size 909008, Integral resident set size 0
Non-physical pagefaults 2353672, Physical pagefaults 0, Swaps 0
Blocks in 0 out 0, Messages in 0 out 0, Signals 0
Voluntary context switches 102785, Involuntary context switches 43

Here the average number of seconds to run all queries in our MySQL instance is 217 seconds, almost 4 minutes. While that was certainly affected by the amount of RAM and CPU available to our virtual machine, it was also due to the large number of queries from a moderate number of client connections repeating twice.

We can see there were a large number of non-physical page faults. Page faults happen when data cannot be found in memory and the system has to go and fetch it from the swap file on disk. The output also shows CPU-related information. In this case we see a large number of context switches.
 

Use Case: Practical Benchmarking Scenario and Capturing Live Queries

So far in our examples, we have been running queries against the original employees database. That's something DBAs certainly wouldn't want you to do. And there's a good reason for it. You don't want to add load your production database and you don't want to run test queries that might delete, update, or insert data into your production tables.

We'll show you how to make a backup of a production database and copy it to a testing environment. In this example it's on the same server, but you ideally you would copy it to a separate server with the same hardware capacity.

More importantly, we'll show you how to record queries live from the production database and add them to a testing script. That is, you'll get queries from the production database, but run tests against the test database.

The general steps are as follows, and you can use them for any mysqlslap test:

1. Copy the production database to a test environment.
2. Configure MySQL to record and capture all connection requests and queries on the production database.
3. Simulate the use case you are trying to test. For example, if you run a shopping cart, you should buy something to trigger all the appropriate database queries from your application.
4. Turn off query logging.
5. Look at the query log and make a list of the queries you want to test.
6. Create a test file for each query you want to test.
7. Run the tests.
8. Use the output to improve your database performance.

To start, let's create a backup of the employees database. We will create a separate directory for its backup:
sudo mkdir /mysqlslap_tutorial/mysqlbackup

cd /mysqlslap_tutorial/mysqlbackup

Create the backup and move it to the new directory:
sudo mysqldump --user sysadmin --password --host localhost employees > ~/employees_backup.sql

sudo cp ~/employees_backup.sql /mysqlslap_tutorial/mysqlbackup/

Go to your MySQL test server. Create the employees_backup database:
CREATE DATABASE employees_backup;

At this point, if you are using a separate server for testing, you should copy the employeesbackup.sql file over to it. From your main terminal session, import the backup data into the employeesbackup database:
sudo mysql -u sysadmin -p employees_backup < /mysqlslap_tutorial/mysqlbackup/employees_backup.sql

On your production MySQL database server, enable the MySQL general query log and provide a file name for it. The general query log captures connection, disconnection, and query activities for a MySQL database instance.
SET GLOBAL general_log=1, general_log_file='capture_queries.log';

Now run the queries that you want to test on the production MySQL server. In this example we will run a query from the command line. However, you may want to generate queries from your application instead of running them directly. If you have a slow process or website page that you want to test, you should run through that process or access that web page now. For example, if you are running a shopping cart, you may want to complete the checkout process now, which should trigger all the appropriate queries on the database server.

This is the query we will run on the production MySQL server. First use the right database:
USE employees;

Now run the query:
SELECT e.first_name, e.last_name, d.dept_name, t.title, t.from_date, t.to_date FROM employees e INNER JOIN  dept_emp de ON e.emp_no=de.emp_no INNER JOIN departments d ON de.dept_no=d.dept_no INNER JOIN titles t ON e.emp_no=t.emp_no ORDER BY  e.first_name, e.last_name, d.dept_name, t.from_date;

Expected output:
489903 rows in set (4.33 sec)

We will turn off general logging when the query completes:
SET GLOBAL general_log=0;

Note that if you leave logging on, queries will continue to be added to the log, which may make testing harder. So, make sure you disable the log right after finishing your test. Let's check that the log file was created in the /var/lib/mysql directory:
sudo ls -l /var/lib/mysql/capt*

-rw-rw----. 1 mysql mysql 861 Sep 24 15:09 /var/lib/mysql/capture_queries.log

Let's copy this file to our MySQL test directory. If you're using a separate server for testing, copy it to that server.
sudo cp /var/lib/mysql/capture_queries.log /mysqlslap_tutorial/

There should be quite a bit of data in this log file. In this example, the query we want should be near the end. Check the last part of the file:
sudo tail /mysqlslap_tutorial/capture_queries.log

Expected output:
         6294 Query show databases
6294 Query show tables
6294 Field List departments
6294 Field List dept_emp
6294 Field List dept_manager
6294 Field List employees
6294 Field List salaries
6294 Field List titles
140930 15:34:52 6294 Query SELECT e.first_name, e.last_name, d.dept_name, t.title, t.from_date, t.to_date FROM employees e INNER JOIN dept_emp de ON e.emp_no=de.emp_no INNER JOIN departments d ON de.dept_no=d.dept_no INNER JOIN titles t ON e.emp_no=t.emp_no ORDER BY e.first_name, e.last_name, d.dept_name, t.from_date
140930 15:35:06 6294 Query SET GLOBAL general_log=0

This log shows SQL commands and their timestamps. The SQL SELECT statement near the end of the file is what we are interested in. It should be exactly the same as the command we ran on the production database, since that's where we captured it.

In this example, we already knew the query. But, in a production environment, this method can be very useful for finding queries that you may not necessarily know about that are running on your server.

Note that if you ran or triggered different queries while logging, this file will look completely different. In a real scenario this file could be inundated with hundreds of entries coming from all different connections. Your goal is to find the query or queries that are causing a bottleneck. You can start by making a list of every line that includes the text Query. Then you'll have a list of exactly what queries were run on your database during the test.

For each query that you want to test, copy it into a file that ends with a .sql extension.
For example:
sudo vi /mysqlslap_tutorial/capture_queries.sql

The contents should be the MySQL query you want to test, without any line breaks and without a semicolon at the end:
SELECT e.first_name, e.last_name, d.dept_name, t.title, t.from_date, t.to_date FROM employees e INNER JOIN  dept_emp de ON e.emp_no=de.emp_no INNER JOIN departments d ON de.dept_no=d.dept_no INNER JOIN titles t ON e.emp_no=t.emp_no ORDER BY  e.first_name, e.last_name, d.dept_name, t.from_date

Next, make sure the query results are not cached. Go back to your test MySQL session. Run the following command:
RESET QUERY CACHE;

Now it's time to run the mysqlslap utility with the script file. Make sure you use the correct script file name in the --query parameter. We will use only ten concurrent connections and repeat the test twice. Run this from your test server:
sudo mysqlslap --user=sysadmin --password --host=localhost  --concurrency=10 --iterations=2 --create-schema=employees_backup --query="/mysqlslap_tutorial/capture_queries.sql" --verbose

The benchmark output looks like this in our system:
Benchmark
Average number of seconds to run all queries: 68.692 seconds
Minimum number of seconds to run all queries: 59.301 seconds
Maximum number of seconds to run all queries: 78.084 seconds
Number of clients running queries: 10
Average number of queries per client: 1
So how can we improve this benchmark?

You'll need a certain amount of familiarity with MySQL queries to assess what the query is doing.
Looking back at the query, we can see it's doing a number of joins across multiple tables. The query shows employee job histories and in doing so, it's joining different tables by the empno field. It's also using the deptno field for joining, but since there are only a few department records, we will ignore this. Since there are many empno entries in the database, it's logical to assume that creating indexes on the empno field could improve the query.

With a little practice, once you've located queries that are taxing the server (that's the part that mysqlslap helps with!), you'll be able to make assessments about the queries based on your knowledge of MySQL and your database.

Next, you can try to improve your database or the queries that are being executed on it.
In our case, let's add the indexes we mentioned above. We will create three indexes on empno. One index will be created on the empno field in the employees table, another index will be created on the empno field in the deptemp table, and the last one will be created on the emp_no field in the titles table.

Let's go to our test MySQL session and execute the following commands:
USE employees_backup;

CREATE INDEX employees_empno ON employees(emp_no);

CREATE INDEX dept_emp_empno ON dept_emp(emp_no);

CREATE INDEX titles_empno ON titles(emp_no);

Coming back to our main terminal window on the test server, if we execute mysqlslap with the same parameters, we will see a difference in the benchmark:
sudo mysqlslap --user=sysadmin --password --host=localhost  --concurrency=10 --iterations=2 --create-schema=employees_backup --query="/mysqlslap_tutorial/capture_queries.sql" --verbose
 
Benchmark
Average number of seconds to run all queries: 55.869 seconds
Minimum number of seconds to run all queries: 55.706 seconds
Maximum number of seconds to run all queries: 56.033 seconds
Number of clients running queries: 10
Average number of queries per client: 1

We can see that there is an immediate improvement in the average, minimum, and maximum time to execute the query. Instead of an average 68 seconds, the query now executes in 55 seconds. That's an improvement of 13 seconds for the same load.

Since this database change produced a good result in the test environment, you can now consider rolling it out to your production database server, although keep in mind that database changes typically have trade-offs in their advantages and disadvantages.

You can repeat the process of testing commands and improvements with all of the queries you gleaned from your log.
 

Troubleshooting - mysqlslap Doesn't Show Output

If you run a test command and don't get any output, this is a good indication that your server resources could be maxed out. Symptoms may include a lack of the Benchmark output, or an error like mysqlslap: Error when storing result: 2013 Lost connection to MySQL server during query.

You may want to try the test again with a smaller number in the --concurrency or --iterations parameter. Alternately, you can try upgrading your test server environment.

This can be a good way to find the outer limits of your database server's capacity.

Conclusion

mysqlslap is a simple, light-weight tool that's easy to use and that integrates natively with the MySQL database engine. It's available for all editions of MySQL from version 5.1.4.

In this tutorial we have seen how to use mysqlslap with its various options and played around with a sample database. You can download other sample databases from the MySQL site and practice with those too. As we mentioned before, please don't run tests on a production database server.

The last use case in this tutorial involved only one query. While we improved the performance of that query somewhat by adding extra indexes to all three tables, the process may not be so simple in real life. Adding extra indexes can sometimes degrade system performance and DBAs often need to weigh the benefits of adding an extra index against the performance cost it may incur.

Real life testing scenarios are more complex, but this should give you the tools to get started with testing and improving your database performance.

How To Set Up a Mirror Director with MirrorBrain on Ubuntu 14.04

$
0
0
Mirroring is a way of scaling a download site, so the download load can be spread across many servers in many parts of the world. Mirrors host copies of the files and are managed by a mirror director. A mirror director is the center of any mirror system. It is responsible for directing traffic to the closest appropriate mirror so users can download more quickly.

Mirroring is a unique system with its own advantages and disadvantages. Unlike a DNS based system, mirroring is more much more flexible. There is no need to wait for DNS or even to trust the mirroring server (the mirror director can scan the mirror to check its validity and completeness). This is one reason many open source projects use mirrors to harness the generosity of ISPs and server owners to take the load off the open source project's own servers for downloads.


Unfortunately, a mirroring system will increase the overhead of any HTTP request, as the request must travel to the mirror director before being redirected to the real file. Therefore, mirroring is commonly used for hosting downloads (single large files), but is not recommended for websites (many small files).

This article will show you how to set up a MirrorBrain instance (a popular, feature-rich mirror director) and an rsync server (rsync lets mirrors sync files with the director) on one server. Then we will set up one mirror on a different server.

Required:
  • Two Ubuntu 14.04 servers in different regions; one director and at least one mirror.
 

Step One — Setting Up Apache

First we need to compile and install MirrorBrain. The entire first part of this tutorial should be done on the mirror director server. We'll let you know when to switch to the mirror.

Perform these steps as root. If necessary, use sudo to access a root shell:
sudo -i

MirrorBrain is a large Apache module, so we will need to use Apache to serve our files. First install Apache and the modules we require:
apt-get install apache2 libapache2-mod-geoip libgeoip-dev apache2-dev

GeoIP is an IP address to location service and will power MirrorBrain's ability to redirect users to the best download location. We need to change GeoIP's configuration file to make it work with MirrorBrain. First open the configuration file:
nano /etc/apache2/mods-available/geoip.conf

Modify it to look like the following. Add the GeoIPOutput Env line, and uncomment the GeoIPDBFile line, and add the MMapCache setting:
 

GeoIPEnable On
GeoIPOutput Env
GeoIPDBFile /usr/share/GeoIP/GeoIP.dat MMapCache


Close and save the file (Ctrl-x, then y, then Enter).

Link the GeoIP database to where MirrorBrain expects to find it:
ln -s /usr/share/GeoIP /var/lib/GeoIP

Next let's enable the modules we just installed and configured:
a2enmod dbd
a2enmod geoip

The geoip module may already be enabled; that's fine.

Step Two — Installing and Compiling MirrorBrain

Now we need to compile the MirrorBrain module. First install some dependencies:
apt-get install python-pip python-dev libdbd-pg-perl python-SQLObject python-FormEncode python-psycopg2 libaprutil1-dbd-pgsql pip install cmdln
Use Perl to install some more dependencies.
perl -MCPAN -e 'install Bundle::LWP'

Pay attention to the questions asked here. You should be able to press Enter or say y to accept the defaults.
You should see quite a bit of output, ending with the line:
  /usr/bin/make install  -- OK

If you get warnings or errors, you may want to run through the configuration again by executing the perl -MCPAN -e 'install Bundle::LWP' command again.

Install the last dependency.
perl -MCPAN -e 'install Config::IniFiles'

Now we can download and extract the MirrorBrain source:
wget http://mirrorbrain.org/files/releases/mirrorbrain-2.18.1.tar.gz
tar -xzvf mirrorbrain-2.18.1.tar.gz

Next we need to add the forms module source to MirrorBrain:
cd mirrorbrain-2.18.1/mod_mirrorbrain/
wget http://apache.webthing.com/svn/apache/forms/mod_form.h
wget http://apache.webthing.com/svn/apache/forms/mod_form.c

Now we can compile and enable the MirrorBrain and forms modules:
apxs -cia -lm mod_form.c
apxs -cia -lm mod_mirrorbrain.c

And then the MirrorBrain autoindex module:
cd ~/mirrorbrain-2.18.1/mod_autoindex_mb
apxs -cia mod_autoindex_mb.c

Let's compile the MirrorBrain GeoIP helpers:

cd ~/mirrorbrain-2.18.1/tools

gcc -Wall -o geoiplookup_city geoiplookup_city.c -lGeoIP
gcc -Wall -o geoiplookup_continent geoiplookup_continent.c -lGeoIP

Copy the helpers into the commands directory:
cp geoiplookup_city /usr/bin/geoiplookup_city
cp geoiplookup_continent /usr/bin/geoiplookup_continent

Install the other internal tools:
install -m 755 ~/mirrorbrain-2.18.1/tools/geoip-lite-update /usr/bin/geoip-lite-update install -m 755 ~/mirrorbrain-2.18.1/tools/null-rsync /usr/bin/null-rsync install -m 755 ~/mirrorbrain-2.18.1/tools/scanner.pl /usr/bin/scanner install -m 755 ~/mirrorbrain-2.18.1/mirrorprobe/mirrorprobe.py /usr/bin/mirrorprobe
Then add the logging file for mirrorprobe (mirrorprobe checks that the mirrors are online):
mkdir /var/log/mirrorbrain
touch /var/log/mirrorbrain/mirrorprobe.log

Now, we can install the MirrorBrain command line management tool:
cd ~/mirrorbrain-2.18.1/mb
python setup.py install

Step Three — Installing PostgreSQL

MirrorBrain uses PostgreSQL, which is easy to set up on Ubuntu. First, let's install PostgreSQL:
apt-get install postgresql postgresql-contrib

Now let's go into the PostgreSQL admin shell:
sudo -i -u postgres

Let's create a MirrorBrain database user. Create a password for this user, and make a note of it, since you'll need it later:
createuser -P mirrorbrain

Then, set up a database for MirrorBrain:
createdb -O mirrorbrain mirrorbrain
createlang plpgsql mirrorbrain

If you get a notice that the language is already installed, that's fine:
createlang: language "plpgsql" is already installed in database "mirrorbrain"
We need to allow password authentication for the database from the local machine (this is required by MirrorBrain). First open the configuration file:
nano /etc/postgresql/9.3/main/pg_hba.conf

Then locate line 90 (it should be the second line that looks like this):
 # "local" is for Unix domain socket connections only
local all all peer

Update it to use md5-based password authentication:
local   all             all                                     md5

Save your changes and restart PostgreSQL:
service postgresql restart

Now let's quit the PostgreSQL shell (Ctrl-D).

Next, complete the database setup by importing MirrorBrain's database schema:
cd ~/mirrorbrain-2.18.1
psql -U mirrorbrain -f sql/schema-postgresql.sql mirrorbrain

When prompted, enter the password we set earlier for the mirrorbrain database user.

The output should look like this:
BEGIN
CREATE TABLE
CREATE TABLE
CREATE TABLE
CREATE VIEW
CREATE TABLE
CREATE INDEX
CREATE TABLE
CREATE TABLE
CREATE TABLE
CREATE FUNCTION
CREATE FUNCTION
CREATE FUNCTION
CREATE FUNCTION
CREATE FUNCTION
CREATE FUNCTION
CREATE FUNCTION
CREATE FUNCTION
CREATE FUNCTION
COMMIT

Add the initial data:
psql -U mirrorbrain -f sql/initialdata-postgresql.sql mirrorbrain

Expected output:
INSERT 0 1
INSERT 0 6
INSERT 0 246

You have now installed MirrorBrain and set up a database!
 

Step Four — Publishing the Mirror

Now add some files to the mirror. We suggest naming the download directory after your domain. Let's create a directory to serve these files (still as root):
mkdir /var/www/download.example.org

Enter that directory:
cd /var/www/download.example.org

Now we need to add some files. If you already have the files on your server, you will want to cp or mv them into this folder:
cp /var/www/example.org/downloads/* /var/www/download.example.org

If they are on a different server you could use scp (the mirror director server needs SSH access to the other server):
scp root@other.server.example.org:/var/www/example.org/downloads/*download.example.org
You can also just upload new files as you would any other files; for example, by using SSHFS or SFTP.
For testing, you can add three sample files:
cd /var/www/download.example.org
touch apples.txt bananas.txt carrots.txt

Next, we need to set up rsync. rsync is a UNIX tool that allows us to sync files between servers. We will be using it to keep our mirrors in sync with the mirror director. Rsync can operate over SSH or a public rsync:// URL. We will set up the rsync daemon (the rsync:// URL) option. First we need to make a configuration file:
nano /etc/rsyncd.conf

Let's add this configuration. The path should be to your download directory, and the comment can be whatever you want:
[main]
path = /var/www/download.example.org
comment = My Mirror Director with Very Fast Download Speed!
read only = true
list = yes
Save the file. Start the rsync daemon:
 rsync --daemon --config=/etc/rsyncd.conf

Now we can test this by running the following on a *NIX system. You can use a domain that resolves to your server, or your server's IP address:
rsync rsync://server.example.org/main

You should see a list of your files.
 

Step Five — Enabling MirrorBrain

Now that we have our files ready, we can enable MirrorBrain. First we need a MirrorBrain user and group:
groupadd -r mirrorbrain 
useradd -r -g mirrorbrain -s /bin/bash -c "MirrorBrain user" -d /home/mirrorbrain mirrorbrain

Now, let's make the MirrorBrain configuration file that will allow the MirrorBrain management tool to connect to the database:
nano /etc/mirrorbrain.conf

Then add this configuration. Most of these settings are to set up the database connection. Be sure to add the mirrorbrain database user's password for the dbpass setting:
[general]
instances = main

[main]
dbuser = mirrorbrain
dbpass = password
dbdriver = postgresql
dbhost = 127.0.0.1
dbname = mirrorbrain

[mirrorprobe]

Save the file. Now let's set up our Apache VirtualHost file for MirrorBrain:
nano /etc/apache2/sites-available/download.example.org.conf


Then add this VirtualHost configuration. You'll need to modify all of the locations where download.example.org is used to have your own domain or IP address that resolves to your server. You should also set up your own email address for the ServerAdmin setting. Make sure you use the mirrorbrain database user's password on the DBDParams line:

ServerName download.example.org
ServerAdmin webmaster@example.org
DocumentRoot /var/www/download.example.org

ErrorLog /var/log/apache2/download.example.org/error.log
CustomLog /var/log/apache2/download.example.org/access.log combined

DBDriver pgsql
DBDParams "host=localhost user=mirrorbrain password=database password dbname=mirrorbrain connect_timeout=15"

download.example.org
> MirrorBrainEngine On MirrorBrainDebug Off FormGET On MirrorBrainHandleHEADRequestLocally Off MirrorBrainMinSize 2048 MirrorBrainExcludeMimeType application/pgp-keys Options FollowSymLinks Indexes AllowOverride None Order allow,deny Allow from all
It is worth looking at some of the MirrorBrain options available under the Directory tag:

NameUsage
MirrorBrainMinSizeSets the minimum size file (in bytes) to be redirected to a mirror to download. This prevents MirrorBrain for redirecting people to download really small files, where the time taken to run the database lookup, GeoIP, etc. is longer than to just serve the file.  
MirrorBrainExcludeMimeTypeSets which mime types should not be served from a mirror. Consider enabling this for key files or similar; small files that must be delivered 100% accurately. Use this option multiple times in your configuration file to enable it for multiple mime types.
MirrorBrainExcludeUserAgentThis option stops redirects for a given user agent. Some clients (e.g. curl) require special configuration to work with redirects, and it may be easier to just serve the files directly to those users. You can use wildcards (e.g. *Chrome/* will disable redirection for any Chrome user).

A full list of configuration options can be found on the MirrorBrain website.

Save and exit the file.

Make sure your log directory exists:
mkdir  /var/log/apache2/download.example.org/

Make a link to the configuration file in the enabled sites directory:
ln -s /etc/apache2/sites-available/download.example.org.conf /etc/apache2/sites-enabled/download.example.org.conf
Now restart Apache:
service apache2 restart

Congratulations, you now have MirrorBrain up and running!

To test that MirrorBrain is working, first visit your download site in a web browser to view the file index. Then click on one of the files to view it. Append ".mirrorlist" to the end of the URL. (Example URL: http://download.example.org/apples.txt.mirrorlist.) If all is working, you should see a page like this:


Cron Job Configuration

Before we can start adding mirrors, we still need to set up some mirror scanning and maintenance cron jobs. First, let's set MirrorBrain to check which mirrors are online (using the mirrorprobe command) every minute:
echo "* * * * * mirrorbrain mirrorprobe" | crontab
And a cron job to scan the mirrors' content (for availability and correctness of files) every hour:
echo "0 * * * * mirrorbrain mb scan --quiet --jobs 4 --all" | crontab

If you have very quickly changing content, it would be wise to add more scan often, e.g., 0,30 * * * * for every half an hour. If you have a very powerful server, you could increase the number of --jobs to scan more mirrors at the same time.

Clean up the database at 1:30 on Monday mornings:
echo "30 1 * * mon mirrorbrain mb db vacuum" | crontab

And update the GeoIP data around about 2:30 on Monday mornings (the sleep statement is to reduce unneeded load spikes on the GeoIP servers):
echo "31 2 * * mon root sleep $(($RANDOM/1024)); /usr/bin/geoip-lite-update" | crontab  

Step Six — Mirroring the Content on Another Server

Now that we have a mirror director set up, let's create our first mirror. You can follow this section for every mirror you want to add.

For this section, use a different Ubuntu 14.04 server, preferably in a different region.
Once you've logged in (as root or using sudo -i), create a mirror content directory:
mkdir -p /var/www/download.example.org

Then copy the content into that directory using the rsync URL that we set up earlier:
rsync -avzh rsync://download.example.org/main /var/www/download.example.org

If you encounter issues with space (IO Error) while using rsync, there is a way around it. You can add the --exclude option to exclude directories which are not as important to your visitors. MirrorBrain will scan your server and not send users to the excluded files, instead sending them to the closest server which has the file. For example, you could exclude old movies and old songs:
rsync -avzh rsync://download.example.org/main /var/www/download.example.org --exclude "movies/old" --exclude "songs/old"
Then we can set your mirror server to automatically sync with the main server every hour using cron (remember to include the --exclude options if you used any):
echo '0 * * * * root rsync -avzh rsync://download.example.org/main /var/www/download.example.org' | crontab
Now we need to publish our mirror over HTTP (for users) and over rsync (for MirrorBrain scanning).
 

Apache

If you already have an HTTP server on your server, you should add a VirtualHost (or equivalent) to serve the /var/www/download.example.org directory. Otherwise, let's install Apache:
apt-get install apache2

Then let's add a VirtualHost file:
nano /etc/apache2/sites-available/london1.download.example.org.conf

Add the following contents. Make sure you set your own values for the ServerName, ServerAdmin, and DocumentRoot directives:

ServerName london1.download.example.org
ServerAdmin webmaster@example.org
DocumentRoot /var/www/download.example.org


Save the file. Enable the new VirtualHost:
ln -s /etc/apache2/sites-available/london1.download.example.org.conf /etc/apache2/sites-enabled/london1.download.example.org.conf
Now restart Apache:
service apache2 restart
 

rsync

Next, we need to set up the rsync daemon (for MirrorBrain scanning). First open the configuration file:
nano /etc/rsyncd.conf

Then add the configuration, making sure the path matches your download directory. The comment can be whatever you want:
[main]
path = /var/www/download.example.org
comment = My Mirror Of Some Cool Files
read only = true
list = yes
Save this file.

Start the rsync daemon:
rsync --daemon --config=/etc/rsyncd.conf
 

Enabling the Mirror on the Director

Now, back on the MirrorBrain server, we need to add the mirror. We can use the mb command (as root). There are quite a few variables in this command, which we'll explain below:
mb new london1.download.example.org
-H http://london1.download.example.org
-R rsync://london1.download.example.org/main
--operator-name=Example --operator-url=example.org
-a "Pat Admin" -e pat@example.org
  • Replace london1.download.example.org with the nickname for this mirror. It doesn't have to resolve
  • -H should resolve to your server; you can use a domain or IP address
  • -R should resolve to your server; you can use a domain or IP address
  • The --operator-name, --operator-url, -a, and -e settings should be your preferred administrator contact information that you want to publish
Then, let's scan and enable the mirror. You'll need to use the same nickname you used in the new command:
mb scan --enable london1.download.example.org

Note: If you run into an error like Can't locate LWP/UserAgent.pm in @INC you should go back to the  
Step Two section and run perl -MCPAN -e 'install Bundle::LWP' again.
Assuming the scan is successful (MirrorBrain can connect to the server), the mirror will be added to the database.
 

Testing

Now try going to the MirrorBrain instance on the director server (e.g., download.example.org - not london1.download.example.org). Again, click on a file, and append ".mirrorlist" to the end of the URL. You should now see the new mirror listed under the available mirrors section.

You can add more mirrors with your own servers in other places in the world, or you can use mb new to add a mirror that somebody else is running for you.
 

Disabling and Re-enabling Mirrors

If you wish to disable a mirror, that is as simple as running:
mb disable london1.download.example.org

Re-enable the mirror using the mb scan --enable london1.download.example.org command as used above.

VCE Exam Simulator 1.1.6 - Download

$
0
0
https://dl.dropboxusercontent.com/content_link/kxpVAfwy8ZVvlBnjmxiLVYnAo5UPcDAFT39FHjjR6HwdB6GhnfCSkyVw00yYdF63?dl=1


A desktop exam engine for certification exam preparation. Create, edit and take exams that are just like the real thing.


VCE Exam Simulator - What's New

v1.1.6 (Oct 9, 2014)

Stability:
  • Fixed: Small miscellaneous bugs.
v1.1.5 (Oct 1, 2014)

Stability:
  • Fixed: Small miscellaneous bugs.
v1.1.4 (Sep 24, 2014)

Stability:
  • Fixed: Small miscellaneous bugs.
v1.1.3 (Sep 18, 2014)

Stability:
  • Added: Proxy settings in main settings.
  • Fixed: Importing questions with unicode symbols.
  • Fixed:"Take incorrectly questions" mode errors.
  • Fixed: Small miscellaneous bugs.
v1.1.2 (Aug 13, 2014)

Stability:
  • Fixed: Proxy settings don't work for all connections.
v1.1.1 (Aug 4, 2014)

Stability:
  • Fixed: Error during resuming session.
v1.1 (Jul 29, 2014)

Stability:
  • Fixed: Small miscellaneous bugs.
v1.0.2 (May 15, 2014)

Functionality:
  • Added: Update software ability for not logged users.
Stability:
  • Fixed: Error during changing number of choices and question type.
  • Fixed: Saving sessions bug.
  • Fixed: Saving proxy settings.
v1.0.1 (Apr 23, 2014)

Stability:
  • Fixed:"Stream read error" during searching.
  • Fixed: SQL injection bug.
  • Fixed: Small miscellaneous bugs.
v1.0 (Mar 23, 2014)

The new version of VCE Exam Simulator for Windows provides users with better functionality, improved stability and flawless user experience. This version incorporates the following enhancements:
Functionality:
  • Added: Advanced localization features, including full support of international symbols. The issue of some symbols/characters not being recognized has been fully fixed. 
  • Updated and enhanced: The option of restoring sessions in the training mode, enabling users to pick up their practice exactly where they left it.
  • Updated and enhanced: Color schemes have been updated to include better variety and bug-free operation.
  • Updated: spell-check for VCE Designer software to include 2014 dictionaries and vocabulary. 

Stability:
  • Updated: Improved security to run the latest VCE files and avoid version-caused glitches.
  • Updated: importing feature to ensure smooth and glitch-free importing of large files (over 1,000 questions).
  • Fixed:"Stream read error" during importing questions and changing the answer option, as well as during the printing process – for smooth operation of the app.
  • Enhanced: Application stability and performance, bugs and glitches causing random crashing have been fixed/removed. 
https://dl.dropboxusercontent.com/content_link/kxpVAfwy8ZVvlBnjmxiLVYnAo5UPcDAFT39FHjjR6HwdB6GhnfCSkyVw00yYdF63?dl=1

How to Identify Network Vilification with Wireshark

$
0
0
Whether you’re looking for peer-to-peer traffic on your network or just want to see what websites a specific IP address is accessing, Wireshark can work for you.


Identifying Peer-to-Peer Traffic

Wireshark’s protocol column displays the protocol type of each packet. If you’re looking at a Wireshark capture, you might see BitTorrent or other peer-to-peer traffic lurking in it.


You can see just what protocols are being used on your network from the Protocol Hierarchy tool, located under the Statistics menu.


This window shows a breakdown of network usage by protocol. From here, we can see that nearly 5 percent of packets on the network are BitTorrent packets. That doesn’t sound like much, but BitTorrent also uses UDP packets. The nearly 25 percent of packets classified as UDP Data packets are also BitTorrent traffic here.


We can view only the BitTorrent packets by right-clicking the protocol and applying it as a filter. You can do the same for other types of peer-to-peer traffic that may be present, such as Gnutella, eDonkey, or Soulseek.


Using the Apply Filter option applies the filter “bittorrent.” You can skip the right-click menu and view a protocol’s traffic by typing its name directly into the Filter box.
From the filtered traffic, we can see that the local IP address of 192.168.1.64 is using BitTorrent.


To view all the IP addresses using BitTorrent, we can select Endpoints in the Statistics menu.


Click over to the IPv4 tab and enable the “Limit to display filter” check box. You’ll see both the remote and local IP addresses associated with the BitTorrent traffic. The local IP addresses should appear at the top of the list.


If you want to see the different types of protocols Wireshark supports and their filter names, select Enabled Protocols under the Analyze menu.


You can start typing a protocol to search for it in the Enabled Protocols window.


Monitoring Website Access

Now that we know how to break traffic down by protocol, we can type “http” into the Filter box to see only HTTP traffic. With the “Enable network name resolution” option checked, we’ll see the names of the websites being accessed on the network.


Once again, we can use the Endpoints option in the Statistics menu.


Click over to the IPv4 tab and enable the “Limit to display filter” check box again. You should also ensure that the “Name resolution” check box  is enabled or you’ll only see IP addresses.
From here we, can see the websites being accessed. Advertising networks and third-party websites that host scripts used on other websites will also appear in the list.


If we want to break this down by a specific IP address to see what a single IP address is browsing, we can do that too. Use the combined filter http and ip.addr == [IP address] to see HTTP traffic associated with a specific IP address.


Open the Endpoints dialog again and you’ll see a list of websites being accessed by that specific IP address.


This is all just scratching the surface of what you can do with Wireshark. You could build much more advanced filters, or even use the Firewall ACL Rules tool to block the unwanted traffic your network.

How To Protect your Server Against the POODLE SSLv3 Vulnerability

$
0
0
On October 14th, 2014, a vulnerability in version 3 of the SSL encryption protocol was disclosed. This vulnerability, dubbed POODLE (Padding Oracle On Downgraded Legacy Encryption), allows an attacker to read information encrypted with this version of the protocol in plain text using a man-in-the-middle attack.

Although SSLv3 is an older version of the protocol which is mainly obsolete, many pieces of software still fall back on SSLv3 if better encryption options are not available. More importantly, it is possible for an attacker to force SSLv3 connections if it is an available alternative for both participants attempting a connection.

The POODLE vulnerability affects any services or clients that make it possible to communicate using SSLv3. Because this is a flaw with the protocol design, and not an implementation issue, every piece of software that uses SSLv3 is vulnerable.


To find out more information about the vulnerability, consult the CVE information found at CVE-2014-3566.

What is the POODLE Vulnerability?

The POODLE vulnerability is a weakness in version 3 of the SSL protocol that allows an attacker in a man-in-the-middle context to decipher the plain text content of an SSLv3 encrypted message.

Who is Affected by this Vulnerability?

This vulnerability affects every piece of software that can be coerced into communicating with SSLv3. This means that any software that implements a fallback mechanism that includes SSLv3 support is vulnerable and can be exploited.
Some common pieces of software that may be affected are web browsers, web servers, VPN servers, mail servers, etc.

How Does It Work?

In short, the POODLE vulnerability exists because the SSLv3 protocol does not adequately check the padding bytes that are sent with encrypted messages.

Since these cannot be verified by the receiving party, an attacker can replace these and pass them on to the intended destination. When done in a specific way, the modified payload will potentially be accepted by the recipient without complaint.

An average of once out of every 256 requests will accepted at the destination, allowing the attacker to decrypt a single byte. This can be repeated easily in order to progressively decrypt additional bytes. Any attacker able to repeatedly force a participant to resend data using this protocol can break the encryption in a very short amount of time.

How Can I Protect Myself?

Actions should be taken to ensure that you are not vulnerable in your roles as both a client and a server. Since encryption is usually negotiated between clients and servers, it is an issue that involves both parties.
Servers and clients should should take steps to disable SSLv3 support completely. Many applications use better encryption by default, but implement SSLv3 support as a fallback option. This should be disabled, as a malicious user can force SSLv3 communication if both participants allow it as an acceptable method.

How To Protect Common Applications

Below, we'll cover how to disable SSLv3 on some common server applications. Take care to evaluate your servers to protect any additional services that may rely on SSL/TCP encryption.

Because the POODLE vulnerability does not represent an implementation problem and is an inherent issue with the entire protocol, there is no workaround and the only reliable solution is to not use it.

Nginx Web Server

To disable SSLv3 in the Nginx web server, you can use the ssl_protocols directive. This will be located in the server or http blocks in your configuration.

For instance, on Ubuntu, you can either add this globally to /etc/nginx/nginx.conf inside of the http block, or to each server block in the /etc/nginx/sites-enabled directory.
sudo nano /etc/nginx/nginx.conf

To disable SSLv3, your ssl_protocols directive should be set like this:
ssl_protocols TLSv1 TLSv1.1 TLSv1.2;

You should restart the server after you have made the above modification:
sudo service nginx restart
 

Apache Web Server

To disable SSLv3 on the Apache web server, you will have to adjust the SSLProtocol directive provided by the mod_ssl module.

This directive can be set either at the server level or in a virtual host configuration. Depending on your distribution's Apache configuration, the SSL configuration may be located in a separate file that is sourced.
On Ubuntu, the server-wide specification for servers can be adjusted by editing the /etc/apache2/mods-available/ssl.conf file. If mod_ssl is enabled, a symbolic link will connect this file to the mods-enabled subdirectory:
sudo nano /etc/apache2/mods-available/ssl.conf

On CentOS, you can can adjust this in the SSL configuration file located here (if SSL is enabled):
sudo nano /etc/httpd/conf.d/ssl.conf

Inside you can find the SSLProtocol directive. If this is not available, create it. Modify this to explicitly remove support for SSLv3:
SSLProtocol all -SSLv3 -SSLv2

Save and close the file. Restart the service to enable your changes.

On Ubuntu, you can type:
sudo service apache2 restart

On CentOS, this would be:
sudo service httpd restart
 

HAProxy Load Balancer

To disable SSLv3 in an HAProxy load balancer, you will need to open the haproxy.cfg file.

This is located at /etc/haproxy/haproxy.cfg:
sudo nano /etc/haproxy/haproxy.cfg

In your front end configuration, if you have SSL enabled, your bind directive will specify the public IP address and port. If you are using SSL, you will want to add no-sslv3 to the end of this line:
frontend name
bind public_ip:443 ssl crt /path/to/certsno-sslv3

Save and close the file.

You will need to restart the service to implement the changes:
sudo service haproxy restart
 

OpenVPN VPN Server

Recent versions of OpenVPN actually do not allow SSLv3. The service is not vulnerable to this specific problem, so you will not need to adjust your configuration.
See this post on the OpenVPN forums for more information.

Postfix SMTP Server

If your Postfix configuration is set up to require encryption, it will use a directive called smtpd_tls_mandatory_protocols.

You can find this in the main Postfix configuration file:
sudo nano /etc/postfix/main.cf

For a Postfix server set up to use encryption at all times, you can ensure that SSLv3 and SSLv2 are not accepted by setting this parameter. If you do not force encryption, you do not have to do anything:
smtpd_tls_mandatory_protocols=!SSLv2, !SSLv3

Save your configuration. Restart the service to implement your changes:
sudo service postfix restart
 

Dovecot IMAP and POP3 Server

In order to disable SSLv3 on a Dovecot server, you will need to adjust a directive called ssl_protocols. Depending on your distributions packaging methods, SSL configurations may be kept in an alternate configuration file.

For most distros, you can adjust this directive by opening this file:
sudo nano /etc/dovecot/conf.d/10-ssl.conf

Inside, set the ssl_protocols directive to disable SSLv2 and SSLv3:
ssl_protocols = !SSLv3 !SSLv2

Save and close the file.

Restart the service in order to implement your changes:
sudo service dovecot restart
 

Further Steps

Along with your server-side applications, you should also update any client applications.
In particular, web browsers may be vulnerable to this issue because of their step-down protocol negotiation. Ensure that your browsers do not allow SSLv3 as an acceptable encryption method. This may be adjustable in the settings or through the installation of an additional plugin or extension.

Conclusion

Due to widespread support for SSLv3, even when stronger encryption is enabled, this vulnerability is far reaching and dangerous. You will need to take measures to protect yourself as both a consumer and provider of any resources that utilize SSL encryption.

Be sure to check out all of your network-accessible services that may leverage SSL/TLS in any form. Often, these applications require explicit instructions to completely disable weaker forms of encryption like SSLv3.

SSH Essentials: Working with SSH Servers, Clients, and Keys

$
0
0

SSH is a secure protocol used as the primary means of connecting to Linux servers remotely. It provides a text-based interface by spawning a remote shell. After connecting, all commands you type in your local terminal are sent to the remote server and executed there.

In this cheat sheet-style article, we will cover some common ways of connecting with SSH to achieve your objectives. This can be used as a quick reference when you need to know how to do connect to or configure your server in different ways.


How To Use This Guide

  • Read the SSH Overview section first if you are unfamiliar with SSH in general or are just getting started.
  • Use whichever subsequent sections are applicable to what you are trying to achieve. Most sections are not predicated on any other, so you can use the examples below independently.
  • Use the Contents menu on the left side of this page (at wide page widths) or your browser's find function to locate the sections you need.
  • Copy and paste the command-line examples given, substituting the values in red with your own values.
 

SSH Overview

The most common way of connecting to a remote Linux server is through SSH. SSH stands for Secure Shell and provides a safe and secure way of executing commands, making changes, and configuring services remotely. When you connect through SSH, you log in using an account that exists on the remote server.
 

How SSH Works

When you connect through SSH, you will be dropped into a shell session, which is a text-based interface where you can interact with your server. For the duration of your SSH session, any commands that you type into your local terminal are sent through an encrypted SSH tunnel and executed on your server.

The SSH connection is implemented using a client-server model. This means that for an SSH connection to be established, the remote machine must be running a piece of software called an SSH daemon. This software listens for connections on a specific network port, authenticates connection requests, and spawns the appropriate environment if the user provides the correct credentials.

The user's computer must have an SSH client. This is a piece of software that knows how to communicate using the SSH protocol and can be given information about the remote host to connect to, the username to use, and the credentials that should be passed to authenticate. The client can also specify certain details about the connection type they would like to establish.
 

How SSH Authenticates Users

Clients generally authenticate either using passwords (less secure and not recommended) or SSH keys, which are very secure.

Password logins are encrypted and are easy to understand for new users. However, automated bots and malicious users will often repeatedly try to authenticate to accounts that allow password-based logins, which can lead to security compromises. For this reason, we recommend always setting up SSH-based authentication for most configurations.

SSH keys are a matching set of cryptographic keys which can be used for authentication. Each set contains a public and a private key. The public key can be shared freely without concern, while the private key must be vigilantly guarded and never exposed to anyone.

To authenticate using SSH keys, a user must have an SSH key pair on their local computer. On the remote server, the public key must be copied to a file within the user's home directory at ~/.ssh/authorized_keys. This file contains a list of public keys, one-per-line, that are authorized to log into this account.

When a client connects to the host, wishing to use SSH key authentication, it will inform the server of this intent and will tell the server which public key to use. The server then check its authorized_keys file for the public key, generate a random string and encrypts it using the public key. This encrypted message can only be decrypted with the associated private key. The server will send this encrypted message to the client to test whether they actually have the associated private key.

Upon receipt of this message, the client will decrypt it using the private key and combine the random string that is revealed with a previously negotiated session ID. It then generates an MD5 hash of this value and transmits it back to the server. The server already had the original message and the session ID, so it can compare an MD5 hash generated by those values and determine that the client must have the private key.
Now that you know how SSH works, we can begin to discuss some examples to demonstrate different ways of working with SSH
 

Generating and Working with SSH Keys

This section will cover how to generate SSH keys on a client machine and distribute the public key to servers where they should be used. This is a good section to start with if you have not previously generated keys due to the increased security that it allows for future connections.
 

Generating an SSH Key Pair

Generating a new SSH public and private key pair on your local computer is the first step towards authenticating with a remote server without a password. Unless there is a good reason not to, you should always authenticate using SSH keys.

A number cryptographic algorithms can be used to generate SSH keys, including RSA, DSA, and ECDSA. RSA keys are generally preferred and are the default key type.

To generate an RSA key pair on your local computer, type:
ssh-keygen
Generating public/private rsa key pair.
Enter file in which to save the key (/home/demo/.ssh/id_rsa):

This prompt allows you to choose the location to store your RSA private key. Press ENTER to leave this as the default, which will store them in the .ssh hidden directory in your user's home directory. Leaving the default location selected will allow your SSH client to find the keys automatically.
Enter passphrase (empty for no passphrase):
Enter same passphrase again:

The next prompt allows you to enter a passphrase of an arbitrary length to secure your private key. By default, you will have to enter any passphrase you set here every time you use the private key, as an additional security measure. Feel free to press ENTER to leave this blank if you do not want a passphrase. Keep in mind though that this will allow anyone who gains control of your private key to login to your servers.

If you choose to enter a passphrase, nothing will be displayed as you type. This is a security precaution.
Your identification has been saved in /root/.ssh/id_rsa.
Your public key has been saved in /root/.ssh/id_rsa.pub.
The key fingerprint is:
8c:e9:7c:fa:bf:c4:e5:9c:c9:b8:60:1f:fe:1c:d3:8a root@here
The key's randomart image is:
+--[ RSA 2048]----+
| |
| |
| |
| + |
| o S . |
| o . * + |
| o + = O . |
| + = = + |
| ....Eo+ |
+-----------------+
This procedure has generated an RSA SSH key pair, located in the .ssh hidden directory within your user's home directory. These files are:
  • ~/.ssh/id_rsa: The private key. DO NOT SHARE THIS FILE!
  • ~/.ssh/id_rsa.pub: The associated public key. This can be shared freely without consequence.
 

Generate an SSH Key Pair with a Larger Number of Bits

SSH keys are 2048 bits by default. This is generally considered to be good enough for security, but you can specify a greater number of bits for a more hardened key.

To do this, include the -b argument with the number of bits you would like. Most servers support keys with a length of at least 4096 bits. Longer keys may not be accepted for DDOS protection purposes:
ssh-keygen -b 4096

If you had previously created a different key, you will be asked if you wish to overwrite your previous key:
Overwrite (y/n)?

If you choose "yes", your previous key will be overwritten and you will no longer be able to log into servers using that key. Because of this, be sure to overwrite keys with caution.
 

Removing or Changing the Passphrase on a Private Key

If you have generated a passphrase for your private key and wish to change or remove it, you can do so easily.

Note: To change or remove the passphrase, you must know the original passphrase. If you have lost the passphrase to the key, there is no recourse and you will have to generate a new key pair.

To change or remove the passphrase, simply type:
ssh-keygen -p
Enter file in which the key is (/root/.ssh/id_rsa):

You can type the location of the key you wish to modify or press ENTER to accept the default value:
Enter old passphrase:

Enter the old passphrase that you wish to change. You will then be prompted for a new passphrase:
Enter new passphrase (empty for no passphrase): 
Enter same passphrase again:

Here, enter your new passphrase or press ENTER to remove the passphrase.
 

Displaying the SSH Key Fingerprint

Each SSH key pair share a single cryptographic "fingerprint" which can be used to uniquely identify the keys. This can be useful in a variety of situations.

To find out the fingerprint of an SSH key, type:
ssh-keygen -l
Enter file in which the key is (/root/.ssh/id_rsa):

You can press ENTER if that is the correct location of the key, else enter the revised location. You will be given a string which contains the bit-length of the key, the fingerprint, and account and host it was created for, and the algorithm used:
4096 8e:c4:82:47:87:c2:26:4b:68:ff:96:1a:39:62:9e:4e  demo@test (RSA)
 

Copying your Public SSH Key to a Server with SSH-Copy-ID

To copy your public key to a server, allowing you to authenticate without a password, a number of approaches can be taken.

If you currently have password-based SSH access configured to your server, and you have the ssh-copy-id utility installed, this is a simple process. The ssh-copy-id tool is included in many Linux distributions' OpenSSH packages, so it very likely may be installed by default.

If you have this option, you can easily transfer your public key by typing:
ssh-copy-id username@remote_host

This will prompt you for the user account's password on the remote system:
The authenticity of host '111.111.11.111 (111.111.11.111)' can't be established. ECDSA key fingerprint is fd:fd:d4:f9:77:fe:73:84:e1:55:00:ad:d6:6d:22:fe. Are you sure you want to continue connecting (yes/no)? yes /usr/bin/ssh-copy-id: INFO: attempting to log in with the new key(s), to filter out any that are already installed /usr/bin/ssh-copy-id: INFO: 1 key(s) remain to be installed -- if you are prompted now it is to install the new keys demo@111.111.11.111's password: After typing in the password, the contents of your ~/.ssh/id_rsa.pub key will be appended to the end of the user account's ~/.ssh/authorized_keys file:
Number of key(s) added: 1

Now try logging into the machine, with: "ssh 'demo@111.111.11.111'"
and check to make sure that only the key(s) you wanted were added.

You can now log into that account without a password:
ssh username@remote_host
 

Copying your Public SSH Key to a Server Without SSH-Copy-ID

If you do not have the ssh-copy-id utility available, but still have password-based SSH access to the remote server, you can copy the contents of your public key in a different way.

You can output the contents of the key and pipe it into the ssh command. On the remote side, you can ensure that the ~/.ssh directory exists, and then append the piped contents into the ~/.ssh/authorized_keys file:
cat ~/.ssh/id_rsa.pub | ssh username@remote_host"mkdir -p ~/.ssh && cat >> ~/.ssh/authorized_keys"
You will be asked to supply the password for the remote account:
The authenticity of host '111.111.11.111 (111.111.11.111)' can't be established.
ECDSA key fingerprint is fd:fd:d4:f9:77:fe:73:84:e1:55:00:ad:d6:6d:22:fe.
Are you sure you want to continue connecting (yes/no)? yes
demo@111.111.11.111's password:

After entering the password, your key will be copied, allowing you to log in without a password:
ssh username@remote_IP_host
 

Copying your Public SSH Key to a Server Manually

If you do not have password-based SSH access available, you will have to add your public key to the remote server manually.

On your local machine, you can find the contents of your public key file by typing:
cat ~/.ssh/id_rsa.pub
ssh-rsa AAAAB3NzaC1yc2EAAAADAQABAAACAQCqql6MzstZYh1TmWWv11q5O3pISj2ZFl9HgH1JLknLLx44+tXfJ7mIrKNxOOwxIxvcBF8PXSYvobFYEZjGIVCEAjrUzLiIxbyCoxVyle7Q+bqgZ8SeeM8wzytsY+dVGcBxF6N4JS+zVk5eMcV385gG3Y6ON3EG112n6d+SMXY0OEBIcO6x+PnUSGHrSgpBgX7Ks1r7xqFa7heJLLt2wWwkARptX7udSq05paBhcpB0pHtA1Rfz3K2B+ZVIpSDfki9UVKzT8JUmwW6NNzSgxUfQHGwnW7kj4jp4AT0VZk3ADw497M2G/12N0PPB5CnhHf7ovgy6nL1ikrygTKRFmNZISvAcywB9GVqNAVE+ZHDSCuURNsAInVzgYo9xgJDW8wUw2o8U77+xiFxgI5QSZX3Iq7YLMgeksaO4rBJEa54k8m5wEiEE1nUhLuJ0X/vh2xPff6SQ1BL/zkOhvJCACK6Vb15mDOeCSq54Cr7kvS46itMosi/uS66+PujOO+xt/2FWYepz6ZlN70bRly57Q06J+ZJoc9FfBCbCyYH7U/ASsmY095ywPsBo1XQ9PqhnN1/YOorJ068foQDNVpm146mUpILVxmq41Cj55YKHEazXGsdBIbXWhcrRf4G2fJLRcGUr9q8/lERo9oxRm5JFX6TCmj6kmiFqv+Ow9gI0x8GvaQ== demo@test

You can copy this value, and manually paste it into the appropriate location on the remote server.
On the remote server, create the ~/.ssh directory if it does not already exist:
mkdir -p ~/.ssh

Afterwards, you can create or append the ~/.ssh/authorized_keys file by typing:
echo public_key_string>> ~/.ssh/authorized_keys

You should now be able to log into the remote server without a password.
 

Basic Connection Instructions

The following section will cover some of the basics about how to connect to a server with SSH.
 

Connecting to a Remote Server

To connect to a remote server and open a shell session there, you can use the ssh command.
The simplest form assumes that your username on your local machine is the same as that on the remote server. If this is true, you can connect using:
ssh remote_host

If your username is different on the remoter server, you need to pass the remote user's name like this:
ssh username@remote_host

Your first time connecting to a new host, you will see a message that looks like this:
The authenticity of host '111.111.11.111 (111.111.11.111)' can't be established. ECDSA key fingerprint is fd:fd:d4:f9:77:fe:73:84:e1:55:00:ad:d6:6d:22:fe. Are you sure you want to continue connecting (yes/no)? yes Type "yes" to accept the authenticity of the remote host.

If you are using password authentication, you will be prompted for the password for the remote account here. If you are using SSH keys, you will be prompted for your private key's passphrase if one is set, otherwise you will be logged in automatically.
 

Running a Single Command on a Remote Server

To run a single command on a remote server instead of spawning a shell session, you can add the command after the connection information, like this:
ssh username@remote_hostcommand_to_run

This will connect to the remote host, authenticate with your credentials, and execute the command you specified. The connection will immediately close afterwards.
 

Logging into a Server with a Different Port

By default the SSH daemon on a server runs on port 22. Your SSH client will assume that this is the case when trying to connect. If your SSH server is listening on a non-standard port (this is demonstrated in a later section), you will have to specify the new port number when connecting with your client.

You can do this by specifying the port number with the -p option:
ssh -p port_numusername@remote_host

To avoid having to do this every time you log into your remote server, you can create or edit a configuration file in the ~/.ssh directory within the home directory of your local computer.

Edit or create the file now by typing:
nano ~/.ssh/config

In here, you can set host-specific configuration options. To specify your new port, use a format like this:
Host remote_alias
HostName remote_host
Port port_num

This will allow you to log in without specifying the specific port number on the command line.


Adding your SSH Keys to an SSH Agent to Avoid Typing the Passphrase


If you have an passphrase on your private SSH key, you will be prompted to enter the passphrase every time you use it to connect to a remote host.

To avoid having to repeatedly do this, you can run an SSH agent. This small utility stores your private key after you have entered the passphrase for the first time. It will be available for the duration of your terminal session, allowing you to connect in the future without re-entering the passphrase.

This is also important if you need to forward your SSH credentials (shown below).
To start the SSH Agent, type the following into your local terminal session:
eval $(ssh-agent)
Agent pid 10891

This will start the agent program and place it into the background. Now, you need to add your private key to the agent, so that it can manage your key:
ssh-add
Enter passphrase for /home/demo/.ssh/id_rsa:
Identity added: /home/demo/.ssh/id_rsa (/home/demo/.ssh/id_rsa)

You will have to enter your passphrase (if one is set). Afterwards, your identity file is added to the agent, allowing you to use your key to sign in without having re-enter the passphrase again.
 

Forwarding your SSH Credentials to Use on a Server

If you wish to be able to connect without a password to one server from within another server, you will need to forward your SSH key information. This will allow you to authenticate to another server through the server you are connected to, using the credentials on your local computer.

To start, you must have your SSH agent started and your SSH key added to the agent (see above). After this is done, you need to connect to your first server using the -A option. This forwards your credentials to the server for this session:
ssh -A username@remote_host

From here, you can SSH into any other host that your SSH key is authorized to access. You will connect as if your private SSH key were located on this server.
 

Server-Side Configuration Options

This section contains some common server-side configuration options that can shape the way that your server responds and what types of connections are allowed.
 

Disabling Password Authentication

If you have SSH keys configured, tested, and working properly, it is probably a good idea to disable password authentication. This will prevent any user from signing in with SSH using a password.

To do this, connect to your remote server and open the /etc/ssh/sshd_config file with root or sudo privileges:
sudo nano /etc/ssh/sshd_config

Inside of the file, search for the PasswordAuthentication directive. If it is commented out, uncomment it. Set it to "no" to disable password logins:
PasswordAuthentication no

After you have made the change, save and close the file. To implement the changes, you should restart the SSH service:
sudo service ssh restart
Now, all accounts on the system will be unable to login with SSH using passwords.
 

Changing the Port that the SSH Daemon Runs On

Some administrators suggest that you change the default port that SSH runs on. This can help decrease the number of authentication attempts your server is subjected to from automated bots.

To change the port that the SSH daemon listens on, you will have to log into your remote server. Open the sshd_config file on the remote system with root privileges, either by logging in with that user or by using sudo:
sudo nano /etc/ssh/sshd_config

Once you are inside, you can change the port that SSH runs on by finding the Port 22 specification and modifying it to reflect the port you wish to use. For instance, to change the port to 4444, put this in your file:
#Port 22
Port 4444

Save and close the file when you are finished. To implement the changes, you must restart the SSH daemon:
sudo service ssh restart

After the daemon restarts, you will need to authenticate by specifying the port number (demonstrated in an earlier section).
 

Limiting the Users Who can Connect Through SSH

To explicitly limit the user accounts who are able to login through SSH, you can take a few different approaches, each of which involve editing the SSH daemon config file.
On your remote server, open this file now with root or sudo privileges:
sudo nano /etc/ssh/sshd_config

The first method of specifying the accounts that are allowed to login is using the AllowUsers directive. Search for the AllowUsers directive in the file. If one does not exist, create it anywhere. After the directive, list the user accounts that should be allowed to login through SSH:
AllowUsers user1user2

Save and close the file. Restart the daemon to implement your changes:
sudo service ssh restart

If you are more comfortable with group management, you can use the AllowGroups directive instead. If this is the case, just add a single group that should be allowed SSH access (we will create this group and add members momentarily):
AllowGroups sshmembers
Save and close the file.

Now, you can create a system group (without a home directory) matching the group you specified by typing:
sudo groupadd -r sshmembers

Make sure that you add whatever user accounts you need to this group. This can be done by typing:
sudo usermod -a -G sshmembersuser1
sudo usermod -a -G sshmembersuser2

Now, restart the SSH daemon to implement your changes:
sudo service ssh restart
 

Disabling Root Login

It is often advisable to completely disable root login through SSH after you have set up an SSH user account that has sudo privileges.

To do this, open the SSH daemon configuration file with root or sudo on your remote server.
sudo nano /etc/ssh/sshd_config

Inside, search for a directive called PermitRootLogin. If it is commented, uncomment it. Change the value to "no":
PermitRootLogin no

Save and close the file. To implement your changes, restart the SSH daemon:
sudo service ssh restart
 

Allowing Root Access for Specific Commands

There are some cases where you might want to disable root access generally, but enable it in order to allow certain applications to run correctly. An example of this might be a backup routine.

This can be accomplished through the root user's authorized_keys file, which contains SSH keys that are authorized to use the account.

Add the key from your local computer that you wish to use for this process (we recommend creating a new key for each automatic process) to the root user's authorized_keys file on the server. We will demonstrate with the ssh-copy-id command here, but you can use any of the methods of copying keys we discuss in other sections:
ssh-copy-id root@remote_host

Now, log into the remote server. We will need to adjust the entry in the authorized_keys file, so open it with root or sudo access:
sudo nano /root/.ssh/authorized_keys

At the beginning of the line with the key you uploaded, add a command= listing that defines the command that this key is valid for. This should include the full path to the executable, plus any arguments:
command="/path/to/command arg1 arg2" ssh-rsa ...

Save and close the file when you are finished.
Now, open the sshd_config file with root or sudo privileges:
sudo nano /etc/ssh/sshd_config

Find the directive PermitRootLogin, and change the value to forced-commands-only. This will only allow SSH key logins to use root when a command has been specified for the key:
PermitRootLogin forced-commands-only

Save and close the file. Restart the SSH daemon to implement your changes:
sudo service ssh restart
 

Forwarding X Application Displays to the Client

The SSH daemon can be configured to automatically forward the display of X applications on the server to the client machine. For this to function correctly, the client must have an X windows system configured and enabled.

To enable this functionality, log into your remote server and edit the sshd_config file as root or with sudo privileges:
sudo nano /etc/ssh/sshd_config

Search for the X11Forwarding directive. If it is commented out, uncomment it. Create it if necessary and set the value to "yes":
X11Forwarding yes

Save and close the file. Restart your SSH daemon to implement these changes:
sudo service ssh restart

To connect to the server and forward an application's display, you have to pass the -X option from the client upon connection:
ssh -X username@remote_host

Graphical applications started on the server through this session should be displayed on the local computer. The performance might be a bit slow, but it is very helpful in a pinch.
 

Client-Side Configuration Options

In the next section, we'll focus on some adjustments that you can make on the client side of the connection.
 

Defining Server-Specific Connection Information

On your local computer, you can define individual configurations for some or all of the servers you connect to. These can be stored in the ~/.ssh/config file, which is read by your SSH client each time it is called.
Create or open this file in your text editor on your local computer:
nano ~/.ssh/config

Inside, you can define individual configuration options by introducing each with a Host keyword, followed by an alias. Beneath this and indented, you can define any of the directives found in the ssh_config man page:
man ssh_config

An example configuration would be:
Host testhost
HostName example.com
Port 4444
User demo

You could then connect to example.com on port 4444 using the username "demo" by simply typing:
ssh testhost

You can also use wildcards to match more than one host. Keep in mind that later matches can override earlier ones. Because of this, you should put your most general matches at the top. For instance, you could default all connections to not allow X forwarding, with an override for example.com by having this in your file:
Host *
ForwardX11 no

Host testhost
HostName example.com
ForwardX11 yes
Port 4444
User demo
Save and close the file when you are finished.
 

Keeping Connections Alive to Avoid Timeout

If you find yourself being disconnected from SSH sessions before you are ready, it is possible that your connection is timing out.

You can configure your client to send a packet to the server every so often in order to avoid this situation:
On your local computer, you can configure this for every connection by editing your ~/.ssh/config file.
Open it now:
nano ~/.ssh/config

If one does not already exist, at the top of the file, define a section that will match all hosts. Set the ServerAliveInterval to "120" to send a packet to the server every two minutes. This should be enough to notify the server not to close the connection:
Host *
ServerAliveInterval 120
Save and close the file when you are finished.
 

Disabling Host Checking

By default, whenever you connect to a new server, you will be shown the remote SSH daemon's host key fingerprint.
The authenticity of host '111.111.11.111 (111.111.11.111)' can't be established.
ECDSA key fingerprint is fd:fd:d4:f9:77:fe:73:84:e1:55:00:ad:d6:6d:22:fe.
Are you sure you want to continue connecting (yes/no)? yes

This is configured so that you can verify the authenticity of the host you are attempting to connect to and spot instances where a malicious user may be trying to masquerade as the remote host.

In certain circumstances, you may wish to disable this feature. Note: This can be a big security risk, so make sure you know what you are doing if you set your system up like this.

To make the change, the open the ~/.ssh/config file on your local computer:
nano ~/.ssh/config

If one does not already exist, at the top of the file, define a section that will match all hosts. Set the StrictHostKeyChecking directive to "no" to add new hosts automatically to the known_hosts file. Set the UserKnownHostsFile to /dev/null to not warn on new or changed hosts:
Host *
StrictHostKeyChecking no
UserKnownHostsFile /dev/null

You can enable the checking on a case-by-case basis by reversing those options for other hosts. The default for StrictHostKeyChecking is "ask":
Host *
StrictHostKeyChecking no
UserKnownHostsFile /dev/null

Host testhost
HostName example.com
StrictHostKeyChecking ask
UserKnownHostsFile /home/demo/.ssh/known_hosts
 

Multiplexing SSH Over a Single TCP Connection

There are situations where establishing a new TCP connection can take longer than you would like. If you are making multiple connections to the same machine, you can take advantage of multiplexing.

SSH multiplexing re-uses the same TCP connection for multiple SSH sessions. This removes some of the work necessary to establish a new session, possibly speeding things up. Limiting the number of connections may also be helpful for other reasons.

To set up multiplexing, you can manually set up the connections, or you can configure your client to automatically use multiplexing when available. We will demonstrate the second option here.
To configure multiplexing, edit your SSH client's configuration file on your local machine:
nano ~/.ssh/config

If you do not already have a wildcard host definition at the top of the file, add one now (as Host *). We will be setting the ControlMaster, ControlPath, and ControlPersist values to establish our multiplexing configuration.

The ControlMaster should be set to "auto" in able to automatically allow multiplexing if possible. The ControlPath will establish the path to control socket. The first session will create this socket and subsequent sessions will be able to find it because it is labeled by username, host, and port.

Setting the ControlPersist option to "1" will allow the initial master connection to be backgrounded. The "1" specifies that the TCP connection should automatically terminate one second after the last SSH session is closed:
Host *
ControlMaster auto
ControlPath ~/.ssh/multiplex/%r@%h:%p
ControlPersist 1

Save and close the file when you are finished. Now, we need to actually create the directory we specified in the control path:
mkdir ~/.ssh/multiplex

Now, any sessions that are established with the same machine will attempt to use the existing socket and TCP connection. When the last session exists, the connection will be torn down after one second.
If for some reason you need to bypass the multiplexing configuration temporarily, you can do so by passing the -S flag with "none":
ssh -S none username@remote_host
 

Setting Up SSH Tunnels

Tunneling other traffic through a secure SSH tunnel is an excellent way to work around restrictive firewall settings. It is also a great way to encrypt otherwise unencrypted network traffic.
 

Configuring Local Tunneling to a Server

SSH connections can be used to tunnel traffic from ports on the local host to ports on a remote host.
A local connection is a way of accessing a network location from your local computer through your remote host. First, an SSH connection is established to your remote host. On the remote server, a connection is made to an external (or internal) network address provided by the user and traffic to this location is tunneled to your local computer on a specified port.

This is often used to tunnel to a less restricted networking environment by bypassing a firewall. Another common use is to access a "localhost-only" web interface from a remote location.
To establish a local tunnel to your remote server, you need to use the -L parameter when connecting and you must supply three pieces of additional information:
  • The local port where you wish to access the tunneled connection.
  • The host that you want your remote host to connect to.
  • The port that you want your remote host to connect on.
These are given, in the order above (separated by colons), as arguments to the -L flag. We will also use the -f flag, which causes SSH to go into the background before executing and the -N flag, which does not open a shell or execute a program on the remote side.

For instance, to connect to example.com on port 80 on your remote host, making the connection available on your local machine on port 8888, you could type:
ssh -f -N -L 8888:example.com:80 username@remote_host

Now, if you point your local web browser to 127.0.0.1:8888, you should see whatever content is at example.com on port 80.
A more general guide to the syntax is:
ssh -L your_port:site_or_IP_to_access:site_portusername@host

Since the connection is in the background, you will have to find its PID to kill it. You can do so by searching for the port you forwarded:
ps aux | grep 8888
1001      5965  0.0  0.0  48168  1136 ?        Ss   12:28   0:00 ssh -f -N -L 8888:example.com:80 username@remote_host
1001 6113 0.0 0.0 13648 952 pts/2 S+ 12:37 0:00 grep --colour=auto 8888

You can then kill the process by targeting the PID, which is the number in the second column of the line that matches your SSH command:
kill 5965

Another option is to start the connection without the -f flag. This will keep the connection in the foreground, preventing you from using the terminal window for the duration of the forwarding. The benefit of this is that you can easily kill the tunnel by typing "CTRL-C".
 

Configuring Remote Tunneling to a Server

SSH connections can be used to tunnel traffic from ports on the local host to ports on a remote host.
In a remote tunnel, a connection is made to a remote host. During the creation of the tunnel, a remote port is specified. This port, on the remote host, will then be tunneled to a host and port combination that is connected to from the local computer. This will allow the remote computer to access a host through your local computer.

This can be useful if you need to allow access to an internal network that is locked down to external connections. If the firewall allows connections out of the network, this will allow you to connect out to a remote machine and tunnel traffic from that machine to a location on the internal network.

To establish a remote tunnel to your remote server, you need to use the -R parameter when connecting and you must supply three pieces of additional information:
  • The port where the remote host can access the tunneled connection.
  • The host that you want your local computer to connect to.
  • The port that you want your local computer to connect to.
These are given, in the order above (separated by colons), as arguments to the -R flag. We will also use the -f flag, which causes SSH to go into the background before executing and the -N flag, which does not open a shell or execute a program on the remote side.

For instance, to connect to example.com on port 80 on our local computer, making the connection available on our remote host on port 8888, you could type:
ssh -f -N -R 8888:example.com:80 username@remote_host

Now, on the remote host, opening a web browser to 127.0.0.1:8888 would allow you to see whatever content is at example.com on port 80.
A more general guide to the syntax is:
ssh -R remote_port:site_or_IP_to_access:site_portusername@host

Since the connection is in the background, you will have to find its PID to kill it. You can do so by searching for the port you forwarded:
ps aux | grep 8888
1001      5965  0.0  0.0  48168  1136 ?        Ss   12:28   0:00 ssh -f -N -R 8888:example.com:80 username@remote_host
1001 6113 0.0 0.0 13648 952 pts/2 S+ 12:37 0:00 grep --colour=auto 8888

You can then kill the process by targeting the PID, which is the number in the second column, of the line that matches your SSH command:
kill 5965

Another option is to start the connection without the -f flag. This will keep the connection in the foreground, preventing you from using the terminal window for the duration of the forwarding. The benefit of this is that you can easily kill the tunnel by typing "CTRL-C".
 

Configuring Dynamic Tunneling to a Remote Server

SSH connections can be used to tunnel traffic from ports on the local host to ports on a remote host.
A dynamic tunnel is similar to a local tunnel in that it allows the local computer to connect to other resources through a remote host. A dynamic tunnel does this by simply specifying a single local port. Applications that wish to take advantage of this port for tunneling must be able to communicate using the SOCKS protocol so that the packets can be correctly redirected at the other side of the tunnel.

Traffic that is passed to this local port will be sent to the remote host. From there, the SOCKS protocol will be interpreted to establish a connection to the desired end location. This set up allows a SOCKS-capable application to connect to any number of locations through the remote server, without multiple static tunnels.

To establish the connection, we will pass the -D flag along with the local port where we wish to access the tunnel. We will also use the -f flag, which causes SSH to go into the background before executing and the -N flag, which does not open a shell or execute a program on the remote side.
For instance, to establish a tunnel on port "7777", you can type:
ssh -f -N -D 7777username@remote_host

From here, you can start pointing your SOCKS-aware application (like a web browser), to the port you selected. The application will send its information into a socket associated with the port.
The method of directing traffic to the SOCKS port will differ depending on application. For instance, in

Firefox, the general location is Preferences > Advanced > Settings > Manual proxy configurations. In Chrome, you can start the application with the --proxy-server= flag set. You will want to use the localhost interface and the port you forwarded.

Since the connection is in the background, you will have to find its PID to kill it. You can do so by searching for the port you forwarded:
ps aux | grep 8888
1001      5965  0.0  0.0  48168  1136 ?        Ss   12:28   0:00 ssh -f -N -D 7777 username@remote_host
1001 6113 0.0 0.0 13648 952 pts/2 S+ 12:37 0:00 grep --colour=auto 8888

You can then kill the process by targeting the PID, which is the number in the second column, of the line that matches your SSH command:
kill 5965

Another option is to start the connection without the -f flag. This will keep the connection in the foreground, preventing you from using the terminal window for the duration of the forwarding. The benefit of this is that you can easily kill the tunnel by typing "CTRL-C".
 

Using SSH Escape Codes to Control Connections

Even after establishing an SSH session, it is possible to exercise control over the connection from within the terminal. We can do this with something called SSH escape codes, which allow us to interact with our local SSH software from within a session.
 

Forcing a Disconnect from the Client-Side (How to Exit Out of a Stuck or Frozen Session)

One of the most useful feature of OpenSSH that goes largely unnoticed is the ability to control certain aspects of the session from within.

These commands can be executed starting with the ~ control character within an SSH session. Control commands will only be interpreted if they are the first thing that is typed after a newline, so always press ENTER one or two times prior to using one.

One of the most useful controls is the ability to initiate a disconnect from the client. SSH connections are typically closed by the server, but this can be a problem if the server is suffering from issues or if the connection has been broken. By using a client-side disconnect, the connection can be cleanly closed from the client.

To close a connection from the client, use the control character (~), with a dot. If your connection is having problems, you will likely be in what appears to be a stuck terminal session. Type the commands despite the lack of feedback to perform a client-side disconnect:
[ENTER]
~.
The connection should immediately close, returning you to your local shell session.
 

Placing an SSH Session into the Background

One of the most useful feature of OpenSSH that goes largely unnoticed is the ability to control certain aspects of the session from within the connection.

These commands can be executed starting with the ~ control character from within an SSH connection.
Control commands will only be interpreted if they are the first thing that is typed after a newline, so always press ENTER one or two times prior to using one.

One capability that this provides is to put an SSH session into the background. To do this, we need to supply the control character (~) and then execute the conventional keyboard shortcut to background a task (CTRL-z):
[ENTER]
~[CTRL-z]

This will place the connection into the background, returning you to your local shell session. To return to your SSH session, you can use the conventional job control mechanisms.

You can immediately re-activate your most recent backgrounded task by typing:
fg

If you have multiple backgrounded tasks, you can see the available jobs by typing:
jobs
[1]+  Stopped                 ssh username@some_host
[2] Stopped ssh username@another_host

You can then bring any of the tasks to the foreground by using the index in the first column with a percentage sign:
fg %2
 

Changing Port Forwarding Options on an Existing SSH Connection

One of the most useful feature of OpenSSH that goes largely unnoticed is the ability to control certain aspects of the session from within the connection.

These commands can be executed starting with the ~ control character from within an SSH connection. Control commands will only be interpreted if they are the first thing that is typed after a newline, so always press ENTER one or two times prior to using one.

One thing that this allows is for a user to alter the port forwarding configuration after the connection has already been established. This allows you to create or tear down port forwarding rules on-the-fly.
These capabilities are part of the SSH command line interface, which can be accessed during a session by using the control character (~) and "C":
[ENTER]
~C
ssh>

You will be given an SSH command prompt, which has a very limited set of valid commands. To see the available options, you can type -h from this prompt. If nothing is returned, you may have to increase the verbosity of your SSH output by using ~v a few times:
[ENTER]
~v
~v
~v
~C
-h
Commands:
-L[bind_address:]port:host:hostport Request local forward
-R[bind_address:]port:host:hostport Request remote forward
-D[bind_address:]port Request dynamic forward
-KL[bind_address:]port Cancel local forward
-KR[bind_address:]port Cancel remote forward
-KD[bind_address:]port Cancel dynamic forward

As you can see, you can easily implement any of the forwarding options using the appropriate options (see the forwarding section for more information). You can also destroy a tunnel with the associated "kill" command specified with a "K" before the forwarding type letter. For instance, to kill a local forward (-L), you could use the -KL command. You will only need to provide the port for this.
So, to set up a local port forward, you may type:
[ENTER]
~C
-L 8888:127.0.0.1:80

Port 8888 on your local computer will now be able to communicate with the web server on the host you are connecting to. When you are finished, you can tear down that forward by typing:
[ENTER]
~C
-KL 8888
 

Conclusion

The above instructions should cover the majority of the information most users will need about SSH on a day-to-day basis. If you have other tips or wish to share your favorite configurations and methods, feel free to use the comments below.

How To Configure SSH Key-Based Authentication on a Linux Server

$
0
0
SSH, or secure shell, is an encrypted protocol used to administer and communicate with servers. When working with a Linux server, chances are, you will spend most of your time in a terminal session connected to your server through SSH.

While there are a few different ways of logging into an SSH server, in this guide, we'll focus on setting up SSH keys. SSH keys provide an easy, yet extremely secure way of logging into your server. For this reason, this is the method we recommend for all users.


How Do SSH Keys Work?

An SSH server can authenticate clients using a variety of different methods. The most basic of these is password authentication, which is easy to use, but not the most secure.

Although passwords are sent to the server in a secure manner, they are generally not complex or long enough to be resistant to repeated, persistent attackers. Modern processing power combined with automated scripts make brute forcing a password-protected account very possible. Although there are other methods of adding additional security (fail2ban, etc.), SSH keys prove to be a reliable and secure alternative.
SSH key pairs are two cryptographically secure keys that can be used to authenticate a client to an SSH server. Each key pair consists of a public key and a private key.

The private key is retained by the client and should be kept absolutely secret. Any compromise of the private key will allow the attacker to log into servers that are configured with the associated public key without additional authentication. As an additional precaution, the key can be encrypted on disk with a passphrase.
The associated public key can be shared freely without any negative consequences. The public key can be used to encrypt messages that only the private key can decrypt. This property is employed as a way of authenticating using the key pair.

The public key is uploaded to a remote server that you want to be able to log into with SSH. The key is added to a special file within the user account you will be logging into called ~/.ssh/authorized_keys.
When a client attempts to authenticate using SSH keys, the server can test the client on whether they are in possession of the private key. If the client can prove that it owns the private key, a shell session is spawned or the requested command is executed.

How To Create SSH Keys

The first step to configure SSH key authentication to your server is to generate an SSH key pair on your local computer.

To do this, we can use a special utility called ssh-keygen, which is included with the standard OpenSSH suite of tools. By default, this will create a 2048 bit RSA key pair, which is fine for most uses.
On your local computer, generate a SSH key pair by typing:
 
ssh-keygen
Generating public/private rsa key pair.
Enter file in which to save the key (/home/username/.ssh/id_rsa):

The utility will prompt you to select a location for the keys that will be generated. By default, the keys will be stored in the ~/.ssh directory within your user's home directory. The private key will be called id_rsa and the associated public key will be called id_rsa.pub.

Usually, it is best to stick with the default location at this stage. Doing so will allow your SSH client to automatically find your SSH keys when attempting to authenticate. If you would like to choose a non-standard path, type that in now, otherwise, press ENTER to accept the default.
If you had previously generated an SSH key pair, you may see a prompt that looks like this:
 
/home/username/.ssh/id_rsa already exists.
Overwrite (y/n)?

If you choose to overwrite the key on disk, you will not be able to authenticate using the previous key anymore. Be very careful when selecting yes, as this is a destructive process that cannot be reversed.
 
Created directory '/home/username/.ssh'. 
Enter passphrase (empty for no passphrase):
Enter same passphrase again:

Next, you will be prompted to enter a passphrase for the key. This is an optional passphrase that can be used to encrypt the private key file on disk.

You may be wondering what advantages an SSH key provides if you still need to enter a passphrase. Some of the advantages are:
  • The private SSH key (the part that can be passphrase protected), is never exposed on the network. The passphrase is only used to decrypt the key on the local machine. This means that network-based brute forcing will not be possible against the passphrase.
  • The private key is kept within a restricted directory. The SSH client will not recognize private keys that are not kept in restricted directories. The key itself must also have restricted permissions (read and write only available for the owner). This means that other users on the system cannot snoop.
  • Any attacker hoping to crack the private SSH key passphrase must already have access to the system. This means that they will already have access to your user account or the root account. If you are in this position, the passphrase can prevent the attacker from immediately logging into your other servers. This will hopefully give you time to create and implement a new SSH key pair and remove access from the compromised key.
Since the private key is never exposed to the network and is protected through file permissions, this file should never be accessible to anyone other than you (and the root user). The passphrase serves as an additional layer of protection in case these conditions are compromised.

A passphrase is an optional addition. If you enter one, you will have to provide it every time you use this key (unless you are running SSH agent software that stores the decrypted key). We recommend using a passphrase, but if you do not want to set a passphrase, you can simply press ENTER to bypass this prompt.
 
Your identification has been saved in /home/username/.ssh/id_rsa.
Your public key has been saved in /home/username/.ssh/id_rsa.pub.
The key fingerprint is:
a9:49:2e:2a:5e:33:3e:a9:de:4e:77:11:58:b6:90:26 username@remote_host
The key's randomart image is:
+--[ RSA 2048]----+
| ..o |
| E o= . |
| o. o |
| .. |
| ..S |
| o o. |
| =o.+. |
|. =++.. |
|o=++. |
+-----------------+

You now have a public and private key that you can use to authenticate. The next step is to place the public key on your server so that you can use SSH key authentication to log in.

How To Copy a Public Key to your Server

If you already have a server available and did not embed keys upon creation, you can still upload your private key and use it to authenticate to your server.

The method you use depends largely on the tools you have available and the details of your current configuration. The following methods all yield the same end result. The easiest, most automated method is first and the ones that follow each require additional manual steps if you are unable to use the preceding methods.

Copying your Public Key Using SSH-Copy-ID

The easiest way to copy your public key to an existing server is to use a utility called ssh-copy-id. Because of its simplicity, this method is recommended if available.

The ssh-copy-id tool is included in the OpenSSH packages in many distributions, so you may have it available on your local system. For this method to work, you must already have password-based SSH access to your server.

To use the utility, you simply need to specify the remote host that you would like to connect to and the user account that you have password SSH access to. This is the account where your public SSH key will be copied.

The syntax is:
ssh-copy-id username@remote_host

You may see a message like this:
The authenticity of host '111.111.11.111 (111.111.11.111)' can't be established.
ECDSA key fingerprint is fd:fd:d4:f9:77:fe:73:84:e1:55:00:ad:d6:6d:22:fe.
Are you sure you want to continue connecting (yes/no)? yes

This just means that your local computer does not recognize the remote host. This will happen the first time you connect to a new host. Type "yes" and press ENTER to continue.

Next, the utility will scan your local account for the id_rsa.pub key that we created earlier. When it finds the key, it will prompt you for the password of the remote user's account:

/usr/bin/ssh-copy-id: INFO: attempting to log in with the new key(s), to filter out any that are already installed
/usr/bin/ssh-copy-id: INFO: 1 key(s) remain to be installed -- if you are prompted now it is to install the new keys
username@111.111.11.111's password:

Type in the password (your typing will not be displayed for security purposes) and press ENTER. The utility will connect to the account on the remote host using the password you provided. It will then copy the contents of your ~/.ssh/id_rsa.pub key into a file in the remote account's home ~/.ssh directory called  
authorized_keys.
You will see output that looks like this:
Number of key(s) added: 1

Now try logging into the machine, with: "ssh 'username@111.111.11.111'"
and check to make sure that only the key(s) you wanted were added.

At this point, your id_rsa.pub key has been uploaded to the remote account. You can continue onto the next section.

Copying your Public Key Using SSH

If you do not have ssh-copy-id available, but you have password-based SSH access to an account on your server, you can upload your keys using a conventional SSH method.

We can do this by outputting the content of our public SSH key on our local computer and piping it through an SSH connection to the remote server. On the other side, we can make sure that the ~/.ssh directory exists under the account we are using and then output the content we piped over into a file called authorized_keys within this directory.

We will use the >> redirect symbol to append the content instead of overwriting it. This will let us add keys without destroying previously added keys.
The full command will look like this:
cat ~/.ssh/id_rsa.pub | ssh username@remote_host"mkdir -p ~/.ssh && cat ~/.ssh/authorized_keys"
You may see a message like this:
The authenticity of host '111.111.11.111 (111.111.11.111)' can't be established.
ECDSA key fingerprint is fd:fd:d4:f9:77:fe:73:84:e1:55:00:ad:d6:6d:22:fe. 
Are you sure you want to continue connecting (yes/no)? yes

This just means that your local computer does not recognize the remote host. This will happen the first time you connect to a new host. Type "yes" and press ENTER to continue.

Afterwards, you will be prompted with the password of the account you are attempting to connect to:
username@111.111.11.111's password:

After entering your password, the content of your id_rsa.pub key will be copied to the end of the authorized_keys file of the remote user's account. Continue to the next section if this was successful.

Copying your Public Key Manually

If you do not have password-based SSH access to your server available, you will have to do the above process manually.

The content of your id_rsa.pub file will have to be added to a file at ~/.ssh/authorized_keys on your remote machine somehow.

To display the content of your id_rsa.pub key, type this into your local computer:
cat ~/.ssh/id_rsa.pub
 
You will see the key's content, which may look something like this:
ssh-rsa AAAAB3NzaC1yc2EAAAADAQABAAACAQCqql6MzstZYh1TmWWv11q5O3pISj2ZFl9HgH1JLknLLx44
+tXfJ7mIrKNxOOwxIxvcBF8PXSYvobFYEZjGIVCEAjrUzLiIxbyCoxVyle7Q+bqgZ8SeeM8wzytsY
+dVGcBxF6N4JS+zVk5eMcV385gG3Y6ON3EG112n6d
+SMXY0OEBIcO6x+PnUSGHrSgpBgX7Ks1r7xqFa7heJLLt2wWwkARptX7udSq05paBhcpB0pHtA1Rfz3K2B
+ZVIpSDfki9UVKzT8JUmwW6NNzSgxUfQHGwnW7kj4jp4AT0VZk3ADw497M2G
/12N0PPB5CnhHf7ovgy6nL1ikrygTKRFmNZISvAcywB9GVqNAVE+ZHDSCuURNsAInVzgYo9xgJDW8wUw2o8U77
+xiFxgI5QSZX3Iq7YLMgeksaO4rBJEa54k8m5wEiEE1nUhLuJ0X/vh2xPff6SQ1BL/zkOhvJCACK6Vb15mDOeCSq54Cr7kvS46itMosi/uS66+PujOO+xt/2FWYepz6ZlN70bRly57Q06J+ZJoc9FfBCbCyYH7U/ASsmY095ywPsBo1XQ9PqhnN1/YOorJ068foQDNVpm146mUpILVxmq41Cj55YKHEazXGsdBIbXWhcrRf4G2fJLRcGUr9q8/lERo9oxRm5JFX6TCmj6kmiFqv+Ow9gI0x8GvaQ== demo@test

Access your remote host using whatever method you have available.

Once you have access to your account on the remote server, you should make sure the ~/.ssh directory is created. This command will create the directory if necessary, or do nothing if it already exists:
mkdir -p ~/.ssh

Now, you can create or modify the authorized_keys file within this directory. You can add the contents of your id_rsa.pub file to the end of the authorized_keys file, creating it if necessary, using this:
echo public_key_string>> ~/.ssh/authorized_keys

In the above command, substitute the public_key_string with the output from the cat ~/.ssh/id_rsa.pub command that you executed on your local system. It should start with ssh-rsa AAAA....
If this works, you can move on to try to authenticate without a password.

Authenticate to your Server Using SSH Keys

If you have successfully completed one of the procedures above, you should be able to log into the remote host without the remote account's password.

The basic process is the same:
ssh username@remote_host

If this is your first time connecting to this host (if you used the last method above), you may see something like this:
The authenticity of host '111.111.11.111 (111.111.11.111)' can't be established.
ECDSA key fingerprint is fd:fd:d4:f9:77:fe:73:84:e1:55:00:ad:d6:6d:22:fe.
Are you sure you want to continue connecting (yes/no)? yes

This just means that your local computer does not recognize the remote host. Type "yes" and then press ENTER to continue.

If you did not supply a passphrase for your private key, you will be logged in immediately. If you supplied a passphrase for the private key when you created the key, you will be required to enter it now. Afterwards, a new shell session should be spawned for you with the account on the remote system.
If successful, continue on to find out how to lock down the server.

Disabling Password Authentication on your Server

If you were able to login to your account using SSH without a password, you have successfully configured SSH key-based authentication to your account. However, your password-based authentication mechanism is still active, meaning that your server is still exposed to brute-force attacks.

Before completing the steps in this section, make sure that you either have SSH key-based authentication configured for the root account on this server, or preferably, that you have SSH key-based authentication configured for an account on this server with sudo access. This step will lock down password-based logins, so ensuring that you have will still be able to get administrative access is essential.

Once the above conditions are true, log into your remote server with SSH keys, either as root or with an account with sudo privileges. Open the SSH daemon's configuration file:
sudo nano /etc/ssh/sshd_config

Inside the file, search for a directive called PasswordAuthentication. This may be commented out. Uncomment the line and set the value to "no". This will disable your ability to log in through SSH using account passwords:
PasswordAuthentication no

Save and close the file when you are finished. To actually implement the changes we just made, you must restart the service.

On Ubuntu or Debian machines, you can issue this command:
sudo service ssh restart

On CentOS/Fedora machines, the daemon is called sshd:
sudo service sshd restart

After completing this step, you've successfully transitioned your SSH daemon to only respond to SSH keys.

Conclusion

You should now have SSH key-based authentication configured and running on your server, allowing you to sign in without providing an account password. From here, there are many directions you can head.

How to Enable Guided Access On Your iPad or iPhone For Kids

$
0
0


iPads and iPhones give you control over how your kids can use your devices. You can quickly lock your device to a certain app before handing it over or lock down an entire device with comprehensive parental controls.

These features are named Guided Access and Restrictions, respectively. Guided Access is ideal for temporarily handing your iPad or iPhone to a kid, while Restrictions are ideal for locking down a device your kids use all the time.


Guided Access?

Guided Access allows you to lock your device to a single app. For example, you could lock your device to only run a specific educational app or game and then hand it to your kid. They’d only be able to use that specific app. When they’re done, you can unlock the device with a PIN you set, allowing you to use it normally.

To set up Guided Access, open the Settings app and navigate to General > Accessibility > Guided Access. From here, you can ensure guided access is enabled and set a passcode.


To enable Guided Access, open the app you want to lock the device to — for example, whatever educational app or game you want your kid to use. Quickly press the Home button three times and the Guided Access screen will appear.

From here, you can further lock down the app. For example, you could disable touch events completely, disable touch in certain areas of the app, disable motion, or disable hardware buttons.
You don’t have to configure any of these settings, however. To start a Guided Access session, just tap the Start option at the top-right corner of the screen.


If you try to tap the Home button to leave the app, you’ll see a “Guided Access is enabled” message at the top of the screen. Press the Home button three times again and you’ll see a PIN prompt. Enter the PIN you provided earlier to leave Guided Access mode.


That’s it — whenever you want to enable Guided Access, just open the app you want to lock the device to and “triple-click” the Home button.

Restrictions

Restrictions allow you to set device-wide restrictions that will always be enforced. For example, you could prevent your kids from ever using certain apps, prevent them from installing new apps, disable in-app purchases, only allow them to install apps with appropriate ratings, prevent access to certain websites, and lock down other settings. Settings you select here can’t be changed without the PIN you provide.

To set up Restrictions, open the Settings app and navigate to General > Restrictions. Enable Restrictions and you’ll be prompted to create a PIN that you’ll need whenever you change your Restrictions settings.


From here, you can scroll down through the list and customize the types of apps, content, and settings you want your kids to have access to.

For example, to enforce content ratings, scroll down to the Allowed Content section. Tap the Apps section and you can choose which types of apps your kids can install. For example, you could prevent them from installing apps with the “17+” age rating.


Tap the Websites option and you’ll be able to block the Safari browser from loading certain types of websites. You can limit access to certain types of adult content or choose to only allow access to specific websites. You can customize which exact websites are and are not allowed, too.

If you wanted to block access to the web entirely, you could disable access to the Safari browser and disable the Installing Apps feature, which would prevent your kids from using the installed Safari browser or installing any other browsers.


Other settings allow you to lock certain privacy and system settings, preventing them from being changed. For example, you could prevent your kids from changing the Mail and Calendar accounts on the device. Near the bottom, you’ll also find options for Game Center — you can prevent your kids from playing multiplayer games or adding friends in Apple’s Game Center app.

The settings you choose will always be enforced until you enter the Restrictions screen in the settings, tap the Disable Restrictions option, and provide the PIN you created.

Conclusion

iOS still doesn’t provide multiple user accounts, but these features go a long way to letting you control what your kids can do on an iPad, whether the iPad is primarily yours or primarily theirs.

Guided Access and Restrictions will work on an iPod Touch, too. If you purchased an iPod Touch for your kid, you can lock it down in the same way.

How To Create a Puppet Module To Automate WordPress Installation on Ubuntu 14.04

$
0
0
Puppet is a configuration management tool that system administrators use to automate the processes involved in maintaining a company's IT infrastructure. Writing individual Puppet manifest files is sufficient for automating simple tasks.

However, when you have an entire workflow to automate, it is ideal to create and use a Puppet module instead. A Puppet module is just a collection of manifests along with files that those manifests require, neatly bundled into a reusable and shareable package.

WordPress is a very popular blogging platform. As an administrator, you might find yourself installing WordPress and its dependencies (Apache, PHP, and MySQL) very often. This installation process is a good candidate for automation, and today we create a Puppet module that does just that.


What This Tutorial Includes

In this tutorial you will create a Puppet module that can perform the following activities:
  • Install Apache and PHP
  • Install MySQL
  • Create a database and a database user on MySQL for WordPress
  • Install and configure WordPress
You will then create a simple manifest that uses the module to set up WordPress on Ubuntu 14.04.

Prerequisites

You will need the following:
  • Ubuntu 14.04 server
  • A sudo user
  • You shoud understand how to manage WordPress once you get to the control panel setup.

Step 1 — Install Puppet in Standalone Mode

To install Puppet using apt-get, the Puppet Labs Package repository has to be added to the list of available repositories. Puppet Labs has a Debian package that does this. The name of this package depends on the version of Ubuntu you are using. As this tutorial uses Ubuntu 14.04, Trusty Tahr, you have to download and install puppetlabs-release-trusty.deb.

Create and move into your Downloads directory:
mkdir ~/Downloads
cd ~/Downloads

Get the package:
wget https://apt.puppetlabs.com/puppetlabs-release-trusty.deb
sudo dpkg -i puppetlabs-release-trusty.deb

You can now install Puppet using apt-get.
sudo apt-get update
sudo apt-get install puppet

Puppet is now installed. You can check by typing in:
sudo puppet --version

It should print Puppet's version. At the time of this writing, the latest version is 3.7.1.
Note: If you see a warning message about templatedir, check the solution in Step 2.

Step 2 - Install Apache and MySQL Modules

Managing Apache and MySQL are such common activities that PuppetLabs has its own modules for them. We'll use these modules to install and configure Apache and MySQL.

You can list all the Puppet modules installed on your system using the following command:
sudo puppet module list

You will find no modules currently installed.

You might see a warning message that says:
Warning: Setting templatedir is deprecated. See http://links.puppetlabs.com/env-settings-deprecations (at /usr/lib/ruby/vendor_ruby/puppet/settings.rb:1071:in `each')
To remove this warning, use nano to edit the puppet.conf file, and comment out the templatedir line:
sudo nano /etc/puppet/puppet.conf

After the edits, the file should have the following contents. You are just commenting out the templatedir line:
[main]
logdir=/var/log/puppet
vardir=/var/lib/puppet
ssldir=/var/lib/puppet/ssl
rundir=/var/run/puppet
factpath=$vardir/lib/facter
#templatedir=$confdir/templates

[master]
# These are needed when the puppetmaster is run by passenger
# and can safely be removed if webrick is used.
ssl_client_header = SSL_CLIENT_S_DN
ssl_client_verify_header = SSL_CLIENT_VERIFY

That should remove the warning message.

Install the PuppetLabs Apache and MySQL modules:
sudo puppet module install puppetlabs-apache
sudo puppet module install puppetlabs-mysql

Verify the installation by listing the modules again:
sudo puppet module list

You should be able to see the Apache and MySQL modules in the list.
/etc/puppet/modules
├── puppetlabs-apache (v1.1.1)
├── puppetlabs-concat (v1.1.1)
├── puppetlabs-mysql (v2.3.1)
└── puppetlabs-stdlib (v4.3.2)

Step 3 - Create a New Module for WordPress

Create a new directory to keep all your custom modules.
mkdir ~/MyModules
cd ~/MyModules

Let us call our module do-wordpress. Generate the generic new module:
puppet module generate do-wordpress --skip-interview

If you don't include the --skip-interview flag, the command will be interactive, and will prompt you with various questions about the module to populate the metadata.json file.

At this point a new directory named do-wordpress has been created. It contains boilerplate code and a directory structure that is necessary to build the module.

Edit the metadata.json file to replace puppetlabs-stdlib with puppetlabs/stdlib.
nano ~/MyModules/do-wordpress/metadata.json

This edit is required due a currently open bug in Puppet. After the change, your metadata.json file should look like this:
{
"name": "do-wordpress",
"version": "0.1.0",
"author": "do",
"summary": null,
"license": "Apache 2.0",
"source": "",
"project_page": null,
"issues_url": null,
"dependencies": [
{"name":"puppetlabs/stdlib","version_requirement":">= 1.0.0"}
]
}

Step 4 - Create a Manifest to Install Apache and PHP

Use nano to create and edit a file named web.pp in the manifests directory, which will install Apache and PHP:
nano ~/MyModules/do-wordpress/manifests/web.pp

Install Apache and PHP with default parameters. We use prefork as the MPM (Multi-Processing Module) to maximize compatibility with other libraries.

Add the following code to the file exactly:
class wordpress::web {

# Install Apache
class {'apache':
mpm_module => 'prefork'
}

# Add support for PHP
class {'::apache::mod::php': }
}

Step 5 - Create a File to Store Configuration Variables

Use nano to create and edit a file named conf.pp in the manifests directory.
nano ~/MyModules/do-wordpress/manifests/conf.pp

This file is the one place where you should set custom configuration values such as passwords and names. Every other configuration file on the system will pull its values from this file.
In the future, if you need to change the Wordpress/MySQL configuration, you will have to change only this file.

Add the following code to the file. Make sure you replace the database values with the custom information you want to use with WordPress. You will most likely want to leave dbhost set to localhost. You should change the rootpassword and dbuserpassword.

Variables that you can or should edit are marked in red:
class wordpress::conf {
# You can change the values of these variables
# according to your preferences

$root_password = 'password'
$db_name = 'wordpress'
$db_user = 'wp'
$db_user_password = 'password'
$db_host = 'localhost'

# Don't change the following variables

# This will evaluate to wp@localhost
$db_user_host = "${db_user}@${db_host}"

# This will evaluate to wp@localhost/wordpress.*
$db_user_host_db = "${db_user}@${db_host}/${db_name}.*"
}

Step 6 - Create a Manifest for MySQL

Use nano to create and edit a file named db.pp in the manifests directory:
nano ~/MyModules/do-wordpress/manifests/db.pp

This manifest does the following:
  • Installs MySQL server
  • Sets the root password for MySQL server
  • Creates a database for Wordpress
  • Creates a user for Wordpress
  • Grants privileges to the user to access the database
  • Installs MySQL client and bindings for various languages
All of the above actions are performed by the classes ::mysql::server and ::mysql::client.
Add the following code to the file exactly as shown. Inline comments are included to provide a better understanding:
class wordpress::db {

class { '::mysql::server':

# Set the root password
root_password => $wordpress::conf::root_password,

# Create the database
databases => {
"${wordpress::conf::db_name}" => {
ensure => 'present',
charset => 'utf8'
}
},

# Create the user
users => {
"${wordpress::conf::db_user_host}" => {
ensure => present,
password_hash => mysql_password("${wordpress::conf::db_user_password}")
}
},

# Grant privileges to the user
grants => {
"${wordpress::conf::db_user_host_db}" => {
ensure => 'present',
options => ['GRANT'],
privileges => ['ALL'],
table => "${wordpress::conf::db_name}.*",
user => "${wordpress::conf::db_user_host}",
}
},
}

# Install MySQL client and all bindings
class { '::mysql::client':
require => Class['::mysql::server'],
bindings_enable => true
}
}

Step 7 - Download the Latest WordPress

Download the latest WordPress installation bundle from the official website using wget and store it in the files directory.

Create and move to a new directory:
mkdir ~/MyModules/do-wordpress/files
cd ~/MyModules/do-wordpress/files

Download the files:
wget http://wordpress.org/latest.tar.gz
 

Step 8 - Create a Template for wp-config.php

You might already know that Wordpress needs a wp-config.php file that contains information about the MySQL database that it is allowed to use. A template is used so that Puppet can generate this file with the right values.

Create a new directory named templates.
mkdir ~/MyModules/do-wordpress/templates

Move into the /tmp directory:
cd /tmp

Extract the WordPress files:
tar -xvzf ~/MyModules/do-wordpress/files/latest.tar.gz  # Extract the tar

The latest.tar.gz file that you downloaded contains a wp-config-sample.php file. Copy the file to the templates directory as wp-config.php.erb.
cp /tmp/wordpress/wp-config-sample.php ~/MyModules/do-wordpress/templates/wp-config.php.erb
Clean up the /tmp directory:
rm -rf /tmp/wordpress  # Clean up

Edit the wp-config.php.erb file using nano.
nano ~/MyModules/do-wordpress/templates/wp-config.php.erb

Use the variables defined in conf.pp to set the values for DBNAME, DBUSER, DBPASSWORD and DBHOST. You can use the exact settings shown below, which will pull in your actual variables from the conf.pp file we created earlier. The items marked in red are the exact changes that you need to make on the four database-related lines.

Ignoring the comments, your file should look like this:
<%= scope.lookupvar('wordpress::conf::db_name') %>
'); define('DB_USER', '<%= scope.lookupvar('wordpress::conf::db_user') %>'); define('DB_PASSWORD', '<%= scope.lookupvar('wordpress::conf::db_user_password') %>'); define('DB_HOST', '<%= scope.lookupvar('wordpress::conf::db_host') %>'); define('DB_CHARSET', 'utf8'); define('DB_COLLATE', ''); define('AUTH_KEY', 'put your unique phrase here'); define('SECURE_AUTH_KEY', 'put your unique phrase here'); define('LOGGED_IN_KEY', 'put your unique phrase here'); define('NONCE_KEY', 'put your unique phrase here'); define('AUTH_SALT', 'put your unique phrase here'); define('SECURE_AUTH_SALT', 'put your unique phrase here'); define('LOGGED_IN_SALT', 'put your unique phrase here'); define('NONCE_SALT', 'put your unique phrase here'); $table_prefix = 'wp_'; define('WP_DEBUG', false); if ( !defined('ABSPATH') ) define('ABSPATH', dirname(__FILE__) . '/'); require_once(ABSPATH . 'wp-settings.php');

Step 9 - Create a Manifest for Wordpress

Use nano to create and edit a file named wp.pp in the manifests directory:
nano ~/MyModules/do-wordpress/manifests/wp.pp

This manifest performs the following actions:
  • Copies the contents of the Wordpress installation bundle to /var/www/. This has to be done because the default configuration of Apache serves files from /var/www/
  • Generates a wp-config.php file using the template
Add the following code to the file exactly as shown:
class wordpress::wp {

# Copy the Wordpress bundle to /tmp
file { '/tmp/latest.tar.gz':
ensure => present,
source => "puppet:///modules/wordpress/latest.tar.gz"
}

# Extract the Wordpress bundle
exec { 'extract':
cwd => "/tmp",
command => "tar -xvzf latest.tar.gz",
require => File['/tmp/latest.tar.gz'],
path => ['/bin'],
}

# Copy to /var/www/
exec { 'copy':
command => "cp -r /tmp/wordpress/* /var/www/",
require => Exec['extract'],
path => ['/bin'],
}

# Generate the wp-config.php file using the template
file { '/var/www/wp-config.php':
ensure => present,
require => Exec['copy'],
content => template("wordpress/wp-config.php.erb")
}
}

Step 10 - Create init.pp, a Manifest that Integrates the Other Manifests

Every Puppet module needs to have a file named init.pp. When an external manifest includes your module, the contents of this file will be executed. The puppet module generate command created a generic version of this file for you already.

Edit init.pp using nano:
nano ~/MyModules/do-wordpress/manifests/init.pp

Let the file have the following contents.
You can leave the commented explanations and examples at the top. There should be an empty block for the wordpress class. Add the contents shown here so the wordpress block looks like the one shown below. Make sure you get the brackets nested correctly.
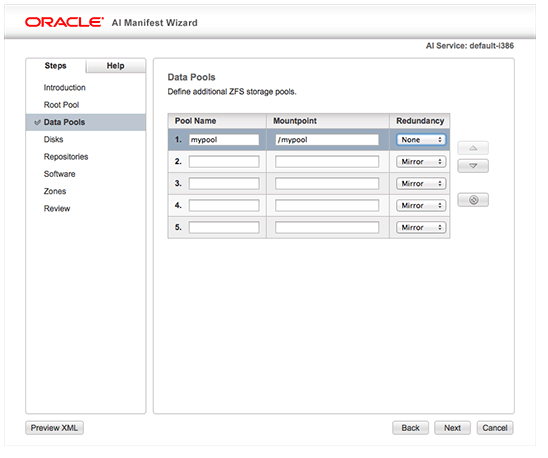
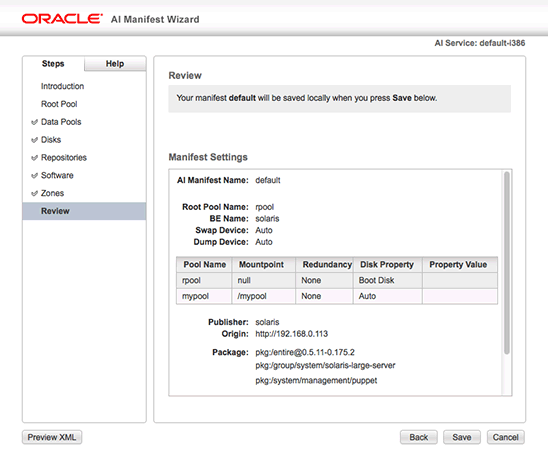
Inline comments are included to explain the settings:
class wordpress {
# Load all variables
class { 'wordpress::conf': }

# Install Apache and PHP
class { 'wordpress::web': }

# Install MySQL
class { 'wordpress::db': }

# Run Wordpress installation only after Apache is installed
class { 'wordpress::wp':
require => Notify['Apache Installation Complete']
}

# Display this message after MySQL installation is complete
notify { 'MySQL Installation Complete':
require => Class['wordpress::db']
}

# Display this message after Apache installation is complete
notify { 'Apache Installation Complete':
require => Class['wordpress::web']
}

# Display this message after Wordpress installation is complete
notify { 'Wordpress Installation Complete':
require => Class['wordpress::wp']
}
}

Step 11 - Build the WordPress Module

The module is now ready to be built. Move into the MyModules directory:
cd ~/MyModules

Use the puppet module build command to build the module:
sudo puppet module build do-wordpress

You should see the following output from a successful build:
Notice: Building /home/user/MyModules/do-wordpress for release
Module built: /home/user/MyModules/do-wordpress/pkg/do-wordpress-0.1.0.tar.gz

The module is now ready to be used and shared. You will find the installable bundle in the module's pkg directory.
 

Step 12 - Install the WordPress Module

To use the module, it has to be installed first. Use the puppet module install command.
sudo puppet module install ~/MyModules/do-wordpress/pkg/do-wordpress-0.1.0.tar.gz

After installation, when you run the sudo puppet module list command, you should see an output similar to this:
/etc/puppet/modules
├── do-wordpress (v0.1.0)
├── puppetlabs-apache (v1.1.1)
├── puppetlabs-concat (v1.1.1)
├── puppetlabs-mysql (v2.3.1)
└── puppetlabs-stdlib (v4.3.2)

Now that it's installed, you should reference this module as do-wordpress for any Puppet commands.
 

Updating or Uninstalling the Module

If you receive installation errors, or if you notice configuration problems with WordPress, you will likely need to make changes in one or more of the manifest and related files we created earlier in the tutorial.
Or, you may simply want to uninstall the module at some point.

To update or uninstall the module, use this command:
sudo puppet module uninstall do-wordpress

If you just wanted to uninstall, you're done.
Otherwise, make the changes you needed, then rebuild and reinstall the module according to Steps 11-12.
 

Step 13 - Use the Module in a Standalone Manifest File to Install WordPress

To use the module to install Wordpress, you have to create a new manifest, and apply it.
Use nano to create and edit a file named install-wp.pp in the /tmp directory (or any other directory of your choice).
nano /tmp/install-wp.pp

Add the following contents to the file exactly as shown:
class { 'wordpress':
}

Apply the manifest using puppet apply. This is the step that gets WordPress up and running on your server:
sudo puppet apply /tmp/install-wp.pp

It's fine to see a warning or two.
This will take a while to run, but when it completes, you will have Wordpress and all its dependencies installed and running.

The final few successful installation lines should look like this:
Notice: /Stage[main]/Apache/File[/etc/apache2/mods-enabled/authn_core.load]/ensure: removed
Notice: /Stage[main]/Apache/File[/etc/apache2/mods-enabled/status.load]/ensure: removed
Notice: /Stage[main]/Apache/File[/etc/apache2/mods-enabled/mpm_prefork.load]/ensure: removed
Notice: /Stage[main]/Apache/File[/etc/apache2/mods-enabled/status.conf]/ensure: removed
Notice: /Stage[main]/Apache/File[/etc/apache2/mods-enabled/mpm_prefork.conf]/ensure: removed
Notice: /Stage[main]/Apache::Service/Service[httpd]: Triggered 'refresh' from 55 events
Notice: Finished catalog run in 55.91 seconds

You can open a browser and visit http://server-IP/. You should see the WordPress welcome screen.


From here, you can configure your WordPress control panel normally.
 

Deploying to Multiple Servers

If you are running Puppet in an Agent-Master configuration and want to install WordPress on one or more remote machines, all you have to do is add the line class {'wordpress':} to the node definitions of those machines.

Conclusion

With this tutorial, you have learned to create your own Puppet module that sets up WordPress for you. You could further build on this to add support for automatically installing certain themes and plugins. Finally, when you feel your module could be useful for others as well, you can publish it on Puppet Forge.
Viewing all 880 articles
Browse latest View live


<script src="https://jsc.adskeeper.com/r/s/rssing.com.1596347.js" async> </script>