This step by step guide will show you how to set up a highly available PostgreSQL cluster using Patroni and HAProxy on Ubuntu 18.0. These instruction can also be applied (slight changes may be required) if you are running an earlier release of Ubuntu 16.04 or 17.
Prerequisites
To follow the steps covered in this tutorial, you will need four (physical or virtual) machines installed with Ubuntu 18.04.4 server having sudo non-root user privileges.
These are the machines we will use in this guide for our cluster setup. However, if you wish you can add up more, its completely up to your requirement.
These are the machines we will use in this guide for our cluster setup. However, if you wish you can add up more, its completely up to your requirement.
| HOSTNAME | IP ADDRESS | PURPOSE |
| NODE1 | 192.168.10.1 | Postgresql, Patroni |
| NODE2 | 192.168.10.2 | Postgresql, Patroni |
| NODE3 | 192.168.10.3 | etcd |
| NODE4 | 192.168.10.4 | HAProxy |
When you have prerequisites in place, please proceed to the below steps:
Installing PostreSQL
In this step, we will install postgres on two of the nodes (node1, node2) one by one using the below command:At the time of this tutorial, the postgresql version 10 was the default release in Ubuntu 18.04 packages repository. If you wish you can install postgresql version 12 like below:
Upon installation, Postgres automatically runs as a service. We need to stop the Postgres service at this point with below command:
Upon installation, Postgres automatically runs as a service. We need to stop the Postgres service at this point with below command:
Installing Patroni
Patroni is an open-source python package that manages postgres configuration. It can be configured to handle tasks like replication, backups and restorations.
Patroni uses utilities that come installed with postgres, located in the /usr/lib/postgresql/10/bin directory by default on Ubuntu 18.04. You will need to create symbolic links in the PATH to ensure that Patroni can find the utilities.
Type the below command to install python and python-pip packages:
Ensure that you have latest version of the setuptools of python package with below command:
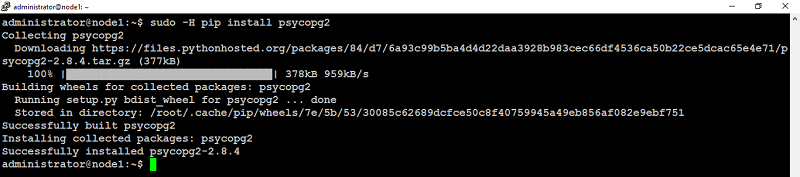
Type below command to install psycopg2:
Type below command to install patroni and python-etcd:
Repeat these steps on remaining nodes (node2 in our case) as well. When you are finished with the above on each node (designated for postgresql and patroni), you can move to next step.
Configuring Patroni
Patroni can be configured using a YAML file which can be placed anywhere. For sake of this guide, we will place this file under /etc/patroni.yml.
Create a patroni.yml file on all three nodes that have postgres and Patroni installed (node1, node2 in our case). Change name to something unique, and change listen and connect_address (under postgresql and restapi) to the appropriate values on each node.
add, update below configuration parameters to reflect yours:
Save and close file.
Next, create /etc/patroni.yml file on your second node (node2 in our case) like below:
Save and close file.
Make note of the data_dir value in the above file. The postgres user needs the ability to write to this directory. If this directory doesn’t exist, create it with below command on each node (node1, node2 in our case):
Make postgres the owner of /data/patroni:Change the permissions on this directory to make it accessible only to the postgres user:
Next, we will create a systemd script that will allow us to start, stop and monitor Patroni.
You need to create a file /etc/systemd/system/patroni.service on each node (node1, node2 in our case) with below command:
add below configuration parameters in it:
Save and close file.
If Patroni is installed in a location other than /usr/local/bin/patroni on your machine, update the appropriate path in above file accordingly.
Installing etcd
Etcd is a fault-tolerant, distributed key-value store that is used to store the state of the postgres cluster. Using Patroni, all of the postgres nodes make use of etcd to keep the postgres cluster up and running.
For sake of this guide we will use a single-server etcd cluster. However, in production, it may be best to use a larger etcd cluster so that one etcd node fails, it doesn’t affect your postgres servers.
Configuring etcd
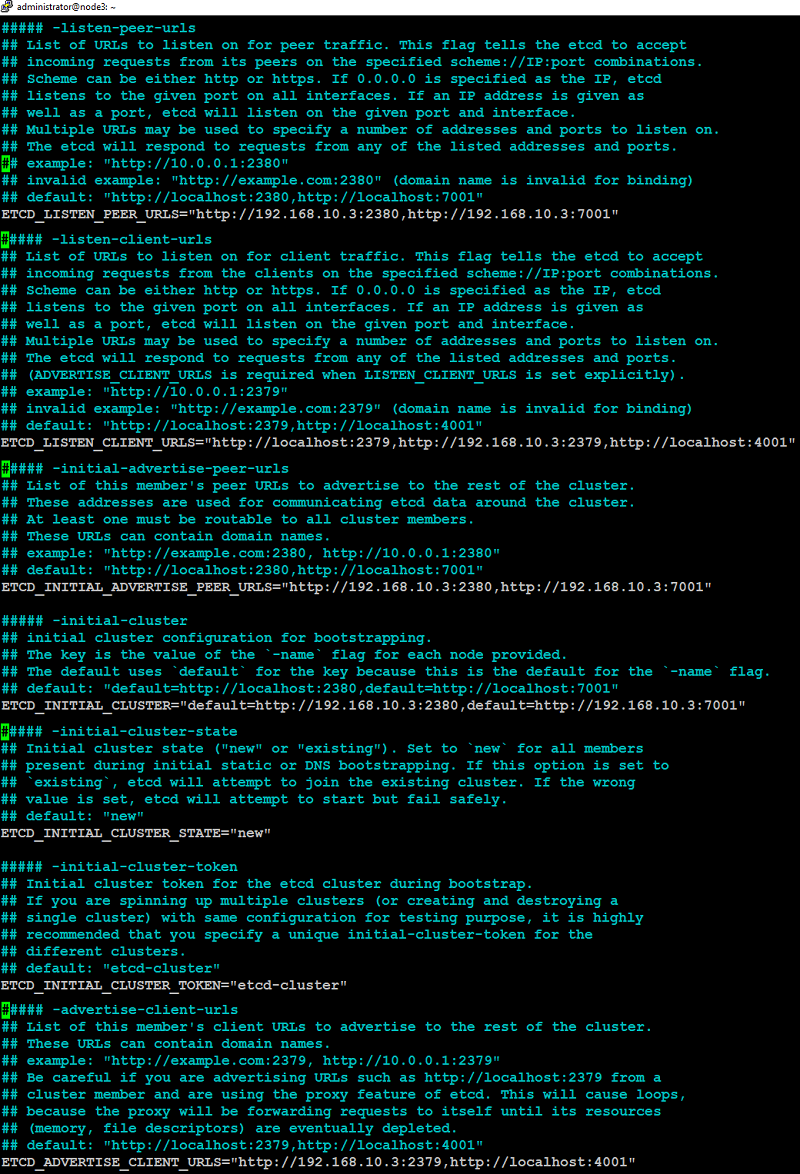
At this point, you need to edit the /etc/default/etcd file on (node3 in our case) like below:Look for the following parameters, uncomment by removing # and update these parameters to reflect yours:
Save and close the file.
You can see final /etc/default/etcd screenshot below on node3 after modification in our case:
Restart the etcd service to take changes into effect:
If etcd service failed to start, reboot your machine.
When etcd service start successfully, you need to start Patroni service on each node but primary (node1 in our case) first with below command:
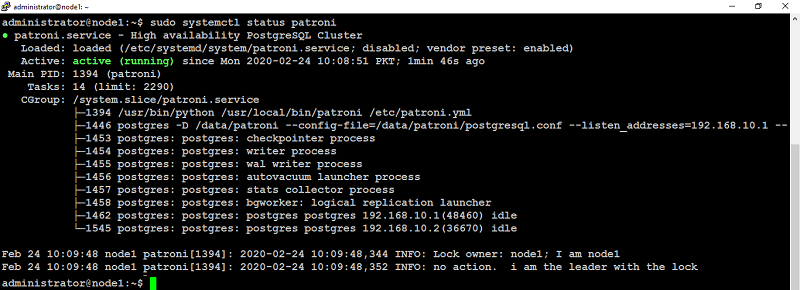
Verify the status of Patroni service status with below command:
If everything is set up correctly, the output from the node1 (master) will look similar to like below:
If everything is set up correctly, the output from the node1 (master) will look similar to like below:
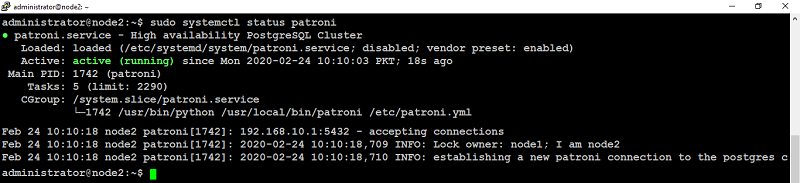
When starting patroni on subsequent nodes, (node2 in our case) the output will look similar to like below:
Make sure you have performed these steps on each of the node with Postgres and Patroni installed (node1, node2 in our case) to create a highly available Postgres cluster with one master and one slave.
Installing HAProxy
When developing an application that uses a database, it can be cumbersome to keep track of the database endpoints if they keep changing. Using HAProxy simplifies this by giving a single endpoint to which you can connect the application.
HAProxy forwards the connection to whichever node is currently the master. It does this using a REST endpoint that Patroni provides. Patroni ensures that, at any given time, only the master postgres node will appear as online, forcing HAProxy to connect to the correct node.
Type the below command to install HAProxy on (node4 in our case):
Configuring HAProxy
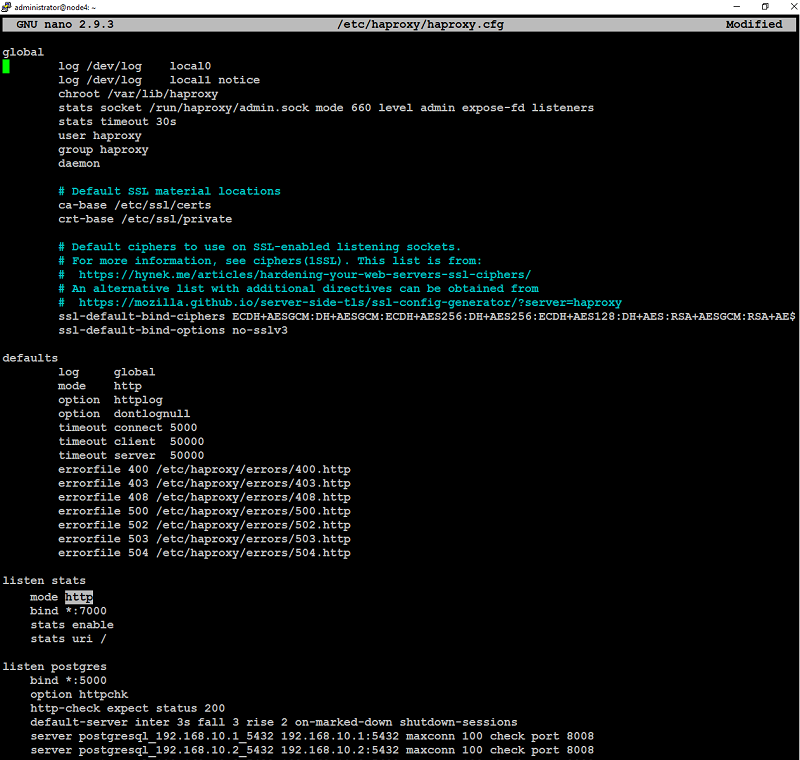
With the Postgres cluster set up, you need a method to connect to the master regardless of which of the servers in the cluster is the master. This is where HAProxy steps in. All Postgres clients (your applications, psql, etc.) will connect to HAProxy which will make sure you connect to the master in the cluster.You need to edit the configuration file /etc/haproxy/haproxy.cfg on the HAProxy node (in our case node4) that has HAProxy installed:
add, update following configuration parameters:
Save and close file when you are finished.
You can see the below screenshot of final /etc/haproxy/haproxy.cfg file on node4 in our case:
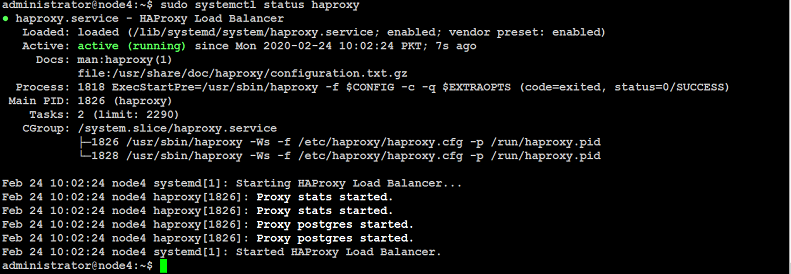
Restart HAProxy to take the changes into effect with below command:
Verify the service status with below command:
![]()
You can also access HAProxy node on port 7000 using any of your preferred web browser to see the HAProxy dashboard like below:
Verify the service status with below command:
You will see the output similar to like below:
If HAProxy fails to start, check for syntax errors with below command:
Testing Postgres Cluster Setup
Connect Postgres clients to the HAProxy IP address of the node on which you installed HAProxy (in this guide, 192.168.10.4) on port 5000.You can also access HAProxy node on port 7000 using any of your preferred web browser to see the HAProxy dashboard like below:
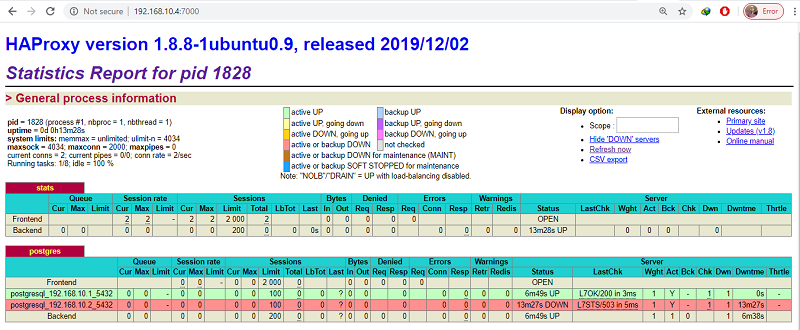
As you can see, the postgresql_192.168.10.1_5432 row is highlighted in green. This indicates that 192.168.10.1 is currently acting as the master.
If you kill the primary node (using sudo systemctl stop patroni or by completely shutting down the server), the dashboard will look similar to like below:

In the postgres section, the postgresql_192.168.10.1_5432 row is now red and the postgresql_192.168.10.2_5432 row is highlighted in green. This indicates that 192.168.10.2 is currently acting as the master.
Note: In this case, it just so happens that the second Postgres server is promoted to master. This might not always be the case if you have more than two nodes in cluster. It is equally likely that the third, fourth or fifth server may be promoted to master.
When you bring up the first server, it will rejoin the cluster as a slave and will sync up with the master.
Wrapping up
You now have a robust, highly available Postgres cluster ready for use. While the setup in this tutorial should go far in making your Postgres deployment highly available, here are few more steps you can take to improve it further:
- Use a larger etcd cluster to improve availability.
- Use PgBouncer to pool connections.
- Add another HAProxy server and configure IP failover to create a highly available HAProxy cluster.


