
If you are dealing a situation where a laptop or desktop machine has to run with CentOS 7 operating system having dual graphics adapter and your desktop or laptop has no option in BIOS to make nvidia display adapter primary then this step by step guide will walk you through the steps to make nvidia graphics adapter functional on CentOS x86_64bit operating system.
I have installed CentOS 7.6 x86_64bit operating system on a laptop in order to meet customer requirements.
I have installed CentOS 7.6 x86_64bit operating system on a laptop in order to meet customer requirements.
Note: You have to disable "Secure Boot" option from the BIOS before performing the following steps.
STEP1 – Install latest epel repository
sudo rpm --import https://www.elrepo.org/RPM-GPG-KEY-elrepo.org
sudo rpm -ivh http://www.elrepo.org/elrepo-release-7.0-3.el7.elrepo.noarch.rpm
yum -y update
reboot
STEP2 – Uninstall generic (nouveau) driver
Switch to single user console mode by pressing key combination of Ctrl + Alt + F2 at the login prompt screen and perform the following steps:
rpm -qa |grep *nouveau*
yum -y autoremove xorg-x11-drv-nouveau
yum -y autoremove xorg-x11-drv-nouveau
reboot
STEP3 – Install latest nvidia driver
Switch to single user console mode by pressing key combination of Ctrl + Alt + F2 at the login prompt screen and perform the following steps:
yum -y install nvidia-detect
yum -y install kmod-nvidia
reboot
STEP4 – Install bumblebee package
Switch to single user console mode by pressing key combination of Ctrl + Alt + F2 at the login prompt screen and perform the following steps:
yum -y install bumblebee
usermod –aG bumblebee yourusername
STEP5– Update bumblebee configuration files
vi /etc/bumblebee/bumblebee.conf
[bumblebeed]
VirtualDisplay=:8
KeepUnusedXServer=false
ServerGroup=bumblebee
TurnCardOffAtExit=false
NoEcoModeOverride=false
Driver=nvidia
XorgConfDir=/etc/bumblebee/xorg.conf.d
[optirun]
Bridge=auto
VGLTransport=proxy
PrimusLibraryPath=/usr/lib64/primus:/usr/lib32/primus
AllowFallbackToIGC=false
[driver-nvidia]
KernelDriver=nvidia-drm
PMMethod=auto
LibraryPath=
XorgModulePath=
XorgConfFile=/etc/bumblebee/xorg.conf.nvidia
Driver=nouveau
[driver-nouveau]
KernelDriver=nouveau
PMMethod=auto
XorgConfFile=/etc/bumblebee/xorg.conf.nouveau
Save and close.
Now edit and remove blacklist nvidia line from the following file and leave blacklist nouveau line as is.
vi /etc/modprobe.d/bumblebee.conf
blacklist nouveau
Save and close.
Now verify nvidia graphic card bus id with the following command:
lscpi | grep nvidia
and update the nvidia display adapter bus id in xorg.conf.nvidia file:
vi /etc/bumblebee/xorg.conf.nvidia
Section "ServerLayout"
Identifier "Layout0"
Option "AutoAddDevices""false"
Option "AutoAddGPU""false"
EndSection
Section "Device"
Identifier "DiscreteNvidia"
Driver "nvidia"
VendorName "NVIDIA Corporation"
BusID "PCI:01:00:0"
Option "ProbeAllGpus""false"
Option "NoLogo""true"
Option "UseEDID""false"
Option "UseDisplayDevice""none"
EndSection
Save and close.
At this point, edit /usr/share/applications/nvidia-settings.desktop file and change the Exec line like below:
vi /usr/share/applications/nvidia-settings.desktop
Exec=optirun nvidia-settings -c :8.0
Save and close.
reboot
Now you can login with graphical desktop at the login prompt screen, then from terminal, execute the following command to open nvidia control panel:
optirun nvidia-settings -c :8.0
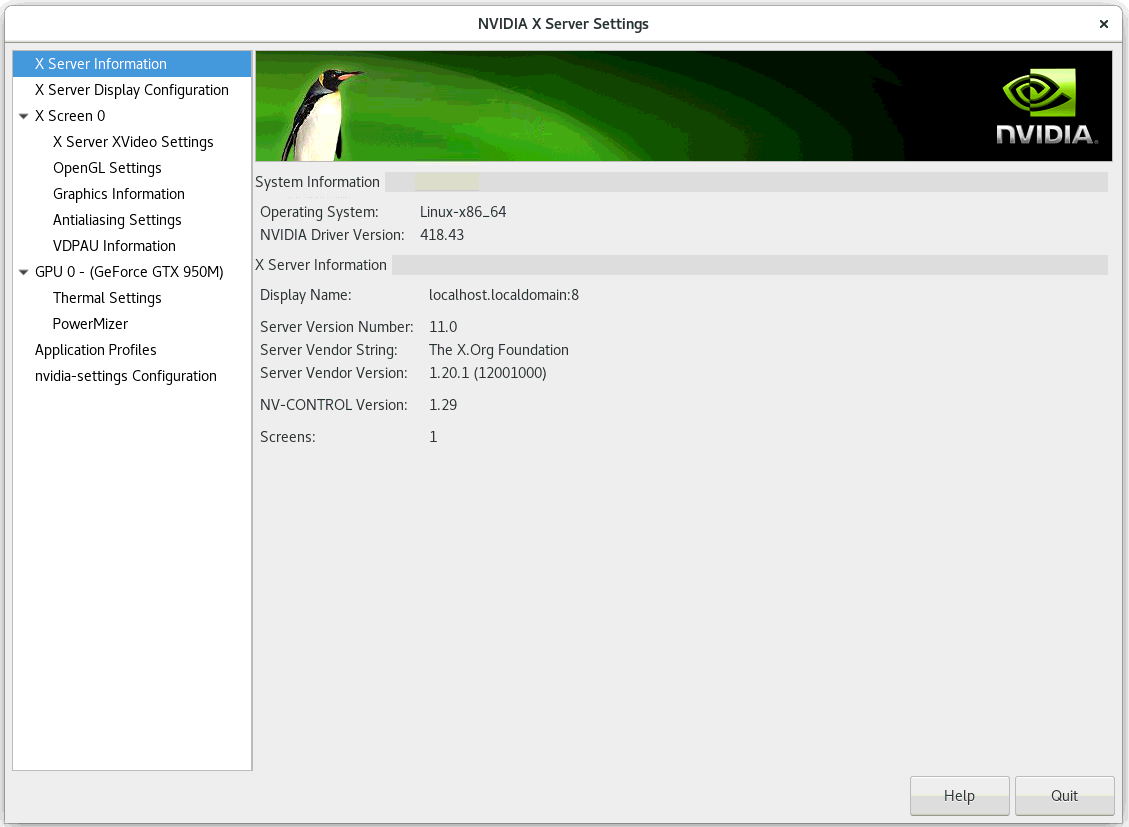
If you can see the above screen on your laptop or desktop running CentOS 7.6 with dual graphics adapter then congrats, you have successfully made nvidia graphics driver functional.