Observium is an open source and light weight network monitoring tool. It allows you to monitor all of the network devices and operating systems in your datacenter. Observium provides a powerful yet simple and easy to use web interface to monitor the health and status of your network devices.
Prerequisites
One Debian 9 server installed either on bare-metal hardware or on a virtual machine with root access.Update Debian 9 Server
Before you begin with this tutorial, you need to update your Debian 9 to the latest stable version by running the following command:apt-get update -y
apt-get upgrade -y
When you are done with the above, restart the system to apply all the updates:
After restarting, log in with root user and install some required packages to your system by running the following command:
apt-get install snmp fping python-mysqldb rrdtool subversion whois mtr-tiny ipmitool graphviz imagemagick -y
Once all the prerequisites are installed, you can proceed to the next step.
Install LAMP Server
Observium requires Apache, Php and MySQL to function. So you will need to install LAMP server on your system.First, install Apache web server by running the following command:
apt-get install apache2 libapache2-mod-php7.0 -y
After installing Apache, start Apache service and make it persistent on reboot with the following command:
systemctl start apache2
systemctl enable apache2
Next, install PHP7 and other required libraries by running the following command:
apt-get install php7.0 php7.0-cli php7.0-mysql php7.0-mysqli php7.0-gd php7.0-mcrypt php7.0-json php-pear -y
Once PHP7 and all the required libraries are installed, run the following command to install MariaDB server:
apt-get install mariadb-server -y
Next, start MariaDB service and enable it to start at boot time with the following command:
systemctl start mysql
systemctl enable mysql
Configure MariaDB
By default, MariaDB is not secured. You can secure it with the following command:mysql_secure_installation
Answer all the questions as follows:
set root password? [Y/n] n
Remove anonymous users? [Y/n] y
Disallow root login remotely? [Y/n] y
Remove test database and access to it? [Y/n] y
Reload privilege tables now? [Y/n] y
Once the MariaDB is secured, you will need to create a database and user for Observium.
First, log in to the MySQL shell with the following command:
mysql -u root -p
Enter your root password, then create a database for Observium with the following command:
MariaDB [(none)]>CREATE DATABASE obmdb DEFAULT CHARACTER SET utf8 COLLATE utf8_general_ci;
Next, create a user for Observium and grant all privileges to the Observium database with the following command:
MariaDB [(none)]>GRANT ALL PRIVILEGES ON obmdb.* TO 'obmadm'@'localhost' IDENTIFIED BY 'password';
Next, flush the privileges with the following command:
MariaDB [(none)]>FLUSH PRIVILEGES;
Finally, exit from the MySQL shell with the following command:
MariaDB [(none)]>\q
Download and Install Observium
Observium is available in two editions Open Source and Subscription, Open Source Edition is freely available for download with less features and few security fixes, while Subscription Edition is comes with additional features and hardware support. You can download the Open Source version of the Observium from their official website with the following command:
After downloading, extract the downloaded archive with the following command:
tar -xvzf observium-community-latest.tar.gz
Next, copy the extracted directory to the Apache web root directory:
cp -ar observium /var/www/html/
Next, rename the sample configuration file and make some changes:
cd /var/www/html/observium
cp config.php.default config.php
nano config.php
Change the file as shown below:
// Database config --- This MUST be configured
$config['db_extension'] = 'mysqli';
$config['db_host'] = 'localhost';
$config['db_user'] = 'obmadm';
$config['db_pass'] = 'password';
$config['db_name'] = 'obmdb';
Save the file, then setup the default schema for the MySQL Database with the following command:
./discovery.php -u
If everything is fine you should see the following output:
___ _ _
/ _ \ | |__ ___ ___ _ __ __ __(_) _ _ _ __ ___
| | | || '_ \ / __| / _ \| '__|\ \ / /| || | | || '_ ` _ \
| |_| || |_) |\__ \| __/| | \ V / | || |_| || | | | | |
\___/ |_.__/ |___/ \___||_| \_/ |_| \__,_||_| |_| |_|
Observium Community Edition 17.9.0
http://www.observium.org
Install initial database schema ... done.
-- Updating database/file schema
310 -> 311 # (db) . Done (0s).
311 -> 312 # (db) .... Done (0s).
312 -> 313 # (db) Done (0s).
313 -> 314 # (db) Done (0s).
314 -> 315 # (php) . Done (0s).
315 -> 316 # (db) . Done (0s).
316 -> 317 # (db) .. Done (0s).
317 -> 318 # (db) . Done (0s).
318 -> 319 # (db) ....... Done (2s).
319 -> 320 # (db) . Done (0s).
320 -> 321 # (db) . Done (0s).
321 -> 322 # (db) . Done (0s).
322 -> 323 # (db) ... Done (1s).
323 -> 324 # (db) ... Done (0s).
324 -> 325 # (db) .... Done (1s).
325 -> 326 # (db) . Done (0s).
326 -> 327 # (db) . Done (0s).
327 -> 328 # (db) . Done (0s).
328 -> 329 # (db) . Done (0s).
329 -> 330 # (db) . Done (0s).
330 -> 331 # (db) . Done (0s).
331 -> 332 # (db) ... Done (1s).
332 -> 333 # (php) Done (0s).
333 -> 334 # (db) . Done (0s).
334 -> 335 # (php) Done (0s).
335 -> 336 # (db) . Done (0s).
336 -> 337 # (db) . Done (1s).
337 -> 338 # (db) . Done (0s).
338 -> 339 # (db) ... Done (0s).
339 -> 340 # (db) ... Done (0s).
340 -> 341 # (db) ........ Done (1s).
341 -> 342 # (db) ............... Done (0s).
342 -> 343 # (db) ... Done (0s).
343 -> 344 # (db) .... Done (1s).
344 -> 345 # (db) .. Done (0s).
345 -> 346 # (db) . Done (0s).
346 -> 347 # (db) . Done (0s).
347 -> 348 # (db) F Done (0s, 1 errors).
348 -> 349 # (db) .. Done (0s).
349 -> 350 # (php) Done (0s).
350 -> 351 # (db) ..... Done (1s).
351 -> 352 # (db) .. Done (0s).
-- Done.
Next, you will need to create a directory to store RRDs and Logs:
mkdir rrd logs
Change the ownership of the observium directory with the following command:
chown -R www-data:www-data /var/www/html/observium
Next, you will need to create an Apache virtual host file for Observium. To do so, create a new configuration file observium.conf:
nano /etc/apache2/sites-available/observium.conf
Add the following lines:
ServerAdmin admin@example.com
ServerName example.com
DocumentRoot /var/www/html/observium
Options FollowSymLinks
AllowOverride None
Options Indexes FollowSymLinks MultiViews
AllowOverride All
Require all granted
ErrorLog /var/log/apache2/error.log
LogLevel warn
CustomLog /var/log/apache2/access.log combined
ServerSignature On
Save the file, then enable the observium virtual host file and disable default virtual host file with the following command:
a2ensite observium
a2dissite 000-default
Next, you will also need to enable Apache rewrite module and PHP mcrypt module. You can do this by running the following command:
a2enmod rewrite
phpenmod mcrypt
Finally, restart apache web server with the following command:
systemctl restart apache2
Next, create your first admin user with the following command:
/var/www/html/observium/adduser.php admin yourpassword 10
If everything went fine, you should see the following output:
Observium CE 0.17.7.8697
Add User
User admin added successfully.
Access Observium Web Interface
Before accessing Observium, you will need to allow port 80 through the UFW firewall. By default, UFW is not installed on Debian 9, so you will need to install it first.apt-get install ufw -y
Once the UFW is installed, enable UFW with the following command:
ufw enable
Next, allow port 80 through UFW firewall with the following command:
ufw allow 80
Once the firewall is configured, open your web browser and type the URL http://server_hostname.example.com or http://server_ip_address you should see the following page:
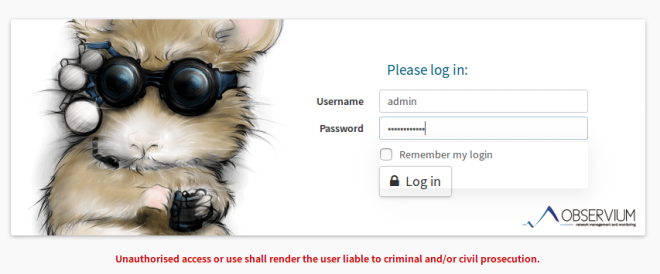
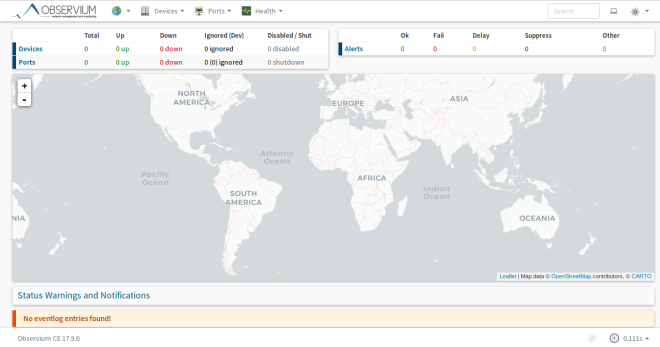
Here, enter your admin username and password, then click on the Login button you should see the Observium default dashboard as below:
Next, you will need to create a cron job for polling and discovering devices from network. You can do this by creating a cron file inside /etc/cron.d directory:
nano /etc/cron.d/observium
Add the following lines:
# Run a complete discovery of all devices once every 2 hours
25 */2 * * * root /var/www/html/observium/discovery.php -h all >> /dev/null 2>&1
# Run automated discovery of newly added devices every 10 minutes
*/10 * * * * root /var/www/html/observium/discovery.php -h new >> /dev/null 2>&1
# Run multithreaded poller wrapper every 10 minutes
*/10 * * * * root /var/www/html/observium/poller-wrapper.py 4 >> /dev/null 2>&1
# Run housekeeping script daily for syslog, eventlog and alert log
10 2 * * * root /var/www/html/observium/housekeeping.php -ysel >> /dev/null 2>&1
# Run housekeeping script daily for rrds, ports, orphaned entries in the database and performance data
10 1 * * * root /var/www/html/observium/housekeeping.php -yrptb >> /dev/null 2>&1
Save and close the file when you are finished, then restart cron service to apply this changes:
systemctl restart cron