Microsoft Outlook 2016 contains a multitude of actions and functions to help you sort, files and respond to messages efficiently. This guide will take you through the steps to customize some of the most useful options as per your need.
To change Outlook's background pattern and theme:
- Click on the File tab in the navigation ribbon.
- Click on Options.
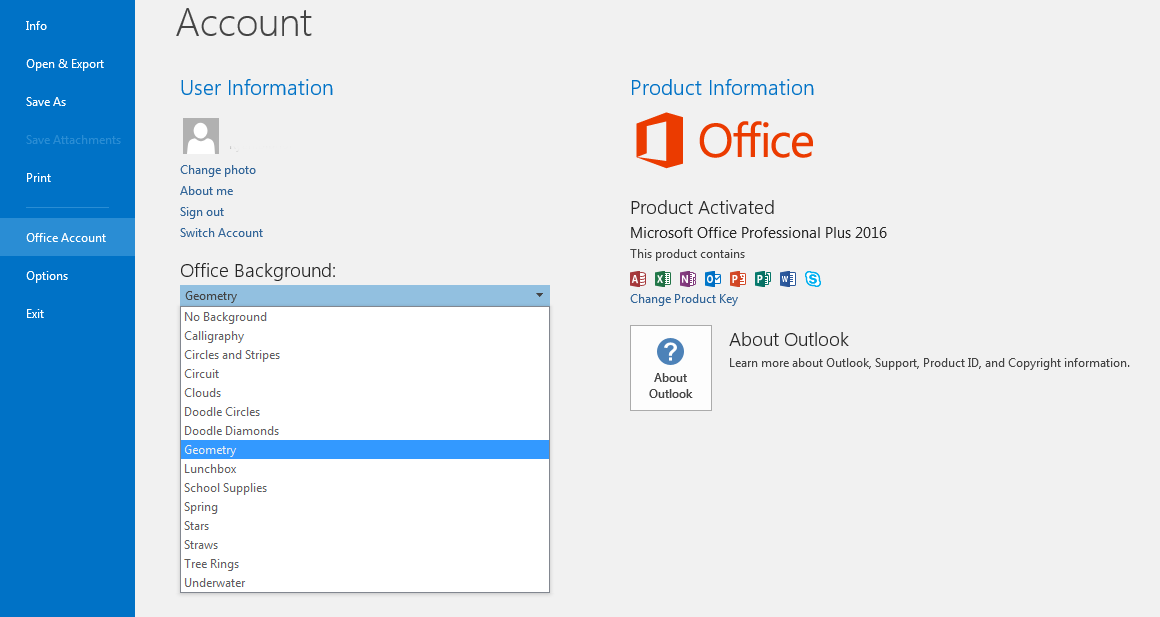
- Navigate to Personalize your copy of Microsoft Office under the General section.
- Choose a background pattern from the Office Background dropdown list.
- Choose a theme from the Office Theme dropdown list
- Click OK to finish.
The Background option provides various patterns to decorate the area surrounding the navigation ribbon. Your options include clouds, underwater imagery, and calligraphy. The theme option changes the colorization of Outlook and your Office theme in general.
How to move the reading pane in Outlook
To move Outlook's reading pane:
- Click View on the navigation ribbon.
- Click on Reading Pane under Layout.
- Choose to place the reading pane to the right or below the Message Preview. (You can also remove the reading pane.)
How to change the reading pane options
To modify the reading pane:
- Click on Reading Pane under the View tab.
- Click on Options.
- Check Mark items as read when viewed in the Reading Pane.
- Choose to modify the five-second delay.
- Check or uncheck additional options.
- Click OK.
How to change the view of the Navigation strip
To modify the Navigation strip view:
- Click on the more (…) icon.
- Select Navigation Options.
- Modify the maximum number of visible items.
- Select/Deselect Compact Navigation to swap between icons and words.
- Modify the order of the Navigation strip links.
- Click OK to save changes.
How to change a folder view
To switch between views:- Select the View Tab. Click on Change View in the Current View Tab.
- Choose between the predefined Compact, Single or Preview views.
- You can click Reset View under the view tab to revert to the default view.
How to apply a view to all folders in Outlook
To apply a view to all folders:- Click the View tab. Select Change View.
- Select Apply Current View to Other Mail Folders.
- Click on all folders that require an application of the view.
- Select Apply view to subfolders if needed. Click OK to apply.
How to create your own view
To create a new Outlook view:- Select the View tab.
- Select Change View under the Current View group.
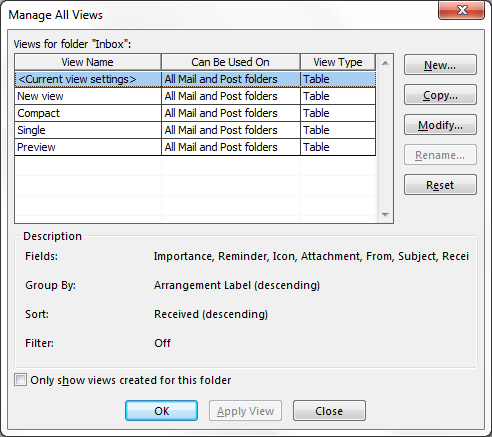
- Select Manage All Views.
- Select New. Enter a name for the new view.
- Select the type of view to use.
- Choose All Mail and Post folders under the Can be used on section.
- Select OK.
- Select options to use in the Advanced View Settings: New view window.
- Click OK.
- Select Apply View to finish.
How to build on an existing view
To use a predefined Outlook view as a template:- Choose View Settings in the View tab.
- Make modifications to presented options in the Advanced View settings window.
- Click OK.
- Click Change View in the View tab. Select Manage Views.
- Choose Current view settings under Views for folder. Select Copy.
- Enter a name.
- Select All Mail and Post folders under Can be used on.
- Select OK.
How to remove a created view
To delete a custom Outlook view:- Click on the View tab in the navigation ribbon.
- Select Change View.
- Select Manage Views.
- Select the custom view.
- Choose Delete.
- Click OK.
Changing the appearance of messages and notifications
To change the Outlook font size:- Click on the View tab in the navigation ribbon.
- Click View Settings in the Current View group.
- Select Conditional Formatting.
- Click Add to create a new rule.
- Enter a name for the new rule.
- Click Font.
- Select a font, style, and size.
- Select Color.
- Select Script.
- Click OK.
- Click OK to save new rule.
- Click OK to save changes.
How to remove a created font size rule
To delete an Outlook font size rule:
- Select the View tab.
- Select View Settings.
- Select Conditional Formatting.
- Click on the rule.
- Click Delete.
How to change the appearance of Plain Text messages
To change the Plain Text message font:- Click on File in the navigation ribbon.
- Select Options.
- Select Mail.
- Click Stationary and Fonts under Compose Messages.
- Select the font theme.
- Choose when to use font theme.
- Select font settings for new mail, replying or forwarding messages if no theme selected.
- Click OK to exit.
- Click OK to save.
How to assign a category to all new mail messages
To assign a category:- Click the Home tab in the navigation ribbon.
- Click Rules in the Move Group.
- Select Manage Rules & Alerts.
- Click New Rule.
- Select Apply rule on messages I receive under Start from a blank rule.
- Click Next.
- Select the condition(s) that apply to the rule.
- Check Assign it to the category category under Select action(s).
- Click the underlined category.
- Choose a color to assign.
- Click Next.
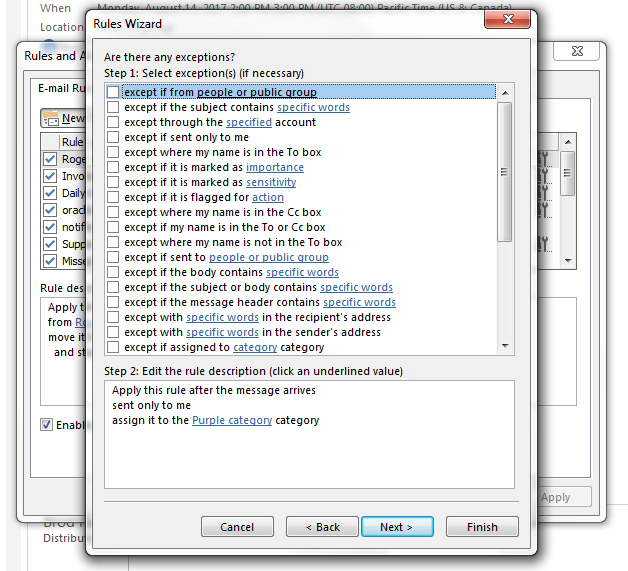
- Add exceptions to the rule.
- Click Next.
- Enter a name for the rule.
- Select Finish.
How to modify the separator line between messages
To modify separator lines in Outlook:- Select the View tab.
- Select View Settings.
- Select Other Settings.
- Navigate to Grid Lines and Group Headings.
- Select an option in the Grid line style drop-down.
- Click OK.
- Click OK to finish.

How to modify the Message Preview pane
To modify the Outlook Message Preview:- Click on View.
- Click on Message Preview under the Arrangement group.
- Click an option to view zero, one, two or three lines of the message body.
How to change the order of messages in Message Preview
To rearrange messages in Message Preview:- Click on By Date at the top of the Message Preview pane.
- Select a sorting open in the window.
- Click on View Settings for additional options.
- Make modifications in Advanced View Settings.
- Click OK.
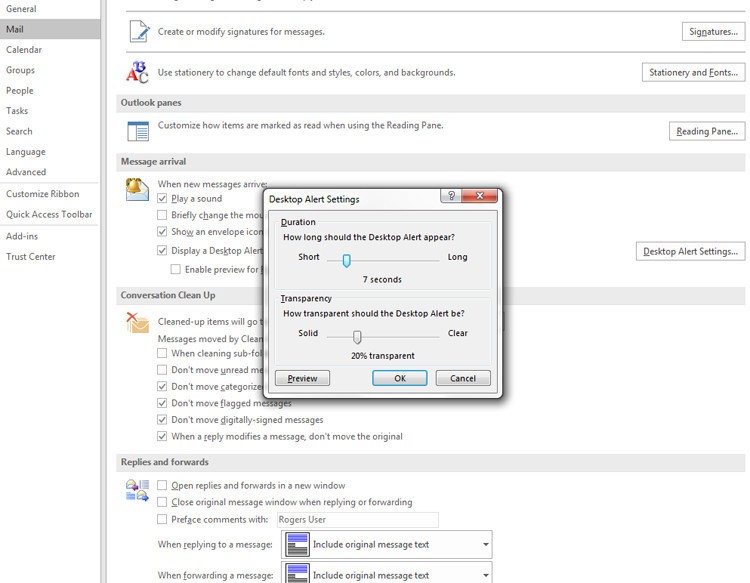
How to change visual notifications for incoming mail
To change incoming email notifications:
- Click on File.
- Click Options.
- Select Mail.
- Navigate to the message arrival section.
- Select or deselect Briefly change the mouse pointer.
- Select or deselect Show an envelope icon in the taskbar.
- Select or deselect Display a Desktop Alert.
- Click on Desktop Alert Settings.
- Choose the duration for the Desktop Alert.
- Choose a transparency level for the Desktop Alert.
- Click OK to save.
- Click OK to finish.
Wrapping up
With these options available, you can truly customize your view and experience in Outlook. Email management can be as simple or as detailed and organized as you want.