
This guide will walk you through the step to install and configure local repository server for your Linux distribution running in your datacenter. Internal Linux repository server helps you to install, update and patch your Linux servers and client machines within no time even without the needs of internet on all of your Linux machines.
Katello is an open source content management software for Linux distribution. It is the alternate of Red Hat Satellite Server 6.1 and 6.2. Apart from the content management, katello can also perform provisioning and configuration task using foreman. It would be easy to make you understand that Katello is an open source Satellite Server which can push updates to its registered Linux Servers or clients.
Prerequisites
- One CentOS 7 (physical or virtual) machine with minimal installation.
- 8 GB RAM minimum (recommended)
- 2 CPU Cores at lease (recommended)
- 20 GB free space in /
- 30 GB space in /var allocated to each OS repository (recommended) All the OS repositories will be synced under /var/lib/pulp. So, if we will sync repo of three OS in /var, then the size of /var would be 90 GB.
Lets get started.
STEP1 - Set Hostname and Update CentOS Server
You can set hostname of your CentOS server by executing the following command.
Edit and update the /etc/hosts file if you don’t have local DNS Server in your environment
You can update your CentOS server by executing the following command.
STEP2 - Configure firewall rules for katello
Execute the following command to open the ports in CentOS firewall for katello setup.
STEP3 - Set the required repositories for katello
Execute the following commands one by one to configure the required repositories for katello setup.
Now you need to update your CentOS server again as we have added new repositories.
STEP4 - Install Katello Package
Execute the following command to install katello packages.
To begin with the installation , first you need to configure your server NTP setting for time synchronization according to your location.
Proceed with the Katello installation by executing the following command
Once the installation successfully completed , you will get the output similar to the following:
Note : If your CentOS server is running behind the proxy server then execute the following command.
STEP5 - Access the Katello Admin Dashboard
Open up your favorite web browser and access https://reposrv.example.com or https://reposrv-ip-address and login with the username as admin and password that you specify in the above step.
Login Page

Dashboard

STEP6 - Download Yum Repositories and Register Clients for Patching
During katello installation, the default organization and location is created. So, you need to first create organization according to your environment. I am going to name it ‘Operations’ and i will keep the default location as it is.
To begin, login to the Dashboard, Select “Default Organization” and click on ‘Manage Organization‘.
To Create New organization , click on ‘New Organization’. Provide the name as per your need.
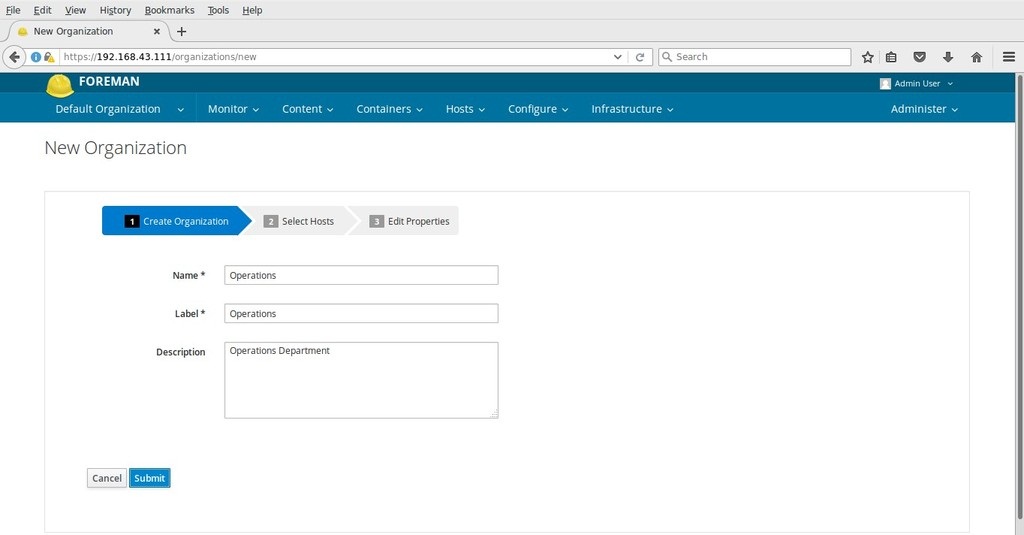
Click Submit
On the next page, Click on ‘Proceed to Edit‘ option.
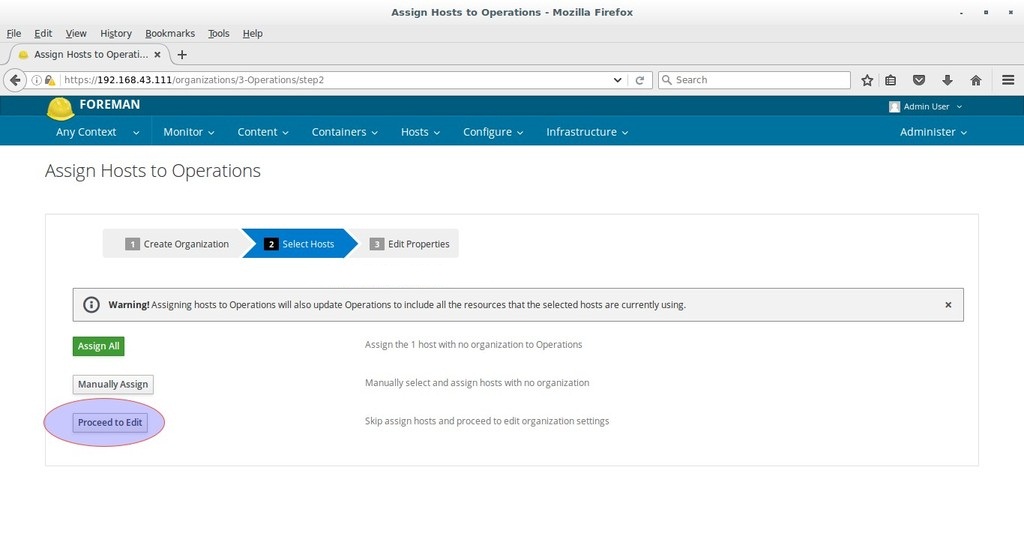
Click Submit on next page.
Now navigate to Organization Tab and Select ‘Operations‘
Let’s first create the GPG keys for CentOS 7 yum repositories. Download the CentOS 7 GPG key from URL ‘http://mirror.centos.org/centos/‘ Or use following wget command
Now from the Contents Tab, Select GPG Keys Click on ‘New GPG key‘
Provide the Key Name , I'm naming it ‘CentOS_7_GPG‘ and upload the above downloaded CentOS 7 RPM key.

Click Save.
Now create the Sync Plan for Repositories. From the Content Tab select ‘Sync Plans‘ and click on ‘New Sync Plan‘ , Provide Sync Plan Name , interval and Start time accordingly.

Click Save
Now from the Content Tab select the Products option and then Click on ‘New Product‘.
Provide the Product Name and it’s label will be automatically set as per Product Name. 
Click Save and then you will get the following screen.
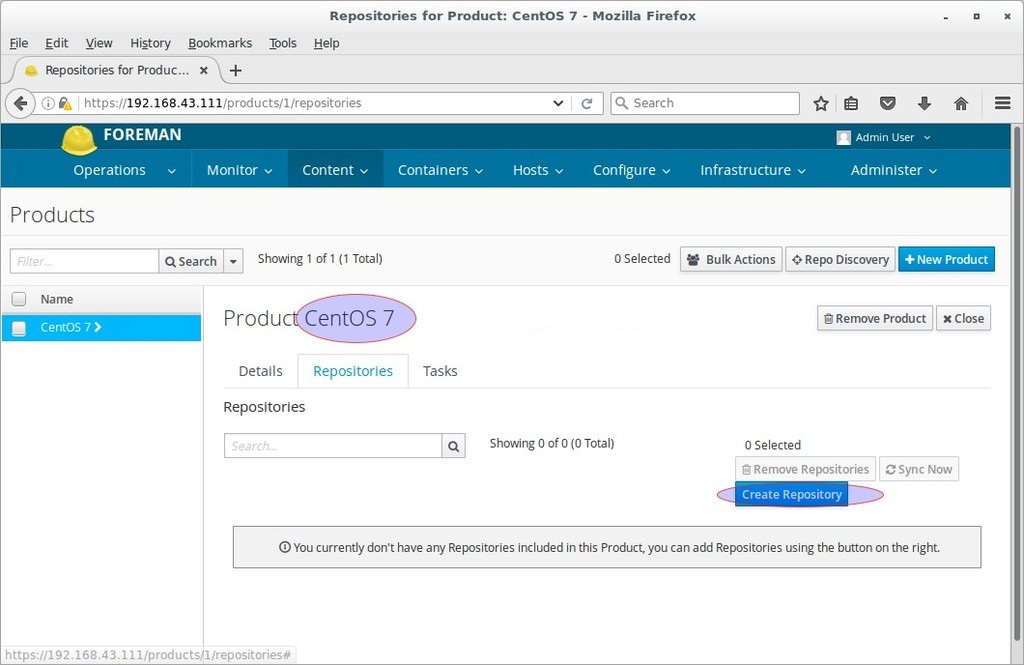
Now Click on Create Repository.
Provide the following and leave other parameters as its.
- Name = base_x86_64
- Label = base_x86_64
- Type = yum
- url = http://mirror.centos.org/centos/7/os/x86_64/
- Download Policy = Immediate
- GPG Key = CentOS_7_GPG
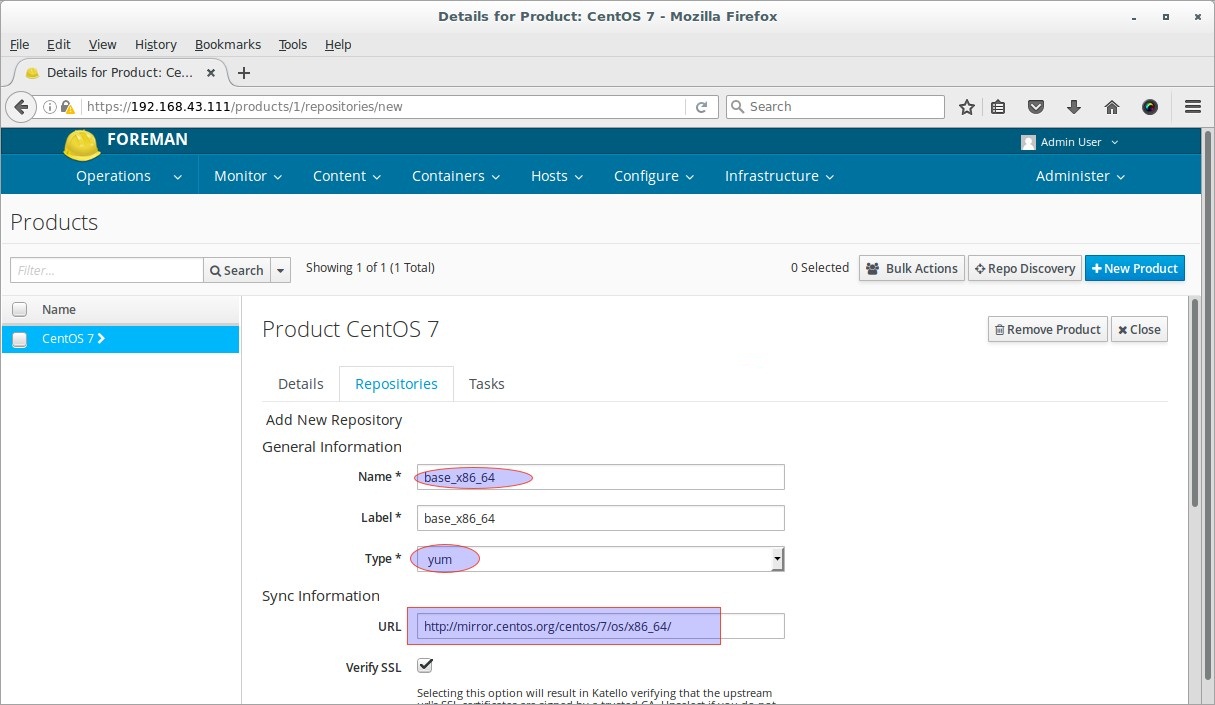
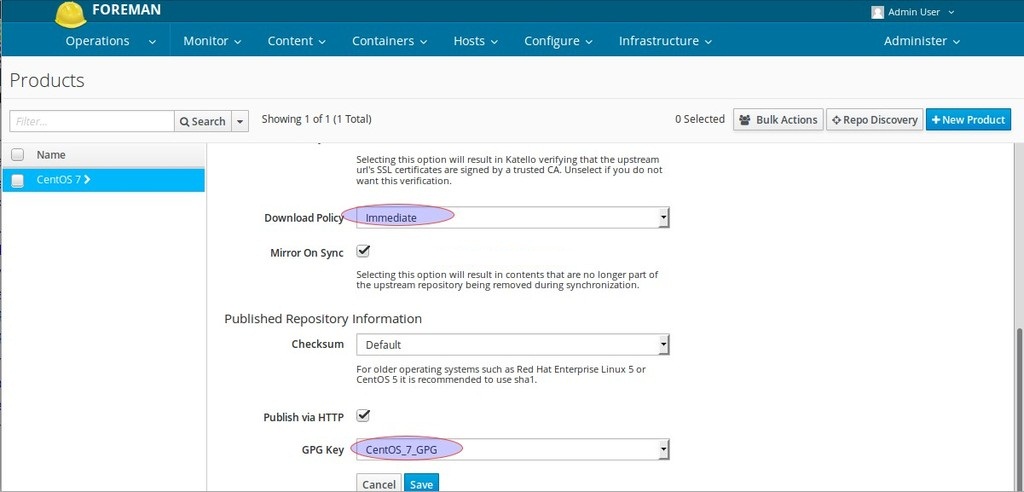
Click Save
On the next page, Select the Repository and Click ‘Sync Now‘

Now create two more repositories for updates and extras.
For Updates repository use the following detail
- name = updates_x86_64
- type = yum
- url = http://mirror.centos.org/centos/7/updates/x86_64/
- Download Policy = Immediate
- GPG Key = CentOS_7_GPG
For Extras repository use the following detail
- name = extras_x86_64
- type = yum
- url = http://mirror.centos.org/centos/7/extras/x86_64/
- Download Policy = Immediate
- GPG Key = CentOS_7_GPG
Note: We can also download and sync the customize and EPEL repository by referring above steps.
Monitor and Verify the Sync Status of Repositories.
From the Content Tab select ‘Sync Status‘ option

It will download and sync repositories but depends on your internet speed. Once it is done, attach the Sync plan to the Product ‘CentOS 7‘

Click Save.
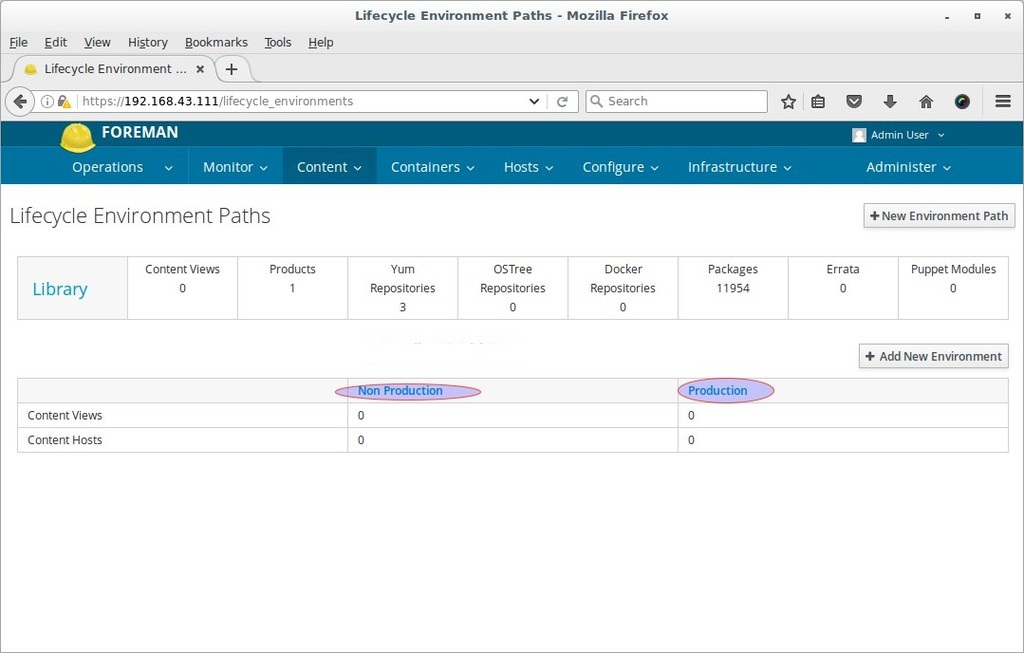
In Katello by default ‘Library Environment‘ is created during the installation, you can create environment as per your requirement keeping Library as Parent Env. In this guide i am going to create followin two Environments and will publish content view to these environments.
- Non Production
- Production
Go To Content Tab > Select Life Cycle Environment > Click on New Environment Path
Specify the Environment name as ‘Non Production‘ 
Click Save
Now create one more Environment with name ‘Production‘
Now create the Content View and promote it to above created Environments.
Go To Content Tab > Select Content Views > Click on Create New View 
Click Save
Now select the Repositories that you want add to this view. In our case, we are adding all repositories.
Now click on ‘Publish New Version’, first this view will be promoted to Library Environment and then we will Click on ‘Promote‘ then Select the ‘Non Production‘ environment and once its done then again promote it to Production Environment.

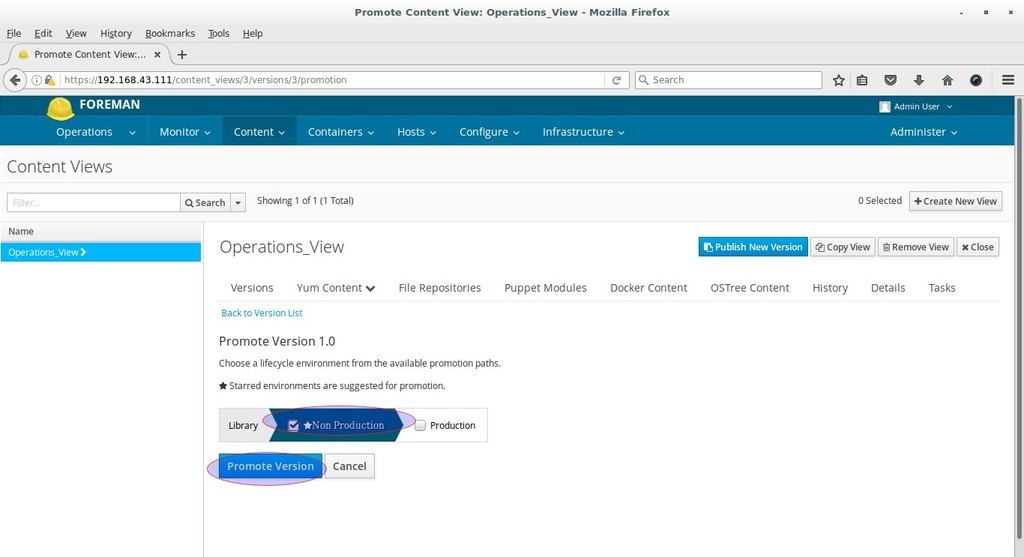
Repeat the same steps for promoting the view to Production Environment.
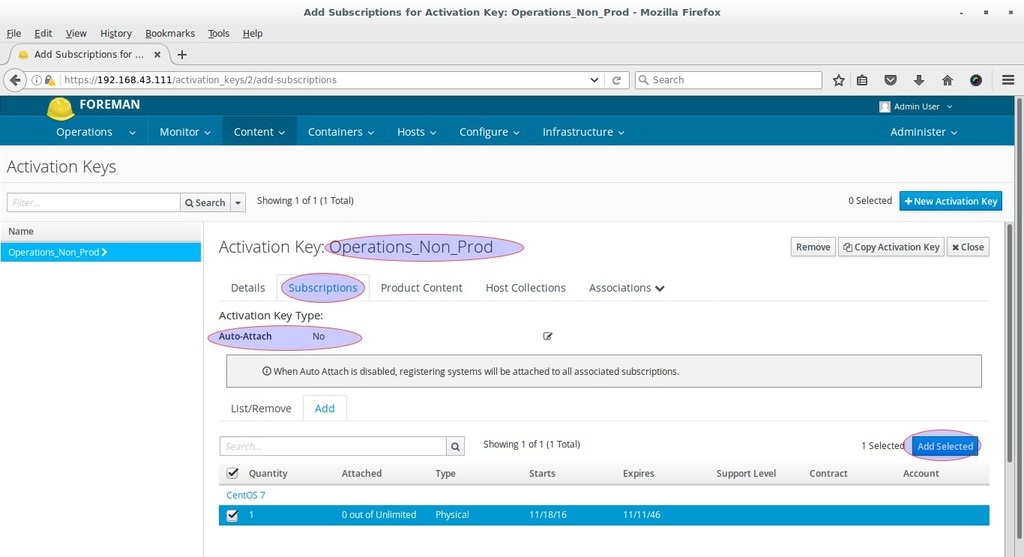
Creating Activation Keys
Since we have downloaded the repositories and created the content views for respective environments. Now it’s time to create Activation Key for registering Linux Clients to Repo Server.
Go To Content Tab > Select Activation Keys > click on New Activation Key
Provide the Key Name, Environment and Content View as per your need.

Click Save
Now go to Subscription Tab and Add ‘CentOS 7‘ Product and disable auto-attach option
When you are done with Activation Key, Start Registering the Linux Servers to Katello.
Register Clients to Katello Server using Activation Keys
SSH your CentOS 7 Server which you want to register on Katello Repo Server and perform the following Steps from the command line.
Install the Subscription-manager using existing centos repository and bootstrap rpm from your katello server
Now run following subscription manager command to register the server to katello.
Now go to Katello Dashboard, Select Operations as the Organization.
Under the Hosts Tab > Select Content Hosts

As we can see that host or server is automatically registered under Non Production Environment and its content View is Operation_view
Now again access the Server (web.example.com) and verify which repositories are enabled. Run the following commands.
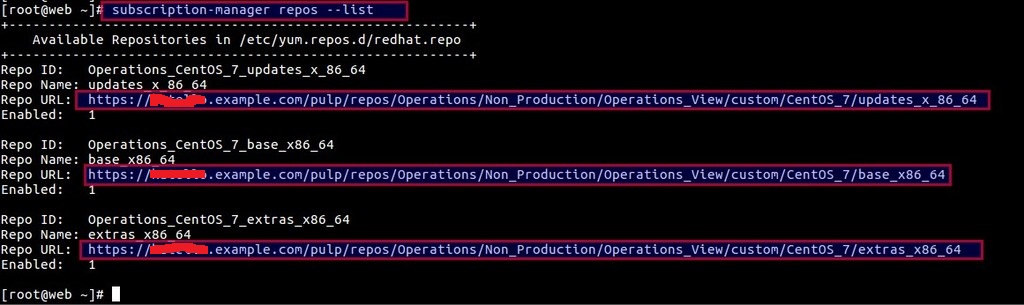
You can also execute the following command to verify which yum repositories are enabled
If you want to push updates from Katello dashboard to its content hosts then katello-agent package needs to be installed on register clients or its content hosts.
Katello agent Package is not available in default CentOS 7 repositories , so set the katello agent repository and execute yum command to install.
Note : Once the Katello agent is installed then you can move default CentOS 7 and katell-agent repository to other location.
Now only repositories from your Katello Server should be available.
From Katello Dashboard verify whether katello-agent is installed on the content host. 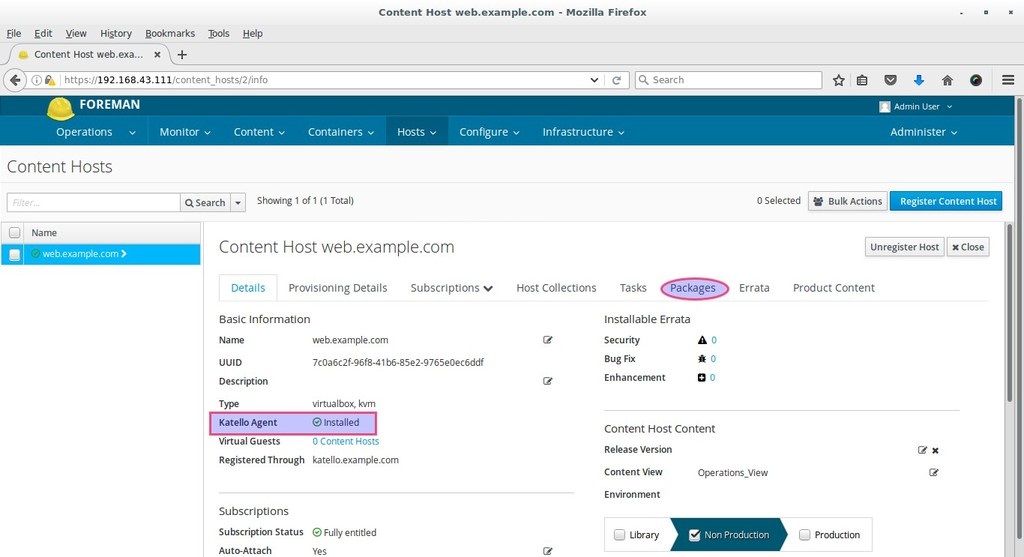
From Packages Tab you can manage packages (like install , remove and update particular or list of packages )
Conclusion
We have demonstrated how to set up local repository on CentOS 7 and synced internet repositories to our local server to make them available to other Linux machines through our local repository server. You can add as many repositories as you want for your Linux distribution such as; Red Hat, Fedora, Ubuntu, SUSE etc.