
In previous article we have covered vRealize automation 7 simple install. In this guide we will show you how to install vRealize automation 7 enterprise. I have split up every single role and made sure it is highly available. This might not necessarily be best practice as it highly depends on your environment. Make sure you read the vRealize Automation 7 – Reference Architecture to ensure you design the environment correctly.
- 2x vRealize Automation 7 Appliances
- 2x Windows Servers for IaaS Web
- 2x Windows Servers for the Management Service (Active / Passive)
- 2x Windows Servers for the agents (one agent will be install – vSphere)
- 2x Windows Servers for the DEMs
Depending on the size and requirements of your environment, you may also need to split out the vRealize Orchestrator from vRA and deploy / load balance two appliances instead. I have not done this here – I might cover it in future articles, but here I simply want to show how to install the vRA / IaaS part.
You can also see an Edge device – This environment has vCNS installed so I will use a vShield Edge as Load Balancer. The Agents and DEMs don’t require a Load Balancer – vRA will handle the failover automatically.

Here you can see I created three pools for
- vRA Appliances (Active / Active)
- IaaS Web (Active / Active)
- Management Service (Active / Passive)

With the relevant virtual servers. Make sure DNS has been setup correctly for the virtual LB IPs

And of course make sure the LB is actually enabled

Browse to your first (primary) vRA appliance and login as root – the installation wizard should start automatically.

Accept the license agreement

The fun bit – select ‘Enterprise Deployment’

Click ‘Next’

Download and install the Automation Agent on every windows server.

Just go through the installation wizard ‘quickly’


Connect to the first vRA appliance and accept the SSL certificate thumbprint

Here I am using the domain admin, which isn’t best practise. But this is a lab, so I am happy to use it

Hit ‘Install’

And wait for the installation to finish


The Windows servers should now pop into the installation wizard.
Click ‘Next’

Add your second appliance.

In order to add the second appliance, you only need to do the following
- Login
- Cancel the installation wizard
- Create a certificate – this can be self-signed as the wizard will replace it later

Accept the SSL certificate of the second appliance

Define the Server Roles

The Hosts aren’t necessarily in the correct order so make sure you look twice !
Here I have configured the following:

Tea-Time .. Click ‘Run’ to check the servers for prerequisites. Bear in mind, this will take .. a while.

If, like me, your Windows servers are plain servers, with no roles installed, the check will likely fail

You can check the details what exactly fail (if for example you configured the servers yourself previously)

Click ‘Fix’. This can take a long time. Depending on your environment etc.

Once everything is fixed, click ‘Run’ again to re-check

If all went well, and all is green, click ‘Next’

Here add the vRA Appliance LB address – remember my vShield Edge Virtual Servers ?

Configure your System Admin password

Once again, add here the Virtual Servers (VIPs) of your LB for both Web and Manager Service
Enter an Encryption Passphrase

Enter your SQL details. Now previously I mentioned that I used the domain admin for the Automation Agent installed.
As a result that user will also have full access on my SQL server and I therefore ok to use Windows Authentication.
If you used a service account, make sure it has the appropriate permissions on the sql server. See notes in the screenshot below.

Click ‘Validate’ and ensure the details are correct

Configure the credentials your IIS App Pools will run under. Again, this my dev environment, so I am using my trusted domain admin

Click ‘Validate’ and ensure your details are correct

Do the same for your Manager Services (Active / Passive)
Note: You cannot have two active Manager Services at the same time

Validate the credentials again.
Click ‘Validate’

Configure the DEMs.

Once more validate the credentials and settings. Ensure each DEM has a unique Instance Name

Make sure you remember the Endpoint name.
The Endpoint name (cAsE SenSItivE) will be used when configuring vRA Endpoints and it needs to match 100%.

Make sure both agent names / endpoints are configured on both servers identically

Validate your settings by clicking ‘Validate’

The next steps are to configure the certificates. For ‘production’ servers I have my own Windows CA.
Rather than creating a certificate for each server / role, I created a certificate with multiple Subject Names
Subject names include each appliance name, FQD, IP and also the Load Balancer Host Names, FQDNs and IPs.
If you intend to use SRM with re-IPing ensure your DR IPs are in the certificate as well.

You may also need to import the certificates to your vShield Edge / Load Balancer – especially if you want to offload SSL
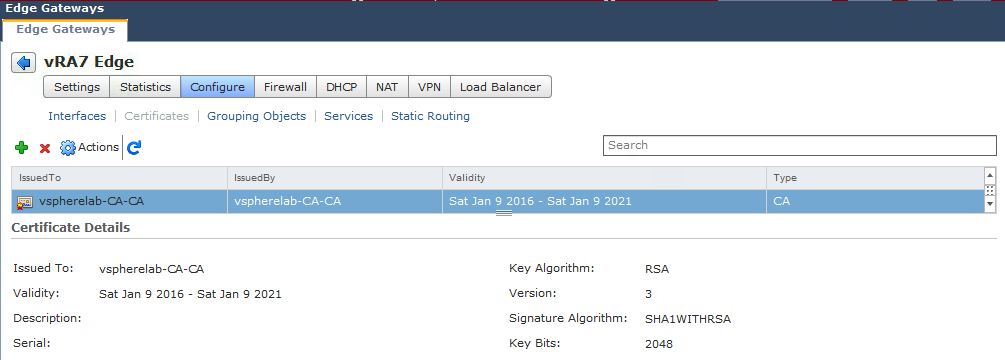
Here now import the certificate.
If you follow my guide to create a certificate then the below certificates required are
- rui.key
- rui.pem

Once imported, click ‘Next’

Do the same for your web servers


And Manager Service


Unfortunately the FQDNs are too long to fit, but here follow the instructions and ensure that only the active / primary hosts are in your Load Balancer Pool

One final validation

This might take a while

But should succeed eventually.
Click ‘Next’

DO IT !!! Either create snapshots or backups – something …

If your backups / snapshots take a long time and the wizard times out (it did for me), login to your first vRA Appliance
vcac-vami installation-wizard activate
This will restart the wizard once you login to your vRA Appliance again. The wizard will start at the same point, so don’t worry.
It might start at the previous step but all you need to do is to get back to the Snapshot page and click ‘Next’
Click ‘Install’

I was watching progress bars for about 3hrs (well, it took 3hrs anyway)


You can also follow the installation of each component. Here you will also find errors .. if there are any

As I said – it took three hours but finished eventually

Enter a license key

Click ‘Next’

Enter a (secure) Admin password and click ‘Create Initial Content’

And watch more progress bars

Done

Now it is time to re-add your hosts into the Load Balancer pools.
Note about the Manager Service : It really depends how your LB works.
As the Manager Service needs to be Active / Passive, either ensure it won’t fail over automatically (secondary is likely installed as manual service), or simply don’t add the second manager server until needed (i.e. you need to fail over). If you do add the secondary, below instructions explain what page you need to monitor

Now you should be able to browse to your vRA environment using the VIP / FQDN.

Once logged in, you can for example check the DEMs, ensuring they are all online etc.

That is it for the installation.