Quantcast
Channel: Tech Support
Viewing all 880 articles
Browse latest View live

How To Set Up OpenVAS Vulnerability Scanner on Ubuntu 18.04

$
0
0

OpenVAS is a full-featured vulnerability scanner. Its capabilities include authenticated and unauthenticated testing, various high level and low level Internet and industrial protocols, performance tuning for large-scale scans and a powerful internal programming language to implement any type of vulnerability test.

Ubuntu includes the OpenVAS in its repository, which is free and open source. This tutorial will walk you through the steps to install, tune and run OpenVAS on an Ubuntu 18.04 server.

Prerequisites
For this tutorial, our Ubuntu 18.04 virtual machine has 2 vCPUs and 3GB of RAM, which is generally sufficient to scan few numbers of hosts at once. However, still if you can provide more resources to it, the smoother your scanning system will run.

Installing OpenVAS
If prerequisites as stated above are in place then you may proceed to install OpenVAS using the following commands:

sudo apt install rpm nsis alien

sudo apt install openvas

The installation will take several minutes to complete.

Configuring OpenVAS
When you are done with installing openvas, execute the following command to run its initial configuration process:

sudo openvas-setup

It will take plenty of time to complete. At the end of the setup, automatically-generated password for the admin user will be displayed. It is highly recommended to change auto generated password so that you can remember it.


Managing OpenVAS Users
If you need to create an additional OpenVAS users, run ‘openvasmd’ with the –create-user option, which will add a new user and display the randomly-generated password.

sudo openvasmd --create-user=operator


sudo openvasmd --get-users

Output
admin
operator

If you’re anything like me, you will forget to save the admin password or accidentally delete it. Fortunately, changing OpenVAS user passwords can easily be accomplished with ‘openvasmd’ and the –new-password option.

sudo openvasmd --user=operator --new-password=yourpassword
sudo openvasmd --user=admin --new-password=yourpassword


Starting and Stopping OpenVAS
You can start or stop openvas services by executing the following commands:

sudo systemctl enable openvas-manager
sudo systemctl enable openvas-scanner

sudo systemctl start openvas-manager
sudo systemctl start openvas-scanner

If you want to stop openvas services, run the following to stop it:

sudo systemctl stop openvas-scanner
sudo systemctl stop openvas-manager

When the services finish initializing, you should find TCP ports 9390 and 9392 listening on your loopback interface.

sudo netstat -ant


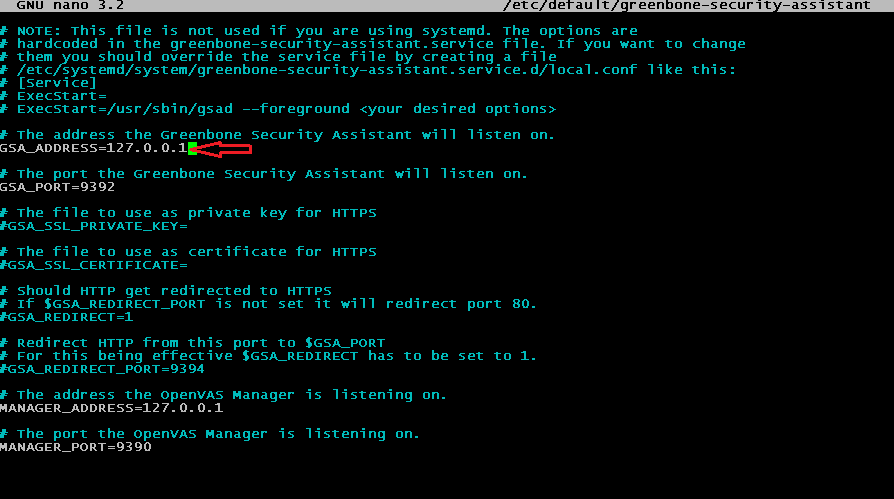
By default, the web interface is only accessible from the local computer and you will not be able to access it from a remote machine. If you need to make it accessible from the intranet or internet then open the following file with root privileges in your preferred text editor:

sudo nano /etc/default/greenbone-security-assistant

Near the top, you should see a parameter that specifies the address that the web interface will listen on. You need to change the value from 127.0.0.1 to the real IP address of your Ubuntu machine. This will let it listen to connections from the intranet, and you will be able to connect:


When done, save and close.

Accessing OpenVAS Web Interface
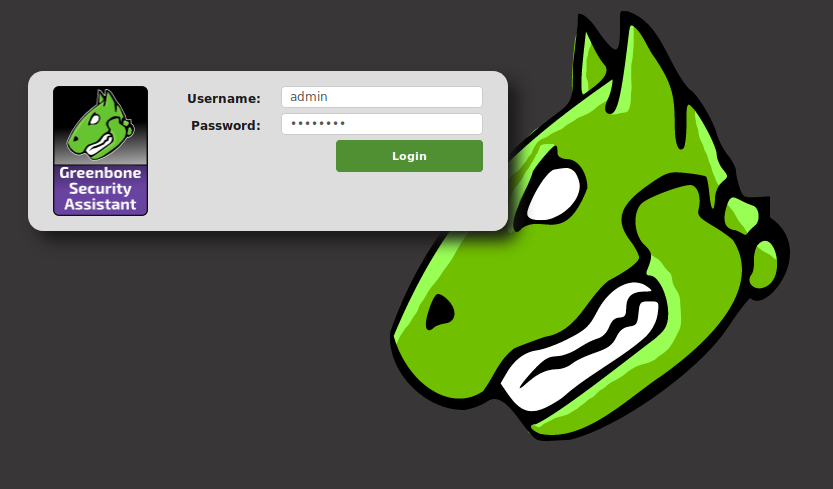
The Greenbone Security Assistant is the OpenVAS web interface available at https://ip_address:9392. After accepting the self-signed certificate warning you will be presented a login page.


You will need to enter the username and password you configured earlier. For this guide, the username was admin.


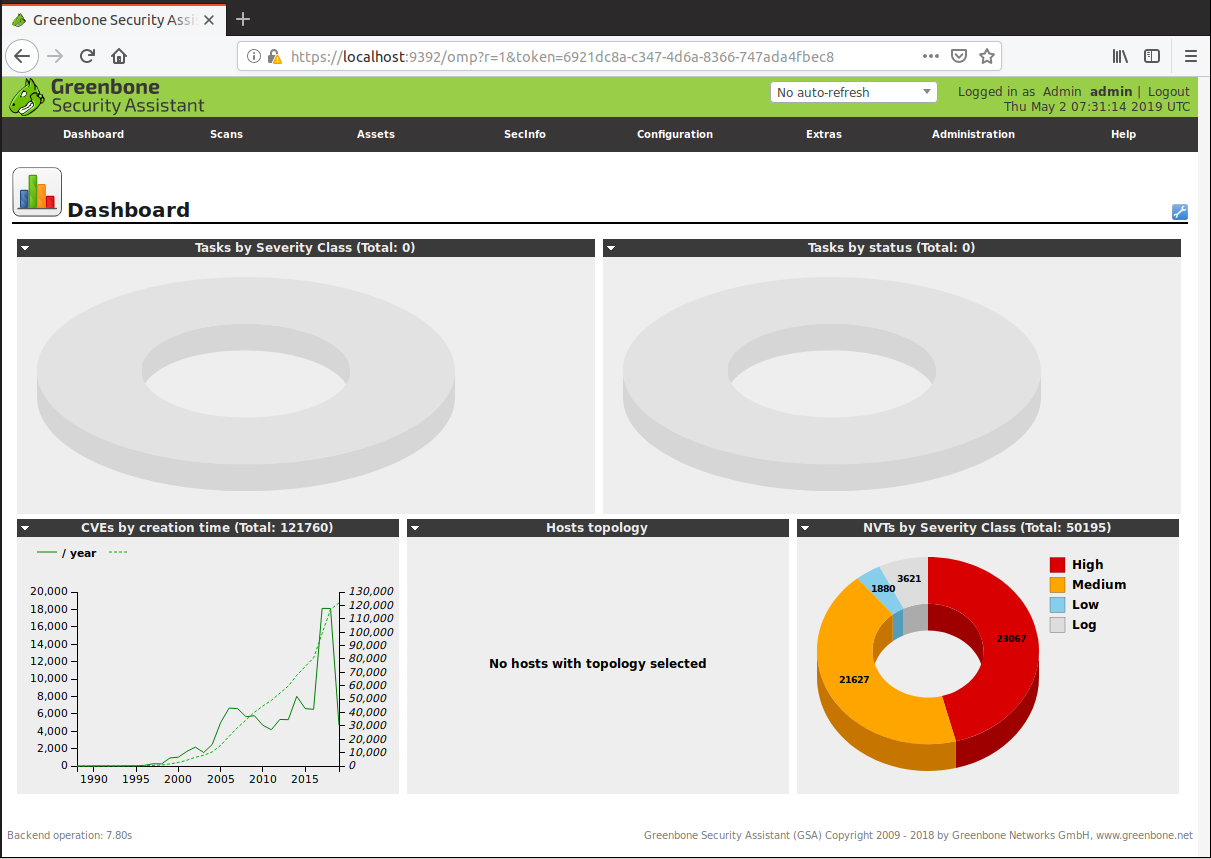
Once you sign in, you will see the main dashboard.


Set Up Credentials
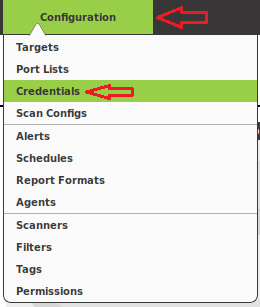
OpenVAS provide the most complete results when you are able to provide the scanning engine with credentials to use on scanned systems. OpenVAS will use these credentials to log in to the scanned system and perform detailed enumeration of installed software, patches, etc. You can add credentials via the “Credentials” entry under the “Configuration” menu.


Click on Star


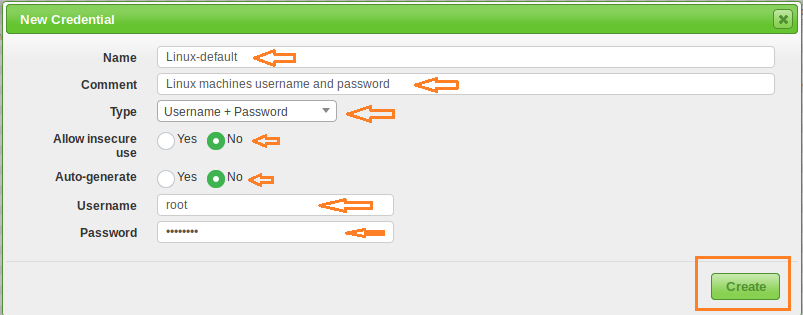
Enter the credentials information of the hosts you want to scan and click Create.


Target Configuration
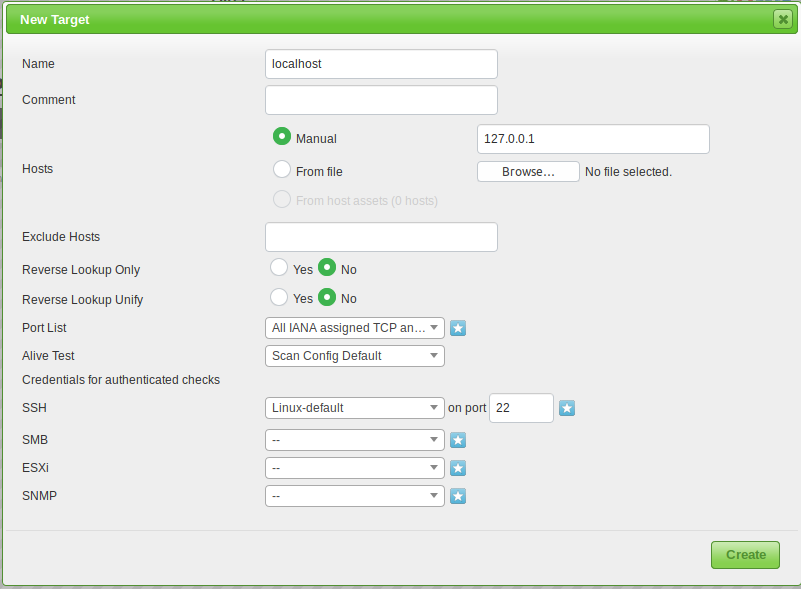
You can configure them under the “Targets” section of the “Configuration” menu.


Scan Configuration
Prior to launching a vulnerability scan, you should fine-tune the Scan Config that will be used, which can be done under the “Scan Configs” section of the “Configuration” menu. You can clone any of the default Scan Configs and edit its options, disabling any services or checks that you don’t require.

Task Configuration
Your credentials, targets, and scan configurations are in place so now you’re ready to put everything together and run a vulnerability scan. In OpenVAS, vulnerability scans are conducted as “Tasks”. When you set up a new task, you can further optimize the scan by either increasing or decreasing the concurrent activities that take place.

With more finely-tuned scan settings and target selection, the results of your scan will be much more useful.


Wrapping up
With the wide range of available features in OpenVAS, we were only able to touch the surface. The number of connected devices in our homes and workplaces is increasing all the time and managing them becomes more of a challenge. Making effective use of a vulnerability scanner can make that management at least a little bit easier.

How To Set Up ISPConfig 3 on an Ubuntu 19.04 Server

$
0
0

ISPConfig is an open source web hosting control panel let's you configure the following services through its browser based interface:

Manage multiple servers from one control panel
Web server management (Apache2 and nginx)
Mail server management (with virtual mail users)
DNS server management (BIND and MyDNS)
Virtualization (OpenVZ)
Administrator, reseller and client login
Configuration mirroring and clusters
Open Source software (BSD license)
    In this tutorial, we'll walk you through the steps to install and configure ispconfig 3.1 on an Ubuntu 19.04 server. You will need to replace some of the highlighted information while performing these steps to meet your environment needs.

    Prerequisites
    To follow this tutorial, you will need one Ubuntu 19.04 server installed either on a (Physical or Virtual) machine with a non-root user having sudo privileges.

    Set Up Timezone and Hostname

    sudo timedatectl set-timezone Asia/Karachi
    sudo hostnamectl set-hostname labserver.layloyar.com

    Set Up Default Shell

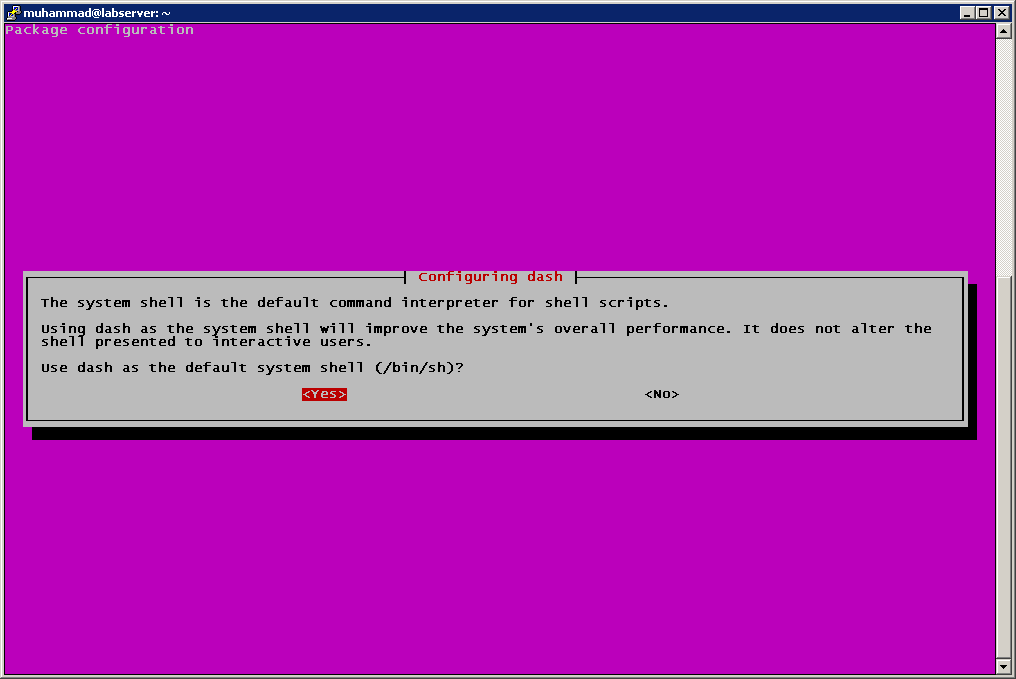
    sudo dpkg-reconfigure dash


    Uninstall Apparmor

    sudo service apparmor stop

    sudo apt autoremove apparmor apparmor-utils

    Output
    Reading package lists... Done
    Building dependency tree
    Reading state information... Done
    Package 'apparmor-utils' is not installed, so not removed
    The following packages will be REMOVED:
      apparmor snapd
    0 upgraded, 0 newly installed, 2 to remove and 87 not upgraded.
    After this operation, 69.4 MB disk space will be freed.
    Do you want to continue? [Y/n] y

    (Reading database ... 66906 files and directories currently installed.)
    Removing snapd (2.37.1.1+19.04) ...
    Removing apparmor (2.12-4ubuntu5.1) ...
    Processing triggers for mime-support (3.60ubuntu1) ...
    Processing triggers for man-db (2.8.3-2ubuntu0.1) ...

    Installing Postfix and Database
    sudo apt -y install postfix postfix-mysql postfix-doc mariadb-client mariadb-server openssl getmail4 rkhunter binutils dovecot-imapd dovecot-pop3d dovecot-mysql dovecot-sieve dovecot-lmtpd

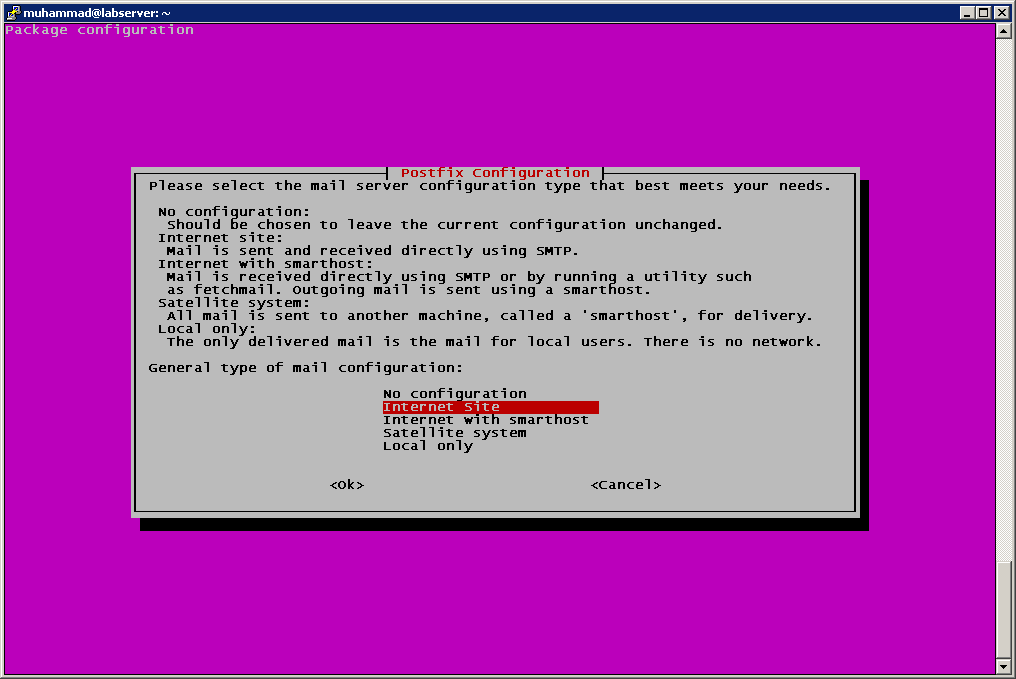
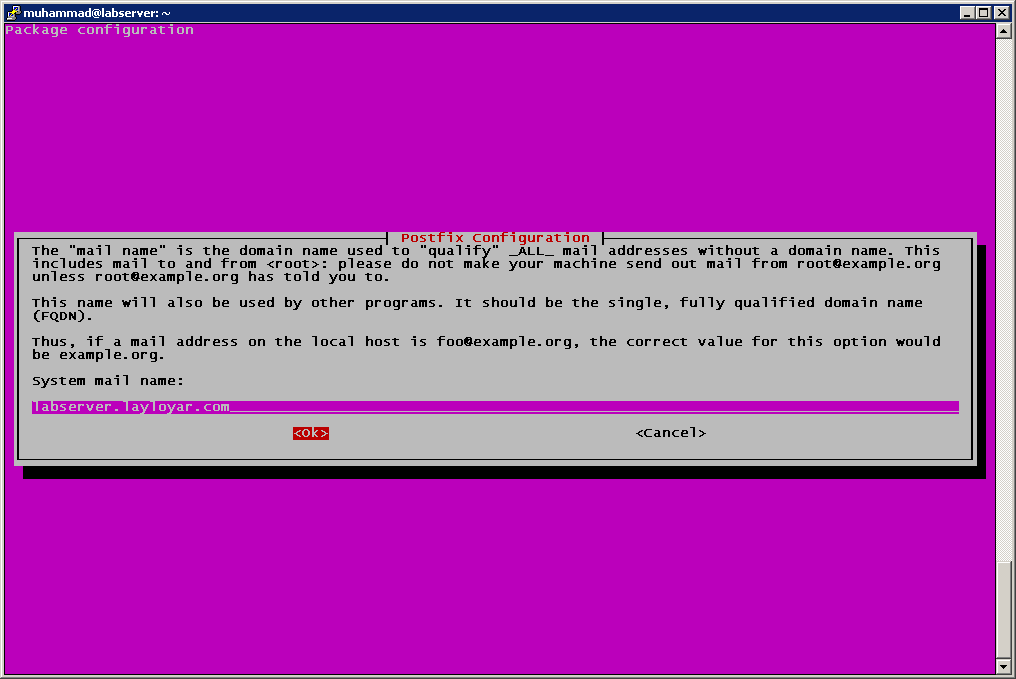
    During installation postfix will present you following screen, choose Internet Site and press OK


    Enter you FQDN on this screen and press OK


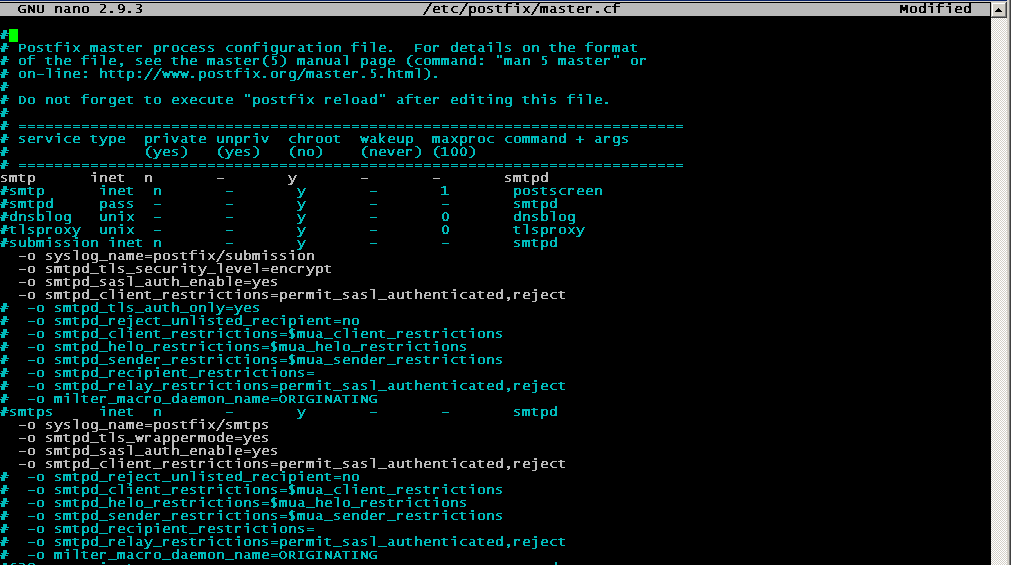
    Edit master.cf file and add or replace the following contents:

    sudo nano /etc/postfix/master.cf

    Change this:

    #submission inet n       -       y       -       -       smtpd
    #  -o syslog_name=postfix/submission
    #  -o smtpd_tls_security_level=encrypt
    #  -o smtpd_sasl_auth_enable=yes
    #  -o smtpd_tls_auth_only=yes
    #  -o smtpd_reject_unlisted_recipient=no
    #  -o smtpd_client_restrictions=$mua_client_restrictions
    #  -o smtpd_helo_restrictions=$mua_helo_restrictions
    #  -o smtpd_sender_restrictions=$mua_sender_restrictions
    #  -o smtpd_recipient_restrictions=
    #  -o smtpd_relay_restrictions=permit_sasl_authenticated,reject
    #  -o milter_macro_daemon_name=ORIGINATING
    #smtps     inet  n       -       y       -       -       smtpd
    #  -o syslog_name=postfix/smtps
    #  -o smtpd_tls_wrappermode=yes
    #  -o smtpd_sasl_auth_enable=yes
    #  -o smtpd_reject_unlisted_recipient=no
    #  -o smtpd_client_restrictions=$mua_client_restrictions
    #  -o smtpd_helo_restrictions=$mua_helo_restrictions
    #  -o smtpd_sender_restrictions=$mua_sender_restrictions
    #  -o smtpd_recipient_restrictions=
    #  -o smtpd_relay_restrictions=permit_sasl_authenticated,reject
    #  -o milter_macro_daemon_name=ORIGINATING

    to this:

    #submission inet n       -       y       -       -       smtpd
      -o syslog_name=postfix/submission
      -o smtpd_tls_security_level=encrypt
      -o smtpd_sasl_auth_enable=yes
      -o smtpd_client_restrictions=permit_sasl_authenticated,reject
    #  -o smtpd_tls_auth_only=yes
    #  -o smtpd_reject_unlisted_recipient=no
    #  -o smtpd_client_restrictions=$mua_client_restrictions
    #  -o smtpd_helo_restrictions=$mua_helo_restrictions
    #  -o smtpd_sender_restrictions=$mua_sender_restrictions
    #  -o smtpd_recipient_restrictions=
    #  -o smtpd_relay_restrictions=permit_sasl_authenticated,reject
    #  -o milter_macro_daemon_name=ORIGINATING
    #smtps     inet  n       -       y       -       -       smtpd
      -o syslog_name=postfix/smtps
      -o smtpd_tls_wrappermode=yes
      -o smtpd_sasl_auth_enable=yes
      -o smtpd_client_restrictions=permit_sasl_authenticated,reject
    #  -o smtpd_reject_unlisted_recipient=no
    #  -o smtpd_client_restrictions=$mua_client_restrictions
    #  -o smtpd_helo_restrictions=$mua_helo_restrictions
    #  -o smtpd_sender_restrictions=$mua_sender_restrictions
    #  -o smtpd_recipient_restrictions=
    #  -o smtpd_relay_restrictions=permit_sasl_authenticated,reject
    #  -o milter_macro_daemon_name=ORIGINATING


    Save and close.

    This will look smiliar to like below.


    Now restart postfix service to take changes into effect 

    sudo systemctl restart postfix

    Output:
    postfix.service - Postfix Mail Transport Agent
       Loaded: loaded (/lib/systemd/system/postfix.service; enabled; vendor preset: enabled)
       Active: active (exited) since Mon 2019-04-29 10:11:55 PKT; 14s ago
      Process: 27934 ExecStart=/bin/true (code=exited, status=0/SUCCESS)
     Main PID: 27934 (code=exited, status=0/SUCCESS)

    Apr 29 10:11:55 labserver systemd[1]: Starting Postfix Mail Transport Agent...
    Apr 29 10:11:55 labserver systemd[1]: Started Postfix Mail Transport Agent.

    Now edit 50-server.cnf file and replace the following

    sudo nano /etc/mysql/mariadb.conf.d/50-server.cnf

    Change this:

    bind-address           = 127.0.0.1

    to this:

    #bind-address           = 127.0.0.1

    Save and close.

    This will look similiar to like below


    Securing MySQL

    sudo mysql_secure_installation

    Output:
    NOTE: RUNNING ALL PARTS OF THIS SCRIPT IS RECOMMENDED FOR ALL MariaDB
          SERVERS IN PRODUCTION USE!  PLEASE READ EACH STEP CAREFULLY!

    In order to log into MariaDB to secure it, we'll need the current
    password for the root user.  If you've just installed MariaDB, and
    you haven't set the root password yet, the password will be blank,
    so you should just press enter here.

    Enter current password for root (enter for none):
    OK, successfully used password, moving on...

    Setting the root password ensures that nobody can log into the MariaDB
    root user without the proper authorisation.

    You already have a root password set, so you can safely answer 'n'.

    Change the root password? [Y/n] y
    New password:
    Re-enter new password:
    Password updated successfully!
    Reloading privilege tables..
     ... Success!


    By default, a MariaDB installation has an anonymous user, allowing anyone
    to log into MariaDB without having to have a user account created for
    them.  This is intended only for testing, and to make the installation
    go a bit smoother.  You should remove them before moving into a
    production environment.

    Remove anonymous users? [Y/n] y
     ... Success!

    Normally, root should only be allowed to connect from 'localhost'.  This
    ensures that someone cannot guess at the root password from the network.

    Disallow root login remotely? [Y/n] y
     ... Success!

    By default, MariaDB comes with a database named 'test' that anyone can
    access.  This is also intended only for testing, and should be removed
    before moving into a production environment.

    Remove test database and access to it? [Y/n] y
     - Dropping test database...
     ... Success!
     - Removing privileges on test database...
     ... Success!

    Reloading the privilege tables will ensure that all changes made so far
    will take effect immediately.

    Reload privilege tables now? [Y/n] y
     ... Success!

    Cleaning up...

    All done!  If you've completed all of the above steps, your MariaDB
    installation should now be secure.

    Thanks for using MariaDB!

    Login to mysql prompt and execute the following.

    sudo mysql -u root -p

    update mysql.user set plugin = 'mysql_native_password' where user='root';

    Output:
    Query OK, 1 row affected (0.00 sec)
    Rows matched: 1  Changed: 1  Warnings: 0

    exit


    Edit debian.cnf file and update the following.

    sudo nano /etc/mysql/debian.cnf

    Change this:

    # Automatically generated for Debian scripts. DO NOT TOUCH!
    [client]
    host     = localhost
    user     = root
    password =
    socket   = /var/run/mysqld/mysqld.sock
    [mysql_upgrade]
    host     = localhost
    user     = root
    password =
    socket   = /var/run/mysqld/mysqld.sock
    basedir  = /usr

    to this:

    # Automatically generated for Debian scripts. DO NOT TOUCH!
    [client]
    host     = localhost
    user     = root
    password = TypePasswordHere
    socket   = /var/run/mysqld/mysqld.sock
    [mysql_upgrade]
    host     = localhost
    user     = root
    password = TypePasswordHere
    socket   = /var/run/mysqld/mysqld.sock
    basedir  = /usr

    Save and close.

    This will look smiliar to like below.


    Restart database service to take changes into effect.

    sudo systemctl restart mysql

    Installing SpamAssassin
    sudo apt -y install amavisd-new spamassassin clamav clamav-daemon unzip bzip2 arj nomarch lzop cabextract apt-listchanges libnet-ldap-perl libauthen-sasl-perl clamav-docs daemon libio-string-perl libio-socket-ssl-perl libnet-ident-perl zip libnet-dns-perl postgrey

    sudo freshclam

    Ignore these errors

    ERROR: /var/log/clamav/freshclam.log is locked by another process
    ERROR: Problem with internal logger (UpdateLogFile = /var/log/clamav/freshclam.log).

    sudo systemctl start clamav-daemon

    sudo wget https://git.ispconfig.org/ispconfig/ispconfig3/raw/stable-3.1/helper_scripts/ubuntu-amavisd-new-2.11.patch --directory-prefix=/tmp

    sudo cp -pf /usr/sbin/amavisd-new /usr/sbin/amavisd-new-orignal
    sudo patch < /tmp/ubuntu-amavisd-new-2.11.patch

    Output:
    patching file amavisd-new
    Hunk #2 succeeded at 34363 (offset 1 line).

    Installing Metronome XMPP Server
    sudo apt -y install git lua5.1 liblua5.1-0-dev lua-filesystem libidn11-dev libssl-dev lua-zlib lua-expat lua-event lua-bitop lua-socket lua-sec luarocks luarocks

    sudo luarocks install lpc

    Output:
    Installing https://luarocks.org/lpc-1.0.0-2.src.rock
    gcc -O2 -fPIC -I/usr/include/lua5.1 -c lpc.c -o lpc.o
    gcc -shared -o lpc.so lpc.o
    install -d /usr/local/lib/luarocks/rocks/lpc/1.0.0-2/lib
    install lpc.so /usr/local/lib/luarocks/rocks/lpc/1.0.0-2/lib
    lpc 1.0.0-2 is now installed in /usr/local (license: MIT/X11)

    sudo adduser --no-create-home --disabled-login --gecos 'Metronome' metronome

    Output:
    Adding user `metronome' ...
    Adding new group `metronome' (1001) ...
    Adding new user `metronome' (1001) with group `metronome' ...
    Not creating home directory `/home/metronome'.

    sudo git clone https://github.com/maranda/metronome.git /opt/metronome

    Output:
    Cloning into '/opt/metronome'...
    remote: Enumerating objects: 185, done.
    remote: Counting objects: 100% (185/185), done.
    remote: Compressing objects: 100% (132/132), done.
    remote: Total 13177 (delta 96), reused 122 (delta 49), pack-reused 12992
    Receiving objects: 100% (13177/13177), 4.08 MiB | 404.00 KiB/s, done.
    Resolving deltas: 100% (7646/7646), done.

    cd /opt/metronome

    sudo ./configure --ostype=debian --prefix=/usr

    Output:
    Looking for Lua... lua5.1 found in $PATH: /usr/bin
    Checking Lua includes... lua.h found in /usr/include/lua5.1/lua.h
    Writing configuration...

    Installation prefix: /usr
    Metronome configuration directory: /etc/metronome
    Using Lua from: /usr

    Done. You can now run 'make' to build.

    sudo make
    sudo make install

    Installing Apache, PHP, phpMyAdmin
    sudo apt -y install apache2 apache2-doc apache2-utils libapache2-mod-php php7.2 php7.2-common php7.2-gd php7.2-mysql php7.2-imap phpmyadmin php7.2-cli php7.2-cgi libapache2-mod-fcgid apache2-suexec-pristine php-pear mcrypt  imagemagick libruby libapache2-mod-python php7.2-curl php7.2-intl php7.2-pspell php7.2-recode php7.2-sqlite3 php7.2-tidy php7.2-xmlrpc php7.2-xsl memcached php-memcache php-imagick php-gettext php7.2-zip php7.2-mbstring php-soap php7.2-soap

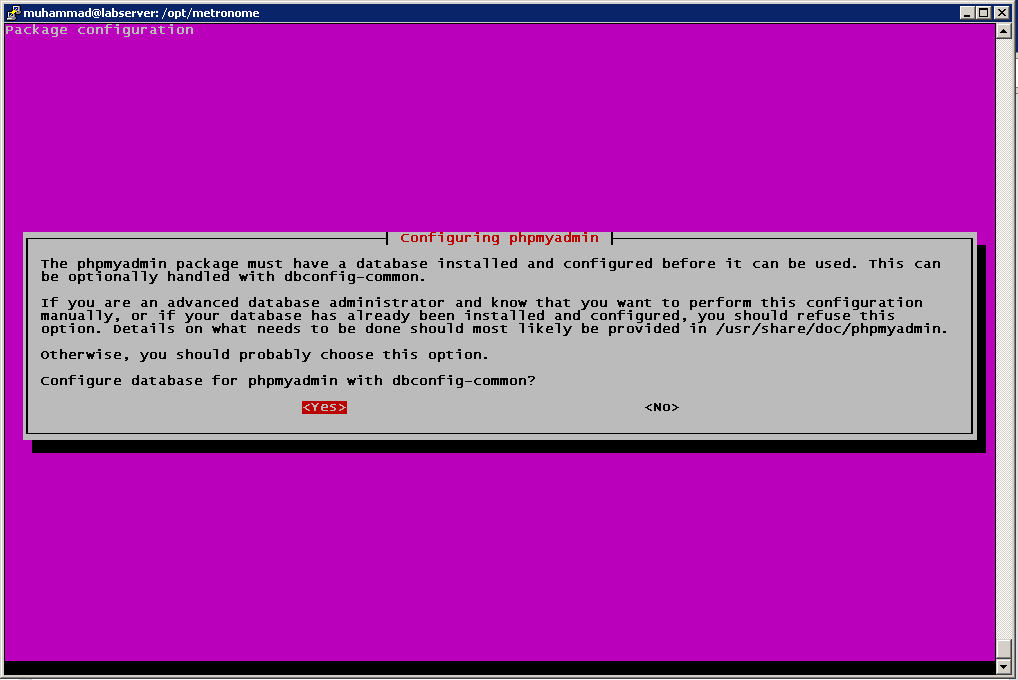
    Select apache2 and press Ok


    Press Yes


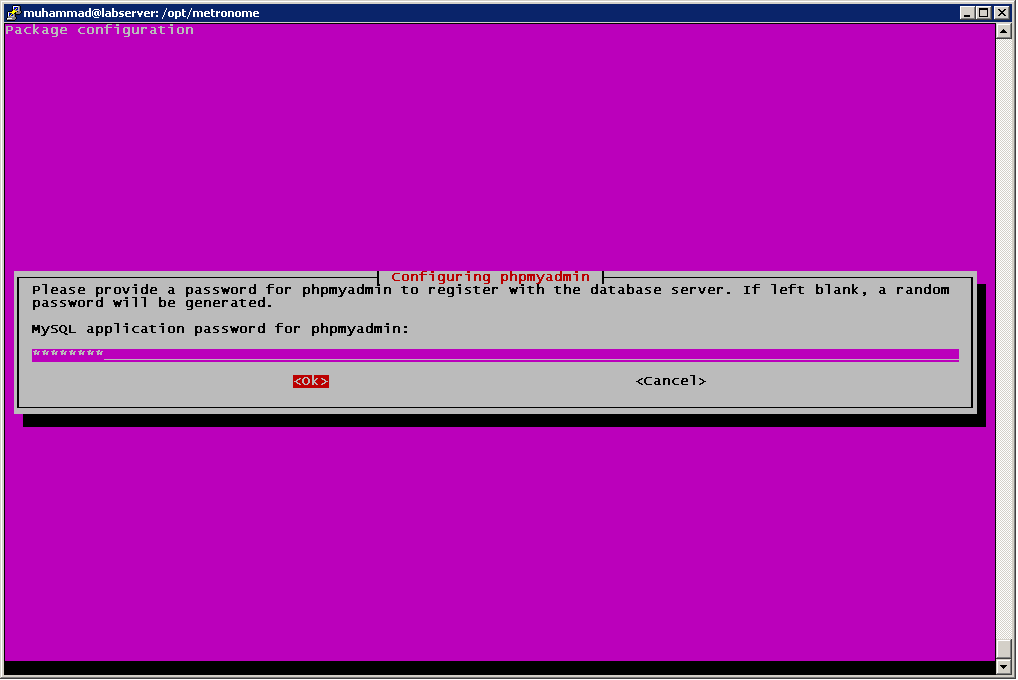
    Type your desired password here and press Ok.


    Type confirm password and press Ok.


    sudo a2enmod suexec rewrite ssl actions include cgi

    Output:
    Enabling module suexec.
    Enabling module rewrite.
    Considering dependency setenvif for ssl:
    Module setenvif already enabled
    Considering dependency mime for ssl:
    Module mime already enabled
    Considering dependency socache_shmcb for ssl:
    Enabling module socache_shmcb.
    Enabling module ssl.
    See /usr/share/doc/apache2/README.Debian.gz on how to configure SSL and create self-signed certificates.
    Enabling module actions.
    Considering dependency mime for include:
    Module mime already enabled
    Enabling module include.
    Enabling module cgi.
    To activate the new configuration, you need to run:
      systemctl restart apache2

    sudo a2enmod dav_fs dav auth_digest headers

    Output:
    Considering dependency dav for dav_fs:
    Enabling module dav.
    Enabling module dav_fs.
    Module dav already enabled
    Considering dependency authn_core for auth_digest:
    Module authn_core already enabled
    Enabling module auth_digest.
    Enabling module headers.
    To activate the new configuration, you need to run:
      systemctl restart apache2

    Keeping security into consideration we need to disable HTTP_PROXY header.

    sudo nano /etc/apache2/conf-available/httpoxy.conf

    <IfModule mod_headers.c>
        RequestHeader unset Proxy early
    </IfModule>

    Save adn close.


    Enable the config file by running:

    sudo a2enconf httpoxy

    Output:
    Enabling conf httpoxy.
    To activate the new configuration, you need to run:
      systemctl reload apache2

    Installing PHP Opcode cache
    sudo apt -y install php7.2-opcache php-apcu

    sudo systemctl restart apache2

    Installing PHP-FPM
    sudo apt -y install php7.2-fpm

    sudo a2enmod actions proxy_fcgi alias

    Output:
    Module actions already enabled
    Considering dependency proxy for proxy_fcgi:
    Enabling module proxy.
    Enabling module proxy_fcgi.
    Module alias already enabled
    To activate the new configuration, you need to run:
      systemctl restart apache2

    Installing HHVM
    sudo apt -y install hhvm

    Installing Let's Encrypt
    sudo apt -y install certbot

    Installing Mailman

    sudo apt -y install mailman

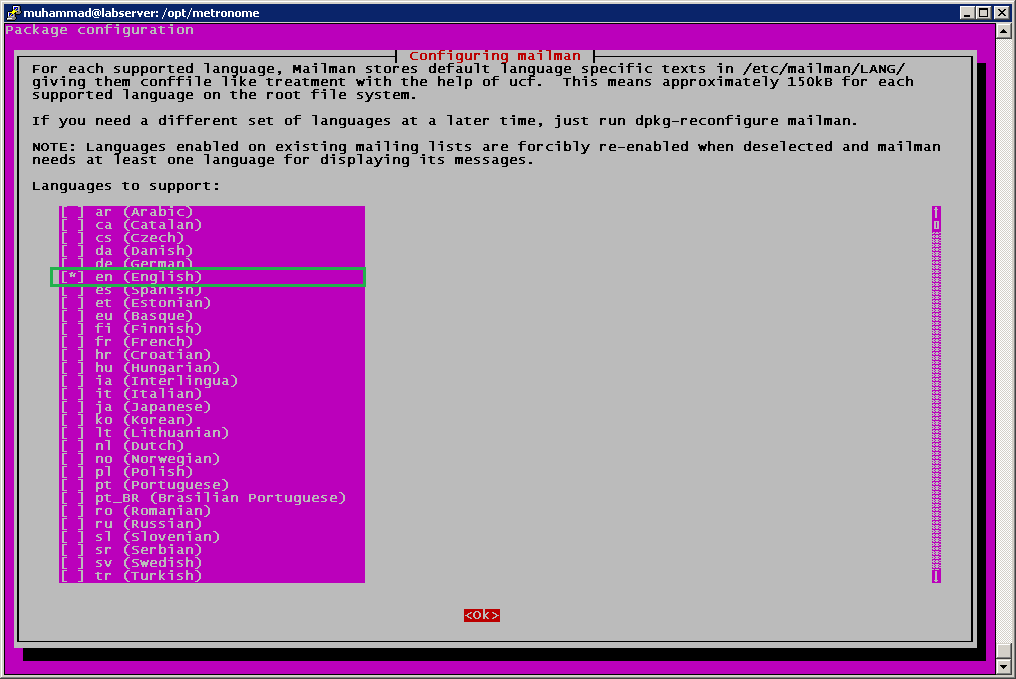
    Select your desired language and press Ok.


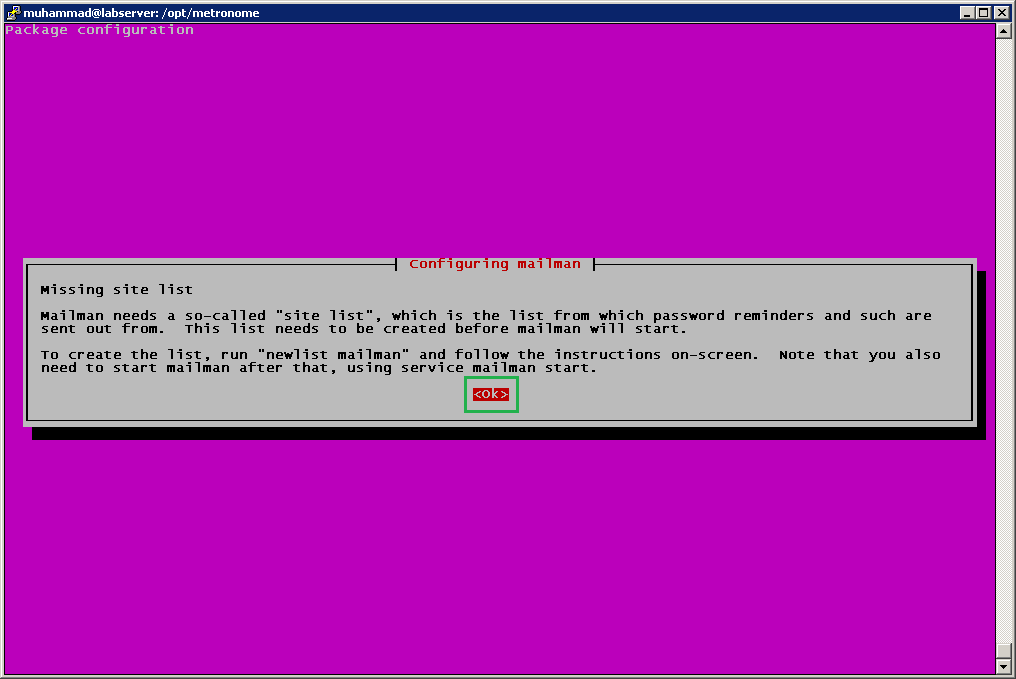
    Press Ok.


    Type following command and respond to the following highlited

    sudo newlist mailman

    Enter the email of the person running the list: support@layloyar.com
    Initial mailman password:TypePasswordHere
    To finish creating your mailing list, you must edit your /etc/aliases (or
    equivalent) file by adding the following lines, and possibly running the
    `newaliases' program:

    ## mailman mailing list
    mailman:              "|/var/lib/mailman/mail/mailman post mailman"
    mailman-admin:        "|/var/lib/mailman/mail/mailman admin mailman"
    mailman-bounces:      "|/var/lib/mailman/mail/mailman bounces mailman"
    mailman-confirm:      "|/var/lib/mailman/mail/mailman confirm mailman"
    mailman-join:         "|/var/lib/mailman/mail/mailman join mailman"
    mailman-leave:        "|/var/lib/mailman/mail/mailman leave mailman"
    mailman-owner:        "|/var/lib/mailman/mail/mailman owner mailman"
    mailman-request:      "|/var/lib/mailman/mail/mailman request mailman"
    mailman-subscribe:    "|/var/lib/mailman/mail/mailman subscribe mailman"
    mailman-unsubscribe:  "|/var/lib/mailman/mail/mailman unsubscribe mailman"

    Hit enter to notify mailman owner...

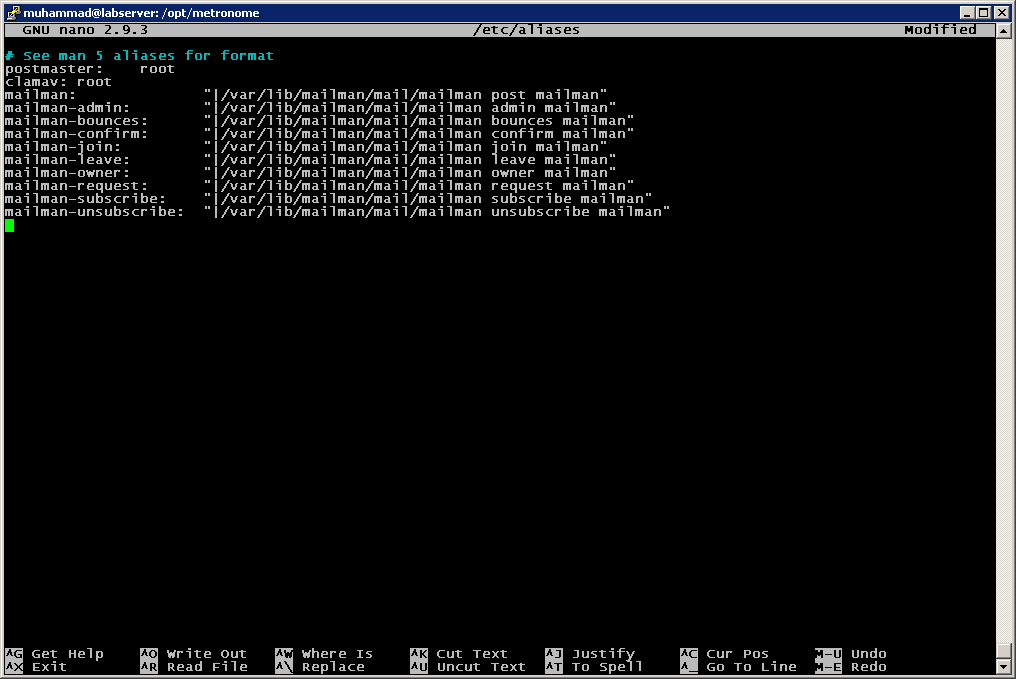
    sudo nano /etc/aliases

    Add the following contents into the file:

    mailman:              "|/var/lib/mailman/mail/mailman post mailman"
    mailman-admin:        "|/var/lib/mailman/mail/mailman admin mailman"
    mailman-bounces:      "|/var/lib/mailman/mail/mailman bounces mailman"
    mailman-confirm:      "|/var/lib/mailman/mail/mailman confirm mailman"
    mailman-join:         "|/var/lib/mailman/mail/mailman join mailman"
    mailman-leave:        "|/var/lib/mailman/mail/mailman leave mailman"
    mailman-owner:        "|/var/lib/mailman/mail/mailman owner mailman"
    mailman-request:      "|/var/lib/mailman/mail/mailman request mailman"
    mailman-subscribe:    "|/var/lib/mailman/mail/mailman subscribe mailman"
    mailman-unsubscribe:  "|/var/lib/mailman/mail/mailman unsubscribe mailman"

    Save and close.


    sudo newaliases

    sudo systemctl restart postfix

    sudo ln -s /etc/mailman/apache.conf /etc/apache2/conf-available/mailman.conf

    sudo a2enconf mailman

    Output:
    Enabling conf mailman.
    To activate the new configuration, you need to run:
      systemctl reload apache2

    Restart Apache services to take changes into effect

    sudo systemctl restart apache2

    sudo systemctl start mailman

    Installing PureFTPd

    sudo apt -y install pure-ftpd-common pure-ftpd-mysql quota quotatool

    sudo nano /etc/default/pure-ftpd-common

    Change following from false to true:

    VIRTUALCHROOT=true

    Save and close.


    Now generate an ssl certificate to secure PureFTPD communication

    sudo openssl req -x509 -nodes -days 3650 -newkey rsa:2048 -keyout /etc/ssl/private/pure-ftpd.pem -out /etc/ssl/private/pure-ftpd.pem

    Output:
    Generating a 2048 bit RSA private key
    ..................................................................................................+++
    ......+++
    writing new private key to '/etc/ssl/private/pure-ftpd.pem'
    -----
    You are about to be asked to enter information that will be incorporated
    into your certificate request.
    What you are about to enter is what is called a Distinguished Name or a DN.
    There are quite a few fields but you can leave some blank
    For some fields there will be a default value,
    If you enter '.', the field will be left blank.
    -----
    Country Name (2 letter code) [AU]:PK
    State or Province Name (full name) [Some-State]:Sindh
    Locality Name (eg, city) []:Karachi
    Organization Name (eg, company) [Internet Widgits Pty Ltd]:Laying
    Organizational Unit Name (eg, section) []:Services
    Common Name (e.g. server FQDN or YOUR name) []:labserver.layloyar.com
    Email Address []:support@layloyar.com

    sudo chmod 600 /etc/ssl/private/pure-ftpd.pem

    sudo systemctl restart pure-ftpd-mysql

    Set Up PureFTPd Qouta

    sudo nano /etc/fstab

    apend the following line:

    UUID=cf9de5a1-9a14-4ce4-bae6-1fa672a45f2b / ext4 errors=remount-ro,usrjquota=quota.user,grpjquota=quota.group,jq
    fmt=vfsv0 0 1

    Save and close.

    sudo mount -o remount /

    sudo quotacheck -avugm

    Output:
    quotacheck: Scanning /dev/sda2 [/] done
    quotacheck: Cannot stat old user quota file //quota.user: No such file or directory. Usage will not be subtracted.
    quotacheck: Cannot stat old group quota file //quota.group: No such file or directory. Usage will not be subtracted.
    quotacheck: Cannot stat old user quota file //quota.user: No such file or directory. Usage will not be subtracted.
    quotacheck: Cannot stat old group quota file //quota.group: No such file or directory. Usage will not be subtracted.
    quotacheck: Checked 13608 directories and 95629 files
    quotacheck: Old file not found.
    quotacheck: Old file not found.

    sudo quotaon -avug

    Output:
    /dev/sda2 [/]: group quotas turned on
    /dev/sda2 [/]: user quotas turned on


    Installing BIND DNS Server

    sudo apt -y install bind9 dnsutils haveged

    sudo systemctl enable haveged

    Output:
    Synchronizing state of haveged.service with SysV service script with /lib/systemd/systemd-sysv-install.
    Executing: /lib/systemd/systemd-sysv-install enable haveged

    sudo systemctl start haveged

    Installing Vlogger, Webalizer, and AWStats

    sudo apt -y install vlogger webalizer awstats geoip-database libclass-dbi-mysql-perl

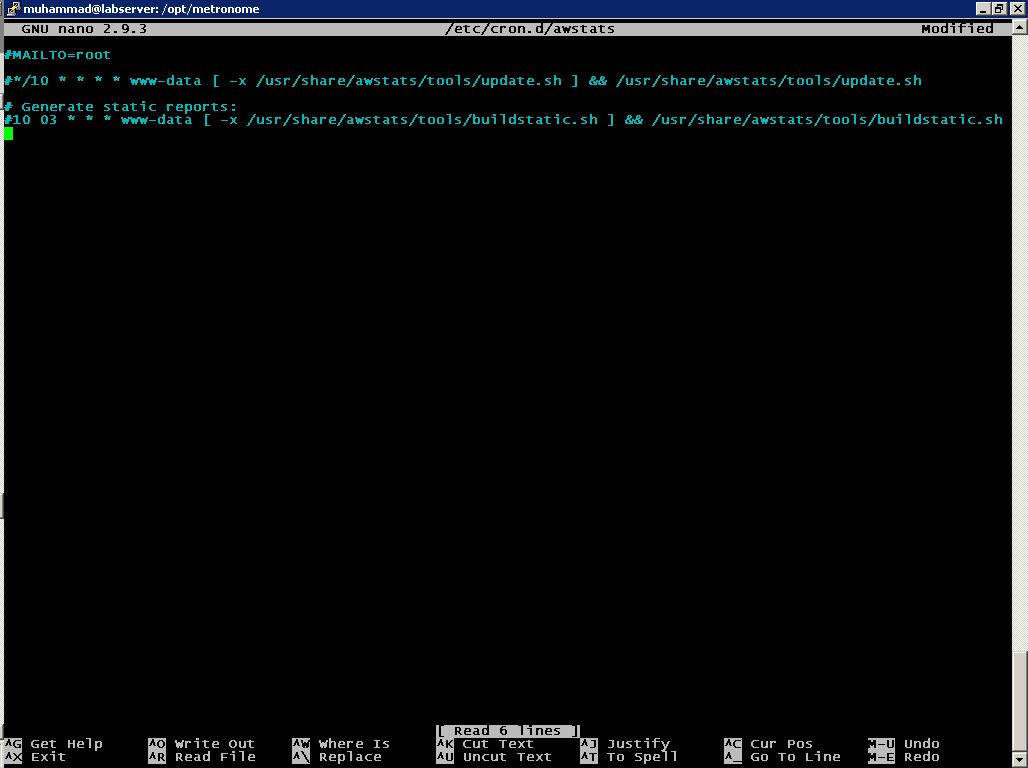
    sudo nano /etc/cron.d/awstats

    Change this:

    MAILTO=root

    */10 * * * * www-data [ -x /usr/share/awstats/tools/update.sh ] && /usr/share/awstats/tools/update.sh

    # Generate static reports:
    10 03 * * * www-data [ -x /usr/share/awstats/tools/buildstatic.sh ] && /usr/share/awstats/tools/buildstatic.sh

    to this:

    #MAILTO=root

    #*/10 * * * * www-data [ -x /usr/share/awstats/tools/update.sh ] && /usr/share/awstats/tools/update.sh

    # Generate static reports:
    #10 03 * * * www-data [ -x /usr/share/awstats/tools/buildstatic.sh ] && /usr/share/awstats/tools/buildstatic.sh

    Save and close.


    Installing Jailkit

    sudo apt -y install build-essential autoconf automake1.11 libtool flex bison debhelper binutils

    wget http://olivier.sessink.nl/jailkit/jailkit-2.19.tar.gz --directory-prefix=/tmp

    cd /tmp

    sudo tar xvfz /tmp/jailkit-2.19.tar.gz

    sudo echo 5 > /tmp/jailkit-2.19/debian/compat

    cd /tmp/jailkit-2.19

    sudo ./debian/rules binary

    sudo dpkg -i /tmp/jailkit*.deb

    Output:
    Selecting previously unselected package jailkit.
    (Reading database ... 99559 files and directories currently installed.)
    Preparing to unpack /tmp/jailkit_2.19-1_amd64.deb ...
    Unpacking jailkit (2.19-1) ...
    Setting up jailkit (2.19-1) ...
    Processing triggers for ureadahead (0.100.0-20) ...
    Processing triggers for systemd (237-3ubuntu10.12) ...
    Processing triggers for man-db (2.8.3-2ubuntu0.1) ...

    Installing fail2ban

    sudo apt -y install fail2ban

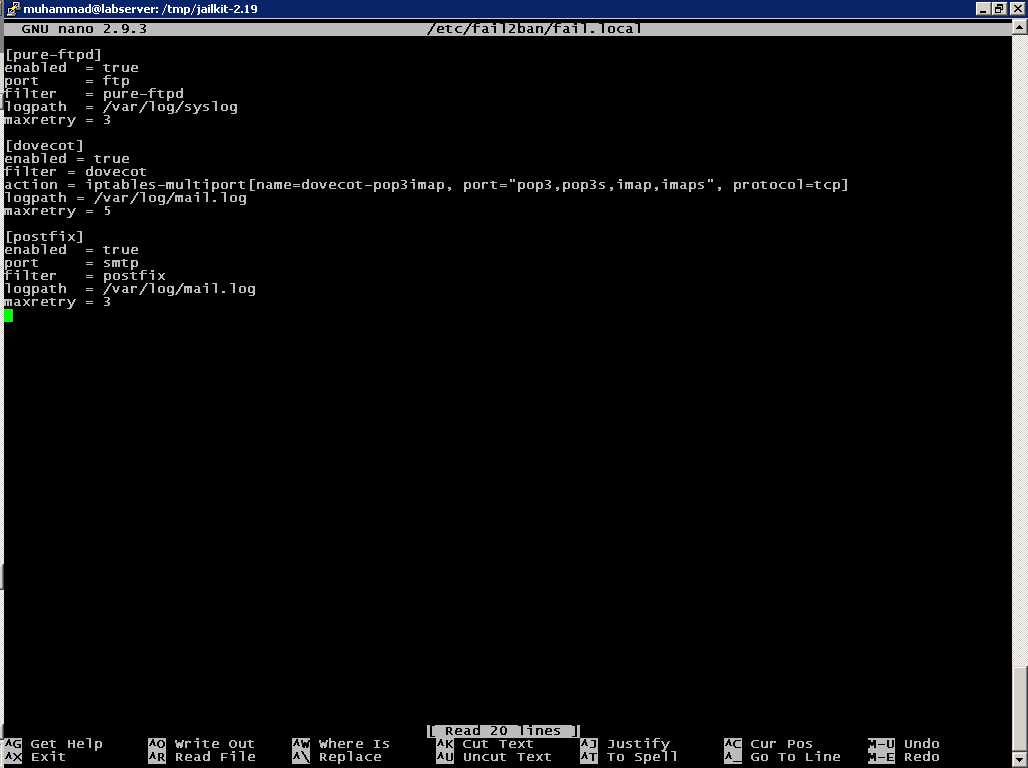
    sudo nano /etc/fail2ban/fail.local

    Add following contents into file:

    [pure-ftpd]
    enabled  = true
    port     = ftp
    filter   = pure-ftpd
    logpath  = /var/log/syslog
    maxretry = 3

    [dovecot]
    enabled = true
    filter = dovecot
    action = iptables-multiport[name=dovecot-pop3imap, port="pop3,pop3s,imap,imaps", protocol=tcp]
    logpath = /var/log/mail.log
    maxretry = 5

    [postfix]
    enabled  = true
    port     = smtp
    filter   = postfix
    logpath  = /var/log/mail.log
    maxretry = 3

    Save and close.


    Installing Roundcube Webmail

    sudo apt -y install roundcube roundcube-core roundcube-mysql roundcube-plugins javascript-common libjs-jquery-mousewheel php-net-sieve tinymce

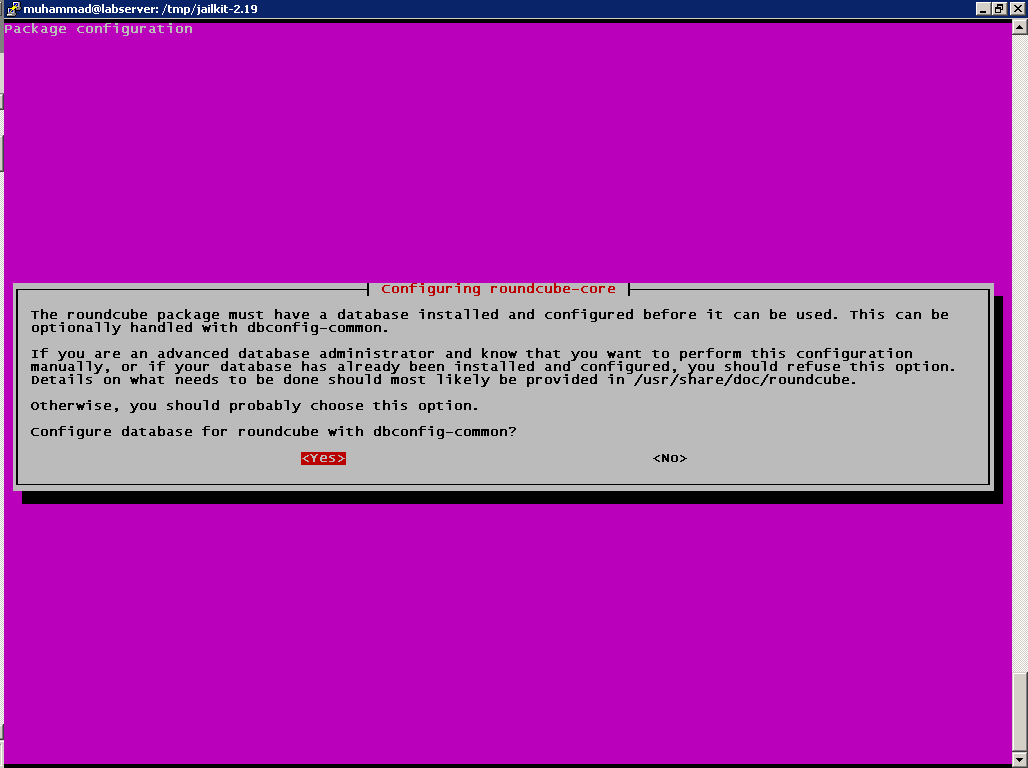
    Press Yes.


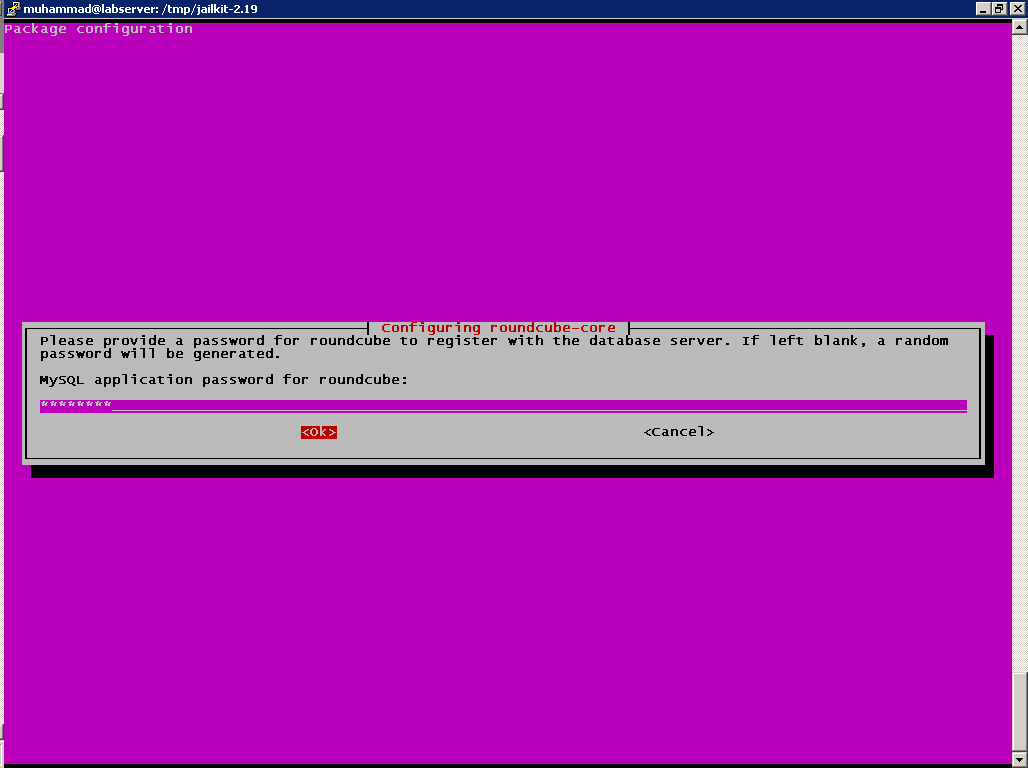
    Type your desired password here and press Ok.


    Type confirm password and press Ok.


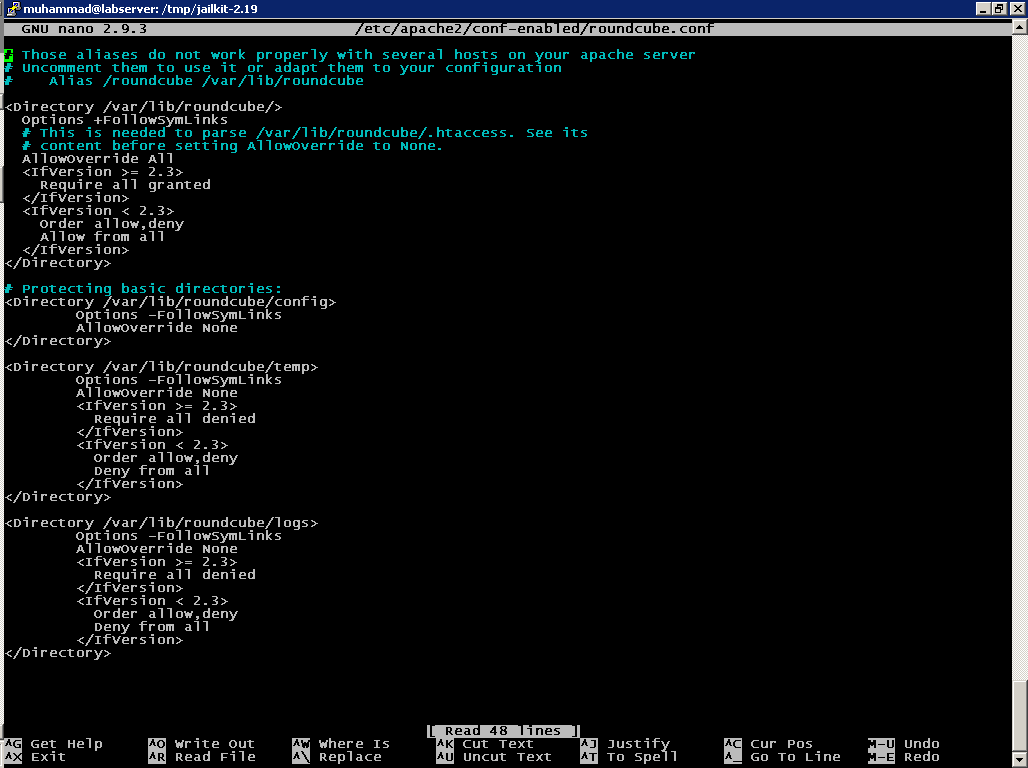
    sudo nano /etc/apache2/conf-enabled/roundcube.conf

    Change this:

    # Those aliases do not work properly with several hosts on your apache server
    # Uncomment them to use it or adapt them to your configuration
    #    Alias /roundcube /var/lib/roundcube

    <Directory /var/lib/roundcube/>
      Options +FollowSymLinks
      # This is needed to parse /var/lib/roundcube/.htaccess. See its
      # content before setting AllowOverride to None.
      AllowOverride All
      <IfVersion >= 2.3>
        Require all granted
      </IfVersion>
      <IfVersion < 2.3>
        Order allow,deny
        Allow from all
      </IfVersion>
    </Directory>

    # Protecting basic directories:
    <Directory /var/lib/roundcube/config>
            Options -FollowSymLinks
            AllowOverride None
    </Directory>

    <Directory /var/lib/roundcube/temp>
            Options -FollowSymLinks
            AllowOverride None
            <IfVersion >= 2.3>
              Require all denied
            </IfVersion>
            <IfVersion < 2.3>
              Order allow,deny
              Deny from all
            </IfVersion>
    </Directory>

    <Directory /var/lib/roundcube/logs>
            Options -FollowSymLinks
            AllowOverride None
            <IfVersion >= 2.3>
              Require all denied
            </IfVersion>
            <IfVersion < 2.3>
              Order allow,deny
              Deny from all
            </IfVersion>
    </Directory>

    to this:

    # Those aliases do not work properly with several hosts on your apache server
    # Uncomment them to use it or adapt them to your configuration
        Alias /roundcube /var/lib/roundcube
        Alias /webmail /var/lib/roundcube

    <Directory /var/lib/roundcube/>
      AddType application/x-httpd-php .php
      Options +FollowSymLinks
      # This is needed to parse /var/lib/roundcube/.htaccess. See its
      # content before setting AllowOverride to None.
      AllowOverride All
      <IfVersion >= 2.3>
        Require all granted
      </IfVersion>
      <IfVersion < 2.3>
        Order allow,deny
        Allow from all
      </IfVersion>
    </Directory>

    # Protecting basic directories:
    <Directory /var/lib/roundcube/config>
            Options -FollowSymLinks
            AllowOverride None
    </Directory>

    <Directory /var/lib/roundcube/temp>
            Options -FollowSymLinks
            AllowOverride None
            <IfVersion >= 2.3>
              Require all denied
            </IfVersion>
            <IfVersion < 2.3>
              Order allow,deny
              Deny from all
            </IfVersion>
    </Directory>

    <Directory /var/lib/roundcube/logs>
            Options -FollowSymLinks
            AllowOverride None
            <IfVersion >= 2.3>
              Require all denied
            </IfVersion>
            <IfVersion < 2.3>
              Order allow,deny
              Deny from all
            </IfVersion>
    </Directory>

    Save and close.


    Restart apache service to take changes into effect.

    sudo systemctl restart apache2

    sudo nano /etc/roundcube/config.inc.php

    change this:

    $config['default_host'] = '';

    to this:

    $config['default_host'] = 'localhost';

    Save and close.

    Installing ISPConfig 3.1

    sudo git clone https://git.ispconfig.org/ispconfig/ispconfig3.git /opt/ispconfig3

    Output:
    Cloning into '/opt/ispconfig3'...
    remote: Enumerating objects: 114299, done.
    remote: Counting objects: 100% (114299/114299), done.
    remote: Compressing objects: 100% (24666/24666), done.
    remote: Total 114299 (delta 89363), reused 113481 (delta 88785)
    Receiving objects: 100% (114299/114299), 28.88 MiB | 691.00 KiB/s, done.
    Resolving deltas: 100% (89363/89363), done.


    sudo php -q /opt/ispconfig3/install/install.php


    --------------------------------------------------------------------------------

     _____ ___________   _____              __ _         ____
    |_   _/  ___| ___ \ /  __ \            / _(_)       /__  \
      | | \ `--.| |_/ / | /  \/ ___  _ __ | |_ _  __ _    _/ /
      | |  `--. \  __/  | |    / _ \| '_ \|  _| |/ _` |  |_ |
     _| |_/\__/ / |     | \__/\ (_) | | | | | | | (_| | ___\ \
     \___/\____/\_|      \____/\___/|_| |_|_| |_|\__, | \____/
                                                  __/ |
                                                 |___/
    --------------------------------------------------------------------------------


    >> Initial configuration

    Operating System: Ubuntu 19.04 (Disco Dingo)

        Following will be a few questions for primary configuration so be careful.
        Default values are in [brackets] and can be accepted with <ENTER>.
        Tap in "quit" (without the quotes) to stop the installer.


    Select language (en,de) [en]:ENTER

    Installation mode (standard,expert) [standard]:ENTER

    Full qualified hostname (FQDN) of the server, eg server1.domain.tld  [labserver.layloyar.com]:ENTER

    MySQL server hostname [localhost]:ENTER

    MySQL server port [3306]:ENTER

    MySQL root username [root]:ENTER

    MySQL root password []: TypePasswordHere

    MySQL database to create [dbispconfig]:ENTER

    MySQL charset [utf8]:ENTER

    Configuring Postgrey
    Configuring Postfix
    Generating a 4096 bit RSA private key
    .......................++
    ............................................................................++
    writing new private key to 'smtpd.key'
    -----
    You are about to be asked to enter information that will be incorporated
    into your certificate request.
    What you are about to enter is what is called a Distinguished Name or a DN.
    There are quite a few fields but you can leave some blank
    For some fields there will be a default value,
    If you enter '.', the field will be left blank.
    -----
    Country Name (2 letter code) [AU]:PK
    State or Province Name (full name) [Some-State]:Sindh
    Locality Name (eg, city) []:Karachi
    Organization Name (eg, company) [Internet Widgits Pty Ltd]:Laying
    Organizational Unit Name (eg, section) []:Services
    Common Name (e.g. server FQDN or YOUR name) []:labserver.layloyar.com
    Email Address []:support@layloyar.com

    postconf: warning: unmatched request: "maildrop.unix"
    Configuring Dovecot
    Configuring Spamassassin
    Configuring Amavisd
    [INFO] service Rspamd not detected
    Configuring Getmail
    Configuring Jailkit
    Configuring Pureftpd
    Configuring BIND
    Configuring Apache
    Configuring vlogger
    Configuring Ubuntu Firewall
    Configuring Fail2ban
    Configuring Apps vhost
    Installing ISPConfig
    ISPConfig Port [8080]:ENTER

    Admin password [a2f2180d]: TypePasswordHere

    Re-enter admin password []: TypePasswordHere

    Do you want a secure (SSL) connection to the ISPConfig web interface (y,n) [y]:ENTER

    Generating RSA private key, 4096 bit long modulus
    ..........++
    ................................++
    e is 65537 (0x010001)
    You are about to be asked to enter information that will be incorporated
    into your certificate request.
    What you are about to enter is what is called a Distinguished Name or a DN.
    There are quite a few fields but you can leave some blank
    For some fields there will be a default value,
    If you enter '.', the field will be left blank.
    -----
    Country Name (2 letter code) [AU]:PK
    State or Province Name (full name) [Some-State]:Sindh
    Locality Name (eg, city) []:Karachi
    Organization Name (eg, company) [Internet Widgits Pty Ltd]:Laying
    Organizational Unit Name (eg, section) []:Services
    Common Name (e.g. server FQDN or YOUR name) []:labserver.layloyar.com
    Email Address []:support@techsupportpk.com

    Please enter the following 'extra' attributes
    to be sent with your certificate request
    A challenge password []:ENTER
    An optional company name []:ENTER
    writing RSA key
    Symlink ISPConfig LE SSL certs to postfix? (y,n) [y]:ENTER

    Symlink ISPConfig LE SSL certs to pureftpd? Creating dhparam file takes some times. (y,n) [y]:ENTER

    Generating DH parameters, 4096 bit long safe prime, generator 2
    This is going to take a long time
    ............................................................................

    Configuring DBServer
    Installing ISPConfig crontab
    no crontab for root
    no crontab for getmail
    Detect IP addresses
    Restarting services ...
    Testing 2 seconds throughput of /dev/random ... 1081519 bytes OK
    Installation completed.

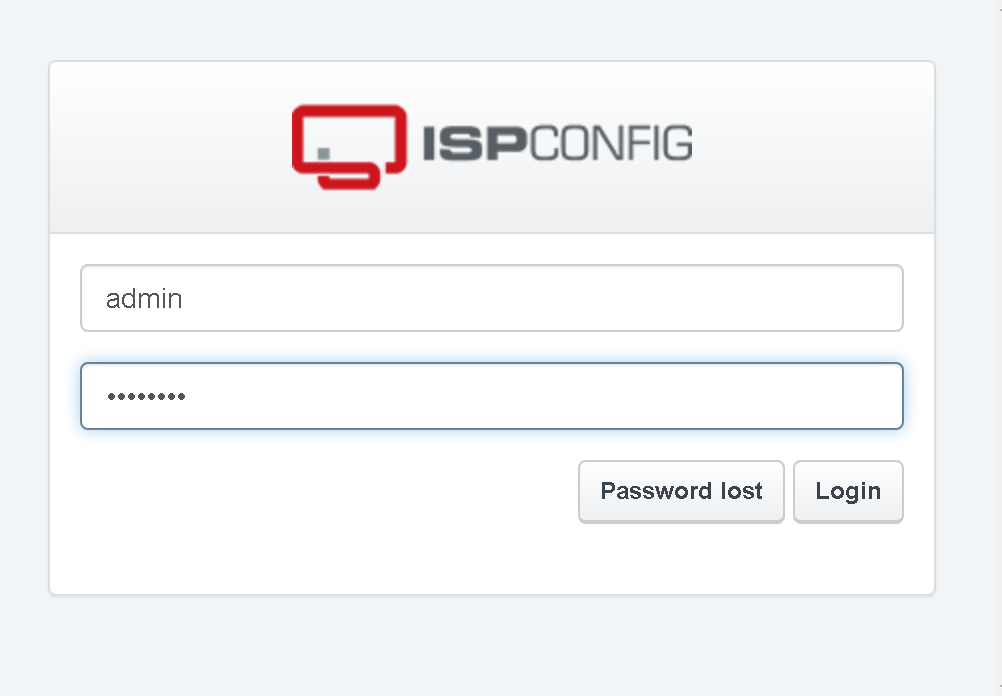
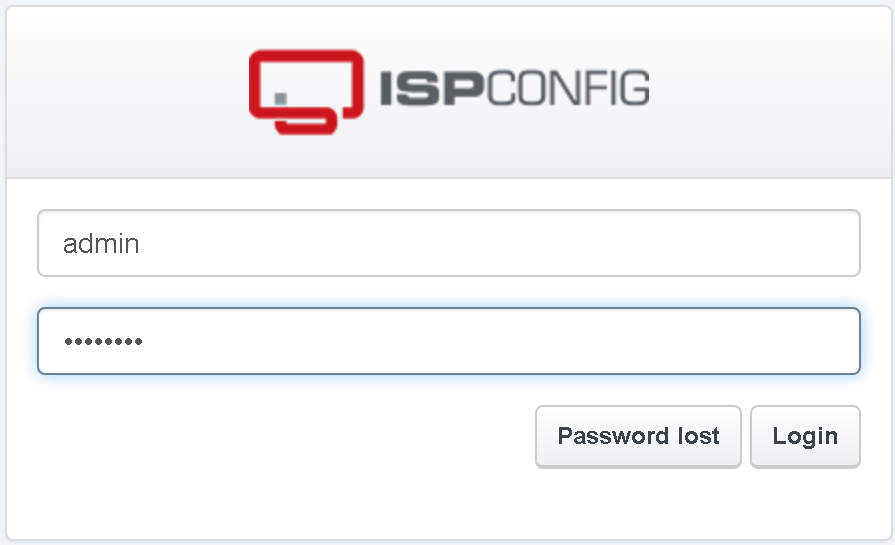
    When you are finished with the above, you can access ISPConfig 3 web control panel by accessing https://labserver.layloyar.com:8080 or https://ip_address:8080 and you will be presented following login screen.

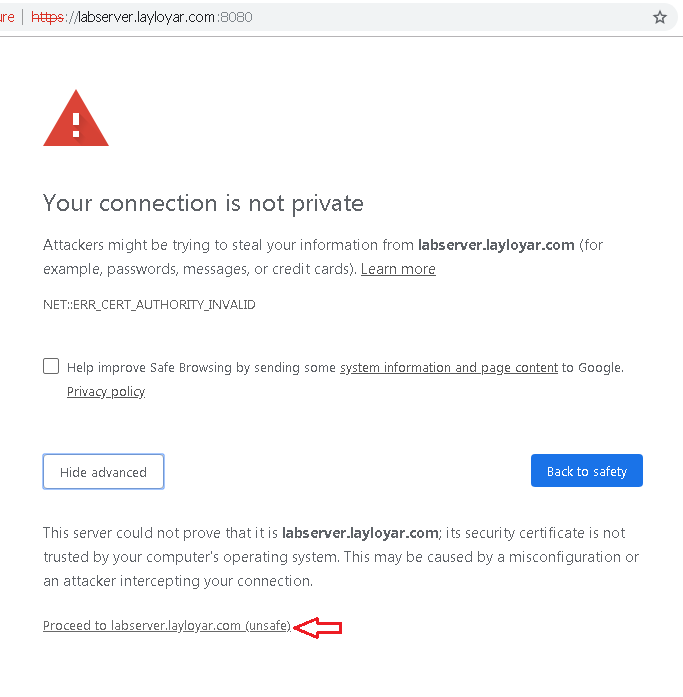
    Since we are using self signed certificate therefore we have to ignore this warnning by clicking Advanced


    Click proceed to (unsafe)


    Enter usernmae admin and password you have created earlier


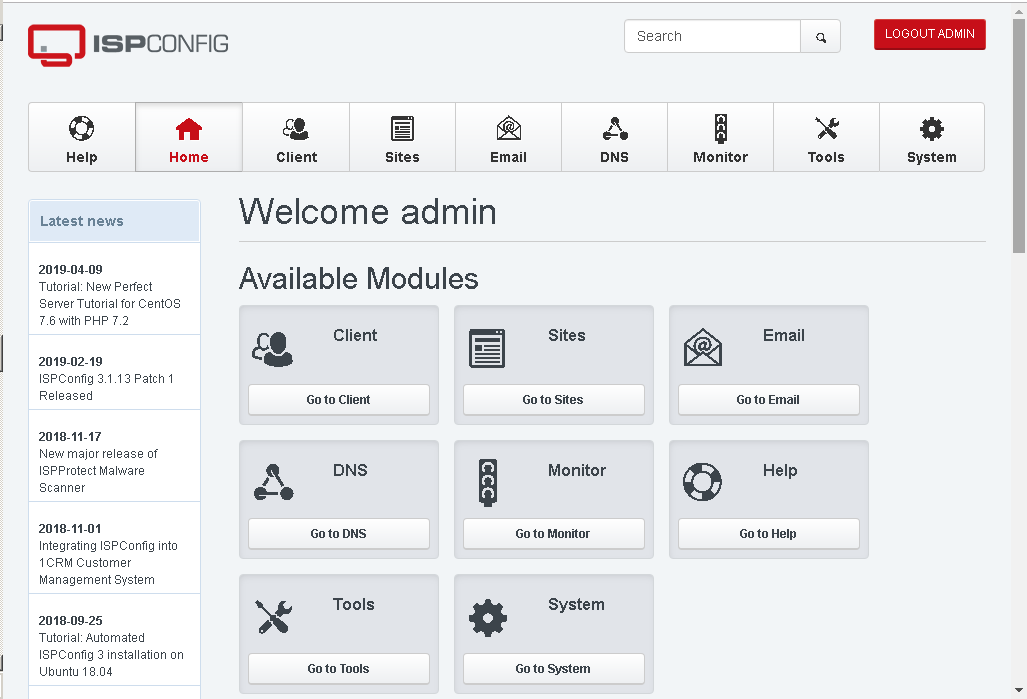
    This is your ispcong dashboard.


    Wrapping up
    You have successfully deployed your first ispconfig 3 on your Ubuntu 19.04 server.

    How To Enable WiFi Connection in Rescue Mode on Ubuntu/CentOS/RHEL/Fedora

    $
    0
    0

    If situation forces you to boot your Linux machines in rescue mode due to whatsoever reason and you need to access WiFi networking to make internet connectivity available from command line then this tutorial will help you.


    The steps illustrated in this guide will help you to establish WiFi networking on a Red Hat, CentOS, Fedora or Ubuntu Linux machine.

    You will need to replace red highlighted text with yours.

    Verify Available WiFi Adapters
    You can find available WiFi adapter name by executing the following command:

    sudo iw dev

    Output
    phy#1
        Interface wlp5s0
            ifindex 4
            type managed

    Bring Up WiFi Interface
    You need to bring your wifi adapter up and running in order to scan available WiFi networks using the following command:

    sudo ip link set wlp5s0 up

    Search WiFi Access Point
    Now you need to scan WiFi access points to gather the ssid and security protocol information using the following command:

    sudo iw wlp5s0 scan

    You will see output similiar to like below. The thing you need to remember is SSID and the security protocol (WPA/WPA2 vs WEP). In our example, the SSID is Ground-Floor and the security protocol is RSN, also commonly referred to as WPA2. The security protocol is important because it determines what tool you use to connect to the wifi network.

    Output
    BSS 8c:67:20:ce:10:30 (on wlp5s0)
        TSF: 4211507413842 usec (51d, 10:20:40)
        freq: 2462
        beacon interval: 100
        capability: ESS Privacy ShortSlotTime (0x0411)
        signal: -53.00 dBm
        last seen: 105 ms ago
        Information elements from Probe Response frame:
        SSID: Ground-Floor
        Supported rates: 1.0* 2.0* 5.5* 11.0* 18.0 24.0 36.0 54.0
        DS Parameter set: channel 11
        ERP: Barker_Preamble_Mode
        RSN:     * Version: 1
             * Group cipher: CCMP
             * Pairwise ciphers: CCMP
             * Authentication suites: PSK
             * Capabilities: 16-PTKSA-RC (0x000c)
        Extended supported rates: 6.0 9.0 12.0 48.0

    Generating Configuration File
    For this guide, we will establish connection to Ground-Floor SSID and for that we need to generate a configuration file by executing the following command:

    sudo wpa_passphrase Ground-Floor>> /etc/wpa_supplicant/wpa_supplicant.conf yourwifipassword

    Connecting to WiFi Network
    Since you have generated configuration file in above example, now you need to establish connection to that WiFi network using the following command:

    sudo wpa_supplicant -B -D wext -i wlp5s0 -c /etc/wpa_supplicant/wpa_supplicant.conf

    Explanation:

    • -B means run wpa_supplicant in the background.
    • -D specifies the wireless driver. wext is the generic driver.
    • -c specifies the path for the configuration file.


    Execute the following command to verify that you are indeed connected to the SSID.

    sudo iw wlp5s0 link

    Output
    Connected to 8c:67:20:ce:10:30 (on wlp5s0)
        SSID: Ground-Floor
        freq: 2412
        RX: 26951 bytes (267 packets)
        TX: 1400 bytes (16 packets)
        signal: -51 dBm
        tx bitrate: 6.5 MBit/s MCS 0

        bss flags:    short-slot-time
        dtim period:    0
        beacon int:    100

    In case you ran into any problem like Not Connected or resource busy then reboot your machine

    Getting an IP Address
    At this point, you need to initiate dhcp client request to get an ip address from your WiFi access point using the following command:

    sudo dhclient wlp5s0

    Verify IP Address
    You can verify your machine ip address either by typing the ipconfig command or ip addr show command like below:

    sudo ip addr show wlp5s0

    Wrapping up
    Congratulation, you are now connected to WiFi networking from command line and now you can use yum, apt like command to install, remove and update your Linux packages or even you can recover your Linux machine from a failure.

    How To Set Up OpenVAS Vulnerability Scanner on Ubuntu 19.04

    $
    0
    0

    OpenVAS is a full-featured vulnerability scanner. Its capabilities include authenticated and unauthenticated testing, various high level and low level Internet and industrial protocols, performance tuning for large-scale scans and a powerful internal programming language to implement any type of vulnerability test.

    Ubuntu includes the OpenVAS in its repository, which is free and open source. This tutorial will walk you through the steps to install, tune and run OpenVAS on an Ubuntu 19.04 server.

    Prerequisites
    For this tutorial, our Ubuntu 19.04 virtual machine has 2 vCPUs and 2GB of RAM, which is generally sufficient to scan small numbers of hosts at once. However, still if you can provide more resources to it, the smoother your scanning system will run.

    Installing OpenVAS
    If prerequisites as stated above are in place then you may proceed to install OpenVAS using the following commands:

    sudo apt install rpm nsis alien

    sudo apt install openvas

    The installation will take several minutes to complete.

    Configuring OpenVAS
    When you are done with installing openvas, execute the following command to run its initial configuration process:

    sudo openvas-setup

    It will take plenty of time to complete. At the end of the setup, automatically-generated password for the admin user will be displayed. It is highly recommended to change auto generated password so that you can remember it.


    Managing OpenVAS Users
    If you need to create an additional OpenVAS users, run ‘openvasmd’ with the –create-user option, which will add a new user and display the randomly-generated password.

    sudo openvasmd --create-user=operator


    sudo openvasmd --get-users

    Output
    admin
    operator

    If you’re anything like me, you will forget to save the admin password or accidentally delete it. Fortunately, changing OpenVAS user passwords can easily be accomplished with ‘openvasmd’ and the –new-password option.

    sudo openvasmd --user=operator --new-password=yourpassword
    sudo openvasmd --user=admin --new-password=yourpassword


    Starting and Stopping OpenVAS
    You can start or stop openvas services by executing the following commands:

    sudo systemctl enable openvas-manager
    sudo systemctl enable openvas-scanner

    sudo systemctl start openvas-manager
    sudo systemctl start openvas-scanner

    If you want to stop openvas services, run the following to stop it:

    sudo systemctl stop openvas-scanner
    sudo systemctl stop openvas-manager

    When the services finish initializing, you should find TCP ports 9390 and 9392 listening on your loopback interface.

    sudo netstat -ant


    By default, the web interface is only accessible from the local computer and you will not be able to access it from a remote machine. If you need to make it accessible from the intranet or internet then open the following file with root privileges in your preferred text editor:

    sudo nano /etc/default/greenbone-security-assistant

    Near the top, you should see a parameter that specifies the address that the web interface will listen on. You need to change the value from 127.0.0.1 to the real IP address of your Ubuntu machine. This will let it listen to connections from the intranet, and you will be able to connect:


    When done, save and close.

    Accessing OpenVAS Web Interface
    The Greenbone Security Assistant is the OpenVAS web interface available at https://ip_address:9392. After accepting the self-signed certificate warning you will be presented a login page.


    You will need to enter the username and password you configured earlier. For this guide, the username was admin.


    Once you sign in, you will see the main dashboard.


    Set Up Credentials
    OpenVAS provide the most complete results when you are able to provide the scanning engine with credentials to use on scanned systems. OpenVAS will use these credentials to log in to the scanned system and perform detailed enumeration of installed software, patches, etc. You can add credentials via the “Credentials” entry under the “Configuration” menu.


    Click on Star


    Enter the credentials information of the hosts you want to scan and click Create.


    Target Configuration
    You can configure them under the “Targets” section of the “Configuration” menu.


    Scan Configuration
    Prior to launching a vulnerability scan, you should fine-tune the Scan Config that will be used, which can be done under the “Scan Configs” section of the “Configuration” menu. You can clone any of the default Scan Configs and edit its options, disabling any services or checks that you don’t require.

    Task Configuration
    Your credentials, targets, and scan configurations are in place so now you’re ready to put everything together and run a vulnerability scan. In OpenVAS, vulnerability scans are conducted as “Tasks”. When you set up a new task, you can further optimize the scan by either increasing or decreasing the concurrent activities that take place.

    With more finely-tuned scan settings and target selection, the results of your scan will be much more useful.


    Wrapping up
    With the wide range of available features in OpenVAS, we were only able to touch the surface. The number of connected devices in our homes and workplaces is increasing all the time and managing them becomes more of a challenge. Making effective use of a vulnerability scanner can make that management at least a little bit easier.

    Alternative to VCE Exam Simulator

    $
    0
    0

    Exam Testing Engine is a desktop test engine designed specifically for certification exam preparation. It allows you to create, edit and take practice tests in an environment very similar to a real exam. You can register for free and download exam test engine from here.


    Exam Testing Engine includes two applications:

    • ETE Designer allows you to create and edit your own professional practice exams. It is designed foremost for authors involved in practice exam development. The application supports most of the question types used in certification exams and allows you to work on an exam using an intuitive user interface. Further, the question preview feature lets the author see exactly how the question will appear during the examination. 
    • ETE Player organizes the exams created in ETE Designer and presents them to the exam taker. The ETE Player interface functions as a realistic simulation of the actual certification exam. Flexible examination mode settings (which can be password-protected from unauthorized modification) make it possible to use ETE Player not only for self-preparation, but also for giving practice exams to students in classrooms. 

    Exam Testing Engine Features

    • The most Realistic certification exam simulation.
    • You can work with most of the question types used in certification exams (Multiple Choice, Fill in the Blank, Select and Place, Point and Shoot, Hot Area, Create a Tree, Build List and Reorder, Drop and Connect).
    • Ability to create case study-based exams.
    • The question preview feature allows the author to see exactly how a question will appear during an examination.
    • Supports question text formatting, including bullets, numbering and alignment.
    • All exam data (including images) is stored in a single file that simplifies copying and distribution of your exams.
    • Printing and print preview of exam files.
    • Supports the most popular image formats: GIF, JPEG and PNG.
    • The Import Wizard automatically creates exam files from existing text files (e.g., .txt, .rtf) containing exam items.
    • Ability to work in a local network using file sharing.
    • You can group questions into sections based on exam topics.
    • Each exam file can contain multiple instances of an exam (Exam A, Exam B, Exam C and so on).
    • You can set a password for opening an exam file in ETE Designer to prevent unauthorized copying, editing and printing of the exam data.
    • You can restrict the ability to start an exam by setting a password.
    • Score history tracking.
    • Doesn't require the installation of additional software. 
    After installation of Exam Testing Engine is complete, a folder with shortcuts appears in the Programs menu.


    Take an exam

    To take an exam, follow the step-by-step instructions given below.


    To launch ETE Player, click Start, point to Programs, point to Exam Testing Engine and then click ETE Player.


    In the exam list, select "000-001 Exam Sample", and then click Start. If necessary, you can use the Add button to add an exam file to the exam list.


    In the Candidate Name field, type your name, and then click OK.


    Navigate through the exam using the Previous and Next buttons and provide your response to all the questions.


    Click Review, to review the list of questions with your responses. To finish the exam, click End Exam. When asked if you are sure, click Yes.


    Read the score report, and then click Exit to return to the main window


    Create a standard exam
    To create a standard exam, follow the step-by-step instructions given below.

    To launch ETE Designer, click Start, point to Programs, point to Exam Testing Engine, and then click ETE Designer.


    To create a new exam file, on the File menu, point to New, and then click Standard Exam .


    On the Properties page, fill in the exam property fields as shown in the image below.


    Go to the Section page, and using the New button, create two sections named "Section 1" and "Section 2".


    In Exam Explorer, select the Question 1 node. On the Question and Answer page, fill in the fields as shown in the image below. Set the correct answer by clicking the radio button corresponding to the choice A. In the Properties window, set the Section property to "Section 1".


    Go to the Preview page, and then click the Show Answer button to view the correct answer with the explanation.


    On the Exam menu, click New Question . In the New Question dialog box, choose Multiple Choice (Multiple Select), and then click OK.


    On the Question and Answer page, fill in the fields as shown in the image below. Set the correct answer by clicking the check boxes corresponding to the choices B and D. In the Properties window, set the Section property to "Section 2".


    To save the exam file, click Save  on the Standard toolbar. In the Save As dialog box, select a path and enter the name of the new exam file as shown in the image below, then click Save.


    To close the exam file, click Close on the File menu.


    For certification provider free of cost exams dumps, navigate here, search your desired exam and just ignore payment kind of ads and scroll down to download section for your desired exam file.

    How To Install Ubuntu 19.04 Desktop in Separate Partition Alongside Windows

    $
    0
    0

    This tutorial will walk you through the steps to install Ubuntu 19.04 desktop in a separate partition alongside Windows 10 in dual boot environment. These steps can also be applied if you want to install Ubuntu alongside older version of Windows for example, Windows 8 or 7.

    For a quick installation please watch following video tutorial:
     

    Prerequisites
    To follow this guide, you will need to have a laptop or desktop machine installed with Windows 10.

    STEP1 - Creating Separate Disk Partition
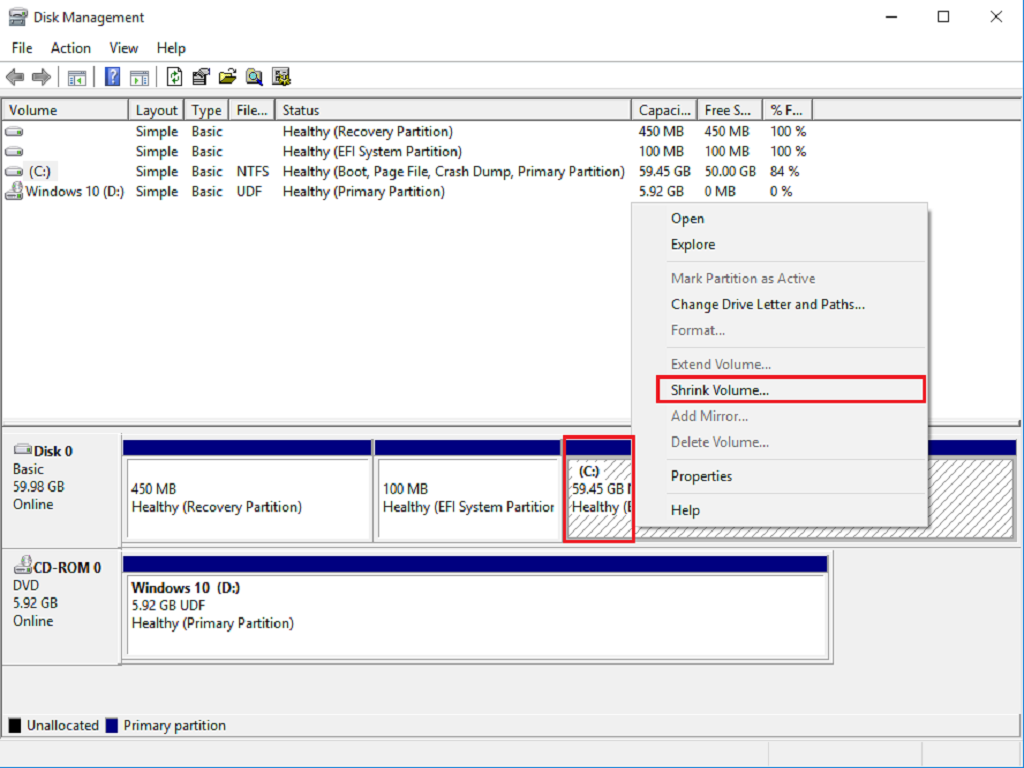
    If you have prerequisites in place, then proceed to your Windows 10 machine and navigate to Start> Disk Management.


    If you have more than one disk in your computer then select appropriate disk. I have only one disk and I don't have any extra space left. So I will pullout 25GB space from my C: drive for Ubuntu installation.

    If you are pulling out space from a partition other than C than choose appropriate partition Right Click> Shrink Volume 


    Wait while Querying Shrink Space


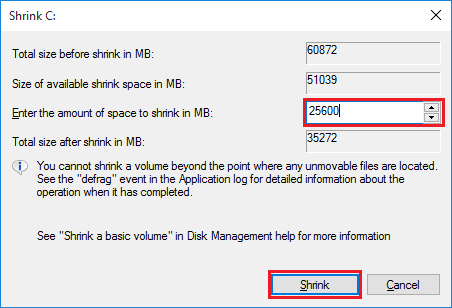
    You need to have at least 25GB disk space for installing Ubuntu 19.04 desktop. You have to Enter the amount of space to shrink in MB: in my case 25600 MB is equal to 25 GB so its enough for my lab environment.

    Click Shrink 


    Here you can see 25 GB shrink space is now in Unallocated space and this what we need for Ubuntu 19.04 installation in a separate partition.


    Reboot your Windows machine and boot it from Ubuntu 19.04 Desktop installation media.


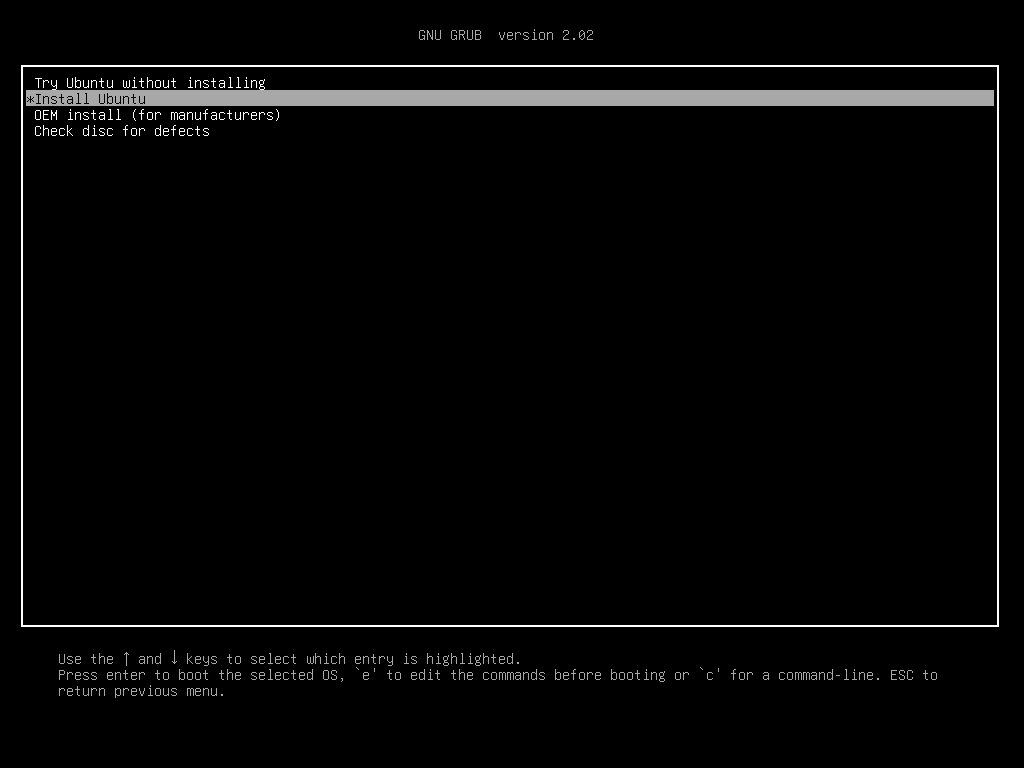
    Choose Install Ubuntu from grub menu


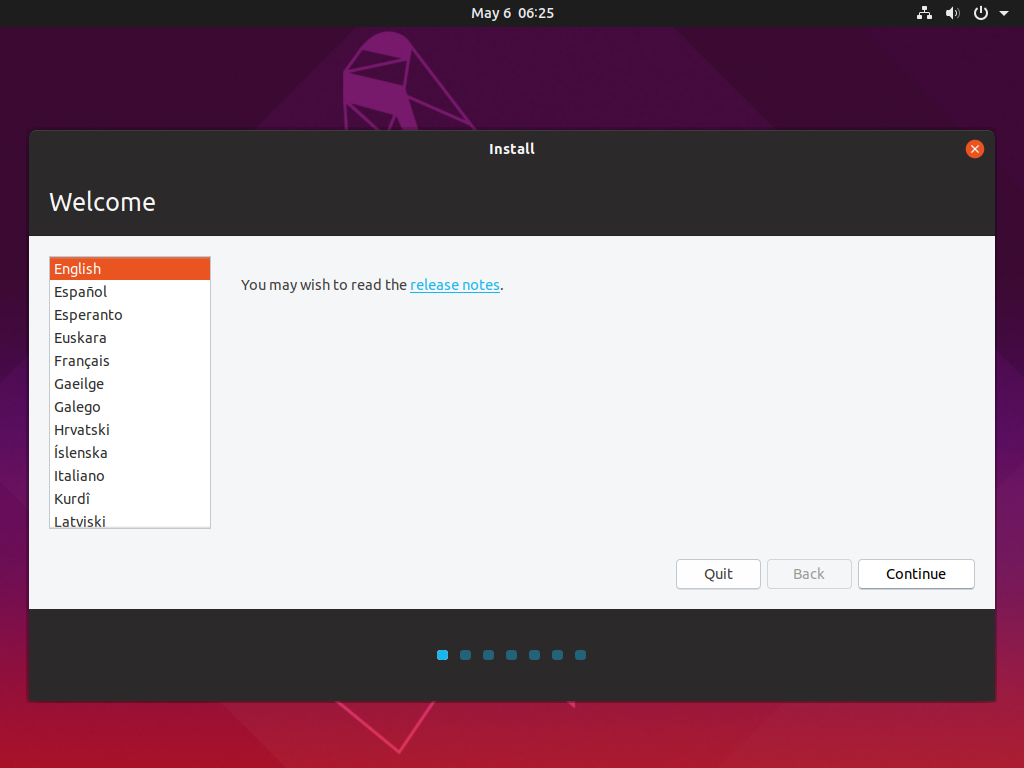
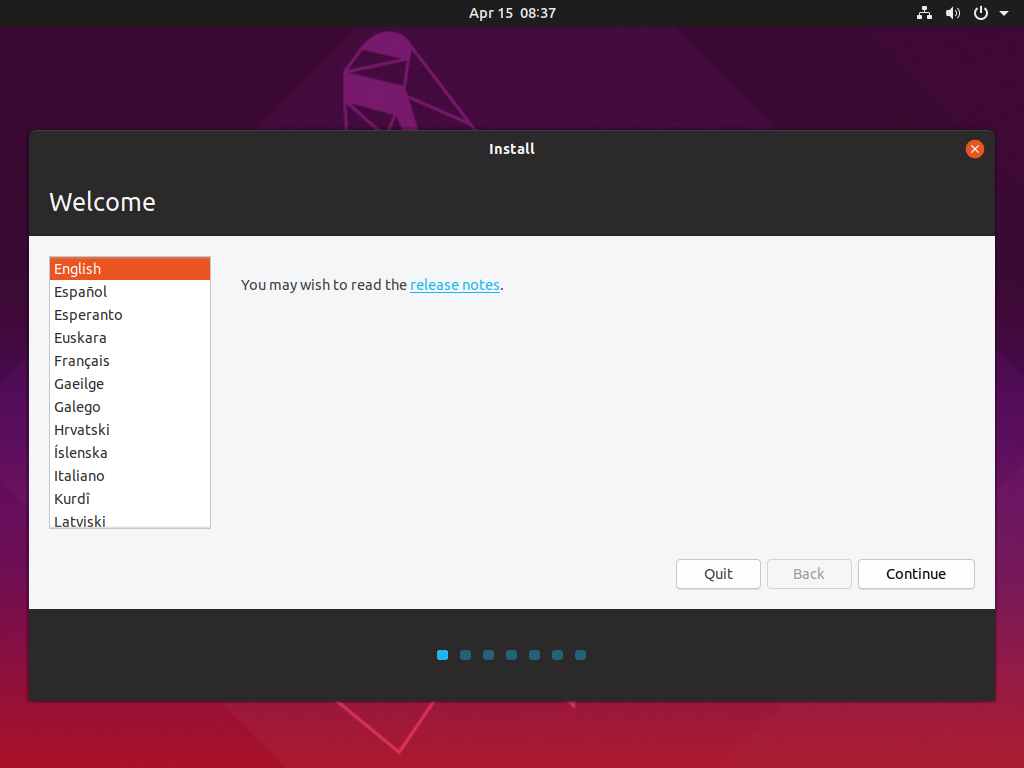
    Choose your appropriate language and click Continue


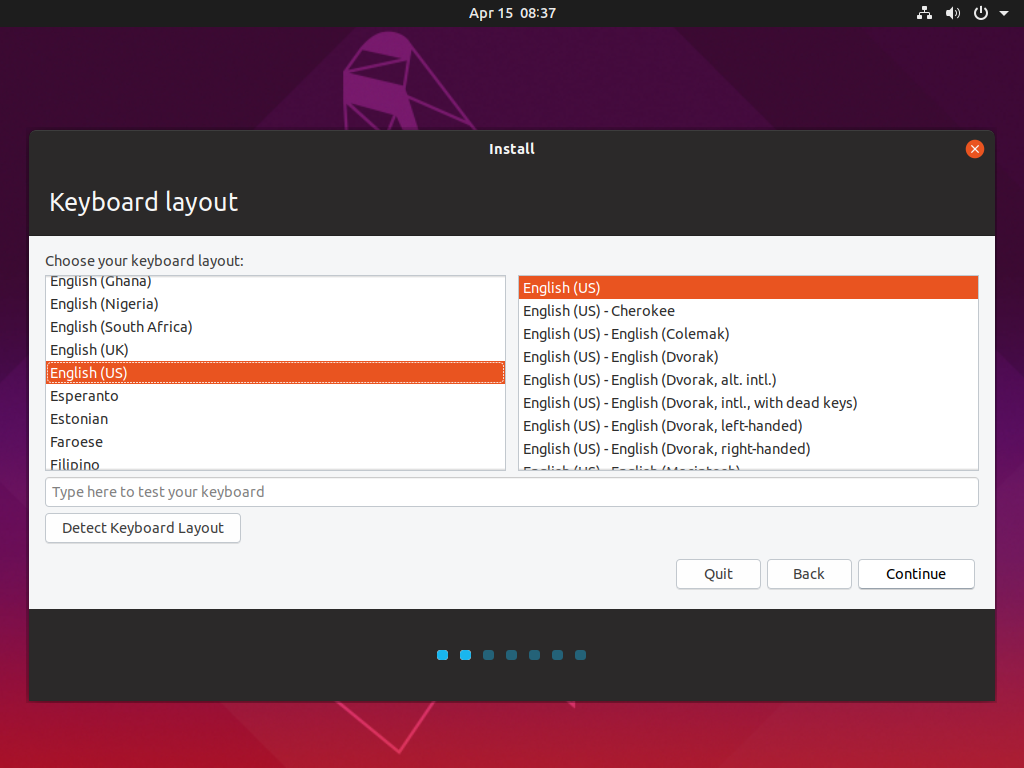
    Choose your appropriate Keyboard Layout and click Continue


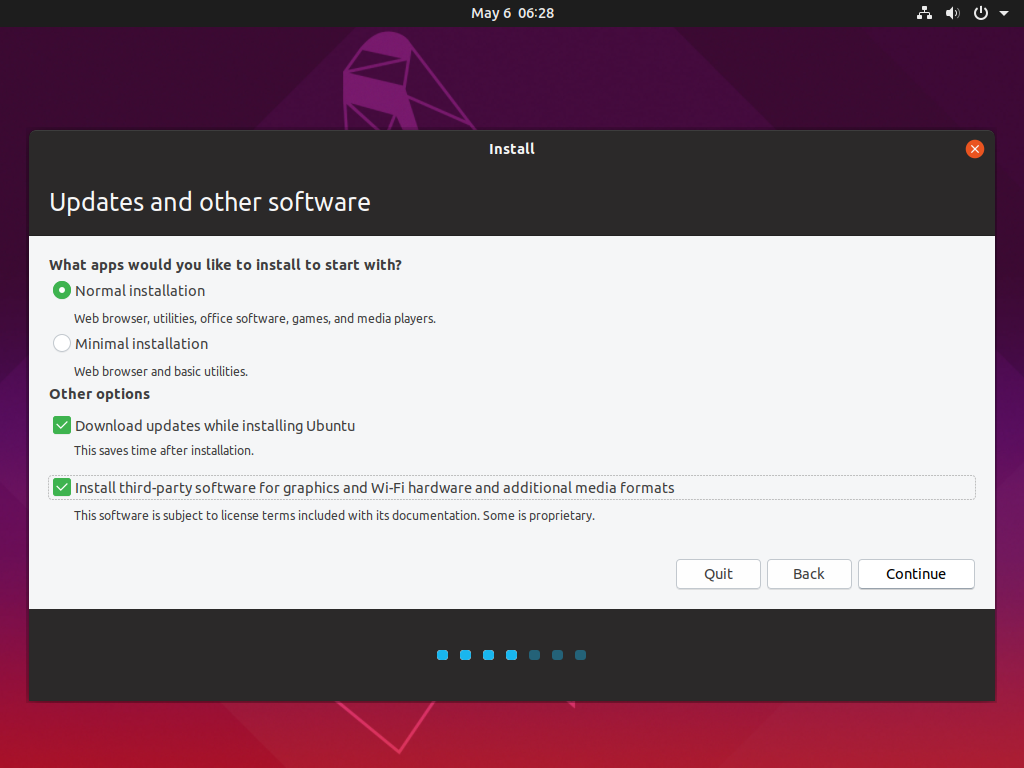
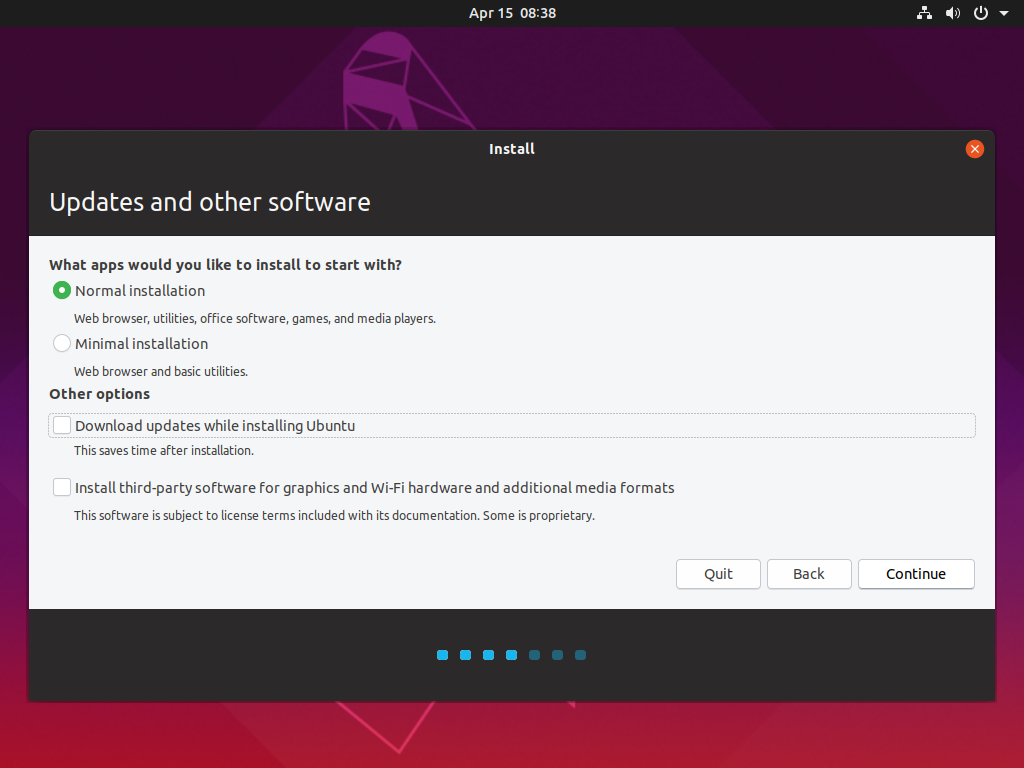
    Keep the default selection as shown in image below and select Install third-party software for smooth installation of Ubuntu on your laptop or desktop.

    Click Continue.


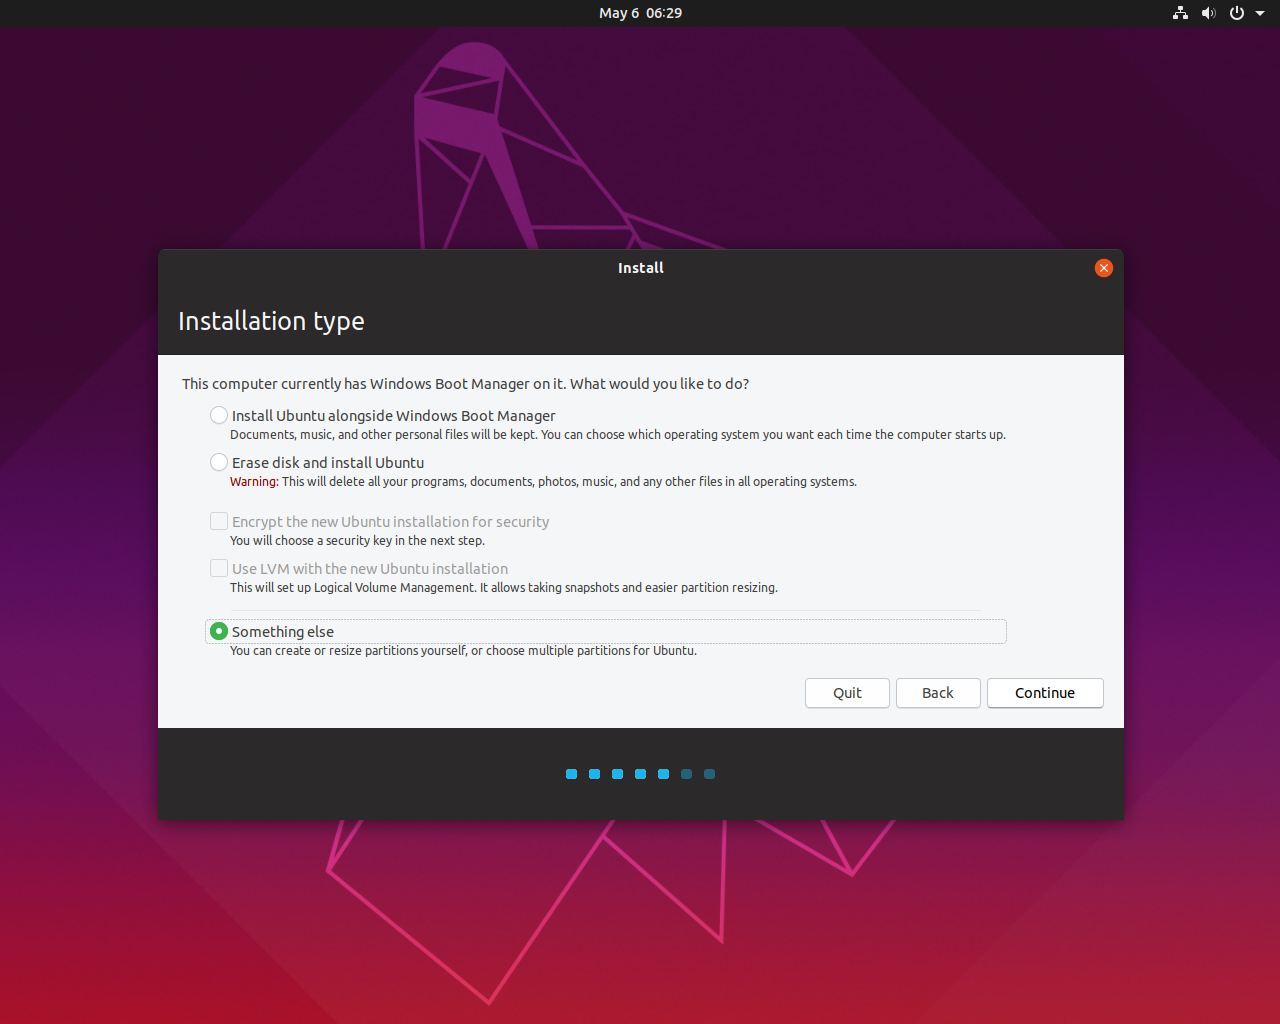
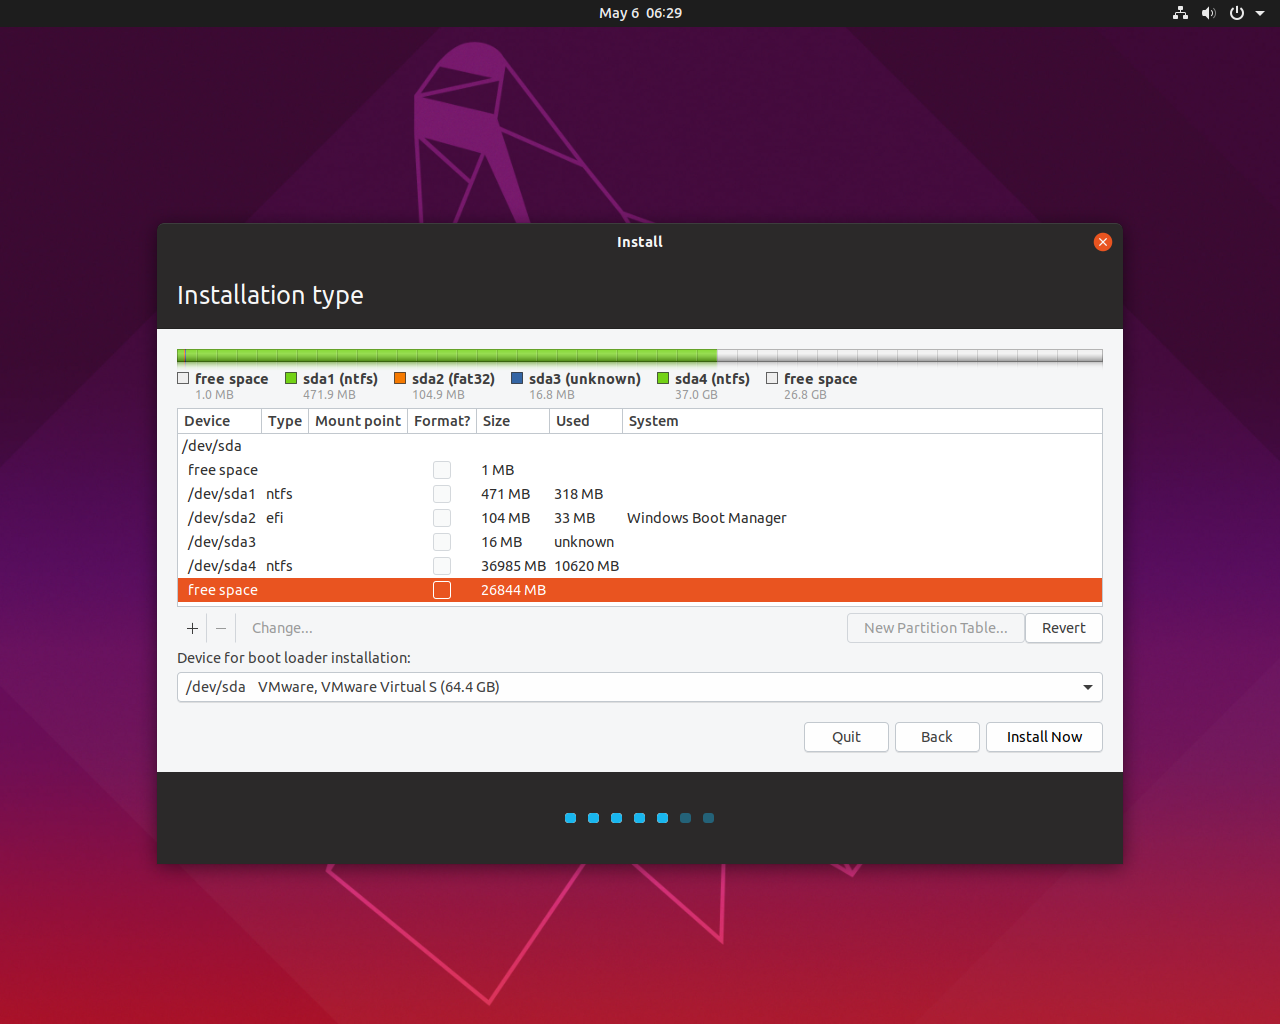
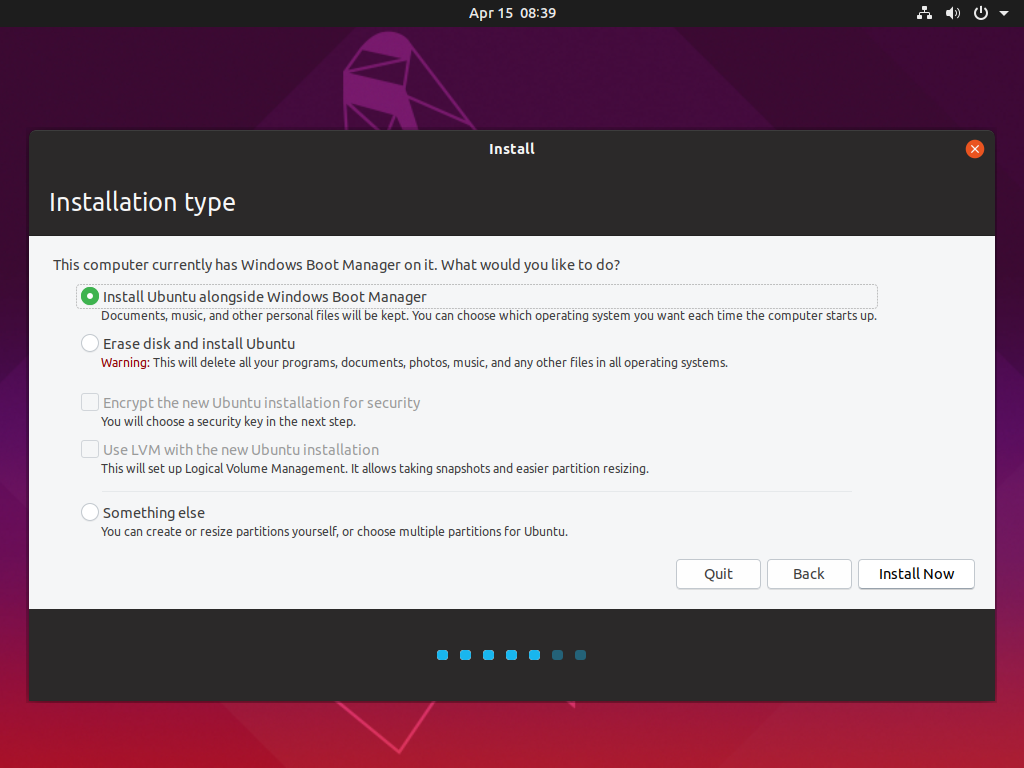
    We are installing Ubuntu in a separate partitions so we have to choose Something else as shown in below screenshot.

    Click Continue


    Warning: Carefully choose your free disk space to create file system for Ubuntu installation. Do not touch other partitions as they are coming from Windows. Leave all other partitions and disk space untouched.

    Click on free space while taking space into consideration 26844 MB is our unallocated disk space we shrink from our C drive.

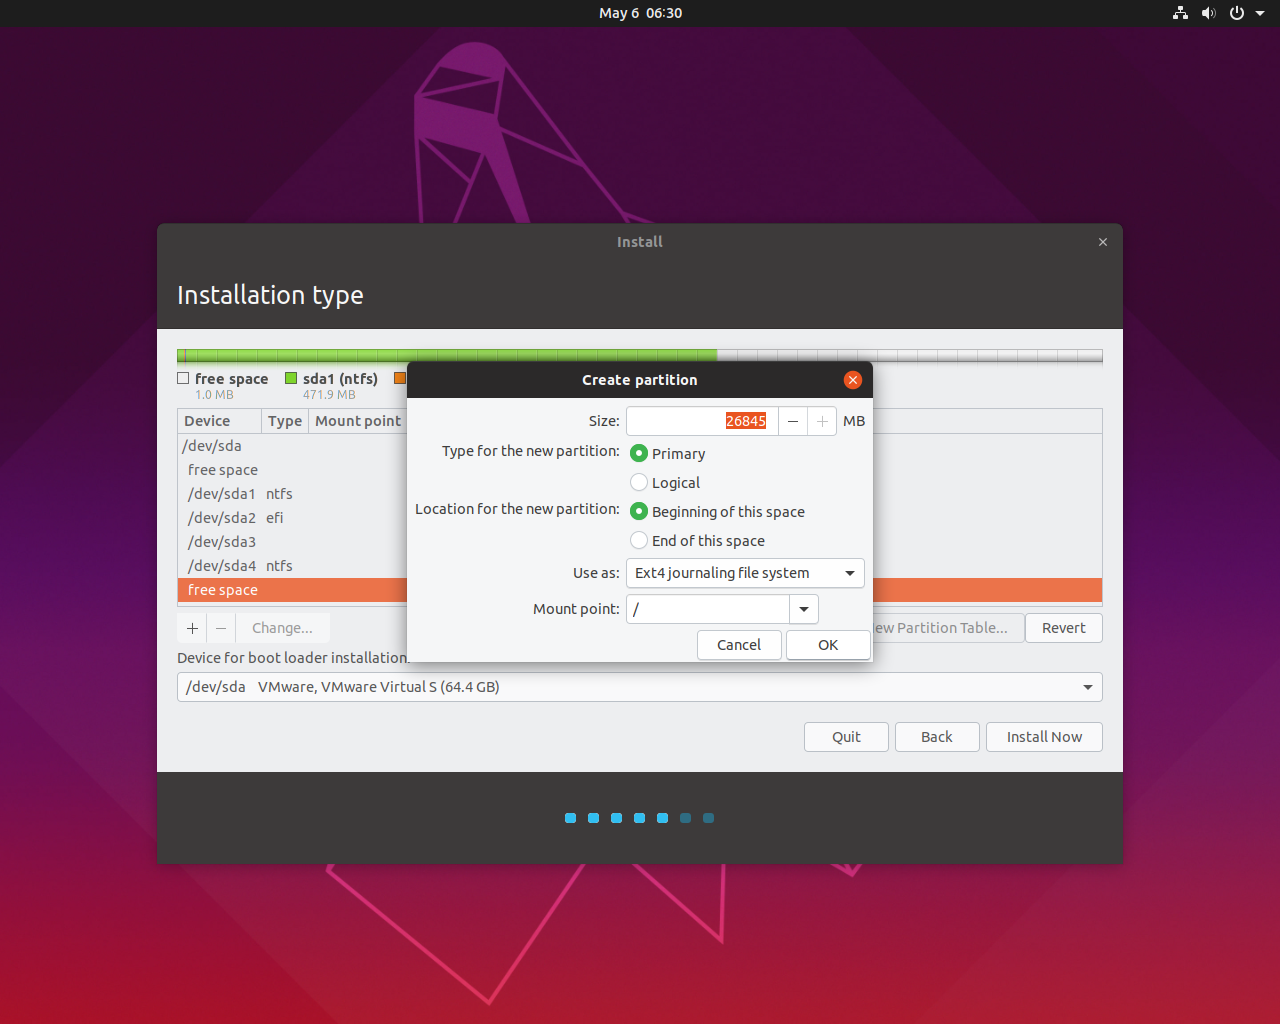
    Click on + sign to create partition for Ubuntu.


    I will use entire 25 GB space for / mount point. If you need separate mount point for /home etc then you have to create those mount point with appropriate space if you have luxury of enough disk space unlike me.

    Click Ok.


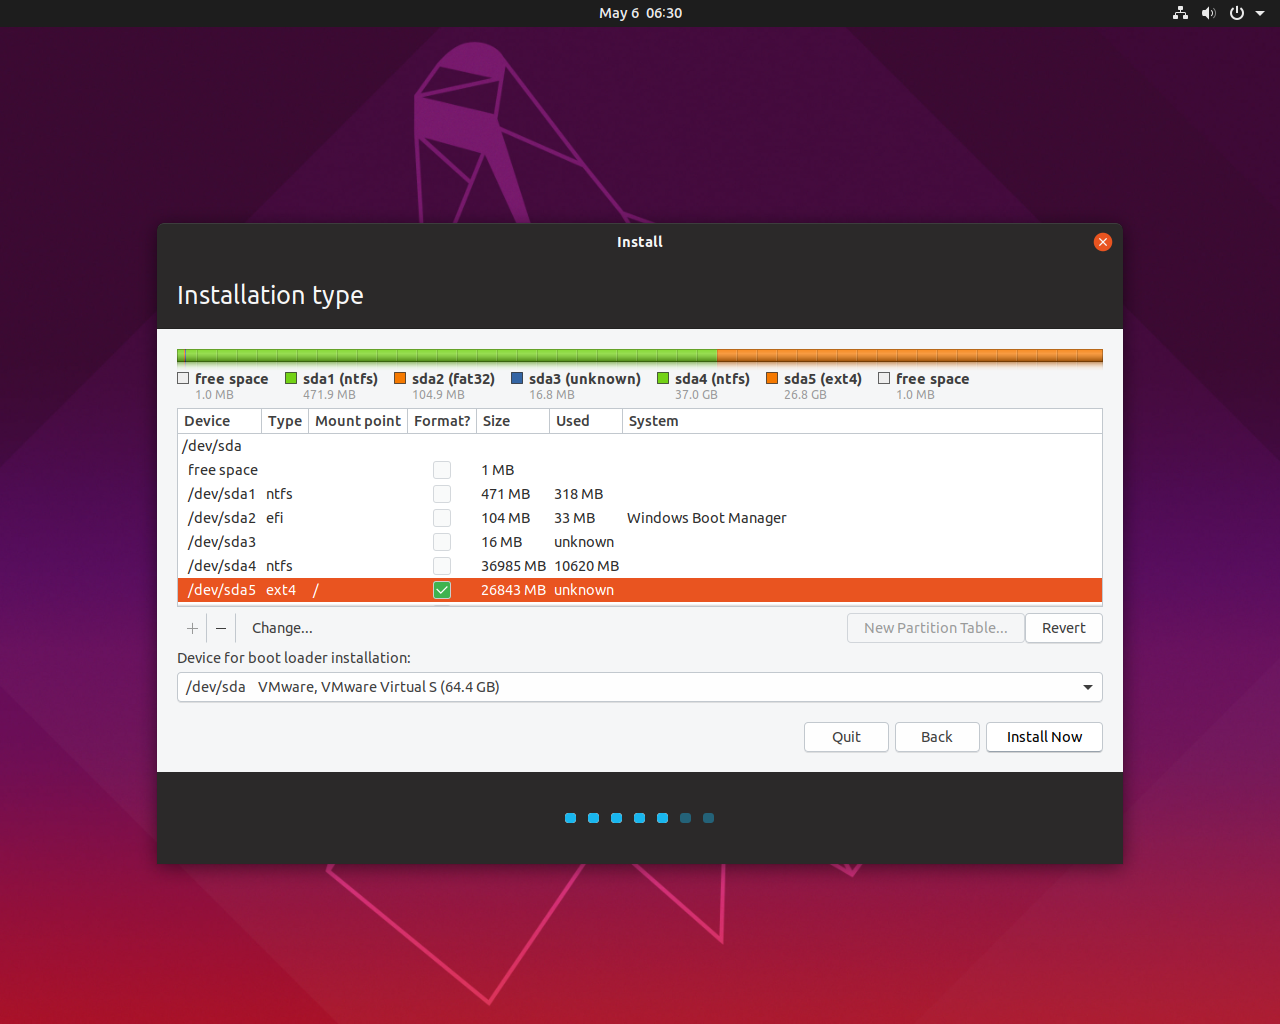
    We have created ext4 file system for Ubuntu installation.

    Click Install Now


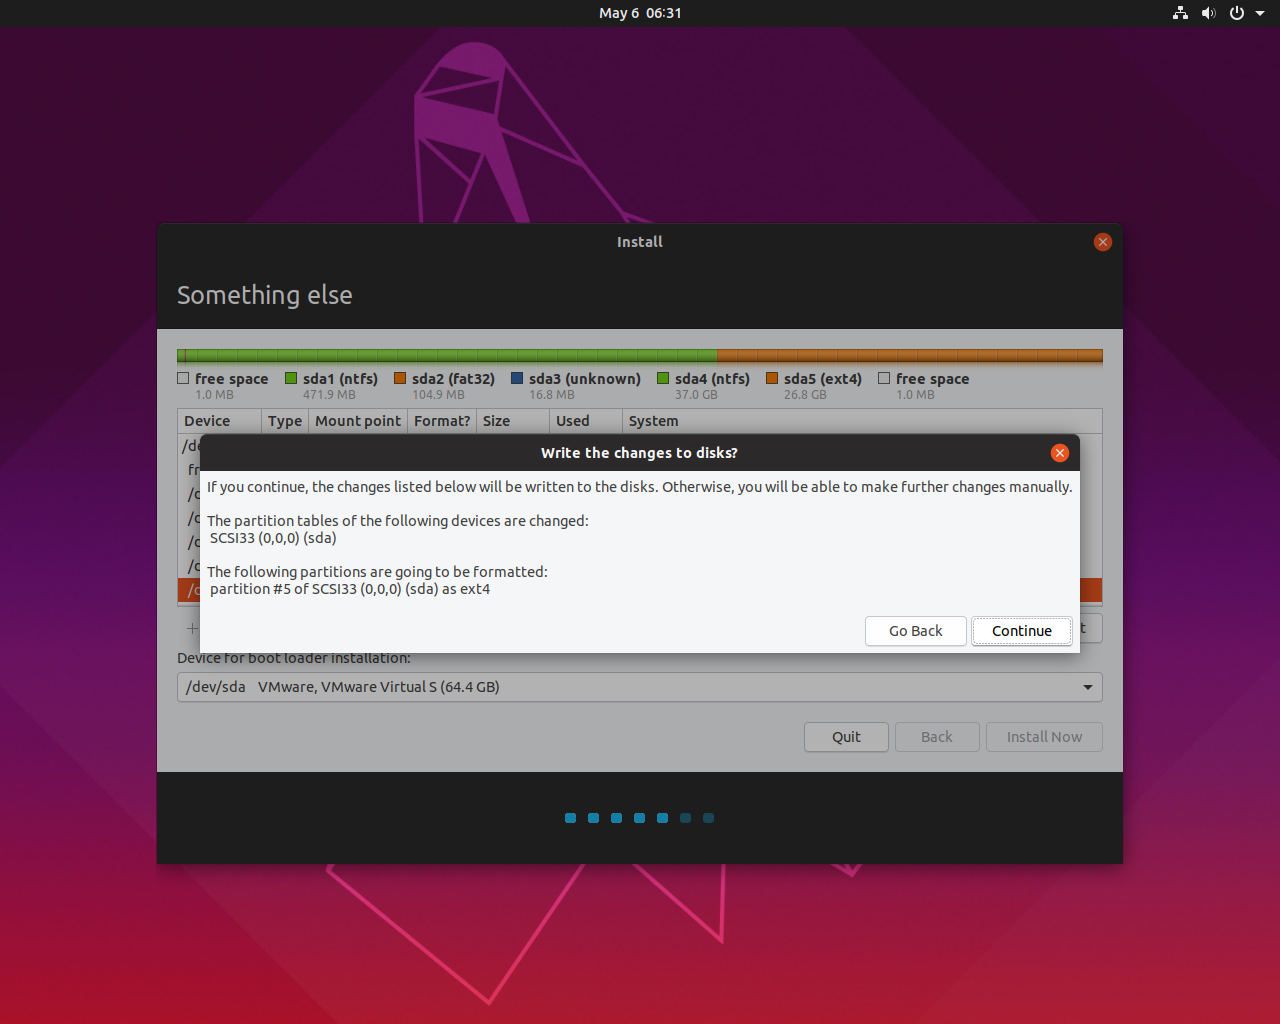
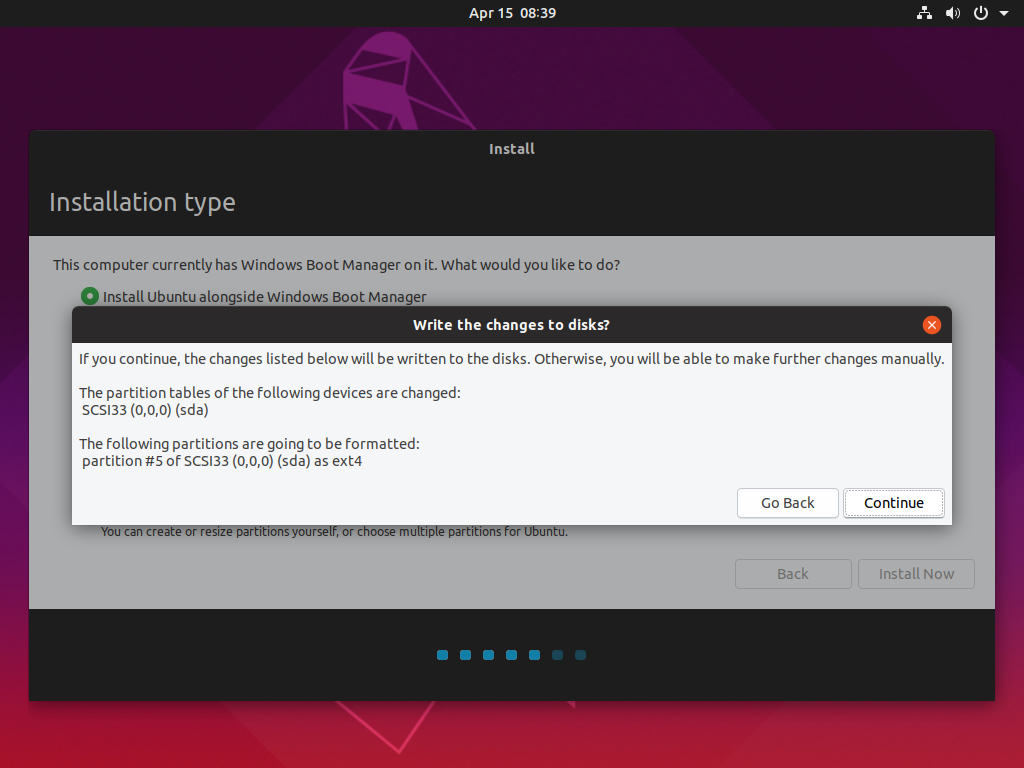
    On write the changes to disks? click Continue.


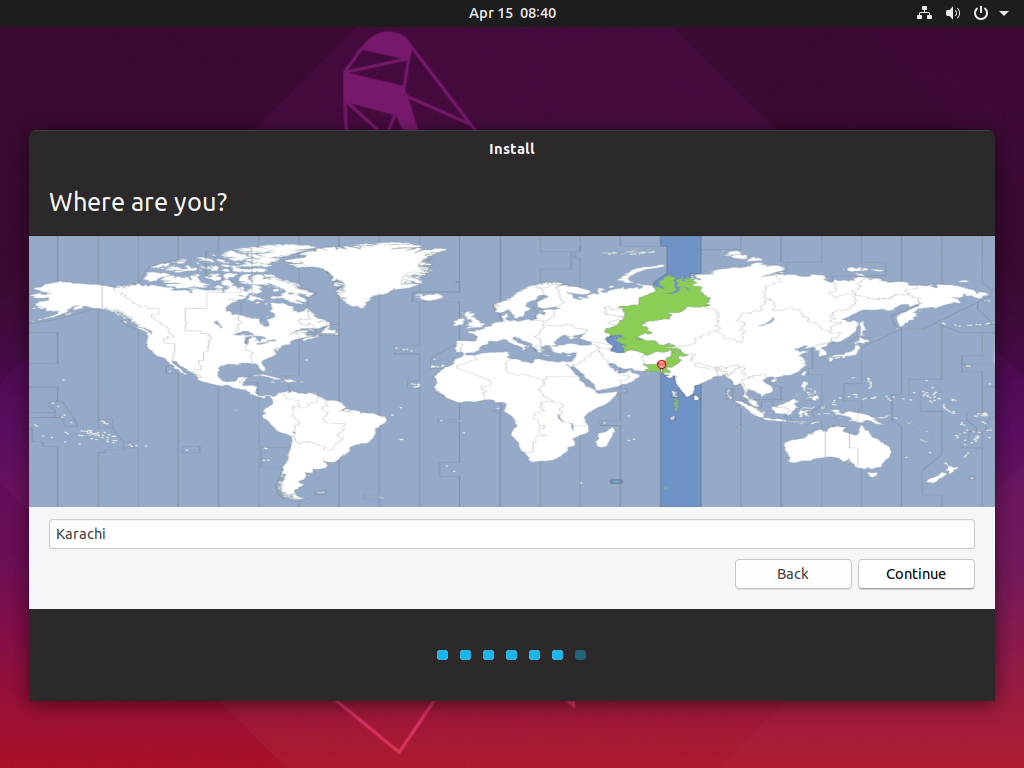
    Select your appropriate location from the map if it is not automatically selected and click Continue.


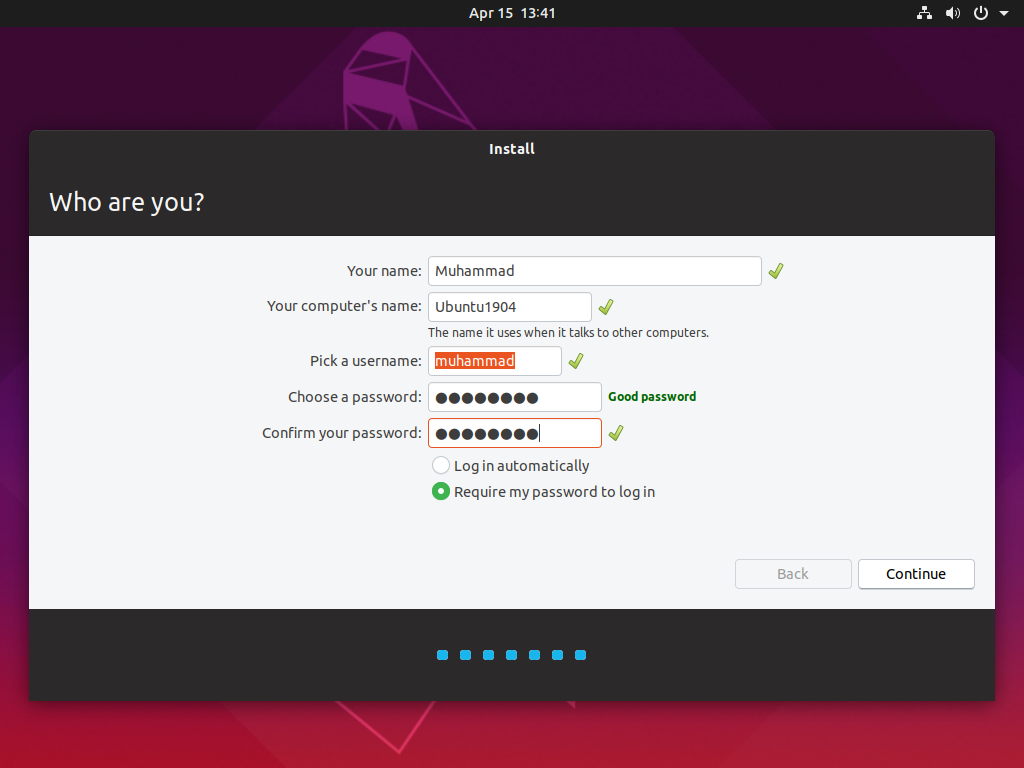
    Provide login credentials here and memorize your password because you will need to log in into Ubuntu once installation completed.

    Click Continue


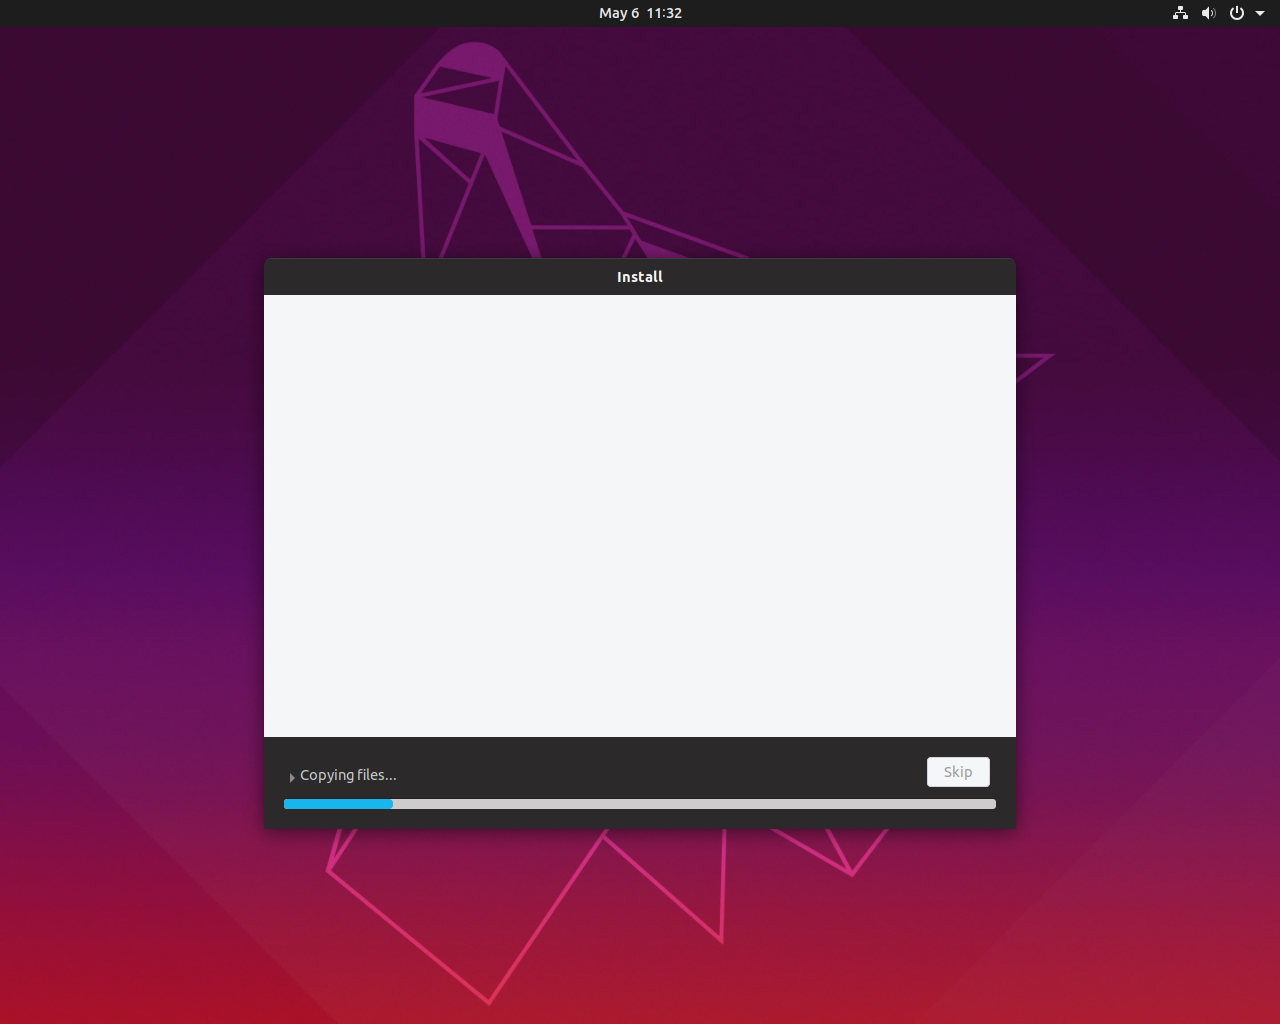
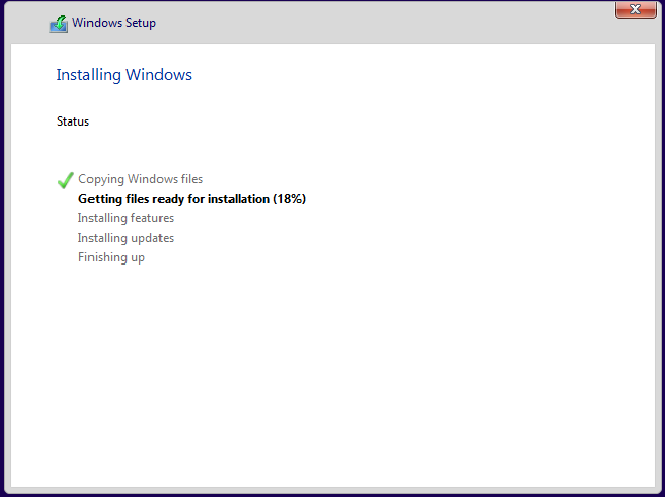
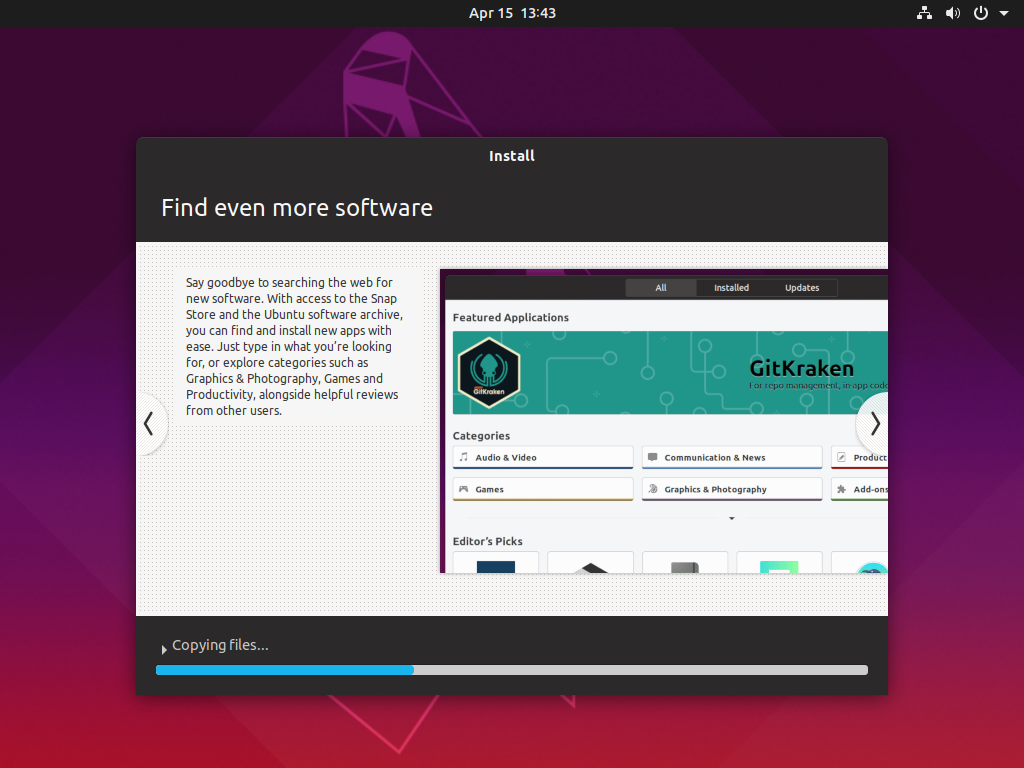
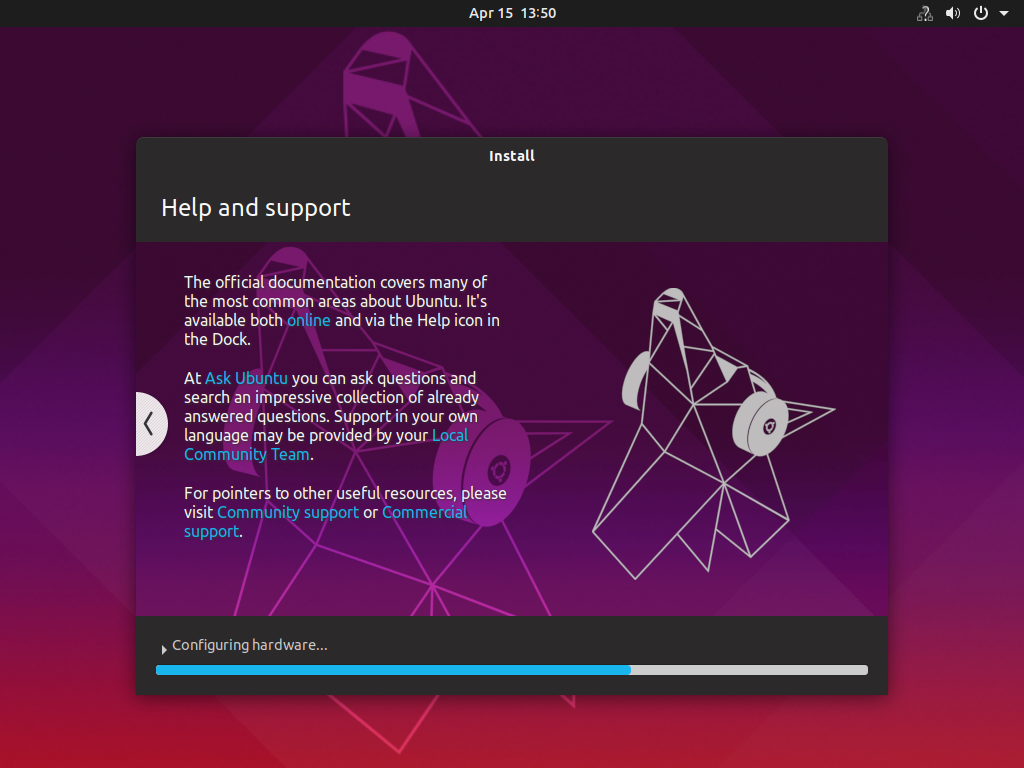
    Installation begin.


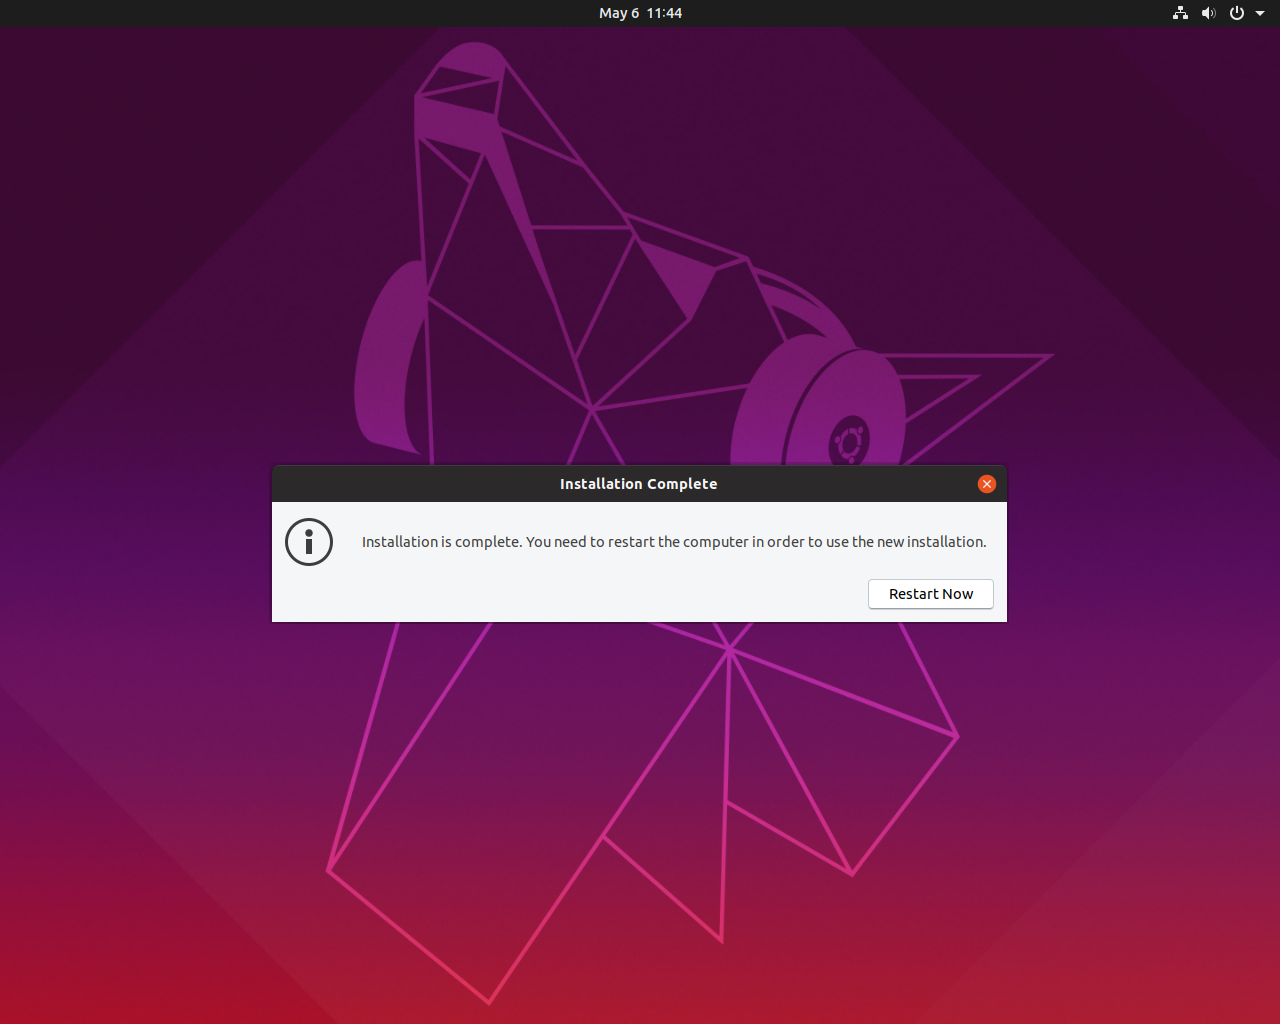
    Click reboot


    Remove Ubuntu installation media from your laptop or desktop and press ENTER.


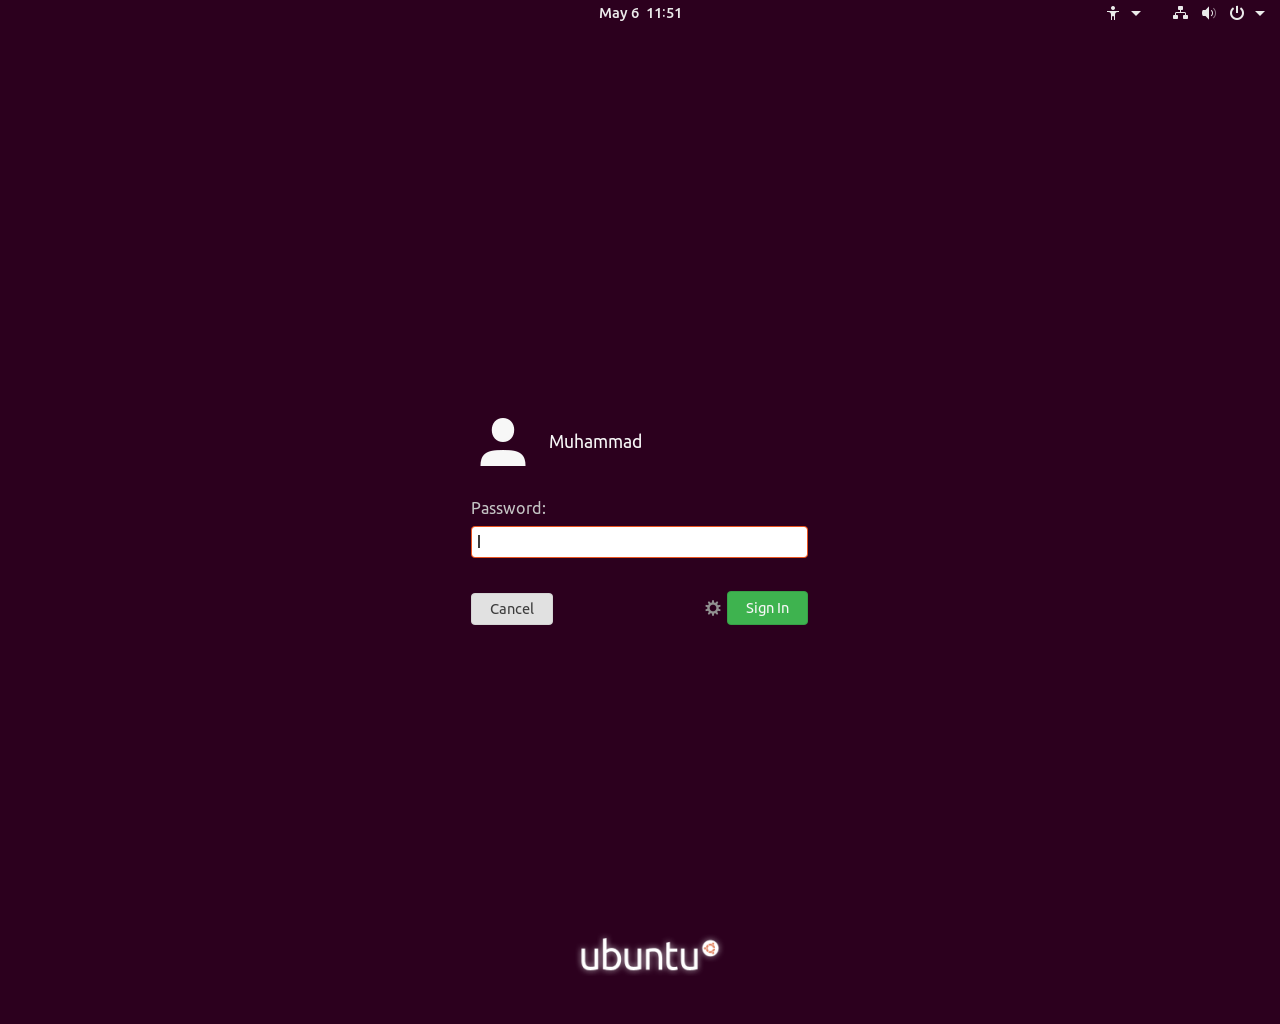
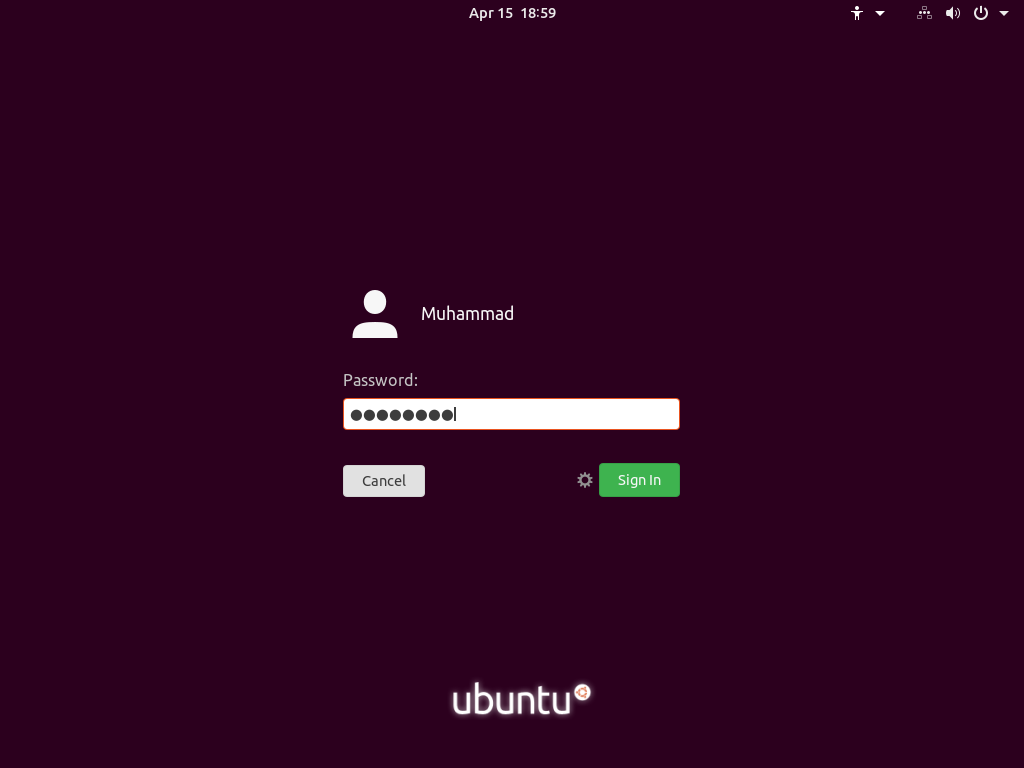
    You will see the following screen once reboot completes.


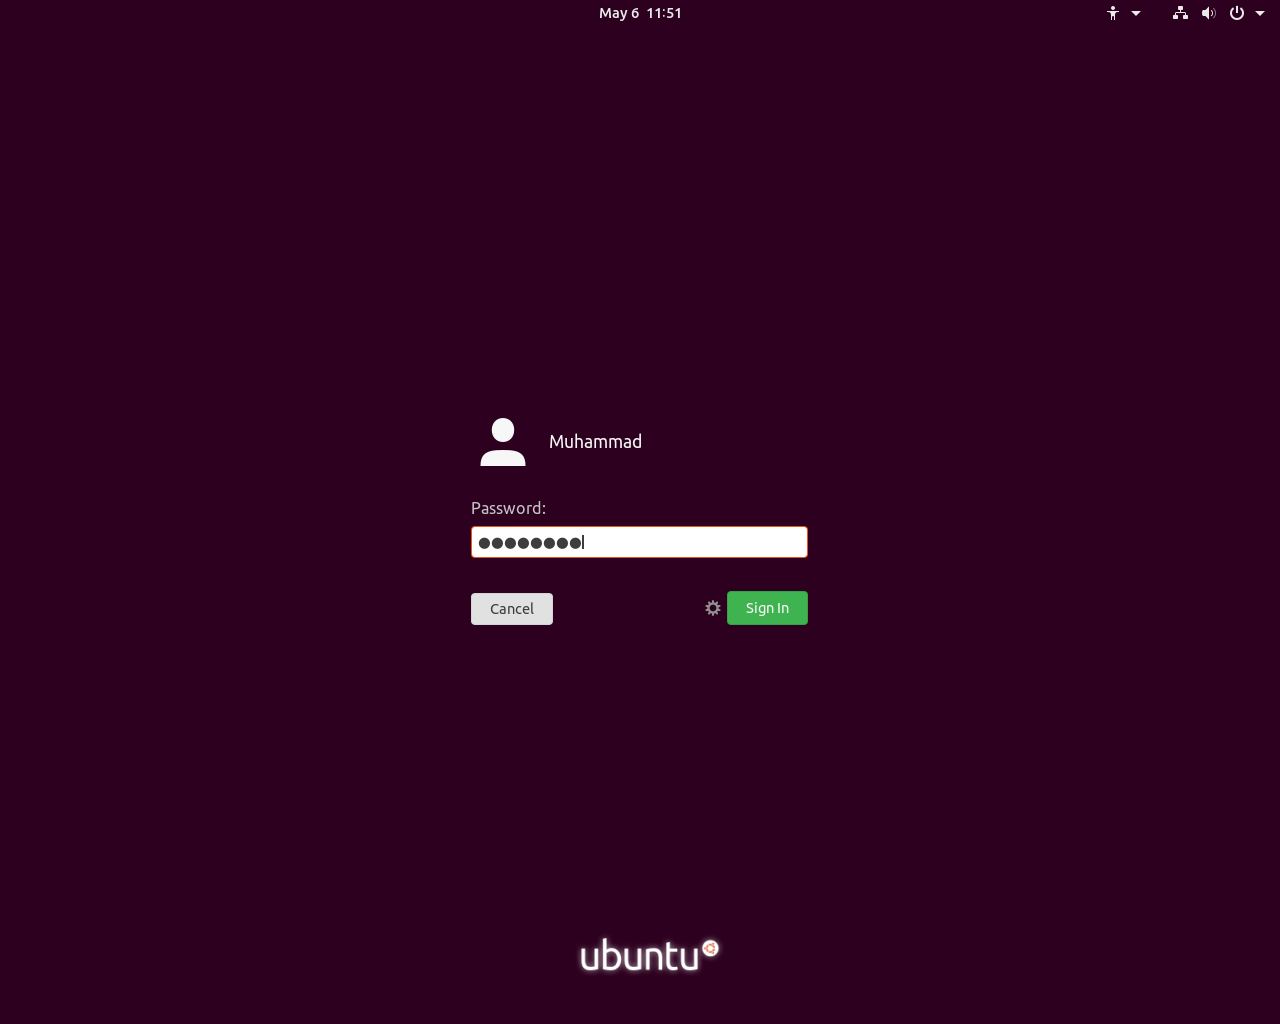
    Log in with your Username and Password.


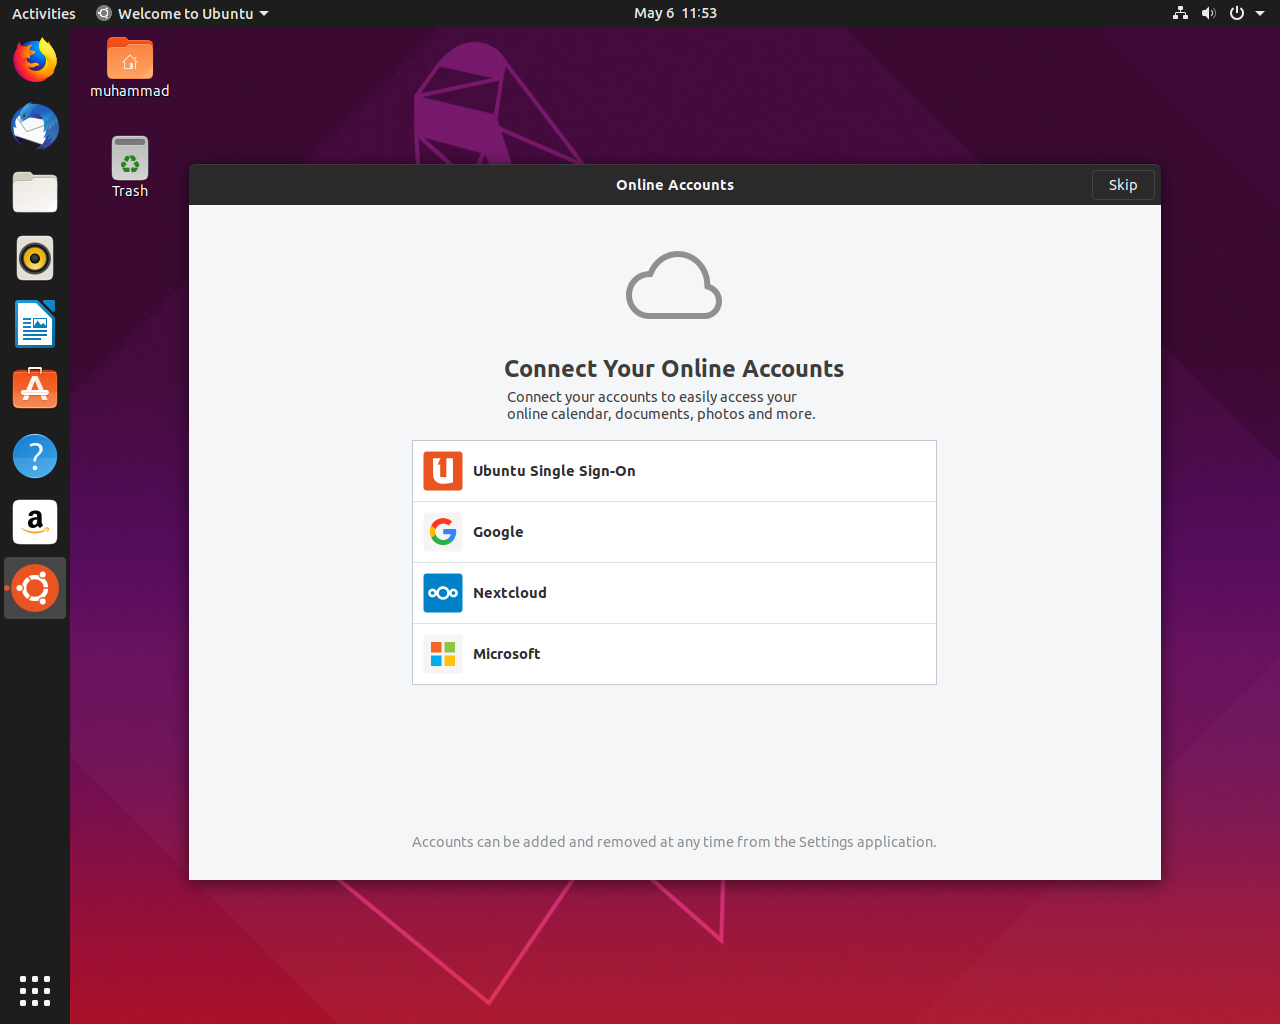
    On the following screen, click Skip.


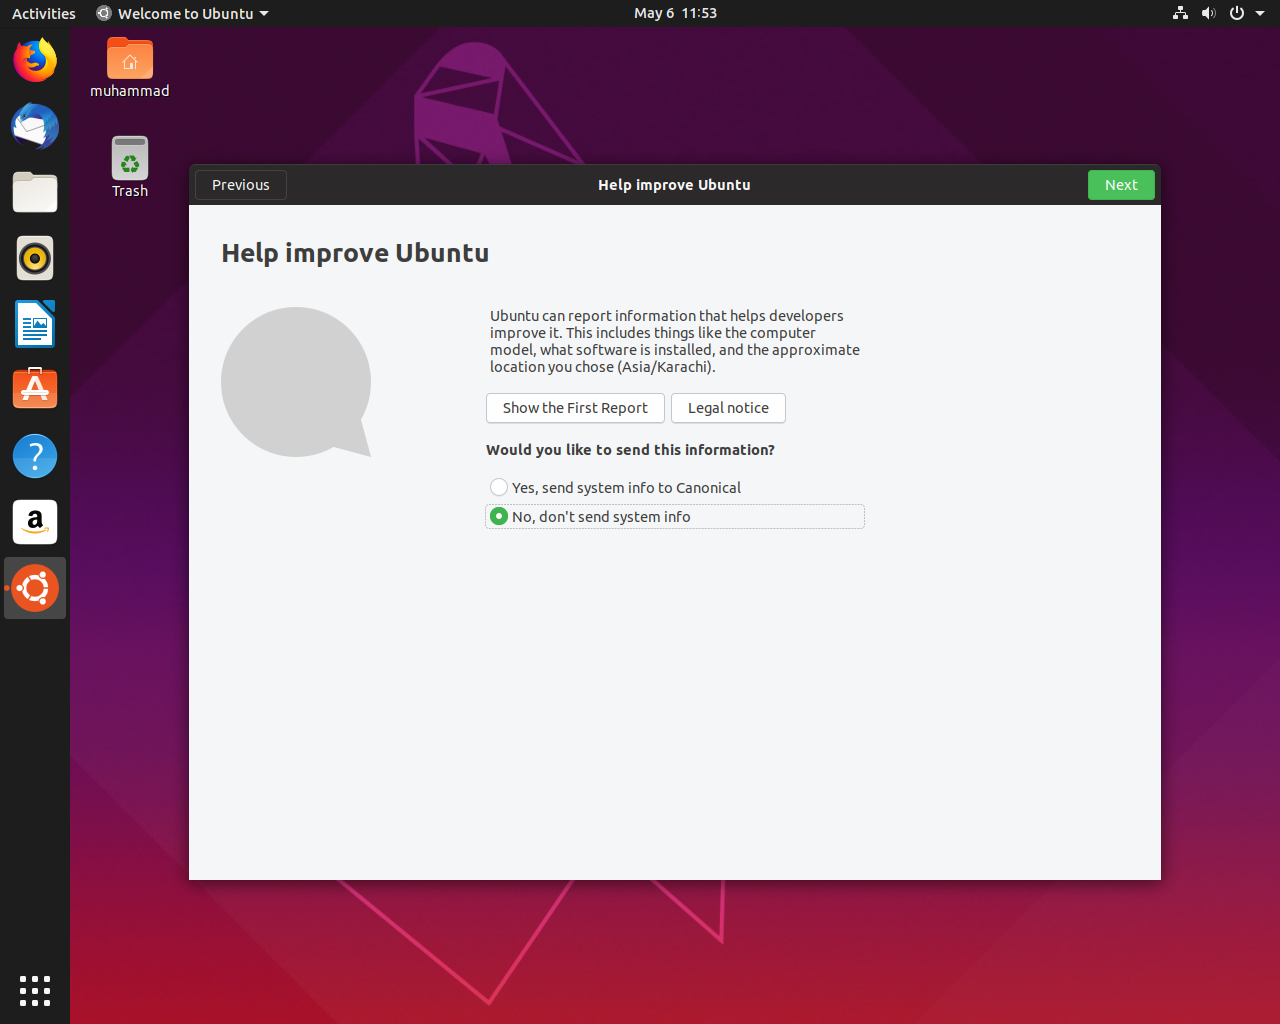
    Click No, don't send system info and click Next


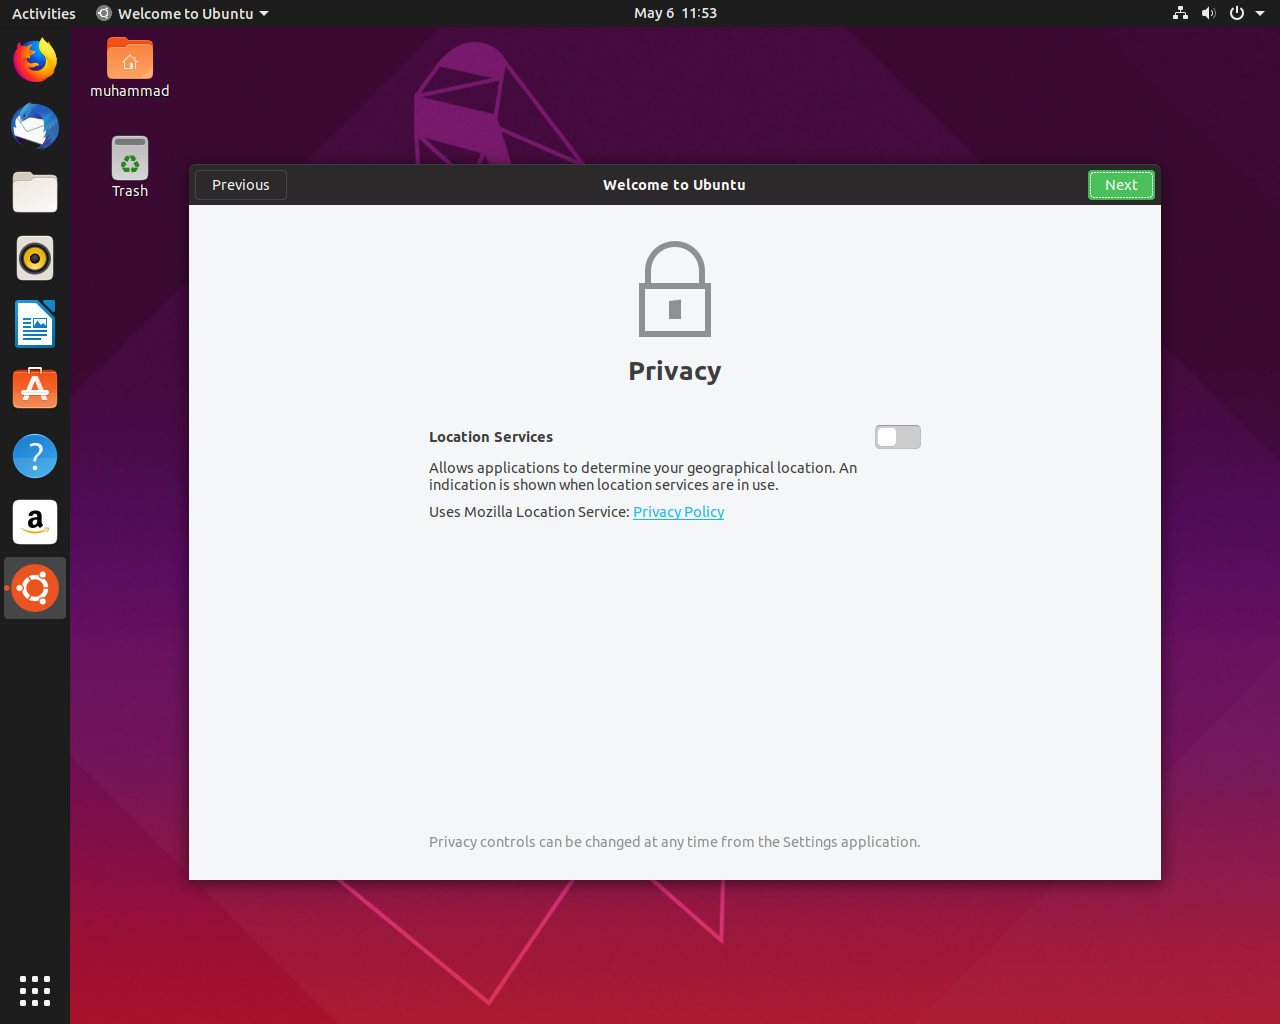
    Taking privacy into consideration, i am not enabling location services.

    Click Next


    Click Next


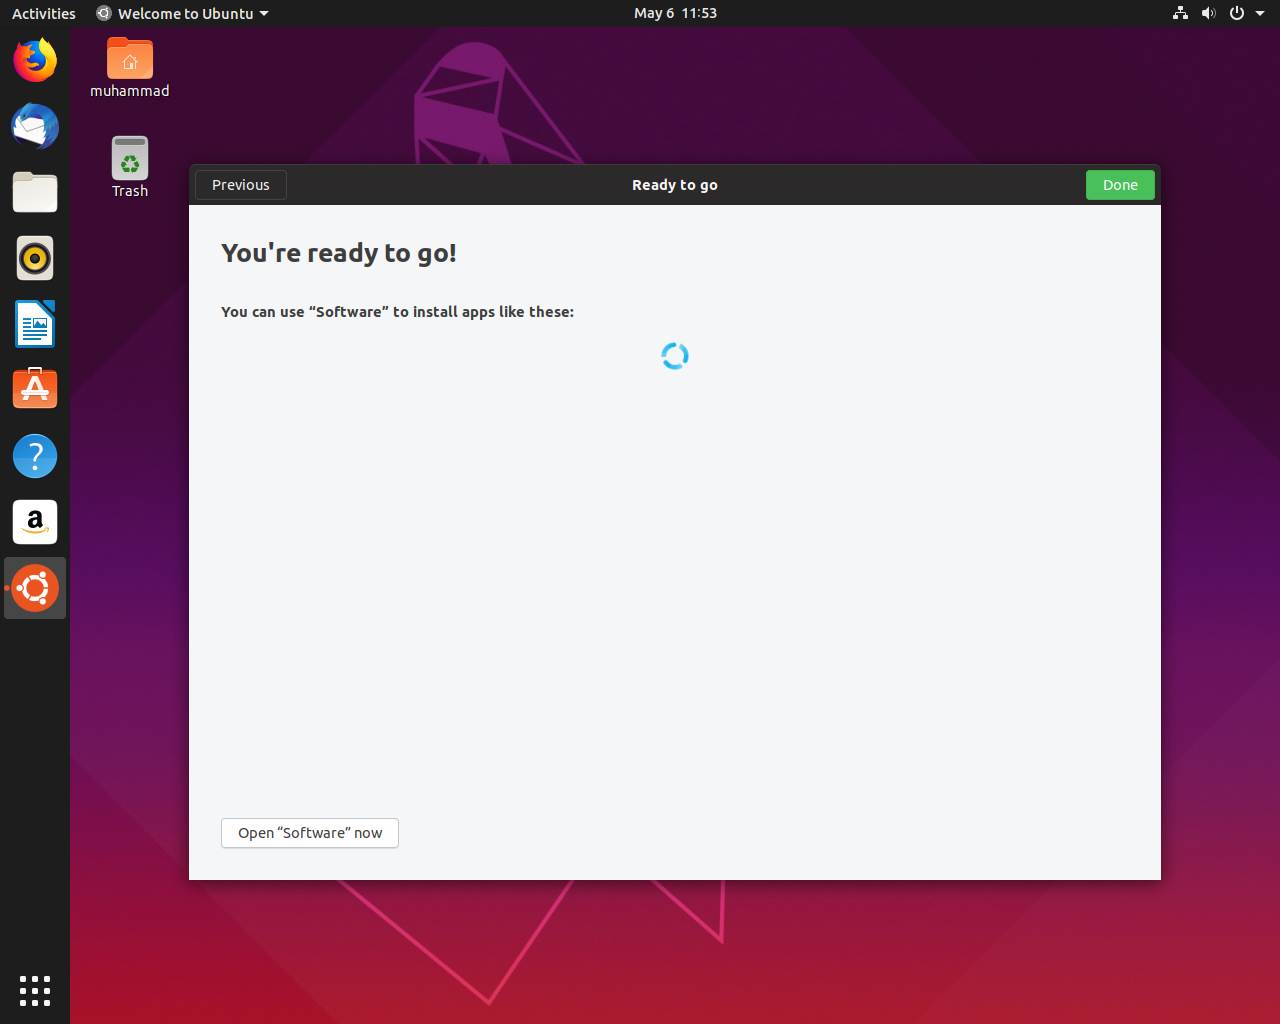
    Click Done.


    You have completed Ubuntu 19.04 desktop installation.


    Now we need to check whether our Windows 10 is working in dual boot or not.

    Let's reboot.


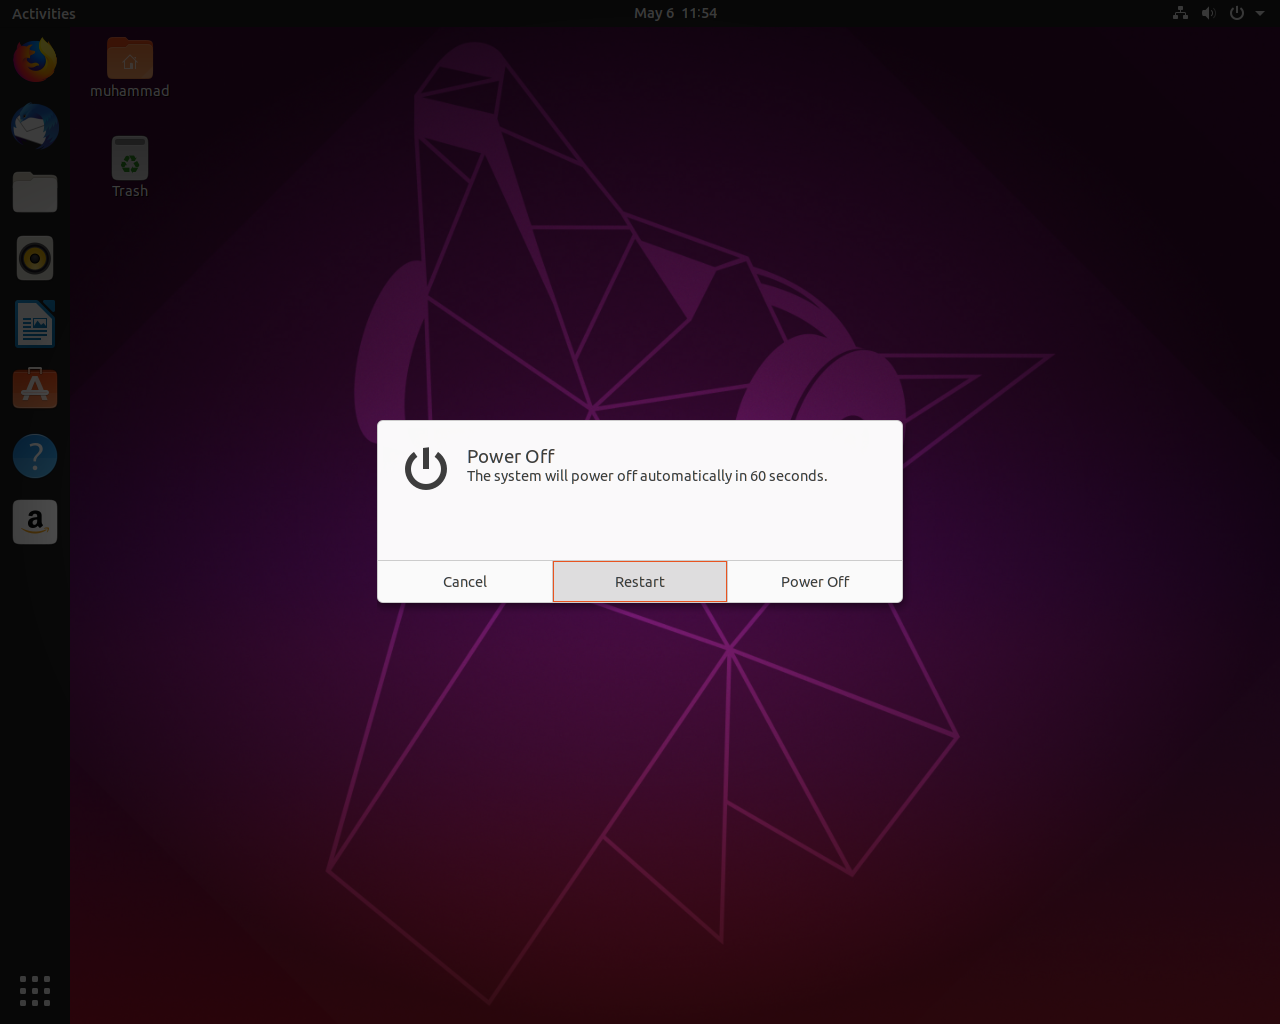
    Click Restart


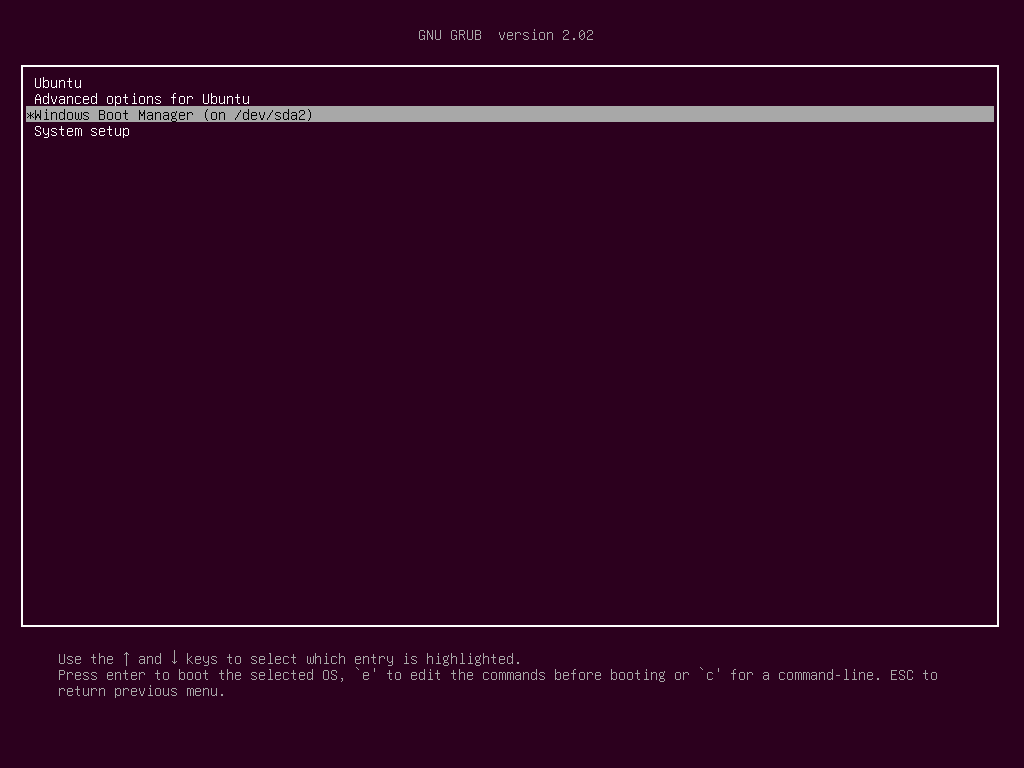
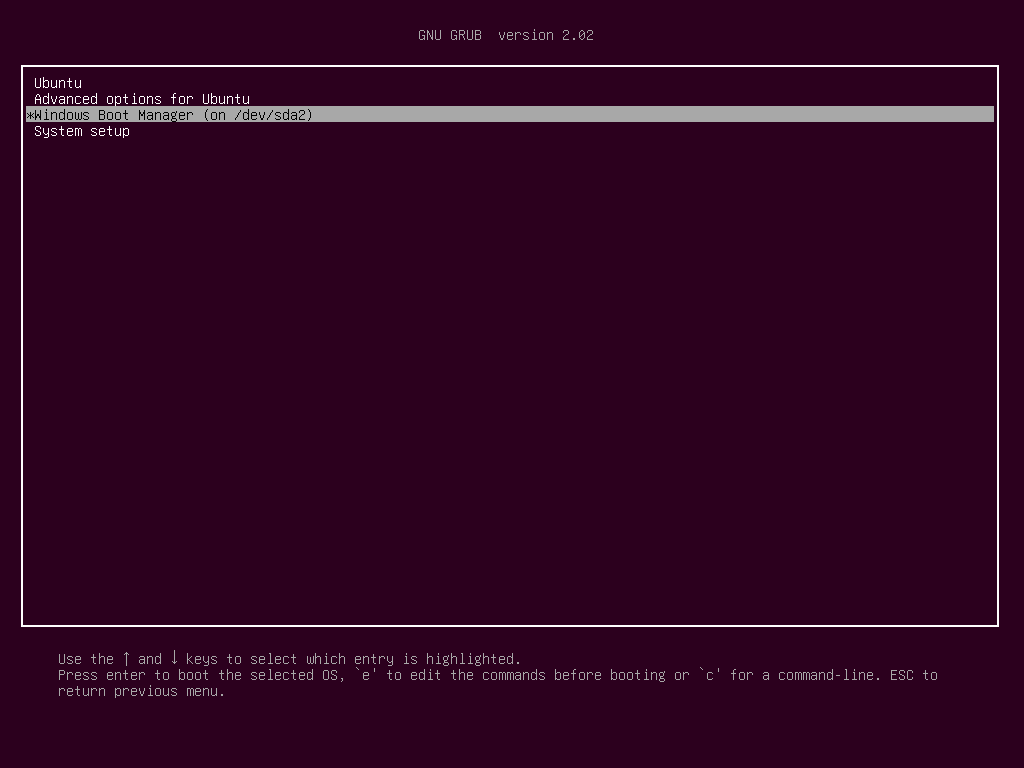
    Choose *Windows Boot Manager..... to boot from Windows 10.


    Excellent! Windows 10 has no issue at all.


    Wrapping up
    Now you have Ubuntu 19.04 desktop in a separate partition alongside Windows 10 in dual boot environment.

    How To Set Up Zabbix Server on Ubuntu 19.04

    $
    0
    0

    Zabbix is open-source monitoring software. It offers real-time monitoring of servers, virtual machines, network devices, and web applications. If you are not interested following text based tutorial, please watch following video which will help you to set up zabbix quickly.


    This tutorial will take you through the steps to install and configure Zabbix server on an Ubuntu 19.04 machine.

    Prerequisites
    To follow this guide, you will need one Ubuntu 19.04 installed on either physical or virtual machine.

    Setting Timezone
    Configure correct timezone on your Ubuntu machine using the following command:

    sudo timedatectl set-timezone Asia/Karachi

    Installing Apache, MySQL, PHP
    You will need to install apache, mysql and php prior to installing zabbix by executing following command:

    sudo apt -y install apache2 mysql-server php

    Installing Zabbix Repository
    Zabbix is available in Ubuntu's package manager, but its outdated and we need to install latest release so using the official Zabbix repository to install the latest stable version.

    First check latest stable release from here and then download and install the appropriate repository configuration package:

    wget https://repo.zabbix.com/zabbix/4.2/ubuntu/pool/main/z/zabbix-release/zabbix-release_4.2-1%2Bbionic_all.deb

    sudo dpkg -i zabbix-release_4.2-1+bionic_all.deb

    sudo apt update

    Installing Zabbix
    Type the following commands to install zabbix server and its agent:

    sudo apt -y install zabbix-server-mysql zabbix-frontend-php

    sudo apt install zabbix-agent

    Configuring MySQL
    We have installed MySQL server in earlier step so we need to configure it by executing the following commands:

    sudo mysql -u root -p

    create database zabbix character set utf8 collate utf8_bin;

    grant all privileges on zabbix.* to zabbix@localhost identified by 'P@ssw0rd';
     

    flush privileges;
     

    exit

    Run the following command to set up the schema and import the data into the zabbix database. Use zcat since the data in the file is compressed.

    sudo zcat /usr/share/doc/zabbix-server-mysql/create.sql.gz | mysql -u zabbix -p zabbix

    Enter the password for the zabbix MySQL user that you configured when prompted.

    In order for the Zabbix server to use this database, you need to set the database password in the Zabbix server configuration file. Open the configuration file in your preferred text editor.

    sudo nano /etc/zabbix/zabbix_server.conf

    Search for the following section of the file:

    ### Option: DBPassword
    #       Database password.
    #       Comment this line if no password is used.
    #
    # Mandatory: no
    # Default:
    # DBPassword=


    You need to uncomment and set the DBPassword value in the file to the password for your database user like below:

    DBPassword=Your_Zabbix_DB_User_Password

    Save and close zabbix_server.conf by pressing CTRL+X, followed by Y and then ENTER if you're using nano.

    Configuring PHP
    The Zabbix installation process created an Apache configuration file that contains these settings. It is located in the directory /etc/zabbix and is loaded automatically by Apache. You need to make a small change to this file, so open it up with the following:

    sudo nano /etc/zabbix/apache.conf 

    Uncomment the timezone line, highlighted in the red color, and change it to your timezone.

    <IfModule mod_php5.c>
            php_value max_execution_time 300
            php_value memory_limit 128M
            php_value post_max_size 16M
            php_value upload_max_filesize 2M
            php_value max_input_time 300
            php_value max_input_vars 10000
            php_value always_populate_raw_post_data -1
            php_value date.timezone Asia/Karachi
    </IfModule>
    <IfModule mod_php7.c>
            php_value max_execution_time 300
            php_value memory_limit 128M
            php_value post_max_size 16M
            php_value upload_max_filesize 2M
            php_value max_input_time 300
            php_value max_input_vars 10000
            php_value always_populate_raw_post_data -1
            php_value date.timezone Asia/Karachi
    </IfModule>


    Save and close apache.conf by pressing CTRL+X, followed by Y and then ENTER if you're using nano.

    Restart Apache to take changes into effect.

    sudo systemctl restart apache2

    You can now start zabbix server by executing the following commands:

    sudo systemctl start zabbix-server
    sudo systemctl enable zabbix-server

    sudo systemctl status zabbix-server 


    Configuring Zabbix
    The zabbix web interface requires some initial setup before you can use it. Launch your browser and go to the address http://zabbix_server_ip_address/zabbix or http://zabbix_server_hostname/zabbix. On the first page, you will see a welcome message like below.

    Click Next step to continue.


    On the next page, you will see the table that lists all of the prerequisites to run Zabbix. Scroll down and look at all of the prerequisites and be sure all of the values in this table must be OK.


    Click Next step to proceed.


    The following page asks for database connection information. Provide the MySQL credentials you configured earlier and click Next step to proceed.


    On the following page, you can leave the options at their default values if you have only one zabbix server in your environment and click Next step to continue.


    The follwoing page will show the pre-installation summary so you can confirm everything is correct.

    Click Next step to continue.


    This process creates the configuration file /usr/share/zabbix/conf/zabbix.conf.php which you could back up and use in the future.

    Click Finish to proceed to the login page.


    The default user is Admin and the password is zabbix.


    After successful login, you will see zabbix default dashboard page.


    Wrapping up
    In this guide, you learned how to set up zabbix server on Ubuntu 19.04 which will help you monitor the state of your servers and applications.

    How To Access Ubuntu File Systems Quickly From Windows

    $
    0
    0

    DiskInternals Linux Reader plays the role of a bridge between your Windows and Ext2/Ext3/Ext4, HFS and ReiserFS file systems. The program gives you an opportunity to use common Windows Explorer for extracting data. A preview option for pictures is one more pleasant point, which is worth mentioning.  It ignores file security policies which means that it is possible to access absolutely any file on a Linux disk from Windows. 

    This software provides for read-only access and does not allow you to make records in file system partitions. This guarantees that the interference in an alternative file system will not affect the work of Linux later. 

    With DiskInternals Linux Reader you can also create and open disk images of linux partitions and it has capability to create virtual disk images of your entire linux disk or a partition from Windows.

    In this tutorial we will show you how to access your Ubuntu file systems from Windows. The instruction mentioned in this guide is not limited to Ubuntu only and it can also be applied on any other linux distribution like Mint, CentOS, Fedora, RHEL, Debian etc.

    Prerequisites
    You can download DiskInternals linux reader from the following link on your Windows and then follow the steps to install and run it.

    Download

    Installing DiskInternals Linux Reader
    When you are done with download, start installing it by double clicking on downloaded file.


    Click Next.


    Click I Agree.


    Click Install.


    Let the installation complete.


    Click Finish.


    Working With DiskInternals Linux Reader
    On the following screen you will see your Windows and Linux partitions all together. I have Ubuntu 18.04 alongside Windows 7 and I have only two Ubuntu partitions root and swap.

    Click Open partition to see its contents.


    On the following screen you can see your linux partitions directories and files including disk stats. From here you can view, extract and save any data of linux partition on your Windows.


    Here we can read contents in grub.cfg file


    If you would like to create image of any partition in terms of taking backup, right click on your any linux partition and click Create Image.


    Provide the location and file name to store your disk image and click Save.


    depends on your disk size, it will take several minutes to complete.


    To mount disk image click Drives from menu and click Mount Image


    Here you have multiple options whether you want to mount a Raw Disk Image or any other virtual disk image. In my case i am going to mount Raw Disk Image.

    Click Next


    Select your disk image file and click Open.


    And here you can see a mounted disk image is visible as disk


    And we are done here.

    Wrapping up
    I hope this tutorial was helpful. Please leave you thoughts and suggestions in comment box below.

    How To Protect MySQL Server with SSL/TLS on Ubuntu 18.04

    $
    0
    0

    MySQL by default is configured to only accept local connections, or connections that initiate from the same machine where MySQL is installed. If you need to access your MySQL database from a remote clients, make sure it is safe and secure. In this tutorial, we will show you how to implement SSL/TLS encryption for MySQL on Ubuntu 18.04 to make your remote connections secure.

    Prerequisites
    To follow the steps mentioned in this guide, you will need two Ubuntu 18.04 (physical or virtual) machines. These steps can also be applied if you would like to implement SSL/TLS encryption on MySQL installed on Ubuntu 19.04.

    Please note that throughout this tutorial, the machine on which you install MySQL will be referred to as the labserver and any commands that should be run on this machine will be highlighted with blue color. Similarly, the other machine as the labclient and any commands that must be run on that machine will be highlighted with pink color.

    You will also need to replace red highlighted text according to your environment.

    Installing MySQL Server
    To install and configure MySQL on your Ubuntu 18.04 server, execute the following commands on labserver:

    sudo apt update
    sudo apt -y install mysql-server
    sudo mysql_secure_installation

    sudo mysql

    SELECT user,authentication_string,plugin,host FROM mysql.user;

    ALTER USER 'root'@'localhost' IDENTIFIED WITH mysql_native_password BY 'your-password';

    FLUSH PRIVILEGES;


    Verify the authentication methods employed by each of your users again to confirm that root no longer authenticates using the auth_socket plugin:

    SELECT user,authentication_string,plugin,host FROM mysql.user;

    exit

    MySQL should have started running automatically. To test this, check its status.

    systemctl status mysql.service

    This means MySQL is up and running.

    Verifying MySQL's Current SSL/TLS Status
    Before you make any configuration changes, you can verify the current SSL/TLS status on the MySQL server instance.

    sudo mysql -u root -p -h 127.0.0.1

    You will be prompted for the MySQL root password that you chose when you installed and configured MySQL. After entering it you'll be dropped into an interactive MySQL session.

    Show the state of the SSL/TLS variables issuing the following command:

    SHOW VARIABLES LIKE '%ssl%';

    Output
    +---------------+----------+
    | Variable_name | Value    |
    +---------------+----------+
    | have_openssl  | DISABLED |
    | have_ssl      | DISABLED |
    | ssl_ca        |          |
    | ssl_capath    |          |
    | ssl_cert      |          |
    | ssl_cipher    |          |
    | ssl_crl       |          |
    | ssl_crlpath   |          |
    | ssl_key       |          |
    +---------------+----------+
    9 rows in set (0.01 sec)


    The have_openssl and have_ssl variables are both marked as DISABLED. This means that SSL functionality has been compiled into the server, but that it is not yet enabled.

    Check the status of your current connection to confirm this:

    \s

    mysql  Ver 14.14 Distrib 5.7.26, for Linux (x86_64) using  EditLine wrapper

    Connection id:      7
    Current database: 
    Current user:       root@localhost
    SSL:         Not in use
    Current pager:      stdout
    Using outfile:      ''
    Using delimiter:    ;
    Server version:     5.7.26-0ubuntu0.18.04.1 (Ubuntu)
    Protocol version:   10
    Connection:      127.0.0.1 via TCP/IP
    Server characterset:    latin1
    Db     characterset:    latin1
    Client characterset:    utf8
    Conn.  characterset:    utf8
    TCP port:       3306
    Uptime:         40 min 11 sec

    Threads: 1  Questions: 33  Slow queries: 0  Opens: 113  Flush tables: 1  Open tables: 106  


    exit

    Generating SSL/TLS Certificates and Keys
    To enable SSL connections to MySQL, you first need to generate the appropriate certificate and key files. The MySQL process must be able to read the generated files, so use the --uid option to declare mysql as the system user that should own the generated files:

    sudo mysql_ssl_rsa_setup --uid=mysql

    This will produce output that looks similar to the following:

    Output
    Generating a 2048 bit RSA private key
    .+++
    ..........+++
    writing new private key to 'ca-key.pem'
    -----
    Generating a 2048 bit RSA private key
    ........................................+++
    ............+++
    writing new private key to 'server-key.pem'
    -----
    Generating a 2048 bit RSA private key
    .................................+++
    ............................................................+++
    writing new private key to 'client-key.pem'

    -----


    These new files will be stored in MySQL's data directory, located by default at /var/lib/mysql. Check the generated files by typing:

    sudo find /var/lib/mysql -name '*.pem' -ls

    Output
    258930      4 -rw-r--r--   1 mysql    mysql        1107 May  22 11:10 /var/lib/mysql/client-cert.pem
    258919      4 -rw-r--r--   1 mysql    mysql         451 May  22 11:10 /var/lib/mysql/public_key.pem
    258925      4 -rw-------   1 mysql    mysql        1675 May  22 11:10 /var/lib/mysql/server-key.pem
    258927      4 -rw-r--r--   1 mysql    mysql        1107 May  22 11:10 /var/lib/mysql/server-cert.pem
    258922      4 -rw-------   1 mysql    mysql        1675 May  22 11:10 /var/lib/mysql/ca-key.pem
    258928      4 -rw-------   1 mysql    mysql        1675 May  22 11:10 /var/lib/mysql/client-key.pem
    258924      4 -rw-r--r--   1 mysql    mysql        1107 May  22 11:10 /var/lib/mysql/ca.pem
    258918      4 -rw-------   1 mysql    mysql        1679 May  22 11:10 /var/lib/mysql/private_key.pem


    Now that you have the necessary certificate and key files, continue on to enable the use of SSL on your MySQL instance.

    Enabling SSL Connections for MySQL
    Latest versions of MySQL look for the appropriate certificate files within the MySQL data directory whenever the server starts. You just to need to restart MySQL service to enable SSL.

    sudo systemctl restart mysql

    sudo mysql -u root -p -h 127.0.0.1

    Take a look at the same information we requested earlier and check the values of the SSL-related variables:.

    SHOW VARIABLES LIKE '%ssl%';

    Output
    +---------------+-----------------+
    | Variable_name | Value           |
    +---------------+-----------------+
    | have_openssl  | YES             |
    | have_ssl      | YES             |
    | ssl_ca        | ca.pem          |
    | ssl_capath    |                 |
    | ssl_cert      | server-cert.pem |
    | ssl_cipher    |                 |
    | ssl_crl       |                 |
    | ssl_crlpath   |                 |
    | ssl_key       | server-key.pem  |
    +---------------+-----------------+
    9 rows in set (0.00 sec)


    The have_openssl and have_ssl variables now read YES instead of DISABLED. Furthermore, the ssl_ca, ssl_cert, and ssl_key variables have been populated with the names of the respective files that we just generated.

    Next, check the connection details again:

    \s

    Output
    SSL:            Cipher in use is DHE-RSA-AES256-SHA
    Connection:      127.0.0.1 via TCP/IP


    This time, the specific SSL cipher is displayed, indicating that SSL is being used to secure the connection.

    exit

    Your MySQL server is now capable of using encryption, but some additional configuration is required to allow remote access and mandate the use of secure connections.

    Secure Remote Connections
    To enable this setting, open the MySQL configuration file in your preferred text editor:

    sudo nano /etc/mysql/my.cnf

    Inside there will be two !includedir directives which are used to source additional configuration files. You must add your own configuration beneath these lines so that it overrides any conflicting settings found in these additional configuration files.

    Start by creating a [mysqld] section to target the MySQL server process. Under that section header, set require_secure_transport to ON, which will force MySQL to only allow secure connections. To allow MySQL to listen for external connections, you must configure it to listen for connections on an external IP address. To do this, you can add the bind-address setting and point it to 0.0.0.0, a wildcard IP address that represents all IP addresses. Essentially, this will force MySQL to listen for connections on every interface:

    !includedir /etc/mysql/conf.d/
    !includedir /etc/mysql/mysql.conf.d/

    [mysqld]
    # Require clients to connect either using SSL
    # or through a local socket file
    require_secure_transport = ON

    bind-address = 0.0.0.0

    After adding these lines, save and close the file. If you used nano to edit the file, you can do so by pressing CTRL+X, Y, then ENTER.

    Next, restart MySQL to apply the new settings:

    sudo systemctl restart mysql

    Verify that MySQL is listening on 0.0.0.0 instead of 127.0.0.1 by typing:

    sudo netstat -plunt

    The output of this command will look like this:

    Output
    Active Internet connections (only servers)
    Proto Recv-Q Send-Q Local Address           Foreign Address         State       PID/Program name  
    tcp        0          0 0.0.0.0:3306    0.0.0.0:*                   LISTEN      13317/mysqld      
    tcp        0          0 0.0.0.0:22    0.0.0.0:*           LISTEN      1293/sshd         
    tcp6       0          0 :::22                         :::*                   LISTEN      1293/sshd

    The 0.0.0.0 highlighted in the above output indicates that MySQL is listening for connections on all available interfaces.

    With that, remote connection attempts are now able to reach your MySQL server. However, you don't currently have any users configured that can connect from a remote machine. We'll create and configure a MySQL user that can connect from your client machine in the next step.

    Creating a Dedicated MySQL User
    You will need to create a dedicated user that will only be able to connect from your client machine.

    To create such a user, log back into MySQL as the root user:

    sudo mysql -u root -p

    CREATE USER 'your_username'@'your_mysql_client_IP' IDENTIFIED BY 'your_password' REQUIRE SSL;

    Next, grant the new user permissions on whichever databases or tables that they should have access to. To demonstrate, create an example database:

    CREATE DATABASE sample;

    Then give your new user access to this database and all of its tables:

    GRANT ALL ON sample.* TO 'your_username'@'your_mysql_client_IP';

    Next, flush the privileges to apply those settings immediately:

    FLUSH PRIVILEGES;

    exit

    Your MySQL server is now set up to allow connections from your remote user.

    Configuring MySQL Client
    To verify that you can connect to MySQL successfully, you will need to install the mysql-client package on the labclient machine. Log in to your client machine and perform the following:

    sudo apt update
    sudo apt -y install mysql-client

    sudo mysql -uyour_username-p -hyour_mysql_server_IP

    After submitting the password, you will be logged in to the remote server. Use \s to check the server's status and confirm that your connection is secure:

    \s

    Output
    SSL:         Cipher in use is DHE-RSA-AES256-SHA
    Connection:      your_mysql_server_IP via TCP/IP

    exit

    You've confirmed that you're able to connect to MySQL over SSL. However, you've not yet confirmed that the MySQL server is rejecting insecure connections. To test this, try connecting once more, but this time append --ssl-mode=disabled to the login command. This will instruct mysql-client to attempt an unencrypted connection:

    sudo mysql -u your_username -p -h mysql_server_IP --ssl-mode=disabled

    After entering your password when prompted, your connection will be refused:

    Output
    ERROR 1045 (28000): Access denied for user 'your_username'@'mysql_server_IP' (using password: YES)

    This shows that SSL connections are permitted while unencrypted connections are refused.

    Wrapping up
    Your MySQL server is now configured to accept secure connections from remote clients.

    How To Configure and Manage Your DNS Server using DNSControl on Ubuntu 18.04

    $
    0
    0

    DNSControl is an opinionated platform for seamlessly managing your DNS configuration across any number of DNS hosts, both in the cloud or in your own infrastructure.

    This article will walk you through the steps to install and configure DNSControl, create a basic DNS configuration, and begin deploying DNS records to a live DNS provider. For this lab, we will use DNSimple as the example DNS provider.

    Prerequisites
    To begin this tutorial, you'll need one Ubuntu 18.04 server with a sudo non-root user and a fully registered domain name with DNS hosted by a supported provider.

    Once you have these ready, log in to your server as your non-root user to begin.

    Installing DNSControl
    DNSControl is written in Go, so you'll start this step by installing Go to your Ubuntu server and setting your GOPATH.

    Go is available within Ubuntu's default software repositories, making it possible to install using conventional package management tools.

    sudo apt update

    sudo apt -y install golang-go

    After confirming the installation, apt will download and install Go and all of its required dependencies.

    Next, we'll configure the required path environment variables for Go.

    nano ~/.profile

    Add the following lines to the very end of your file:

    export GOPATH="$HOME/go"
    export PATH="$PATH:$GOPATH/bin"

    Once you have added these lines to the bottom of the file, save and close it. Then reload your profile by either logging out and back in, or sourcing the file again:

    source ~/.profile

    Now you've installed and configured Go, you can install DNSControl.

    The go get command can be used to fetch a copy of the code, automatically compile it and install it into your Go directory:

    go get github.com/StackExchange/dnscontrol

    Once this is complete, you can check the installed version to make sure that everything is working:

    dnscontrol version

    Your output will look similar to the following:

    Output
    dnscontrol 0.2.8-dev

    If you see a dnscontrol: command not found error, double-check your Go path setup.

    Now that you've installed DNSControl, you can create a configuration directory and connect DNSControl to your DNS provider in order to allow it to make changes to your DNS records.

    Configuring DNSControl
    In this section, we'll create the required configuration directories for DNSControl, and connect it to your DNS provider so that it can begin to make live changes to your DNS records.

    First, you need to create a new directory in which you can store your DNSControl configuration, and then move into it:

    mkdir ~/dnscontrol
    cd ~/dnscontrol

    If you plan to use DNSControl to write BIND zone files, you should also create the zones directory:

    mkdir ~/dnscontrol/zones

    Next, you need to configure the creds.json file, which is what will allow DNSControl to authenticate to your DNS provider and make changes. The format of creds.json differs slightly depending on the DNS provider that you are using. Please see the Service Providers list in the official DNSControl documentation to find the configuration for your own provider.

    Create the file creds.json in the ~/dnscontrol directory:

    cd ~/dnscontrol
    nano creds.json

    Add the sample creds.json configuration for your DNS provider to the file. If you're using DNSimple as your DNS provider, you can use the following parameters replacing red highlighted text with yours:

    {
      "dnsimple": {
        "token": "your-dnsimple-account-access-token"
      }
    }

    This file tells DNSControl to which DNS providers you want it to connect.

    You'll need to provide some form of authentication for your DNS provider. This is usually an API key or OAuth token, but some providers require extra information, as documented in the Service Providers list in the official DNSControl documentation.

    If you have multiple different DNS providers—for example, for multiple domain names, or delegated DNS zones—you can define these all in the same creds.json file.

    You've set up the initial DNSControl configuration directories, and configured creds.json to allow DNSControl to authenticate to your DNS provider and make changes. Next you'll create the configuration for your DNS zones.

    Creating a DNS Configuration File
    In this step, you'll create an initial DNS configuration file, which will contain the DNS records for your domain name or delegated DNS zone.

    dnsconfig.js is the main DNS configuration file for DNSControl. In this file, DNS zones and their corresponding records are defined using JavaScript syntax. This is known as a DSL, or Domain Specific Language. The JavaScript DSL page in the official DNSControl documentation provides further details.

    To begin, create the DNS configuration file in the ~/dnscontrol directory:

    cd ~/dnscontrol
    nano dnsconfig.js

    Then, add the following sample configuration to the file:

    // Providers:

    var REG_DNSIMPLE = NewRegistrar("dnsimple", "DNSIMPLE");
    var DNSIMPLE = NewDnsProvider("dnsimple", "DNSIMPLE");

    // Domains:

    D("example.tld", REG_DNSIMPLE, DnsProvider(DNSIMPLE),
        A("@","1.2.3.4")
    );

    This sample file defines a domain name or DNS zone at a particular provider, which in this case is example.com hosted by DNSimple. An example A record is also defined for the zone root (@), pointing to the IPv4 address of the server that you're hosting your domain/website on.

    There are three main functions that make up a basic DNSControl configuration file:

    • NewRegistrar(name, type, metadata): defines the domain registrar for your domain name. DNSControl can use this to make required changes, such as modifying the authoritative nameservers. If you only want to use DNSControl to manage your DNS zones, this can generally be left as NONE.
    • NewDnsProvider(name, type, metadata): defines a DNS service provider for your domain name or delegated zone. This is where DNSControl will push the DNS changes that you make.
    • D(name, registrar, modifiers): defines a domain name or delegated DNS zone for DNSControl to manage, as well as the DNS records present in the zone.

    You should configure NewRegistrar(), NewDnsProvider(), and D() accordingly using the Service Providers list in the official DNSControl documentation.

    Once complete, save and close the file.

    Populating Your DNS Configuration File
    Next, we'll populate the DNS configuration file with useful DNS records for our website or service, using the DNSControl syntax.

    In order to begin adding DNS records for your domain or delegated DNS zone, edit your DNS configuration file:

    cd ~/dnscontrol
    nano dnsconfig.js

    Next, you can begin populating the parameters for the existing D() function using the syntax described in the previous list, as well as the Domain Modifiers section of the official DNSControl documentation. A comma (,) must be used in-between each record.

    For reference, the code block here contains a full sample configuration for a basic, initial DNS setup:

    D('example.com', REG_NONE, DnsProvider(DNS_DNSimple),
        A('@', 'your-server-ip'),
        A('www', 'your-server-ip'),
        A('mail', 'your-server-ip'),
        AAAA('@', 'your-server-ipv6-address'),
        AAAA('www', 'your-server-ipv6-address'),
        AAAA('mail', 'your-server-ipv6-address'),
        MX('@', 10, 'mail.example.com.'),
        TXT('@', 'v=spf1 -all'),
        TXT('_dmarc', 'v=DMARC1; p=reject; rua=mailto:abuse@example.com; aspf=s; adkim=s;')
    );

    Once you have completed your initial DNS configuration, save and close the file.

    Testing and Deploying Your DNS Configuration
    We'll run a local syntax check on your DNS configuration, and then deploy the changes to the live DNS server/provider.

    Firstly, move into your dnscontrol directory:

    cd ~/dnscontrol

    Next, use the preview function of DNSControl to check the syntax of your file, and output what changes it will make (without actually making them):

    dnscontrol preview

    If the syntax of your DNS configuration file is correct, DNSControl will output an overview of the changes that it will make. This should look similar to the following:

    Output
    ******************** Domain: example.com
    ----- Getting nameservers from: dnsimple
    ----- DNS Provider: dnsimple...8 corrections
    #1: CREATE A example.com your-server-ip ttl=300
    #2: CREATE A www.example.com your-server-ip ttl=300
    #3: CREATE A mail.example.com your-server-ip ttl=300
    #4: CREATE AAAA example.com 2001:db8::1 ttl=300
    #5: CREATE TXT _dmarc.example.com "v=DMARC1; p=reject; rua=mailto:abuse@example.com; aspf=s; adkim=s;" ttl=300
    #6: CREATE AAAA www.example.com 2001:db8::1 ttl=300
    #7: CREATE AAAA mail.example.com 2001:db8::1 ttl=300
    #8: CREATE MX example.com 10 mail.example.com. ttl=300
    ----- Registrar: none...0 corrections
    Done. 8 corrections.

    If you see an error warning in your output, DNSControl will provide details on what and where the error is located within your file.

    Finally, you can push out the changes to your live DNS provider:

    dnscontrol push

    You'll see an output similar to the following:

    Output
    ******************** Domain: example.com
    ----- Getting nameservers from: dnsimple
    ----- DNS Provider: dnsimple...8 corrections
    #1: CREATE TXT _dmarc.example.com "v=DMARC1; p=reject; rua=mailto:abuse@example.com; aspf=s; adkim=s;" ttl=300
    SUCCESS!
    #2: CREATE A example.com your-server-ip ttl=300
    SUCCESS!
    #3: CREATE AAAA example.com 2001:db8::1 ttl=300
    SUCCESS!
    #4: CREATE AAAA www.example.com 2001:db8::1 ttl=300
    SUCCESS!
    #5: CREATE AAAA mail.example.com 2001:db8::1 ttl=300
    SUCCESS!
    #6: CREATE A www.example.com your-server-ip ttl=300
    SUCCESS!
    #7: CREATE A mail.example.com your-server-ip ttl=300
    SUCCESS!
    #8: CREATE MX example.com 10 mail.example.com. ttl=300
    SUCCESS!
    ----- Registrar: none...0 corrections
    Done. 8 corrections.

    Now, if you check the DNS settings for your domain in the DNSimple control panel, you'll see the changes.


    You can also check the record creation by running a DNS query for your domain/delegated zone. You'll see that the records have been updated accordingly:

    dig +short example.com

    You'll see output showing the IP address and relevant DNS record from your zone that was deployed using DNSControl. DNS records can take some time to propagate, so you may need to wait and run this command again.

    Wrapping up
    You have completed DNSControl set up and DNS configuration deployment to a live provider. Now you can manage and test your DNS configuration changes in a safe, offline environment before deploying them to production.

    How To Configure Three Nodes Galera Cluster with MariaDB on Ubuntu 18.04

    $
    0
    0

    This tutorial will take you through the steps to configure an active-active MariaDB Galera cluster. For this lab set up, we will configure and test three Ubuntu 18.04 servers that will act as nodes in the cluster.


    Prerequisites
    To follow this guide, you will need three Ubuntu 18.04 (virtual or physical) machines each with a non-root user with sudo privileges.

    Set Up MariaDB Repositories to All Nodes
    First, we'll add the MariaDB repository key with the apt-key command, which the APT package manager will use to verify that the package is authentic:

    sudo apt-key adv --recv-keys --keyserver hkp://keyserver.ubuntu.com:80 0xF1656F24C74CD1D8

    Once you have the trusted key in the database, you can add the repository with the following command:

    sudo add-apt-repository 'deb [arch=amd64,arm64,ppc64el] http://mirrors.neusoft.edu.cn/mariadb/repo/10.4/ubuntu bionic main'

    After adding the repository, run apt update in order to include package manifests from the new repository:

    sudo apt update

    Once you have completed this step on your first node, repeat for your second and third nodes.

    Installing MariaDB on All Nodes
    The latest available MariaDB Server and MariaDB Galera Server packages are combined, so installing mariadb-server will automatically install Galera and several dependencies:

    sudo apt install mariadb-server

    From MariaDB version 10.4 onwards, the root MariaDB user does not have a password by default. To set a password for the root user, start by logging into MariaDB:

    sudo mysql -u root

    Once you're inside the MariaDB shell, change the password by executing the following statement:

    set password = password("your_password");

    You will see the following output indicating that the password was set correctly:

    Output
    Query OK, 0 rows affected (0.001 sec)

    Exit the MariaDB shell by running the following command:

    quit;

    You now have all of the pieces necessary to begin configuring the cluster, but since you'll be relying on rsync in later steps, make sure it's installed:

    sudo apt install rsync

    This will confirm that the newest version of rsync is already available or prompt you to upgrade or install it.

    Configuring the First Node

    By default, MariaDB is configured to check the /etc/mysql/conf.d directory to get additional configuration settings from files ending in .cnf. Create a file in this directory with all of your cluster-specific directives:

    sudo nano /etc/mysql/conf.d/galera.cnf

    Add the following configuration into the file. The configuration specifies different cluster options, details about the current server and the other servers in the cluster, and replication-related settings. Note that the IP addresses in the configuration are the private addresses of your respective servers; replace the highlighted lines with the appropriate IP addresses.

    [mysqld]
    binlog_format=ROW
    default-storage-engine=innodb
    innodb_autoinc_lock_mode=2
    bind-address=0.0.0.0

    # Galera Provider Configuration
    wsrep_on=ON
    wsrep_provider=/usr/lib/galera/libgalera_smm.so

    # Galera Cluster Configuration
    wsrep_cluster_name="test_cluster"
    wsrep_cluster_address="gcomm://First_Node_IP,Second_Node_IP,Third_Node_IP"

    # Galera Synchronization Configuration
    wsrep_sst_method=rsync

    # Galera Node Configuration
    wsrep_node_address="This_Node_IP"
    wsrep_node_name="This_Node_Name"

    When you are satisfied with your cluster configuration file, copy the contents into your clipboard, save and close the file. With the nano text editor, you can do this by pressing CTRL+X, typing y, and pressing ENTER.

    Now that you have configured your first node successfully, you can move on to configuring the remaining nodes in the next section.

    Configuring the Remaining Nodes
    In this step, you will configure the remaining two nodes. On your second node, open the configuration file:

    sudo nano /etc/mysql/conf.d/galera.cnf

    Paste in the configuration you copied from the first node, then update the Galera Node Configuration to use the IP address or resolvable domain name for the specific node you're setting up. Finally, update its name, which you can set to whatever helps you identify the node in your log files:

    # Galera Node Configuration
    wsrep_node_address="This_Node_IP"
    wsrep_node_name="This_Node_Name"

    Save and exit the file.

    Once you have completed these steps, repeat them on the third node.

    Opening the Firewall on All Nodes
    In this step, you will configure your firewall so that the ports required for inter-node communication are open. On every server, check the status of the firewall by running:

    sudo ufw status

    In this case, only SSH is allowed through:

    Output
    Status: active

    To                         Action      From
    --                         ------      ----
    OpenSSH                    ALLOW       Anywhere
    OpenSSH (v6)            ALLOW       Anywhere (v6)

    Since only SSH traffic is permitted in this case, you’ll need to add rules for MySQL and Galera traffic. If you tried to start the cluster, it would fail because of firewall rules.

    Open the ports with the following command:

    sudo ufw allow 3306,4567,4568,4444/tcp
    sudo ufw allow 4567/udp

    After you have configured your firewall on the first node, create the same firewall settings on the second and third node.

    Starting the Cluster
    In this step, you will start your MariaDB cluster. To begin, you need to stop the running MariaDB service so that you can bring your cluster online.

    Use the following command on all three servers to stop MariaDB so that you can bring them back up in a cluster:

    sudo systemctl stop mysql
    sudo systemctl status mysql

    Output
    Jun 25 12:57:40 node-01 systemd[1]: Stopped MariaDB 10.4.4 database server.

    Once you've shut down mysql on all of the nodes, you're ready to proceed.

    To start first node, you'll need to use a special startup script. The way you've configured your cluster, each node that comes online tries to connect to at least one other node specified in its galera.cnf file to get its initial state. Without using the galera_new_cluster script that allows systemd to pass the --wsrep-new-cluster parameter, a normal systemctl start mysql would fail because there are no nodes running for the first node to connect with.

    sudo galera_new_cluster

    This command will not display any output on successful execution. When this script succeeds, the node is registered as part of the cluster, and you can see it with the following command:

    mysql -u root -p -e "SHOW STATUS LIKE 'wsrep_cluster_size'"

    You will see the following output indicating that there is one node in the cluster:

    Output
    +--------------------+-------+
    | Variable_name      | Value |
    +--------------------+-------+
    | wsrep_cluster_size | 1     |
    +--------------------+-------+

    On the remaining nodes, you can start mysql normally. They will search for any member of the cluster list that is online, so when they find one, they will join the cluster.

    Now you can start the second node. Start mysql:

    sudo systemctl start mysql

    No output will be displayed on successful execution. You will see your cluster size increase as each node comes online:

    mysql -u root -p -e "SHOW STATUS LIKE 'wsrep_cluster_size'"

    You will see the following output indicating that the second node has joined the cluster and that there are two nodes in total.

    Output
    +--------------------+-------+
    | Variable_name      | Value |
    +--------------------+-------+
    | wsrep_cluster_size | 2     |
    +--------------------+-------+

    It's now time to start the third node. Start mysql:

    sudo systemctl start mysql

    Run the following command to find the cluster size:

    mysql -u root -p -e "SHOW STATUS LIKE 'wsrep_cluster_size'"

    You will see the following output, which indicates that the third node has joined the cluster and that the total number nodes in the cluster is three.

    Output
    +--------------------+-------+
    | Variable_name      | Value |
    +--------------------+-------+
    | wsrep_cluster_size | 3     |
    +--------------------+-------+

    At this stage, the entire cluster is online and communicating successfully. Next, you can ensure the working setup by testing replication in the next section.

    Testing Replication
    You've gone through the steps up to this point so that your cluster can perform replication from any node to any other node, known as active-active replication. Follow the steps below to test and see if the replication is working as expected.

    You'll start by making database changes on your first node. The following commands will create a database called playground and a table inside of this database called equipment.

    mysql -u root -p -e 'CREATE DATABASE playaround;

    CREATE TABLE playaround.equipment ( id INT NOT NULL AUTO_INCREMENT, type VARCHAR(50), quant INT, color VARCHAR(25), PRIMARY KEY(id));

    INSERT INTO playaround.equipment (type, quant, color) VALUES ("slide", 2, "blue");'

    You now have one value in your table.

    Next, look at the second node to verify that replication is working:

    mysql -u root -p -e 'SELECT * FROM playaround.equipment;'

    If replication is working, the data you entered on the first node will be visible here on the second:

    Output
    +----+-------+-------+-------+
    | id | type  | quant | color |
    +----+-------+-------+-------+
    |  1 | slide |     2 | blue  |

    From this same node, you can write data to the cluster:

    mysql -u root -p -e 'INSERT INTO playaround.equipment (type, quant, color) VALUES ("swing", 10, "yellow");'

    From the third node, you can read all of this data by querying the table again:

    mysql -u root -p -e 'SELECT * FROM playaround.equipment;'

    You will see the following output showing the two rows:

    Output
       +----+-------+-------+--------+
       | id | type  | quant | color  |
       +----+-------+-------+--------+
       |  1 | slide |     2 | blue   |
       |  2 | swing |    10 | yellow |
       +----+-------+-------+--------+

    Again, you can add another value from this node:

    mysql -u root -p -e 'INSERT INTO playaround.equipment (type, quant, color) VALUES ("seesaw", 3, "green");'

    Back on the first node, you can verify that your data is available everywhere:

    mysql -u root -p -e 'SELECT * FROM playaround.equipment;'

    You will see the following output which indicates that the rows are available on the first node.

    Output
       +----+--------+-------+--------+
       | id | type   | quant | color  |
       +----+--------+-------+--------+
       |  1 | slide  |     2 | blue   |
       |  2 | swing  |    10 | yellow |
       |  3 | seesaw |     3 | green  |
       +----+--------+-------+--------+

    You've verified successfully that you can write to all of the nodes and that replication is being performed properly.

    Wrapping up
    You have configured three-node Galera cluster with MariaDB. If you plan on using a Galera cluster in a production situation, it’s recommended that you begin with no fewer than five nodes.

    How To Set Up ISPConfig-3 on an Ubuntu 18.04

    $
    0
    0

    ISPConfig is an open source web hosting control panel let's you configure the following services through its browser based interface:

    Manage multiple servers from one control panel
    Web server management (Apache2 and nginx)
    Mail server management (with virtual mail users)
    DNS server management (BIND and MyDNS)
    Virtualization (OpenVZ)
    Administrator, reseller and client login
    Configuration mirroring and clusters
    Open Source software (BSD license)
      In this tutorial, we'll walk you through the steps to install and configure ispconfig 3.1 on an Ubuntu 18.04 server. You will need to replace some of the highlighted information while performing these steps to meet your environment needs.

      Prerequisites
      To follow this tutorial, you will need one Ubuntu 18.04 server installed either on a (Physical or Virtual) machine with a non-root user having sudo privileges.

      Setting Timezone and Hostname

      sudo timedatectl set-timezone Asia/Karachi
      sudo hostnamectl set-hostname labserver.layloyar.com

      Set Up Default Shell

      sudo dpkg-reconfigure dash


      Uninstall Apparmor

      sudo service apparmor stop

      sudo apt autoremove apparmor apparmor-utils

      Output
      Reading package lists... Done
      Building dependency tree
      Reading state information... Done
      Package 'apparmor-utils' is not installed, so not removed
      The following packages will be REMOVED:
        apparmor snapd
      0 upgraded, 0 newly installed, 2 to remove and 87 not upgraded.
      After this operation, 69.4 MB disk space will be freed.
      Do you want to continue? [Y/n] y

      (Reading database ... 66906 files and directories currently installed.)
      Removing snapd (2.37.1.1+18.04) ...
      Removing apparmor (2.12-4ubuntu5.1) ...
      Processing triggers for mime-support (3.60ubuntu1) ...
      Processing triggers for man-db (2.8.3-2ubuntu0.1) ...

      Installing Postfix and Database
      sudo apt -y install postfix postfix-mysql postfix-doc mariadb-client mariadb-server openssl getmail4 rkhunter binutils dovecot-imapd dovecot-pop3d dovecot-mysql dovecot-sieve dovecot-lmtpd

      During installation postfix will present you following screen, choose Internet Site and press OK


      Enter you FQDN on this screen and press OK


      Edit master.cf file and add or replace the following contents:

      sudo nano /etc/postfix/master.cf

      Change this:

      #submission inet n       -       y       -       -       smtpd
      #  -o syslog_name=postfix/submission
      #  -o smtpd_tls_security_level=encrypt
      #  -o smtpd_sasl_auth_enable=yes
      #  -o smtpd_tls_auth_only=yes
      #  -o smtpd_reject_unlisted_recipient=no
      #  -o smtpd_client_restrictions=$mua_client_restrictions
      #  -o smtpd_helo_restrictions=$mua_helo_restrictions
      #  -o smtpd_sender_restrictions=$mua_sender_restrictions
      #  -o smtpd_recipient_restrictions=
      #  -o smtpd_relay_restrictions=permit_sasl_authenticated,reject
      #  -o milter_macro_daemon_name=ORIGINATING
      #smtps     inet  n       -       y       -       -       smtpd
      #  -o syslog_name=postfix/smtps
      #  -o smtpd_tls_wrappermode=yes
      #  -o smtpd_sasl_auth_enable=yes
      #  -o smtpd_reject_unlisted_recipient=no
      #  -o smtpd_client_restrictions=$mua_client_restrictions
      #  -o smtpd_helo_restrictions=$mua_helo_restrictions
      #  -o smtpd_sender_restrictions=$mua_sender_restrictions
      #  -o smtpd_recipient_restrictions=
      #  -o smtpd_relay_restrictions=permit_sasl_authenticated,reject
      #  -o milter_macro_daemon_name=ORIGINATING

      to this:

      #submission inet n       -       y       -       -       smtpd
        -o syslog_name=postfix/submission
        -o smtpd_tls_security_level=encrypt
        -o smtpd_sasl_auth_enable=yes
        -o smtpd_client_restrictions=permit_sasl_authenticated,reject
      #  -o smtpd_tls_auth_only=yes
      #  -o smtpd_reject_unlisted_recipient=no
      #  -o smtpd_client_restrictions=$mua_client_restrictions
      #  -o smtpd_helo_restrictions=$mua_helo_restrictions
      #  -o smtpd_sender_restrictions=$mua_sender_restrictions
      #  -o smtpd_recipient_restrictions=
      #  -o smtpd_relay_restrictions=permit_sasl_authenticated,reject
      #  -o milter_macro_daemon_name=ORIGINATING
      #smtps     inet  n       -       y       -       -       smtpd
        -o syslog_name=postfix/smtps
        -o smtpd_tls_wrappermode=yes
        -o smtpd_sasl_auth_enable=yes
        -o smtpd_client_restrictions=permit_sasl_authenticated,reject
      #  -o smtpd_reject_unlisted_recipient=no
      #  -o smtpd_client_restrictions=$mua_client_restrictions
      #  -o smtpd_helo_restrictions=$mua_helo_restrictions
      #  -o smtpd_sender_restrictions=$mua_sender_restrictions
      #  -o smtpd_recipient_restrictions=
      #  -o smtpd_relay_restrictions=permit_sasl_authenticated,reject
      #  -o milter_macro_daemon_name=ORIGINATING


      Save and close.

      This will look smiliar to like below.


      Now restart postfix service to take changes into effect 

      sudo systemctl restart postfix

      Output:
      postfix.service - Postfix Mail Transport Agent
         Loaded: loaded (/lib/systemd/system/postfix.service; enabled; vendor preset: enabled)
         Active: active (exited) since Mon 2019-04-29 10:11:55 PKT; 14s ago
        Process: 27934 ExecStart=/bin/true (code=exited, status=0/SUCCESS)
       Main PID: 27934 (code=exited, status=0/SUCCESS)

      Apr 29 10:11:55 labserver systemd[1]: Starting Postfix Mail Transport Agent...
      Apr 29 10:11:55 labserver systemd[1]: Started Postfix Mail Transport Agent.

      Now edit 50-server.cnf file and replace the following

      sudo nano /etc/mysql/mariadb.conf.d/50-server.cnf

      Change this:

      bind-address           = 127.0.0.1

      to this:

      #bind-address           = 127.0.0.1

      Save and close.

      This will look similiar to like below


      Securing MySQL

      sudo mysql_secure_installation

      Output:
      NOTE: RUNNING ALL PARTS OF THIS SCRIPT IS RECOMMENDED FOR ALL MariaDB
            SERVERS IN PRODUCTION USE!  PLEASE READ EACH STEP CAREFULLY!

      In order to log into MariaDB to secure it, we'll need the current
      password for the root user.  If you've just installed MariaDB, and
      you haven't set the root password yet, the password will be blank,
      so you should just press enter here.

      Enter current password for root (enter for none):
      OK, successfully used password, moving on...

      Setting the root password ensures that nobody can log into the MariaDB
      root user without the proper authorisation.

      You already have a root password set, so you can safely answer 'n'.

      Change the root password? [Y/n] y
      New password:
      Re-enter new password:
      Password updated successfully!
      Reloading privilege tables..
       ... Success!


      By default, a MariaDB installation has an anonymous user, allowing anyone
      to log into MariaDB without having to have a user account created for
      them.  This is intended only for testing, and to make the installation
      go a bit smoother.  You should remove them before moving into a
      production environment.

      Remove anonymous users? [Y/n] y
       ... Success!

      Normally, root should only be allowed to connect from 'localhost'.  This
      ensures that someone cannot guess at the root password from the network.

      Disallow root login remotely? [Y/n] y
       ... Success!

      By default, MariaDB comes with a database named 'test' that anyone can
      access.  This is also intended only for testing, and should be removed
      before moving into a production environment.

      Remove test database and access to it? [Y/n] y
       - Dropping test database...
       ... Success!
       - Removing privileges on test database...
       ... Success!

      Reloading the privilege tables will ensure that all changes made so far
      will take effect immediately.

      Reload privilege tables now? [Y/n] y
       ... Success!

      Cleaning up...

      All done!  If you've completed all of the above steps, your MariaDB
      installation should now be secure.

      Thanks for using MariaDB!

      Login to mysql prompt and execute the following.

      sudo mysql -u root -p

      update mysql.user set plugin = 'mysql_native_password' where user='root';

      Output:
      Query OK, 1 row affected (0.00 sec)
      Rows matched: 1  Changed: 1  Warnings: 0

      exit


      Edit debian.cnf file and update the following.

      sudo nano /etc/mysql/debian.cnf

      Change this:

      # Automatically generated for Debian scripts. DO NOT TOUCH!
      [client]
      host     = localhost
      user     = root
      password =
      socket   = /var/run/mysqld/mysqld.sock
      [mysql_upgrade]
      host     = localhost
      user     = root
      password =
      socket   = /var/run/mysqld/mysqld.sock
      basedir  = /usr

      to this:

      # Automatically generated for Debian scripts. DO NOT TOUCH!
      [client]
      host     = localhost
      user     = root
      password = TypePasswordHere
      socket   = /var/run/mysqld/mysqld.sock
      [mysql_upgrade]
      host     = localhost
      user     = root
      password = TypePasswordHere
      socket   = /var/run/mysqld/mysqld.sock
      basedir  = /usr

      Save and close.

      This will look smiliar to like below.


      Restart database service to take changes into effect.

      sudo systemctl restart mysql

      Installing SpamAssassin
      sudo apt -y install amavisd-new spamassassin clamav clamav-daemon unzip bzip2 arj nomarch lzop cabextract apt-listchanges libnet-ldap-perl libauthen-sasl-perl clamav-docs daemon libio-string-perl libio-socket-ssl-perl libnet-ident-perl zip libnet-dns-perl postgrey

      sudo freshclam

      Ignore these errors

      ERROR: /var/log/clamav/freshclam.log is locked by another process
      ERROR: Problem with internal logger (UpdateLogFile = /var/log/clamav/freshclam.log).

      sudo systemctl start clamav-daemon

      sudo wget https://git.ispconfig.org/ispconfig/ispconfig3/raw/stable-3.1/helper_scripts/ubuntu-amavisd-new-2.11.patch --directory-prefix=/tmp

      sudo cp -pf /usr/sbin/amavisd-new /usr/sbin/amavisd-new-orignal
      sudo patch < /tmp/ubuntu-amavisd-new-2.11.patch

      Output:
      patching file amavisd-new
      Hunk #2 succeeded at 34363 (offset 1 line).

      Installing Metronome XMPP Server
      sudo apt -y install git lua5.1 liblua5.1-0-dev lua-filesystem libidn11-dev libssl-dev lua-zlib lua-expat lua-event lua-bitop lua-socket lua-sec luarocks luarocks

      sudo luarocks install lpc

      Output:
      Installing https://luarocks.org/lpc-1.0.0-2.src.rock
      gcc -O2 -fPIC -I/usr/include/lua5.1 -c lpc.c -o lpc.o
      gcc -shared -o lpc.so lpc.o
      install -d /usr/local/lib/luarocks/rocks/lpc/1.0.0-2/lib
      install lpc.so /usr/local/lib/luarocks/rocks/lpc/1.0.0-2/lib
      lpc 1.0.0-2 is now installed in /usr/local (license: MIT/X11)

      sudo adduser --no-create-home --disabled-login --gecos 'Metronome' metronome

      Output:
      Adding user `metronome' ...
      Adding new group `metronome' (1001) ...
      Adding new user `metronome' (1001) with group `metronome' ...
      Not creating home directory `/home/metronome'.

      sudo git clone https://github.com/maranda/metronome.git /opt/metronome

      Output:
      Cloning into '/opt/metronome'...
      remote: Enumerating objects: 185, done.
      remote: Counting objects: 100% (185/185), done.
      remote: Compressing objects: 100% (132/132), done.
      remote: Total 13177 (delta 96), reused 122 (delta 49), pack-reused 12992
      Receiving objects: 100% (13177/13177), 4.08 MiB | 404.00 KiB/s, done.
      Resolving deltas: 100% (7646/7646), done.

      cd /opt/metronome

      sudo ./configure --ostype=debian --prefix=/usr

      Output:
      Looking for Lua... lua5.1 found in $PATH: /usr/bin
      Checking Lua includes... lua.h found in /usr/include/lua5.1/lua.h
      Writing configuration...

      Installation prefix: /usr
      Metronome configuration directory: /etc/metronome
      Using Lua from: /usr

      Done. You can now run 'make' to build.

      sudo make
      sudo make install

      Installing Apache, PHP, phpMyAdmin
      sudo apt -y install apache2 apache2-doc apache2-utils libapache2-mod-php php7.2 php7.2-common php7.2-gd php7.2-mysql php7.2-imap phpmyadmin php7.2-cli php7.2-cgi libapache2-mod-fcgid apache2-suexec-pristine php-pear mcrypt  imagemagick libruby libapache2-mod-python php7.2-curl php7.2-intl php7.2-pspell php7.2-recode php7.2-sqlite3 php7.2-tidy php7.2-xmlrpc php7.2-xsl memcached php-memcache php-imagick php-gettext php7.2-zip php7.2-mbstring php-soap php7.2-soap

      Select apache2 and press Ok


      Press Yes


      Type your desired password here and press Ok.


      Type confirm password and press Ok.


      sudo a2enmod suexec rewrite ssl actions include cgi

      Output:
      Enabling module suexec.
      Enabling module rewrite.
      Considering dependency setenvif for ssl:
      Module setenvif already enabled
      Considering dependency mime for ssl:
      Module mime already enabled
      Considering dependency socache_shmcb for ssl:
      Enabling module socache_shmcb.
      Enabling module ssl.
      See /usr/share/doc/apache2/README.Debian.gz on how to configure SSL and create self-signed certificates.
      Enabling module actions.
      Considering dependency mime for include:
      Module mime already enabled
      Enabling module include.
      Enabling module cgi.
      To activate the new configuration, you need to run:
        systemctl restart apache2

      sudo a2enmod dav_fs dav auth_digest headers

      Output:
      Considering dependency dav for dav_fs:
      Enabling module dav.
      Enabling module dav_fs.
      Module dav already enabled
      Considering dependency authn_core for auth_digest:
      Module authn_core already enabled
      Enabling module auth_digest.
      Enabling module headers.
      To activate the new configuration, you need to run:
        systemctl restart apache2

      Keeping security into consideration we need to disable HTTP_PROXY header.

      sudo nano /etc/apache2/conf-available/httpoxy.conf

      <IfModule mod_headers.c>
          RequestHeader unset Proxy early
      </IfModule>

      Save adn close.


      Enable the config file by running:

      sudo a2enconf httpoxy

      Output:
      Enabling conf httpoxy.
      To activate the new configuration, you need to run:
        systemctl reload apache2

      Installing PHP Opcode cache
      sudo apt -y install php7.2-opcache php-apcu

      sudo systemctl restart apache2

      Installing PHP-FPM
      sudo apt -y install php7.2-fpm

      sudo a2enmod actions proxy_fcgi alias

      Output:
      Module actions already enabled
      Considering dependency proxy for proxy_fcgi:
      Enabling module proxy.
      Enabling module proxy_fcgi.
      Module alias already enabled
      To activate the new configuration, you need to run:
        systemctl restart apache2

      Installing HHVM
      sudo apt -y install hhvm

      Installing Let's Encrypt
      sudo apt -y install certbot

      Installing Mailman

      sudo apt -y install mailman

      Select your desired language and press Ok.


      Press Ok.


      Type following command and respond to the following highlited

      sudo newlist mailman

      Enter the email of the person running the list: support@layloyar.com
      Initial mailman password:TypePasswordHere
      To finish creating your mailing list, you must edit your /etc/aliases (or
      equivalent) file by adding the following lines, and possibly running the
      `newaliases' program:

      ## mailman mailing list
      mailman:              "|/var/lib/mailman/mail/mailman post mailman"
      mailman-admin:        "|/var/lib/mailman/mail/mailman admin mailman"
      mailman-bounces:      "|/var/lib/mailman/mail/mailman bounces mailman"
      mailman-confirm:      "|/var/lib/mailman/mail/mailman confirm mailman"
      mailman-join:         "|/var/lib/mailman/mail/mailman join mailman"
      mailman-leave:        "|/var/lib/mailman/mail/mailman leave mailman"
      mailman-owner:        "|/var/lib/mailman/mail/mailman owner mailman"
      mailman-request:      "|/var/lib/mailman/mail/mailman request mailman"
      mailman-subscribe:    "|/var/lib/mailman/mail/mailman subscribe mailman"
      mailman-unsubscribe:  "|/var/lib/mailman/mail/mailman unsubscribe mailman"

      Hit enter to notify mailman owner...

      sudo nano /etc/aliases

      Add the following contents into the file:

      mailman:              "|/var/lib/mailman/mail/mailman post mailman"
      mailman-admin:        "|/var/lib/mailman/mail/mailman admin mailman"
      mailman-bounces:      "|/var/lib/mailman/mail/mailman bounces mailman"
      mailman-confirm:      "|/var/lib/mailman/mail/mailman confirm mailman"
      mailman-join:         "|/var/lib/mailman/mail/mailman join mailman"
      mailman-leave:        "|/var/lib/mailman/mail/mailman leave mailman"
      mailman-owner:        "|/var/lib/mailman/mail/mailman owner mailman"
      mailman-request:      "|/var/lib/mailman/mail/mailman request mailman"
      mailman-subscribe:    "|/var/lib/mailman/mail/mailman subscribe mailman"
      mailman-unsubscribe:  "|/var/lib/mailman/mail/mailman unsubscribe mailman"

      Save and close.


      sudo newaliases

      sudo systemctl restart postfix

      sudo ln -s /etc/mailman/apache.conf /etc/apache2/conf-available/mailman.conf

      sudo a2enconf mailman

      Output:
      Enabling conf mailman.
      To activate the new configuration, you need to run:
        systemctl reload apache2

      Restart Apache services to take changes into effect

      sudo systemctl restart apache2

      sudo systemctl start mailman

      Installing PureFTPd

      sudo apt -y install pure-ftpd-common pure-ftpd-mysql quota quotatool

      sudo nano /etc/default/pure-ftpd-common

      Change following from false to true:

      VIRTUALCHROOT=true

      Save and close.


      Now generate an ssl certificate to secure PureFTPD communication

      sudo openssl req -x509 -nodes -days 3650 -newkey rsa:2048 -keyout /etc/ssl/private/pure-ftpd.pem -out /etc/ssl/private/pure-ftpd.pem

      Output:
      Generating a 2048 bit RSA private key
      ..................................................................................................+++
      ......+++
      writing new private key to '/etc/ssl/private/pure-ftpd.pem'
      -----
      You are about to be asked to enter information that will be incorporated
      into your certificate request.
      What you are about to enter is what is called a Distinguished Name or a DN.
      There are quite a few fields but you can leave some blank
      For some fields there will be a default value,
      If you enter '.', the field will be left blank.
      -----
      Country Name (2 letter code) [AU]:PK
      State or Province Name (full name) [Some-State]:Sindh
      Locality Name (eg, city) []:Karachi
      Organization Name (eg, company) [Internet Widgits Pty Ltd]:Laying
      Organizational Unit Name (eg, section) []:Services
      Common Name (e.g. server FQDN or YOUR name) []:labserver.layloyar.com
      Email Address []:support@layloyar.com

      sudo chmod 600 /etc/ssl/private/pure-ftpd.pem

      sudo systemctl restart pure-ftpd-mysql

      Set Up PureFTPd Qouta

      sudo nano /etc/fstab

      apend the following line:

      UUID=cf9de5a1-9a14-4ce4-bae6-1fa672a45f2b / ext4 errors=remount-ro,usrjquota=quota.user,grpjquota=quota.group,jq
      fmt=vfsv0 0 1

      Save and close.

      sudo mount -o remount /

      sudo quotacheck -avugm

      Output:
      quotacheck: Scanning /dev/sda2 [/] done
      quotacheck: Cannot stat old user quota file //quota.user: No such file or directory. Usage will not be subtracted.
      quotacheck: Cannot stat old group quota file //quota.group: No such file or directory. Usage will not be subtracted.
      quotacheck: Cannot stat old user quota file //quota.user: No such file or directory. Usage will not be subtracted.
      quotacheck: Cannot stat old group quota file //quota.group: No such file or directory. Usage will not be subtracted.
      quotacheck: Checked 13608 directories and 95629 files
      quotacheck: Old file not found.
      quotacheck: Old file not found.

      sudo quotaon -avug

      Output:
      /dev/sda2 [/]: group quotas turned on
      /dev/sda2 [/]: user quotas turned on


      Installing BIND DNS Server

      sudo apt -y install bind9 dnsutils haveged

      sudo systemctl enable haveged

      Output:
      Synchronizing state of haveged.service with SysV service script with /lib/systemd/systemd-sysv-install.
      Executing: /lib/systemd/systemd-sysv-install enable haveged

      sudo systemctl start haveged

      Installing Vlogger, Webalizer, and AWStats

      sudo apt -y install vlogger webalizer awstats geoip-database libclass-dbi-mysql-perl

      sudo nano /etc/cron.d/awstats

      Change this:

      MAILTO=root

      */10 * * * * www-data [ -x /usr/share/awstats/tools/update.sh ] && /usr/share/awstats/tools/update.sh

      # Generate static reports:
      10 03 * * * www-data [ -x /usr/share/awstats/tools/buildstatic.sh ] && /usr/share/awstats/tools/buildstatic.sh

      to this:

      #MAILTO=root

      #*/10 * * * * www-data [ -x /usr/share/awstats/tools/update.sh ] && /usr/share/awstats/tools/update.sh

      # Generate static reports:
      #10 03 * * * www-data [ -x /usr/share/awstats/tools/buildstatic.sh ] && /usr/share/awstats/tools/buildstatic.sh

      Save and close.


      Installing Jailkit

      sudo apt -y install build-essential autoconf automake1.11 libtool flex bison debhelper binutils

      wget http://olivier.sessink.nl/jailkit/jailkit-2.19.tar.gz --directory-prefix=/tmp

      cd /tmp

      sudo tar xvfz /tmp/jailkit-2.19.tar.gz

      sudo echo 5 > /tmp/jailkit-2.19/debian/compat

      cd /tmp/jailkit-2.19

      sudo ./debian/rules binary

      sudo dpkg -i /tmp/jailkit*.deb

      Output:
      Selecting previously unselected package jailkit.
      (Reading database ... 99559 files and directories currently installed.)
      Preparing to unpack /tmp/jailkit_2.19-1_amd64.deb ...
      Unpacking jailkit (2.19-1) ...
      Setting up jailkit (2.19-1) ...
      Processing triggers for ureadahead (0.100.0-20) ...
      Processing triggers for systemd (237-3ubuntu10.12) ...
      Processing triggers for man-db (2.8.3-2ubuntu0.1) ...

      Installing fail2ban

      sudo apt -y install fail2ban

      sudo nano /etc/fail2ban/fail.local

      Add following contents into file:

      [pure-ftpd]
      enabled  = true
      port     = ftp
      filter   = pure-ftpd
      logpath  = /var/log/syslog
      maxretry = 3

      [dovecot]
      enabled = true
      filter = dovecot
      action = iptables-multiport[name=dovecot-pop3imap, port="pop3,pop3s,imap,imaps", protocol=tcp]
      logpath = /var/log/mail.log
      maxretry = 5

      [postfix]
      enabled  = true
      port     = smtp
      filter   = postfix
      logpath  = /var/log/mail.log
      maxretry = 3

      Save and close.


      Installing Roundcube Webmail

      sudo apt -y install roundcube roundcube-core roundcube-mysql roundcube-plugins javascript-common libjs-jquery-mousewheel php-net-sieve tinymce

      Press Yes.


      Type your desired password here and press Ok.


      Type confirm password and press Ok.


      sudo nano /etc/apache2/conf-enabled/roundcube.conf

      Change this:

      # Those aliases do not work properly with several hosts on your apache server
      # Uncomment them to use it or adapt them to your configuration
      #    Alias /roundcube /var/lib/roundcube

      <Directory /var/lib/roundcube/>
        Options +FollowSymLinks
        # This is needed to parse /var/lib/roundcube/.htaccess. See its
        # content before setting AllowOverride to None.
        AllowOverride All
        <IfVersion >= 2.3>
          Require all granted
        </IfVersion>
        <IfVersion < 2.3>
          Order allow,deny
          Allow from all
        </IfVersion>
      </Directory>

      # Protecting basic directories:
      <Directory /var/lib/roundcube/config>
              Options -FollowSymLinks
              AllowOverride None
      </Directory>

      <Directory /var/lib/roundcube/temp>
              Options -FollowSymLinks
              AllowOverride None
              <IfVersion >= 2.3>
                Require all denied
              </IfVersion>
              <IfVersion < 2.3>
                Order allow,deny
                Deny from all
              </IfVersion>
      </Directory>

      <Directory /var/lib/roundcube/logs>
              Options -FollowSymLinks
              AllowOverride None
              <IfVersion >= 2.3>
                Require all denied
              </IfVersion>
              <IfVersion < 2.3>
                Order allow,deny
                Deny from all
              </IfVersion>
      </Directory>

      to this:

      # Those aliases do not work properly with several hosts on your apache server
      # Uncomment them to use it or adapt them to your configuration
          Alias /roundcube /var/lib/roundcube
          Alias /webmail /var/lib/roundcube

      <Directory /var/lib/roundcube/>
        AddType application/x-httpd-php .php
        Options +FollowSymLinks
        # This is needed to parse /var/lib/roundcube/.htaccess. See its
        # content before setting AllowOverride to None.
        AllowOverride All
        <IfVersion >= 2.3>
          Require all granted
        </IfVersion>
        <IfVersion < 2.3>
          Order allow,deny
          Allow from all
        </IfVersion>
      </Directory>

      # Protecting basic directories:
      <Directory /var/lib/roundcube/config>
              Options -FollowSymLinks
              AllowOverride None
      </Directory>

      <Directory /var/lib/roundcube/temp>
              Options -FollowSymLinks
              AllowOverride None
              <IfVersion >= 2.3>
                Require all denied
              </IfVersion>
              <IfVersion < 2.3>
                Order allow,deny
                Deny from all
              </IfVersion>
      </Directory>

      <Directory /var/lib/roundcube/logs>
              Options -FollowSymLinks
              AllowOverride None
              <IfVersion >= 2.3>
                Require all denied
              </IfVersion>
              <IfVersion < 2.3>
                Order allow,deny
                Deny from all
              </IfVersion>
      </Directory>

      Save and close.


      Restart apache service to take changes into effect.

      sudo systemctl restart apache2

      sudo nano /etc/roundcube/config.inc.php

      change this:

      $config['default_host'] = '';

      to this:

      $config['default_host'] = 'localhost';

      Save and close.

      Installing ISPConfig 3.1

      sudo git clone https://git.ispconfig.org/ispconfig/ispconfig3.git /opt/ispconfig3

      Output:
      Cloning into '/opt/ispconfig3'...
      remote: Enumerating objects: 114299, done.
      remote: Counting objects: 100% (114299/114299), done.
      remote: Compressing objects: 100% (24666/24666), done.
      remote: Total 114299 (delta 89363), reused 113481 (delta 88785)
      Receiving objects: 100% (114299/114299), 28.88 MiB | 691.00 KiB/s, done.
      Resolving deltas: 100% (89363/89363), done.


      sudo php -q /opt/ispconfig3/install/install.php


      --------------------------------------------------------------------------------

       _____ ___________   _____              __ _         ____
      |_   _/  ___| ___ \ /  __ \            / _(_)       /__  \
        | | \ `--.| |_/ / | /  \/ ___  _ __ | |_ _  __ _    _/ /
        | |  `--. \  __/  | |    / _ \| '_ \|  _| |/ _` |  |_ |
       _| |_/\__/ / |     | \__/\ (_) | | | | | | | (_| | ___\ \
       \___/\____/\_|      \____/\___/|_| |_|_| |_|\__, | \____/
                                                    __/ |
                                                   |___/
      --------------------------------------------------------------------------------


      >> Initial configuration

      Operating System: Ubuntu 18.04.2 LTS (Bionic Beaver)

          Following will be a few questions for primary configuration so be careful.
          Default values are in [brackets] and can be accepted with <ENTER>.
          Tap in "quit" (without the quotes) to stop the installer.


      Select language (en,de) [en]:ENTER

      Installation mode (standard,expert) [standard]:ENTER

      Full qualified hostname (FQDN) of the server, eg server1.domain.tld  [labserver.layloyar.com]:ENTER

      MySQL server hostname [localhost]:ENTER

      MySQL server port [3306]:ENTER

      MySQL root username [root]:ENTER

      MySQL root password []: TypePasswordHere

      MySQL database to create [dbispconfig]:ENTER

      MySQL charset [utf8]:ENTER

      Configuring Postgrey
      Configuring Postfix
      Generating a 4096 bit RSA private key
      .......................++
      ............................................................................++
      writing new private key to 'smtpd.key'
      -----
      You are about to be asked to enter information that will be incorporated
      into your certificate request.
      What you are about to enter is what is called a Distinguished Name or a DN.
      There are quite a few fields but you can leave some blank
      For some fields there will be a default value,
      If you enter '.', the field will be left blank.
      -----
      Country Name (2 letter code) [AU]:PK
      State or Province Name (full name) [Some-State]:Sindh
      Locality Name (eg, city) []:Karachi
      Organization Name (eg, company) [Internet Widgits Pty Ltd]:Laying
      Organizational Unit Name (eg, section) []:Services
      Common Name (e.g. server FQDN or YOUR name) []:labserver.layloyar.com
      Email Address []:support@layloyar.com

      postconf: warning: unmatched request: "maildrop.unix"
      Configuring Dovecot
      Configuring Spamassassin
      Configuring Amavisd
      [INFO] service Rspamd not detected
      Configuring Getmail
      Configuring Jailkit
      Configuring Pureftpd
      Configuring BIND
      Configuring Apache
      Configuring vlogger
      Configuring Ubuntu Firewall
      Configuring Fail2ban
      Configuring Apps vhost
      Installing ISPConfig
      ISPConfig Port [8080]:ENTER

      Admin password [a2f2180d]: TypePasswordHere

      Re-enter admin password []: TypePasswordHere

      Do you want a secure (SSL) connection to the ISPConfig web interface (y,n) [y]:ENTER

      Generating RSA private key, 4096 bit long modulus
      ..........++
      ................................++
      e is 65537 (0x010001)
      You are about to be asked to enter information that will be incorporated
      into your certificate request.
      What you are about to enter is what is called a Distinguished Name or a DN.
      There are quite a few fields but you can leave some blank
      For some fields there will be a default value,
      If you enter '.', the field will be left blank.
      -----
      Country Name (2 letter code) [AU]:PK
      State or Province Name (full name) [Some-State]:Sindh
      Locality Name (eg, city) []:Karachi
      Organization Name (eg, company) [Internet Widgits Pty Ltd]:Laying
      Organizational Unit Name (eg, section) []:Services
      Common Name (e.g. server FQDN or YOUR name) []:labserver.layloyar.com
      Email Address []:support@techsupportpk.com

      Please enter the following 'extra' attributes
      to be sent with your certificate request
      A challenge password []:ENTER
      An optional company name []:ENTER
      writing RSA key
      Symlink ISPConfig LE SSL certs to postfix? (y,n) [y]:ENTER

      Symlink ISPConfig LE SSL certs to pureftpd? Creating dhparam file takes some times. (y,n) [y]:ENTER

      Generating DH parameters, 4096 bit long safe prime, generator 2
      This is going to take a long time
      ............................................................................

      Configuring DBServer
      Installing ISPConfig crontab
      no crontab for root
      no crontab for getmail
      Detect IP addresses
      Restarting services ...
      Testing 2 seconds throughput of /dev/random ... 1081519 bytes OK
      Installation completed.

      When you are finished with the above, you can access ISPConfig 3 web control panel by accessing https://labserver.layloyar.com:8080 or https://ip_address:8080 and you will be presented following login screen.

      Since we are using self signed certificate therefore we have to ignore this warnning by clicking Advanced


      Click proceed to (unsafe)


      Enter usernmae admin and password you have created earlier


      This is your ispcong dashboard.


      Wrapping up
      You have successfully deployed your first ispconfig 3 on your Ubuntu 18.04 server.

      How to Install Unison on Ubuntu 18.04

      $
      0
      0

      Unison is an open-source file-synchronization tool for OSX, Linux, Unix, and Windows. It allows two replicas of a collection of files and directories to be stored on different hosts (or different disks on the same host), modified separately, and then brought up to date by propagating the changes in each replica to the other.

      This article will walk you through the steps to install and configure Unison on a pair of servers and use it to back up a directory. We will also configure Unison to use SSH as the secure communication protocol and create a cron job to periodically run Unison.

      To begin this tutorial, you'll need two Ubuntu 18.04 servers, configured using the Basic Server Setup with Ubuntu 18.04 guide.

      This lab guide will use two servers, one primary server that hosts the data that you will back up and another is backup server that will host the backed up data.


      Create Additional Non-Root Users
      First, on the primary server create a new user called primuser and make it sudoer using the following commands:

      $ sudo adduser primuser
      $ sudo usermod -aG sudo primuser

      Finally, switch to the primuser account:

      $ su - primuser

      Now on backup server create a new user called bkpuser and make it sudoer using the following commands:

      $ sudo adduser bkpuser
      $ sudo usermod -aG sudo bkpuser

      Finally, switch to the bkpuser account:

      $ su - bkpuser


      Install Unison on Both Servers
      We will install unison on both servers using the following commands:

      $ sudo apt-get update
      $ sudo apt-get install unison


      Configure SSH
      Type the following command from the primuser home directory on the primary server to generate a SSH key pair:

      $ ssh-keygen -t rsa -b 4096 -f .ssh/primuser

      The above command creates the public and private SSH keys in the following two files:

      .ssh/primuser
      .ssh/primuser.pub

      The .ssh/primuser file contain the private SSH key and .ssh/primuser.pub contain public key. You need to copy the contents of the public key file to the backup server. The easiest way to display the contents of the public key file for copying is to use the cat command to print the contents to the terminal:

      $ cat .ssh/primuser.pub

      On the backup server in the bkpuser home directory, open the .ssh/authorized_keys file with a text editor. Here, you will use nano:

      $ nano .ssh/authorized_keys

      Paste the public key into the editor, then save and exit.

      You can now test that the SSH configuration is working by logging into the backup server from the primary server via SSH.

      $ ssh -i .ssh/primuser bkpuser@backup_server_ip

      Accept the fingerprint by pressing Y and then ENTER, and log in and out. You just needed to confirm that SSH works between the servers and save the backup server's SSH fingerprint.

      Next, check that Unison will connect by running the following command from the primuser home directory on the primary server:

      $ ssh -i .ssh/primuser bkpuser@backup_server.example.com unison -version

      If everything is working you will see a response showing the version of Unison on the backup server:

      Output
      unison version 2.48.3

         
      Configure Unison
      We need to create the configuration directory under the primauser's home directory on the primary server:

      $ mkdir .unison

      Open a new file with the name default.prf in a text editor in the .unison directory. This file contains the Unison configuration. Open the file with the following command:

      $ nano .unison/default.prf

      Then enter the following:

      force = /home/primuser/data
      sshargs = -i /home/primuser/.ssh/primuser


      Back Up a Directory with Unison
      Create a directory that will hold the data to back up by running the following command from the primuser home directory:

      $ mkdir backup_data

      Next, use the touch command to create three empty files:

      touch backup_data/file{1..3}

      Now that you have the data directory and some test files to back up, you can run Unison to back up the files to the backup server. The following command will do this:

      $ unison -batch -auto /home/primuser/backup_data ssh://bkpuser@backup_server_ip//home/bkpuser/backup_data

      This command will print a long message the first time that it is run. The message reads as follows:

      Output
      Contacting server...
      Connected [//primary_server_ip//home/primuser/backup_data -> //primary_server_ip//home/bkpuser/backup_data]
      Looking for changes
      Warning: No archive files were found for these roots, whose canonical names are:
              /home/primuser/backup_data
              //backup_server_ip//home/bkpuser/backup_data
      This can happen either
      because this is the first time you have synchronized these roots,
      or because you have upgraded Unison to a new version with a different
      archive format. 

      Update detection may take a while on this run if the replicas are
      large.

      Unison will assume that the 'last synchronized state' of both replicas
      was completely empty.  This means that any files that are different
      will be reported as conflicts, and any files that exist only on one
      replica will be judged as new and propagated to the other replica.
      If the two replicas are identical, then no changes will be reported.

      If you see this message repeatedly, it may be because one of your machines
      is getting its address from DHCP, which is causing its host name to change
      between synchronizations.  See the documentation for the UNISONLOCALHOSTNAME
      environment variable for advice on how to correct this.

      Donations to the Unison project are gratefully accepted:
      http://www.cis.upenn.edu/~bcpierce/unison

        Waiting for changes from server
      Reconciling changes
      dir      ---->            / 
      Propagating updates
      UNISON 2.48.3 started propagating changes at 12:52:43.70 on 10 Apr 2019
      [BGN] Copying  from /home/primuser/backup_data to //backup_server_ip//home/bkpuser/backup_data
      [END] Copying 
      UNISON 2.48.3 finished propagating changes at 12:52:43.71 on 10 Apr 2019
      Saving synchronizer state
      Synchronization complete at 12:52:43  (1 item transferred, 0 skipped, 0 failed)

      After each synchronization run the backup server will have an exact copy of the data directory on the primary server.

      Warning: Any new files or changes in the data directory on the backup server will get lost when you run Unison.


      Create a Unison Cron Job
      Run the crontab command on the primary server with the -e flag to open it in edit mode:

      $ crontab -e

      Once you have the crontab open, add the following command to the first empty line under the existing text:

      * */5 * * * /usr/bin/unison -log -logfile /var/log/unison.log -auto -batch -silent /home/primuser/backup_data ssh://bkpuser@backup_server_ip//home/bkpuser/backup_data

      In this example, Unison is run every 5 hours. You can change this to any frequency that better meets your requirements.

      Once you've made these changes, save and close the file.

      Next, create the log file that Unison will write to on the primary server. The following command will create this file:

      $ sudo touch /var/log/unison.log

      Next, make the primuser the owner of the file.

      $ sudo chown primuser /var/log/unison.log

      You can check the status of the Unison backups by reading the log file at /var/log/unison.log. Unison will only log something when it has either backed up a new or updated file or if it encountered an error.


      Wrapping up
      In this tutorial, you installed and configured the Unison file synchronization software to back up a directory over SSH. You also configured cron to automatically run backups at a specified schedule.

      How To Set Up Local Programming Environment Using Go on Windows 10

      $
      0
      0

      Go is an open source programming language that makes it easy to build simple, reliable, and efficient software. In this article we will guide you through installing Go on your local Windows 10 machine and setting up a programming environment using the powershell.

      Prerequisites
      To begin this tutorial, you will need a Windows 10 machine with administrative access and must have internet connectivity.

      Configure PowerShell
      To open Windows PowerShell, you can right-click on the Start menu icon on the lower left-hand corner of your screen. When the menu pops up, click on Search, and then type PowerShell into the search bar. When you are presented with options, right-click on Windows PowerShell from the Desktop app. For the sake of this guide, select Run as Administrator. When you are prompted with a dialog box that asks "Do you want to allow this app to make changes to your PC?" click on Yes.

      Once you do this, you’ll see a text-based interface that has a string of words that looks like this:


      Switch to system folder by typing the following command:

      cd ~

      You'll then be in a home directory such as PS C:\Users\yourusername

      To continue with the installation process, you must first set up permissions through PowerShell. Configured to run in the most secure mode by default, there are a few levels of permissions that you can set up as an administrator:

      Restricted is the default execution policy. Under this mode you will not be able to run scripts, and PowerShell will work only as an interactive shell.

      AllSigned will enable you to run all scripts and configuration files that are signed by a trusted publisher, meaning that you could potentially open your machine up to the risk of running malicious scripts that happen to be signed by a trusted publisher.

      RemoteSigned will let you run scripts and configuration files downloaded from the internet signed by trusted publishers, again opening your machine up to vulnerabilities if these trusted scripts are actually malicious.

      Unrestricted will run all scripts and configuration files downloaded from the internet as soon as you confirm that you understand that the file was downloaded from the internet. In this case no digital signature is required, so you could be opening your machine up to the risk of running unsigned and potentially malicious scripts downloaded from the internet.

      For the sake of this guide, we will use the RemoteSigned execution policy to set the permissions for the current user. This will allow the PowerShell to accept trusted scripts without making the permissions as broad as they would be with an Unrestricted permission.

      Type the following command in PowerShell:

      Set-ExecutionPolicy -Scope CurrentUser

      PowerShell will then prompt you to provide an execution policy. Type the following to use RemoteSigned:

      RemoteSigned

      Once you press ENTER, you’ll be asked to confirm the change to the execution policy. Type the letter y to allow the changes to take effect. You can confirm that this worked by asking for the current permissions across the machine:

      Get-ExecutionPolicy -List

      You should receive output that looks something like this:

      Output:
              Scope ExecutionPolicy
              ----- ---------------
      MachinePolicy       Undefined
         UserPolicy       Undefined
            Process       Undefined
        CurrentUser    RemoteSigned
       LocalMachine       Undefined

      This confirms that the current user can run trusted scripts downloaded from the internet. You can now move on to downloading the files we will need to set up our Go programming environment.

      Install Package Manager Chocolatey
      A package manager is a collection of software tools that work to automate installation processes. Start by creating a WebClient object called $script that shares internet connection settings with Internet Explorer:

      $script = New-Object Net.WebClient

      Take a look at the available options by piping the $script object with | to the Get-Member class:

      $script | Get-Member

      This will return all members (properties and methods) of this WebClient object:

      Output
      DownloadFileAsync         Method     void DownloadFileAsync(uri address, string fileName), void DownloadFileAsync(ur...
      DownloadFileTaskAsync     Method     System.Threading.Tasks.Task DownloadFileTaskAsync(string address, string fileNa...
      DownloadString            Method     string DownloadString(string address), string DownloadString(uri address) #method we will use
      DownloadStringAsync       Method     void DownloadStringAsync(uri address), void DownloadStringAsync(uri address, Sy...
      DownloadStringTaskAsync   Method     System.Threading.Tasks.Task[string] DownloadStringTaskAsync(string address), Sy…

      Looking over the output, you can identify the DownloadString method used to display the script and signature in the PowerShell window. Use this method to inspect the script:

      $script.DownloadString("https://chocolatey.org/install.ps1")

      After inspecting the script, install Chocolatey by typing the following into PowerShell:

      iwr https://chocolatey.org/install.ps1 -UseBasicParsing | iex

      Allow PowerShell to install Chocolatey. Once it is fully installed, you can begin installing additional tools with the choco command.

      If you need to upgrade Chocolatey at any time in the future, run the following command:

      choco upgrade chocolatey

      With the package manager installed, you can install the rest of what you need for the Go programming environment.

      Install Go
      We will use Chocolatey package manager to install Go on Windows 10 machine:

      choco install -y golang

      PowerShell will now install Go, generating output within PowerShell during that process. Once the install is completed, you should see the following output:

      Output
      Environment Vars (like PATH) have changed. Close/reopen your shell to
      see the changes (or in powershell/cmd.exe just type `refreshenv`).
      The install of golang was successful.
       Software installed as 'msi', install location is likely default.

      Chocolatey installed 1/1 packages.
      See the log for details (C:\ProgramData\chocolatey\logs\chocolatey.log).

      With the installation finished, you’ll now confirm that Go is installed. To see the changes, close and re-open PowerShell as an Administrator, then check the version of Go available on your local machine:

      go version

      You'll receive output similar to the following:

      Output
      go version go1.12.1 windows/amd643.7.0

      Once Go is installed, you can set up a workspace for your development projects.

      Create Go Workspace
      Now that you have Chocolatey, nano, and Go installed, you can create your programming workspace.

      The Go workspace will contain two directories at its root:

      1. src - The directory that contains Go source files. A source file is a file that you write using the Go programming language. Source files are used by the Go compiler to create an executable binary file.

      2. bin - The directory that contains executables built and installed by the Go tools. Executables are binary files that run on your system and execute tasks. These are typically the programs compiled by your source code or another downloaded Go source code.

      Here is what a typical workspace may look like:

      .
      ├── bin
      │   ├── buffalo                                      # command executable
      │   ├── dlv                                          # command executable
      │   └── packr                                        # command executable
      └── src
          └── github.com
              └── techsupportpk
                  └── godo
                      ├── .git                            # Git repository metadata
                      ├── account.go                      # package source
                      ├── account_test.go                 # test source
                      ├── ...
                      ├── timestamp.go
                      ├── timestamp_test.go
                      └── util
                          ├── vm.go
                          └── vm_test.go

      The default directory for the Go workspace as of 1.8 is your user's home directory with a go subdirectory, or $HOME/go. If you are using an earlier version of Go than 1.8, it is still considered best practice to use the $HOME/go location for your workspace

      Type the following command to navigate to the $HOME directory:

      cd $HOME

      Next, create the directory structure for your Go workspace:

      mkdir go/bin, go/src

      This will ensure the following directory structure is now in place:

      └── $HOME
          └── go
              ├── bin
              └── src

      Since you used Chocolatey for the installation, this environment variable should already be set. You can verify this with the following command:

      $env:GOPATH

      You should see the following output, with your username in place of username:

      Output
      C:\Users\username\go

      When Go compiles and installs tools, it will put them in the $GOPATH/bin directory. For convenience, it's common to add the workspace's bin subdirectory to your $PATH. You can do this using the setx command in PowerShell:

      setx PATH "$($env:path);$GOPATH\bin"

      This will now allow you to run any programs you compile or download via the Go tools anywhere on your system.

      Now that you have the root of the workspace created and your $GOPATH environment variable set, you will create your future projects with the following directory structure. This example assumes you are using github.com as your repository:

      $GOPATH/src/github.com/username/project

      Build a Simple Program
      From your home directory, open up a command-line text editor, such as notepad, and create a new file:

      notepad test.go

      Once the text file opens up in notepad, type out your program:

      package main

      import "fmt"

      func main() {
          fmt.Println("Hello, World!")
      }

      Exit notepad and when prompted to save the file, save it.

      This code will use the fmt package and call the Println function with Hello, World! as the argument. This will cause the phrase Hello, World! to print out to the terminal when the program is run.

      Return to your powershell, run the program:

      go run test.go

      The test.go program that you just created should cause PowerShell to produce the following output:

      Output
      Hello, World!

      In this step, you used a basic program to verify that your Go workspace is properly configured.

      Wrapping up
      At this point you have a Go programming workspace set up on your local Windows 10 machine and now you can begin coding projects.

      How To Dual Boot Ubuntu 19.04 Alongside Windows 10

      $
      0
      0
      The Ubuntu 19.04 desktop image allows you to try Ubuntu without changing your computer at all, and at your option to install it permanently later. This type of image is what most people will want to use. You will need at least 1024MiB of RAM to install from this image.


      Download your copy of Ubuntu 19.04 desktop image from here and burn it into dvd or make usb bootable.

      In this step by step guide, we will show you how to install Ubuntu 19.04 desktop alongside Windows 10.


      Installing Windows 10 
      First you need to install Windows 10 on your machine if you don't have already.


      Install Ubuntu 19.04 Alongside Windows
      When you are done installing Windows 10, start your machine with Ubuntu 19.04 bootable media and click *Install Ubuntu  to begin with.


      Choose your preferred language and click Continue


      Choose your keyboard layout and click Continue


      Select Normal installation and click Continue


      Select Install Ubuntu alongside Windows Boot Manager and click Install Now


      Click Continue


      Select your location and click Continue


      Set your login credentials and click Continue


      Installation process started.


      Almost done


      Remove installation media and press ENTER


      Let your machine boot from *Ubuntu


      Login with your username and password and press Sign In


      Your Ubuntu 19.04 desktop is ready to explore.


      For Windows, Reboot your machine and choose *Windows Boot Manager to boot with Windows 10


      You can switch between Windows and Ubuntu by rebooting your machine and choosing your desired operating system from the boot prompt.


      Wrapping up
      Congratulation! You have successfully installed Ubuntu 19.04 desktop alongside Windows 10. These installation steps are also valid if you are using Windows 7 or 8.

      Initial Server Setup with Ubuntu 19.04

      $
      0
      0
      The server install image allows you to install Ubuntu 19.04 permanently on a computer for use as a server. It will not install a graphical user interface. This guide will take you through the steps to install your first Ubuntu 19.04 server on a (physical or virtual) machine.


      You can download Ubuntu 19.04 server image from here and make usb bootable or burn it into dvd then boot your machine with bootable media to begin the installation.

      Choose your appropriate language and press ENTER


      Select your Keyboard Layout and press Done 


      Press ENTER to Install Ubuntu


      Choose your appropriate network connection and protocol then press Done


      Press Done


      Press Done


      Choose your appropriate disk layout and press ENTER to continue.


      If you have more than one disk then choose carefully on which disk you want to install Ubuntu 19.04

      Press ENTER


      When you are done with partitioning, press Done to continue
       

      Press Continue to format the disk


      Provide your credentials and press Done


      If you want to manage your Ubuntu server remotely then choose Install OpenSSH server andthen press Done.


      Leave it default and press Done


      Installation started and will take several minutes to complete.


      Let it install updates


      Installation completed, press Reboot


      Remove the installation media and press ENTER


      Login with your provided credentials during installation and start exploring your first Ubuntu 19.04 server.


      That's all.

      How To Install LAMP Stack on Ubuntu 19.04

      $
      0
      0
      A LAMP Stack is a group of open-source software that is typically installed together to enable a server to host dynamic websites and web apps. This term is actually an acronym which represents the Linux operating system, with the Apache web server. The site data is stored in a MySQL database, and dynamic content is processed by PHP.


      In this tutorial, we will show you how to install a LAMP stack on an Ubuntu 19.04 server.

      Prerequisites
      In order to complete this guide, you will need to have an Ubuntu 19.04 server with a non-root sudo-enabled user account and a basic firewall.

      Installing Apache
      The Apache web server is among the most popular web servers in the world. It's well-documented and has been in wide use for much of the history of the web, which makes it a great default choice for hosting a website.

      sudo apt update
      sudo apt install -y apache2

      It will ask you for your regular user's password to verify your intentions. Once you've entered your password, apt will tell you which packages it plans to install and how much extra disk space they'll take up.

      Configure Firewall to Allow Web Traffic
      Make sure that your firewall allows HTTP and HTTPS traffic. You can check that UFW has an application profile for Apache like so:

      sudo ufw app list

      Output
      Available applications:
        Apache
        Apache Full
        Apache Secure
        OpenSSH


      Allow incoming SSH, HTTP and HTTPS traffic using the following commands:

      sudo ufw allow in 'Apache Full'
      sudo ufw allow in 'OpenSSH'


      Installing MySQL
      MySQL is a database management system. Basically, it will organize and provide access to databases where your website or app can store information.

      Again, use apt to acquire and install this software:

      sudo apt install -y mysql-server

      When the installation is complete, run a simple security script that comes pre-installed with MySQL which will remove some dangerous defaults and lock down access to your database system. Start the interactive script by running:

      sudo mysql_secure_installation

      This will ask if you want to configure the VALIDATE PASSWORD PLUGIN.

      Answer Y for yes, or anything else to continue without enabling.

      Securing the MySQL server deployment.

      Connecting to MySQL using a blank password.

      VALIDATE PASSWORD PLUGIN can be used to test passwords
      and improve security. It checks the strength of password
      and allows the users to set only those passwords which are
      secure enough. Would you like to setup VALIDATE PASSWORD plugin?

      Press y|Y for Yes, any other key for No: y

      There are three levels of password validation policy:

      LOW    Length >= 8
      MEDIUM Length >= 8, numeric, mixed case, and special characters
      STRONG Length >= 8, numeric, mixed case, special characters and dictionary                  file

      Please enter 0 = LOW, 1 = MEDIUM and 2 = STRONG: 2
      Please set the password for root here.

      New password:

      Re-enter new password:

      Estimated strength of the password: 100
      Do you wish to continue with the password provided?(Press y|Y for Yes, any other key for No) : y
      By default, a MySQL installation has an anonymous user,
      allowing anyone to log into MySQL without having to have
      a user account created for them. This is intended only for
      testing, and to make the installation go a bit smoother.
      You should remove them before moving into a production
      environment.

      Remove anonymous users? (Press y|Y for Yes, any other key for No) : y
      Success.


      Normally, root should only be allowed to connect from
      'localhost'. This ensures that someone cannot guess at
      the root password from the network.

      Disallow root login remotely? (Press y|Y for Yes, any other key for No) : y
      Success.

      By default, MySQL comes with a database named 'test' that
      anyone can access. This is also intended only for testing,
      and should be removed before moving into a production
      environment.


      Remove test database and access to it? (Press y|Y for Yes, any other key for No) : y
       - Dropping test database...
      Success.

       - Removing privileges on test database...
      Success.

      Reloading the privilege tables will ensure that all changes
      made so far will take effect immediately.

      Reload privilege tables now? (Press y|Y for Yes, any other key for No) : y
      Success.

      All done!


      If you prefer to use a password when connecting to MySQL as root, you will need to switch its authentication method from auth_socket to mysql_native_password. To do this, open up the MySQL prompt from your terminal:

      sudo mysql

      ALTER USER 'root'@'localhost' INDENTIFIED WITH mysql_native_password BY 'Password';

      FLUSH PRIVILEGES;

      exit


      Installing PHP
      PHP is the component of your setup that will process code to display dynamic content. It can run scripts, connect to your MySQL databases to get information, and hand the processed content over to your web server to display.

      sudo apt install -y php libapache2-mod-php php-mysql

      This should install PHP without any problems.

      In most cases, you will want to modify the way that Apache serves files when a directory is requested. Currently, if a user requests a directory from the server, Apache will first look for a file called index.html. We want to tell the web server to prefer PHP files over others, so make Apache look for an index.php file first.

      To do this, type this command to open the dir.conf file in a text editor with root privileges:

      sudo nano /etc/apache2/mods-enabled/dir.conf

      It will look like this:

      <IfModule mod_dir.c>
          DirectoryIndex index.html index.cgi index.pl index.php index.xhtml index.htm
      </IfModule>

      Move the PHP index file (highlighted above) to the first position after the DirectoryIndex specification, like this:

      <IfModule mod_dir.c>
          DirectoryIndex index.php index.html index.cgi index.pl index.xhtml index.htm
      </IfModule>

      When you are finished, save and close the file by pressing CTRL+X. Confirm the save by typing Y and then hit ENTER to verify the file save location.

      After this, restart the Apache web server in order for your changes to be recognized. Do this by typing this:

      sudo systemctl restart apache2
      sudo systemctl status apache2

      apache2.service - The Apache HTTP Server
         Loaded: loaded (/lib/systemd/system/apache2.service; enabled; vendor preset: enabled)
         Active: active (running) since Tue 2019-04-16 06:21:14 UTC; 9s ago
           Docs: https://httpd.apache.org/docs/2.4/
        Process: 11855 ExecStart=/usr/sbin/apachectl start (code=exited, status=0/SUCCESS)
       Main PID: 11869 (apache2)
          Tasks: 6 (limit: 2277)
         Memory: 11.1M
         CGroup: /system.slice/apache2.service
                 ├─11869 /usr/sbin/apache2 -k start
                 ├─11870 /usr/sbin/apache2 -k start
                 ├─11871 /usr/sbin/apache2 -k start
                 ├─11872 /usr/sbin/apache2 -k start
                 ├─11873 /usr/sbin/apache2 -k start
                 └─11874 /usr/sbin/apache2 -k start

      Apr 16 06:21:14 ubuntu1904 systemd[1]: Starting The Apache HTTP Server...
      Apr 16 06:21:14 ubuntu1904 apachectl[11855]: AH00558: apache2: Could not reliably determine the ser
      Apr 16 06:21:14 ubuntu1904 systemd[1]: Started The Apache HTTP Server.

      Press Q to exit this status output.


      Testing PHP Processing
      In order to test that your system is configured properly for PHP, create a very basic PHP script called info.php. In order for Apache to find this file and serve it correctly, it must be saved to a very specific directory, which is called the "web root".

      In Ubuntu 19.04, this directory is located at /var/www/html/. Create the file at that location by running:

      sudo nano /var/www/html/info.php

      This will open a blank file. Add the following text, which is valid PHP code, inside the file:

      <?php
      phpinfo();
      ?>

      When you are finished, save and close the file.

      Now you can test whether your web server is able to correctly display content generated by this PHP script. To try this out, visit this page in your web browser. You'll need your server's public IP address again.

      The address you will want to visit is:

      http://your_server_ip/info.php

      The page that you come to should look something like this:


      This page provides some basic information about your server from the perspective of PHP. It is useful for debugging and to ensure that your settings are being applied correctly.

      If you can see this page in your browser, then your PHP is working as expected.

      You probably want to remove this file after this test because it could actually give information about your server to unauthorized users. To do this, run the following command:

      sudo rm /var/www/html/info.php

      You can always recreate this page if you need to access the information again later.


      Wrapping up
      Now that you have a LAMP stack installed, you have many choices for what to do next. Basically, you've installed a platform that will allow you to install most kinds of websites and web software on your Ubuntu 19.04 server.

      Secure Your Websites with Basic Authentication in Apache on Ubuntu 19.04

      $
      0
      0

      This tutorial will show you how to secure a directory serving web contents from unauthorized access using basic authentication in Apache on Ubuntu 19.04.

      Prerequisite
      To follow this tutorial, you will need one Ubuntu 19.04 (physical or virtual) machine with sudo non-root user privileges.

      Installing Apache Web Server
      You can install apache web server package using the following command:

      sudo apt update
      sudo apt -y install apache2

      When installation completed, apache service automatically starts, you can verify whether apache service is started:

      sudo systemctl status apache2


      Installing Basic Authentication
      In this step, you need to install basic authentication package to protect apache web server contents.

      sudo apt -y install apache2-utils pwauth libapache2-mod-authnz-external

      Now we need to create a configuration file under /etc/apache2/sites-available directory similar to below:

      sudo tee /etc/apache2/sites-available/protected.conf<<EOF

      <Directory /var/www/html/protected>

          AuthType Basic
          AuthName "Basic Authentication"
          AuthUserFile /etc/apache2/.htpasswd
          require valid-user
      </Directory>
      EOF

      Next, add users to the Basic Authentication file.

      sudo htpasswd -c /etc/apache2/.htpasswd testuser1

      Output
      New password:
      Re-type new password:
      Adding password for user testuser1

      The “-c” switch in above command is used to create a file storing users credentials during initial setup. Now you can add more users like below:

      sudo htpasswd /etc/apache2/.htpasswd testuser2

      Output
      New password:
      Re-type new password:
      Adding password for user testuser2

      You can see .htpasswd file information storing users credentials using the following command:

      sudo cat /etc/apache2/.htpasswd

      Output
      testuser1:$apr1$nIxlKLgc$xGTv.J1x5wtbJqAfFPt6o1
      testuser2:$apr1$F4OnyIyv$WImqRIR5BBopTMjqGXs/c1

      Activate Protected Web Site
      In the earlier step, we created protected.conf file to host our test website and now we need to activate it by executing the following command:

      sudo a2ensite protected.conf

      Output
      Enabling site protected.
      To activate the new configuration, you need to run:
        systemctl reload apache2

      Next, create protected directory under /var/www/html path like below:

      sudo mkdir -p /var/www/html/protected

      At this point, we need to create index.html page with following contents into /var/www/html/protected directory for testing:

      sudo tee /var/www/html/protected/index.html<<EOF

      <html>
      <body>
      <div style="width: 100%; font-size: 50px; font-weight: bold; text-align: center;">
      This is my protected web page using Basic Authentication in Apache
      </div>
      </body>
      </html>
      EOF

      Restart Apache service to take changes into effect.

      sudo systemctl restart apache2

      Testing Protected Web Page
      Open up your favorite web browser and access http://your_server_hostname/protected or http://your_server_ip/protected and you will be presented the following login page.


      Once authenticated, you will see the following index.html page contents confirming that our basic authentication is successful.


      Wrapping up
      You have successfully implemented basic authentication to protect your web contents hosted on Ubuntu 19.04 with Apache web server.

      How To Implement a Help Desk System using OTRS on Ubuntu 18.04

      $
      0
      0
      Open source ticket request system also known a help desk and IT service management system. The OTRS is written in Perl, supports a variety of databases including (MySQL, PostgreSQL, Oracle etc.), and can integrate with LDAP/Active directory for central authentication.

      This guide will take you through the steps to install OTRS Community Edition on an Ubuntu 18.04 server and set up a simple help desk system, which will help you to receive and process requests from your customers using both the web interface and email.

      Prerequisites
      To follow this guide, you will need one Ubuntu 18.04 server having a non-root user with sudo privileges. You will also need to create an A record with yourdomain.com and www.yourdomain.com pointing to your server's IP address in your private or public DNS.

      Installing Apache
      First you need to install Apache using Ubuntu's package manager like below:

      sudo apt update
      sudo apt -y install apache2

      Installing MySQL
      Now that you have your web server up and running, it is time to install MySQL. Type following apt command to install:

      sudo apt -y install mysql-server

      When the installation is complete, run a simple security script that comes pre-installed with MySQL which will remove some dangerous defaults and lock down access to your database system. Start the interactive script by running:

      sudo mysql_secure_installation

      This will ask if you want to configure the VALIDATE PASSWORD PLUGIN.

      Answer Y for yes, or anything else to continue without enabling.

      VALIDATE PASSWORD PLUGIN can be used to test passwords
      and improve security. It checks the strength of password
      and allows the users to set only those passwords which are
      secure enough. Would you like to setup VALIDATE PASSWORD plugin?

      Press y|Y for Yes, any other key for No:

      If you answer “yes”, you'll be asked to select a level of password validation. Keep in mind that if you enter 2 for the strongest level, you will receive errors when attempting to set any password which does not contain numbers, upper and lowercase letters, and special characters, or which is based on common dictionary words.

      There are three levels of password validation policy:

      LOW    Length >= 8
      MEDIUM Length >= 8, numeric, mixed case, and special characters
      STRONG Length >= 8, numeric, mixed case, special characters and dictionary                  file

      Please enter 0 = LOW, 1 = MEDIUM and 2 = STRONG: 1

      Regardless of whether you chose to set up the VALIDATE PASSWORD PLUGIN, your server will next ask you to select and confirm a password for the MySQL root user. This is an administrative account in MySQL that has increased privileges.

      If you enabled password validation, you'll be shown the password strength for the root password you just entered and your server will ask if you want to change that password. If you are happy with your current password, enter N for "no" at the prompt:

      Using existing password for root.

      Estimated strength of the password: 100
      Change the password for root ? ((Press y|Y for Yes, any other key for No) : n

      For the rest of the questions, press Y and hit the ENTER key at each prompt. This will remove some anonymous users and the test database, disable remote root logins, and load these new rules so that MySQL immediately respects the changes you have made.

      If you prefer to use a password when connecting to MySQL as root, you will need to switch its authentication method from auth_socket to mysql_native_password. To do this, open up the MySQL prompt from your terminal:

      sudo mysql

      Next, check which authentication method each of your MySQL user accounts use with the following command:

      SELECT user,authentication_string,plugin,host FROM mysql.user;

      Output
      +------------------+-------------------------------------------+-----------------------+-----------+
      | user             | authentication_string                     | plugin                | host      |
      +------------------+-------------------------------------------+-----------------------+-----------+
      | root             |                                           | auth_socket           | localhost |
      | mysql.session    | *THISISNOTAVALIDPASSWORDTHATCANBEUSEDHERE | mysql_native_password | localhost |
      | mysql.sys        | *THISISNOTAVALIDPASSWORDTHATCANBEUSEDHERE | mysql_native_password | localhost |
      | debian-sys-maint | *CC744277A401A7D25BE1CA89AFF17BF607F876FF | mysql_native_password | localhost |
      +------------------+-------------------------------------------+-----------------------+-----------+
      4 rows in set (0.00 sec)

      In above output, you can see that the root user does in fact authenticate using the auth_socket plugin. To configure the root account to authenticate with a password, run the following ALTER USER command. Be sure to change password to a strong password of your choosing:

      ALTER USER 'root'@'localhost' IDENTIFIED WITH mysql_native_password BY 'your_password';

      Then, run FLUSH PRIVILEGES which tells the server to reload the grant tables and put your new changes into effect:

      FLUSH PRIVILEGES;

      Check the authentication methods employed by each of your users again to confirm that root no longer authenticates using the auth_socket plugin:

      SELECT user,authentication_string,plugin,host FROM mysql.user;

      Output
      +------------------+-------------------------------------------+-----------------------+-----------+
      | user             | authentication_string                     | plugin                | host      |
      +------------------+-------------------------------------------+-----------------------+-----------+
      | root             | *3636DACC8616D997782ADD0839F92C1571D6D78F | mysql_native_password | localhost |
      | mysql.session    | *THISISNOTAVALIDPASSWORDTHATCANBEUSEDHERE | mysql_native_password | localhost |
      | mysql.sys        | *THISISNOTAVALIDPASSWORDTHATCANBEUSEDHERE | mysql_native_password | localhost |
      | debian-sys-maint | *CC744277A401A7D25BE1CA89AFF17BF607F876FF | mysql_native_password | localhost |
      +------------------+-------------------------------------------+-----------------------+-----------+
      4 rows in set (0.00 sec)

      You can see in above output that the root MySQL user now authenticates using a password. Once you confirm this on your own server, you can exit the MySQL shell:

      exit

      Installing the OTRS
      In this step, you will install OTRS and a set of Perl modules that will increase the system's functionality. OTRS is available in Ubuntu's package manager, but the official documentation suggests installing OTRS from source.

      Download the source archive with the wget command. For this guide, we will download version 6.0.19; you can find the latest available version on the OTRS download page.

      cd ~
      wget http://ftp.otrs.org/pub/otrs/otrs-6.0.19.tar.gz

      tar xzf otrs-6.0.19.tar.gz

      sudo mv otrs-6.0.19 /opt/otrs

      Installing Perl Modules
      Because OTRS is written in Perl, it uses a number of Perl modules. Check for missing modules by using the CheckModules.pl script included with OTRS:

      sudo /opt/otrs/bin/otrs.CheckModules.pl

      You'll see output like below, listing which modules you already have downloaded and which you are missing:

      Output
        o Apache::DBI......................FAILED! Not all prerequisites for this module correctly installed.
        o Apache2::Reload..................ok (v0.13)
      . . .
        o XML::LibXML......................Not installed! Use: 'apt-get install -y libxml-libxml-perl' (required - Required for XML processing.)
        o XML::LibXSLT.....................Not installed! Use: 'apt-get install -y libxml-libxslt-perl' (optional - Required for Generic Interface XSLT mapping module.)
        o XML::Parser......................Not installed! Use: 'apt-get install -y libxml-parser-perl' (optional - Recommended for XML processing.)
        o YAML::XS.........................Not installed! Use: 'apt-get install -y libyaml-libyaml-perl' (required - Required for fast YAML processing.)

      Some modules are only needed for optional functionality, such as communication with other databases or handling mail with specific character sets; others are necessary for the program to work.

      To install the missing modules, type or copy the following command and paste it on your terminal to install:

      sudo apt install libapache2-mod-perl2 libdbd-mysql-perl libtimedate-perl libnet-dns-perl libnet-ldap-perl libio-socket-ssl-perl libpdf-api2-perl libsoap-lite-perl libtext-csv-xs-perl libjson-xs-perl libapache-dbi-perl libxml-libxml-perl libxml-libxslt-perl libyaml-perl libarchive-zip-perl libcrypt-eksblowfish-perl libencode-hanextra-perl libmail-imapclient-perl libtemplate-perl libdatetime-perl

      Whenever you're done installing these modules, rerun the script to make sure that all the required modules have been installed:

      sudo /opt/otrs/bin/otrs.CheckModules.pl

      Your output will now show all the installed modules:

      Output
      o Text::CSV_XS.....................ok (v1.34)
      o Time::HiRes......................ok (v1.9741)
      o XML::LibXML......................ok (v2.0128)
      o XML::LibXSLT.....................ok (v1.95)
      o XML::Parser......................ok (v2.44)
      o YAML::XS.........................ok (v0.69)

      Now that you have OTRS and its dependencies installed on your server, you can configure OTRS to use Apache and MySQL.

      Configuring OTRS
      In this section, we will create a system user for OTRS, and then configure Apache and MySQL server to work with OTRS.

      Create a user named otrs to run OTRS functions with the useradd command:

      sudo useradd -d /opt/otrs -c 'OTRS user' otrs

      Next, add otrs to the webserver group:

      sudo usermod -G www-data otrs

      OTRS comes with a default config file /opt/otrs/Kernel/Config.pm.dist. Activate this by copying it without the .dist filename extension:

      sudo cp /opt/otrs/Kernel/Config.pm.dist /opt/otrs/Kernel/Config.pm

      Now, navigate to the /opt/otrs directory:

      cd /opt/otrs

      From here, run the otrs.SetPermissions.pl script. It will detect the correct user and group settings and set the file and directory permissions for OTRS.

      sudo bin/otrs.SetPermissions.pl

      This will yield the following output:

      Output
      Setting permissions on /opt/otrs

      The correct permissions are now set.

      Next, activate the apache2 configuration file and make sure it is loaded after all other configurations. To do this, make a symbolic link with the zzz_ prefix:

      sudo ln -s /opt/otrs/scripts/apache2-httpd.include.conf /etc/apache2/sites-enabled/zzz_otrs.conf

      OTRS requires a few Apache modules to be active for optimal operation. You can activate them via the tool a2enmod. Although some of these have already been enabled, it is a good idea to check them all:

      sudo a2enmod perl
      sudo a2enmod headers
      sudo a2enmod deflate
      sudo a2enmod filter

      These modules enable Apache to work with Perl, control HTTP headers, compress server output, and configure output content filters.

      Restart your web server to apply new configurations:

      sudo systemctl restart apache2

      Before you go to the next step and run the web installer, change some of the MySQL configuration settings. Open the MySQL configuration file in your preferred text editor:

      sudo nano /etc/mysql/mysql.conf.d/mysqld.cnf

      Look for the following options under the [mysqld] section. For max_allowed_packet and query_cache_size, change the values to 64M and 32M respectively, as highlighted in the following code block:

      max_allowed_packet      = 64M
      thread_stack            = 192K
      thread_cache_size       = 8
      # This replaces the startup script and checks MyISAM tables if needed
      # the first time they are touched
      myisam-recover-options  = BACKUP
      #max_connections        = 100
      #table_open_cache       = 64
      #thread_concurrency     = 10
      #
      # * Query Cache Configuration
      #
      query_cache_limit       = 1M
      query_cache_size        = 32M

      This adjusts the maximum allowed packet size and the query cache size so that MySQL can interface with OTRS.

      Then add the following highlighted additional options under the [mysqld] section, at the end of the file:

      # ssl-cert=/etc/mysql/server-cert.pem
      # ssl-key=/etc/mysql/server-ikey.pem
      innodb_log_file_size = 256M
      collation-server = utf8_unicode_ci
      init-connect='SET NAMES utf8'
      character-set-server = utf8

      This sets the database logfile size, determines the character set and collation, and creates an init_connect string to set the character set upon starting the MySQL server.

      Save and close mysqld.cnf by pressing CTRL + X, followed by Y and then ENTER. Then, restart your MySQL server to apply the new parameters:

      sudo systemctl restart mysql.service

      Now that you have created the otrs user and configured Apache and MySQL to work with OTRS, you are ready to use the web installer.

      Configuring Database using the Web Installer
      In this step, you will configure OTRS's database settings in a web browser and start the OTRS daemon process on the command line.

      Open https://yourdomain.com/otrs/installer.pl or https://your_server_ip/otrs/installer.pl in your favorite web browser, replacing yourdomain.com or your_server_ip with your domain name or ip address of the server. You will find a welcome screen with the message Welcome to OTRS 6 and information about the OTRS offices.


      Click Next.

      The next page will have the license for OTRS, which is the GNU General Public License common to open source programs. Accept by clicking Accept license and continue.

      On the next page, you will be prompted to select a database type. The defaults (MySQL and Create a new database for OTRS) are fine for your setup, so click Next to proceed.


      On the next page, enter the MySQL credentials that you set up during the MySQL server installation. Use root for the User field, then enter the password you created. Leave the default host value.

      Click Check database settings to make sure it works. The installer will generate credentials for the new database. There is no need to remember this generated password.


      Click Next to proceed.

      The database will be created and you will see the successful result:


      Click Next.

      Next, provide the following required system settings:

      System FQDN: A fully qualified domain name. Replace yourdomain.com with your own domain name.
      AdminEmail: The email address of your system administrator. Emails about errors with OTRS will go here.
      Organization: Your organization's name.

      Leave all other options at their default values:

      Click Next.


      Now you will land on the Mail Configuration page. In order to be able to send and receive emails, you have to configure a mail account. We will set up this later step, so click Skip this for now.

      The OTRS installation is now complete; you will see a Finished page with a link to the admin panel after Start page, and the credentials of the OTRS super user after that. Make sure you write down the generated password for the root@localhost user and the URL for the Start page.

      The only thing left after a successful installation is to start the OTRS daemon and activate its cronjob.

      Bring up the terminal you are using to access your Ubuntu 18.04 server. The OTRS daemon is responsible for handling any asynchronous and recurring tasks in OTRS. Start it with the otrs user:

      sudo su - otrs -c "/opt/otrs/bin/otrs.Daemon.pl start"

      You will see the following output:

      Output
      Manage the OTRS daemon process.

      Daemon started

      There are two default cron files in the /opt/otrs/var/cron/ directory. Move into this directory.

      cd /opt/otrs/var/cron

      These cron files are used to make sure that the OTRS daemon is running. Activate them by copying them without the .dist filename extension.

      sudo cp aaa_base.dist aaa_base
      sudo cp otrs_daemon.dist otrs_daemon

      To schedule these cron jobs, use the script Cron.sh with the otrs user:

      sudo su - otrs -c "/opt/otrs/bin/Cron.sh start"

      Next, we will log in to the administrator web interface and secure OTRS.

      Securing OTRS
      We have a fully functional OTRS, but it's not secure to use the super user account. Instead, we'll create a new agent. In OTRS, agents are users who have rights to the various functions of the system. In this example, we will use a single agent who has access to all functions of the system.

      To get started, log in as root@localhost. Open the Start page link which you received in the previous step. Enter root@localhost for the username and the password you copied from earlier step of web installer, then click Login.

      You will see the main dashboard. It contains several widgets which show different information about tickets, statistics, news, etc. You can freely rearrange them by dragging or switch their visibility in settings.


      First, create a new agent. To do this, follow the link by clicking on the red message in the top of the screen that reads Don't use the Superuser account to work with OTRS 6! Create new Agents and work with these accounts instead. This will bring you to the Agent Management screen.


      Click the Add agent button. This will bring you to the Add Agent screen. Most of the default options are fine. Fill in the first name, last name, username, password, and email fields. Record the username and password for future login. Submit the form by clicking the Save button.

      Next, change the group relations for the new agent. Because your agent will also be the administrator, you can give it full read and write access to all groups. To do this, click the checkbox next to RW all the way on the right, under Change Group Relations for Agent.


      Finally, click Save and finish.

      Now, log out and log back in again using the newly created account. You can find the Logout link by clicking on the avatar picture in the top left corner.


      Once you have logged back in, you can customize your agent's preferences by clicking on Personal preferences in the avatar menu. There you can change your password, choose the interface language, configure setup notifications and favorite queues, change interface skins, etc.

      Once you have logged in as your new agent and configured the account to your liking, the next step is to configure the inbound mail options to generate tickets from incoming emails.

      Configuring OTRS Inbound Mail
      Customers have two ways to forward new tickets to OTRS: via the customer front-end or by sending an email. In order to receive customer's messages you need to set up a POP or IMAP account. We will use a Gmail account as an example for OTRS configuration.

      Navigate to the Admin tab by clicking on Admin in the top menu. Then find the PostMaster Mail Accounts option and click on it. Press the Add Mail Account button to set up a new mailbox.


      On the Add Mail Account screen, select IMAPS for Type. For Username, type in your email address, and Password. Leave all other options as default. Click Save.

      Next, send a test email from an external email account to your dedicated OTRS email account. The mail will be fetched every 10 minutes by the OTRS daemon, but you can force receipt by clicking the Fetch mail link.

      As a result, you will see the new ticket.


      Now you are ready to accept tickets from customers via email. Next, you will go through the process of creating a ticket through the customer front-end.

      Configuring OTRS Customer Interface
      The second way for a customer to create a ticket is through the OTRS front-end. In this step, you will walk through this process to make sure this ticket creation method is set up.

      The customer front-end is located at https://yourdomain.com/otrs/customer.pl or https://your_server_ip/otrs/customer.pl. Navigate to it in a web browser. You can create a customer account there and submit a ticket using the GUI.

      Use the Sign up now link to open the registration form.


      Fill out the form and press the Create button.

      You will see a message like this:

      New account created. Sent login information to username@youremail.com. Please check your email.

      Check your inbox for the message from the OTRS. You will see a message with the new account credentials:

      Hi example,

      You or someone impersonating you has created a new OTRS account for
      you.

      Full name: example
      User name: example@youremail.com
      Password : user_password

      You can log in via the following URL. We encourage you to change your password
      via the Preferences button after logging in.

      http://yourdomain.com/otrs/customer.pl

      Now, use the provided credentials to access the customer front-end and create another ticket. All new tickets created using the customer front-end will immediately appear on the agent's dashboard:


      On the agent dashboard, you can see the information on all current tickets: their status (new, opened, escalated, etc.), their age (the time elapsed from the moment when the ticket was received), and subject.

      You can click on the ticket number (in the TICKET# column) to view its details. The agent can also take actions on the ticket here, like changing its priority or state, moving it to another queue, closing it, or adding a note.

      You have now successfully set up your OTRS account.

      Wrapping up
      In this guide, you have configured OTRS and created test help desk tickets. Now you can accept and process requests from your users using both the web interface and email.

      How To Set Up a Support Desk using osTicket on Ubuntu 18.04

      $
      0
      0

      osTicket is a widely-used open source support ticket system. It seamlessly integrates inquiries created via email, phone and web-based forms into a simple easy-to-use multi-user web interface. Manage, organize and archive all your support requests and responses in one place while providing your customers with accountability and responsiveness they deserve. 

      The osTicket is written in PHP, supports a variety of databases including (MySQL, PostgreSQL), and can integrate with LDAP/Active directory for central authentication.

      This tutorial will help you to implement a support desk for your users and customers using open source osTicket on an Ubuntu 18.04 server.

      Prerequisites
      To follow this tutorial, you will need one Ubuntu 18.04 (physical or virtual) machine having a non-root user with sudo privileges.

      Installing Nginx
      You can install nginx web server using the following command:

      sudo apt update
      sudo apt install -y nginx

      Installing MySQL
      For database, we will install MySQL server to fulfill osticket database requirement:

      sudo apt install -y mysql-server
      sudo mysql_secure_installation

      Securing the MySQL server deployment.

      Connecting to MySQL using a blank password.

      VALIDATE PASSWORD PLUGIN can be used to test passwords
      and improve security. It checks the strength of password
      and allows the users to set only those passwords which are
      secure enough. Would you like to setup VALIDATE PASSWORD plugin?

      Press y|Y for Yes, any other key for No: y

      There are three levels of password validation policy:

      LOW    Length >= 8
      MEDIUM Length >= 8, numeric, mixed case, and special characters
      STRONG Length >= 8, numeric, mixed case, special characters and dictionary                  file

      Please enter 0 = LOW, 1 = MEDIUM and 2 = STRONG: 1
      Please set the password for root here.

      New password:
      Re-enter new password:

      Estimated strength of the password: 100
      Do you wish to continue with the password provided?(Press y|Y for Yes, any other key for No) : y
      By default, a MySQL installation has an anonymous user,
      allowing anyone to log into MySQL without having to have
      a user account created for them. This is intended only for
      testing, and to make the installation go a bit smoother.
      You should remove them before moving into a production
      environment.

      Remove anonymous users? (Press y|Y for Yes, any other key for No) : y
      Success.


      Normally, root should only be allowed to connect from
      'localhost'. This ensures that someone cannot guess at
      the root password from the network.

      Disallow root login remotely? (Press y|Y for Yes, any other key for No) : y
      Success.

      By default, MySQL comes with a database named 'test' that
      anyone can access. This is also intended only for testing,
      and should be removed before moving into a production
      environment.


      Remove test database and access to it? (Press y|Y for Yes, any other key for No) : y
       - Dropping test database...
      Success.

       - Removing privileges on test database...
      Success.

      Reloading the privilege tables will ensure that all changes
      made so far will take effect immediately.

      Reload privilege tables now? (Press y|Y for Yes, any other key for No) : y
      Success.

      All done!

      Installing PHP

      sudo apt install -y php7.2-cli php7.2-mysql php7.2-cgi php7.2-fpm php7.2-gd php7.2-imap php7.2-xml php7.2-mbstring php7.2-intl php-apcu zip

      sudo nano /etc/php/7.2/fpm/php.ini

      Uncomment cgi.fix_pathinfo variable and change its value to 0

      cgi.fix_pathinfo=0

      Save and close.

      sudo systemctl restart php7.2-fpm
      sudo systemctl enable php7.2-fpm

      Output
      Synchronizing state of php7.2-fpm.service with SysV service script with /lib/systemd/systemd-sysv-install.
      Executing: /lib/systemd/systemd-sysv-install enable php7.2-fpm

      sudo systemctl enable nginx

      Output
      Synchronizing state of nginx.service with SysV service script with /lib/systemd/systemd-sysv-install.
      Executing: /lib/systemd/systemd-sysv-install enable nginx

      sudo systemctl enable mysql

      Output
      Synchronizing state of mysql.service with SysV service script with /lib/systemd/systemd-sysv-install.
      Executing: /lib/systemd/systemd-sysv-install enable mysql

      sudo systemctl status nginx

      Output
      nginx.service - A high performance web server and a reverse proxy server
         Loaded: loaded (/lib/systemd/system/nginx.service; enabled; vendor preset: enabled)
         Active: active (running) since Wed 2019-07-03 06:25:24 UTC; 3min 42s ago
           Docs: man:nginx(8)
       Main PID: 3078 (nginx)
          Tasks: 2 (limit: 2319)
         CGroup: /system.slice/nginx.service
                 ├─3078 nginx: master process /usr/sbin/nginx -g daemon on; master_process on;
                 └─3081 nginx: worker process

      sudo systemctl status mysql

      Output
      mysql.service - MySQL Community Server
         Loaded: loaded (/lib/systemd/system/mysql.service; enabled; vendor preset: enabled)
         Active: active (running) since Wed 2019-07-03 06:26:55 UTC; 2min 15s ago
       Main PID: 4197 (mysqld)
          Tasks: 29 (limit: 2319)
         CGroup: /system.slice/mysql.service
                 └─4197 /usr/sbin/mysqld --daemonize --pid-file=/run/mysqld/mysqld.pid


      Configuring Nginx

      sudo nano /etc/nginx/sites-available/default

      Uncomment the PHP 7 configuration line below:

      server {
          listen 80 default_server;
          listen [::]:80 default_server;

          root /var/www/html;
          index index.php index.html index.htm index.nginx-debian.html;

          server_name _;

          location / {
              try_files $uri $uri/ =404;
          }

          location ~ \.php$ {
              include snippets/fastcgi-php.conf;
              fastcgi_pass unix:/run/php/php7.2-fpm.sock;
          }

          location ~ /\.ht {
              deny all;
          }
      }

      Save and close.

      sudo nano /etc/nginx/sites-available/osticket.conf

      server {
      listen 80;
      server_name labserver;
      root /var/www/osTicket/upload;

      access_log /var/log/nginx/access.log;
      error_log /var/log/nginx/error.log;
      index index.php index.html index.htm;

      gzip on;
      gzip_min_length 1000;
      gzip_types text/plain application/x-javascript text/xml text/css application/xml;

      set $path_info "";

      location ~ /include {
      deny all;
      return 403;
      }

      if ($request_uri ~ "^/api(/[^\?]+)") {
      set $path_info $1;
      }

      location ~ ^/api/(?:tickets|tasks).*$ {
      try_files $uri $uri/ /api/http.php?$query_string;
      }

      if ($request_uri ~ "^/scp/.*\.php(/[^\?]+)") {
      set $path_info $1;
      }

      location ~ ^/scp/ajax.php/.*$ {
      try_files $uri $uri/ /scp/ajax.php?$query_string;
      }

      location / {
      try_files $uri $uri/ index.php;

      fastcgi_buffer_size          128k;
      fastcgi_buffers              256 256k;

      }

      location ~ \.php$ {
      fastcgi_param SCRIPT_FILENAME $document_root$fastcgi_script_name;
      include fastcgi_params;
      include snippets/fastcgi-php.conf;
      fastcgi_pass unix:/run/php/php7.2-fpm.sock;
      }

      }

      Save and close.

      sudo ln -s /etc/nginx/sites-available/osticket.conf /etc/nginx/sites-enabled/

      sudo nginx -t

      Output
      nginx: the configuration file /etc/nginx/nginx.conf syntax is ok
      nginx: configuration file /etc/nginx/nginx.conf test is successful

      sudo systemctl restart nginx

      Downloading osTicket
      You can find the latest version of osticket from the official website https://osticket.com/download/

      wget https://s3.amazonaws.com/downloads.osticket.com/core/osTicket-v1.12.zip

      sudo unzip osTicket-v1.12.zip
      sudo mv osTicket-v1.12 /var/www/osTicket

      sudo chown -R www-data:www-data /var/www/osTicket

      cd /var/www/osTicket
      sudo cp include/ost-sampleconfig.php include/ost-config.php


      Creating Database

      sudo mysql -u root -p
      create user 'osticket'@'localhost' identified by 'Your-Password';
      grant all privileges on osticket.* to 'osticket'@'localhost';
      flush privileges;
      exit

      Run osTicket Web Installer
      To run osticket web installer, open your favorite web browser and type http://your_servername.domain or http://your_server_ip and you will see the following screen.

      Make sure all prerequisites are green and click Continue.


      Provide all the information and click Install Now


      It will take few minutes to complete.

      Once completed, you will see the following screen contains information including permission and links to access ticket system and admin panel.


      Now go back to Ubuntu server terminal and type the following command:

      sudo chmod 0644 /var/www/osTicket/include/ost-config.php

      Access http://your_server.domain or http://your_server_ip and you will see the following screen. From here you or your customer can create a support ticket or check status of already created tickets.


      Access http://your_server.domain/scp or http://your_server_ip/scp and you will see the following screen. Login with username and password you created in earlier web installer step.


      Once logged in, you will see the following dashboard of admin panel. From here you can control, customize and manage your osTicket support desk


      Wrapping up
      You have successfully installed and configured support desk system using osTicket. Now you can accept and process support requests from your users and customers using both the web interface and email.
      Viewing all 880 articles
      Browse latest View live