This tutorial will walk you through the steps to set up a two nodes rac cluster using oracle grid infrastructure 18.3 as well as oracle database 18.3 on CentOS or RHEL 7 server. These instruction can also be applied if you are running Fedora or Oracle Linux 7 server.
Prerequisite
- You will need two CentOS/RHEL 7 servers either (physical or virtual) machines with minimum 8GB of memory and two network interface.
- Must have root user privileges.
- A working DNS server.
Environment
You should document everything before going into actual deployment:
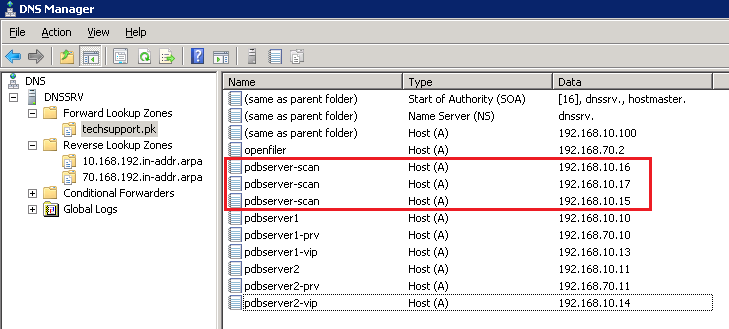
You need to create (HOST-A) record of your SCAN in your DNS server like below:
1. Configuring SELinux
Log in to your first node, in our case (pdbserver1) and edit /etc/selinux/config file, replace SELINUX=enforcing parameter to SELINUX=permissiveSave and close file when you are done.
2. Disabling Firewall
You also need to stop and disable firewalld service if it is running, with below command:3. Set Timezone
Make sure timezone is correctly set on your servers. If it is not already, then you must set correct timezone with below command by replacing Asia/Karachi with yours:It is recommended to sync your servers clock with locally or publicly available NTP server like below:
4. Set Hostname
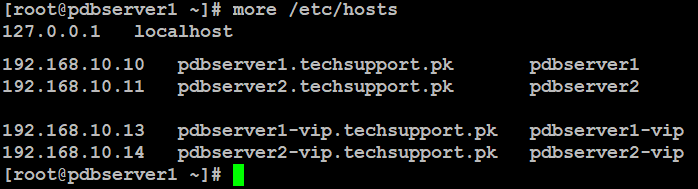
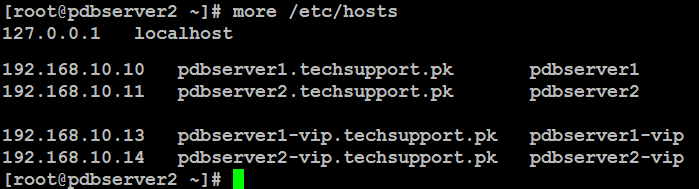
You can set hostname of your servers like below by replacing red highlighted with you actual server name.Edit your server's /etc/hosts file and add your nodes like below:
on pdbserver1:
on pdbserver2:
5. Adding EPEL Repository
It is recommended to add extra packages for enterprise Linux repository so that you can easily find and install required packages using yum package manager:6. Adding Oracle Repository
Since, we are installing oracle grid infrastructure and database on CentOS/RHEL 7 server, we need to install some of the important packages from oracle Linux repository:Add below contents in it:
Save and close file when you are finished.
7. Installing Prerequisites
These are the important and required packages you need to install on your Linux servers. Type the below command to install these packages all together:You will also need to install oracleasm in order to configure your shared storage for oracle grid infrastructure:
Now you need to create password for oracle user like below:
8. Configuring OracleASM
At this point, you need to configure oracleasm on all of the servers with root user privileges like below:Enter the user oracle and group dba when it prompts like the output shown in below image
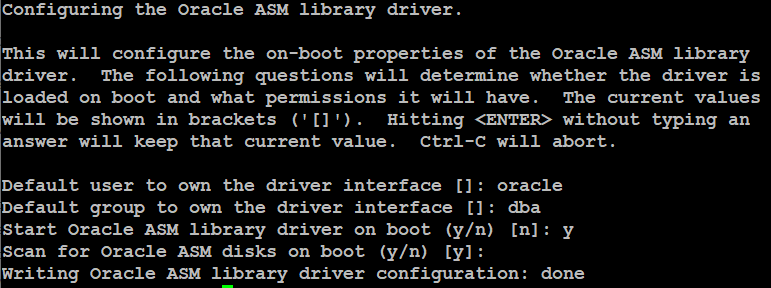
Now type the below command to load oracleasm driver:
This will show you the output like below:

When you are finished from step 1 to 8 on each node in your environment, you can proceed to next step.
9. Creating Disk Group
For this guide we are using openfiler as our ISCSI shared storage and we have already configured it using iscsiadm command as well as created raw disks using fdisk on our servers.Now, log in to your first node (pdbserver1) with root user and create disk group like below:
Type below commands to scan disk groups:
You will see the similar output like below:

Since this the shared storage so we will just execute below command to scan disk groups on the remaining nodes, in our case (pdbserver2) with root user. If you have more then two nodes in your environment, just type below command one by one.
10. Configuring Shell Environment
Its time to create environment variables on all of the nodes one by one. Log in with oracle user or you can switch from root user session to oracle directly with below command:Now, you need to edit default .bash_profile of oracle user like below:
Add below contents at the end of the file but make sure you replace red highlighted with yours:
Save and close file when you are done.
Again, create grid_env file like below:
Add below contents in it:
Save and close file when you are finished.
Now create db_env file like below"
Add below contents in it:
Save and close file when you are done.
Now, make grid_env and db_env executable with below command:
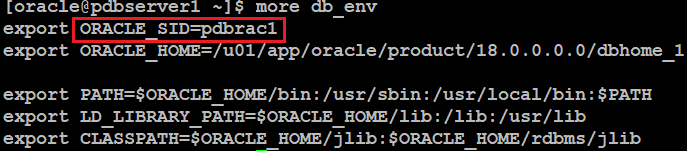
Before proceeding to next step, make sure you have performed all of the above steps on each node. We are just preparing two nodes cluster, so the environment variables on our servers are as shown in image below.
bash_profile on pdbserver1
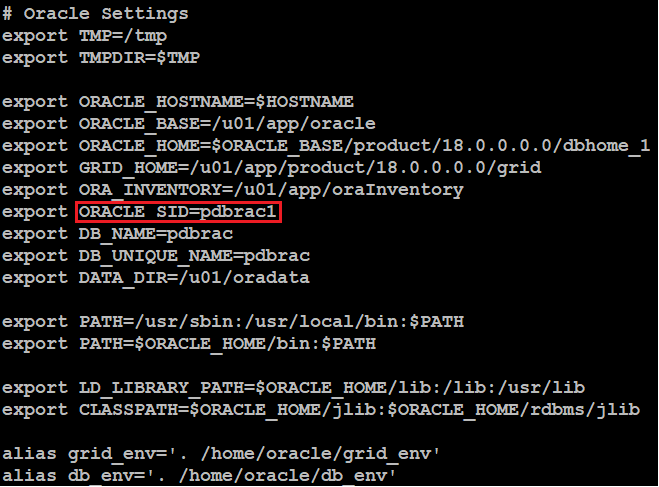
bash_profile on pdbserver2:
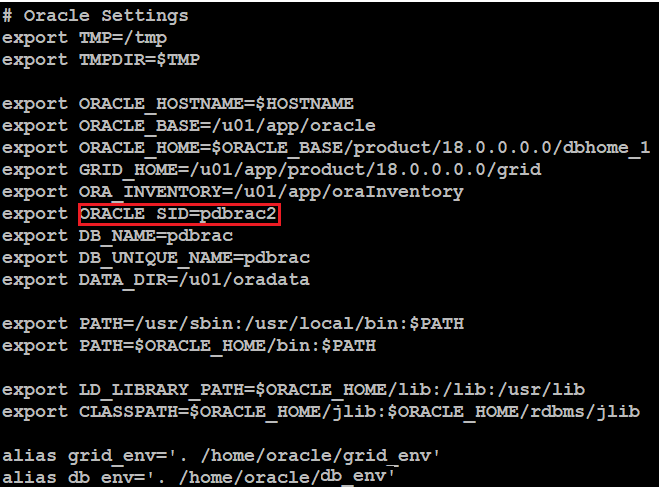
db_env on pdbserver1:
db_env on pdbserver2:

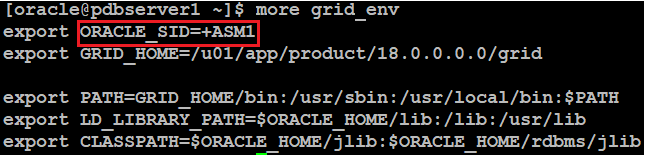
grid_env on pdbserver1:
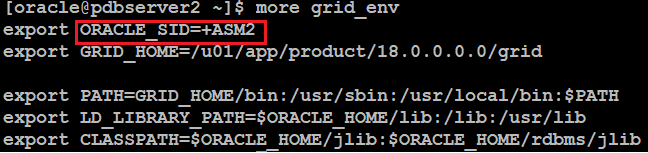
grid_env on pdbserver2:
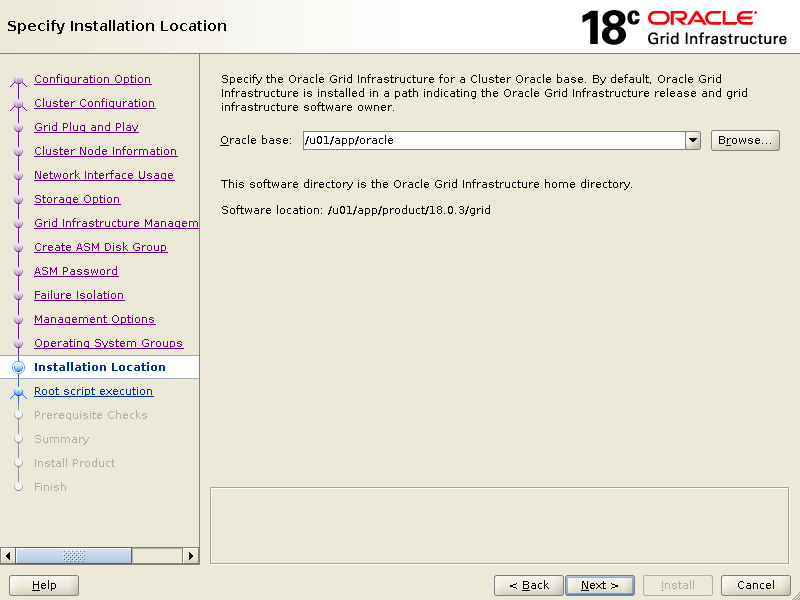
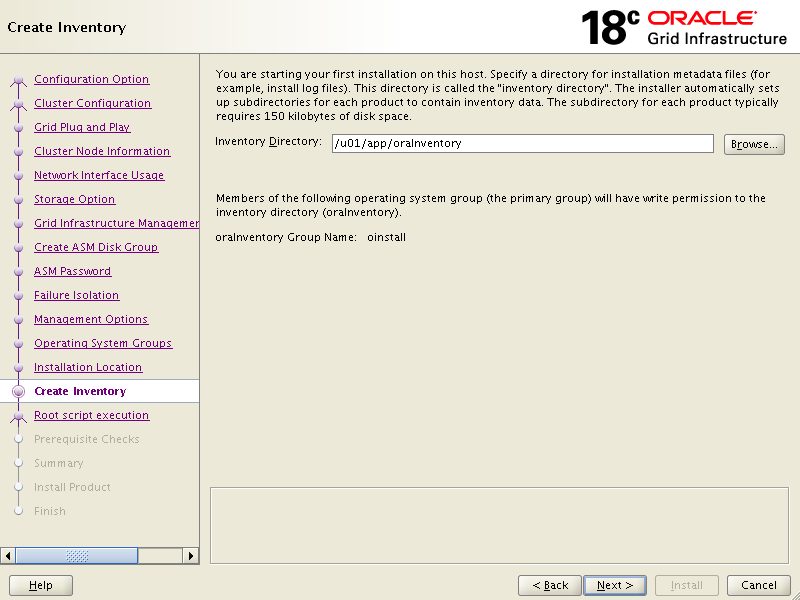
11. Creating Oracle Base
With root user privileges, create these directories under /u01 on each node and set appropriate permission like blow:Now log in with oracle user on your first node and extract grid setup under /u01/app/product/18.0.0.0.0/grid directory like below:
At this point, you need to install cvuqdisk rpm package from grid setup directory with root user on each node like below:
When you are done installing cvuqdisk rpm package on each node, proceed to next step of grid installation.
12. Installing Oracle Grid 18c
We will run graphical installation, if you wish you can go for silent installation as well. Log in to your first node with oracle user and run grid setup like below:Since this our first grid infrastructure installation so keep the default on below screen click Next,
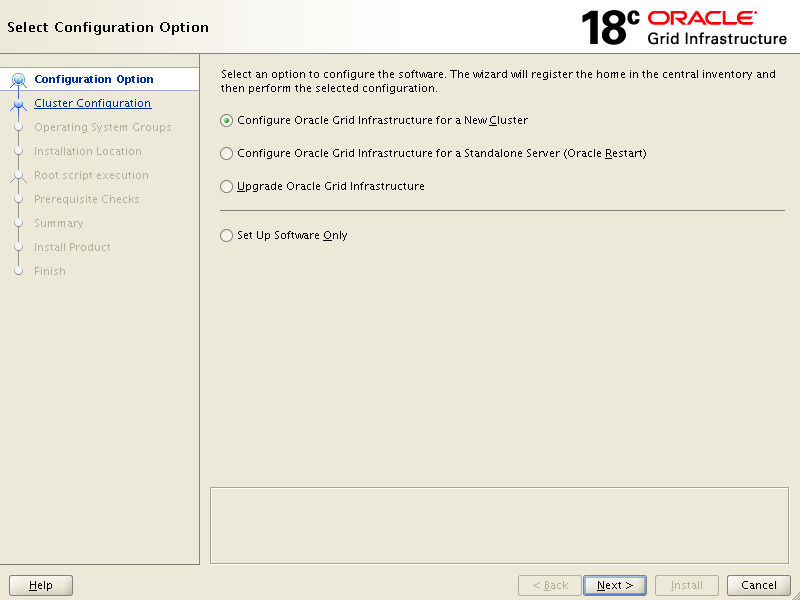
{Configure an Oracle Standalone Cluster} and click Next

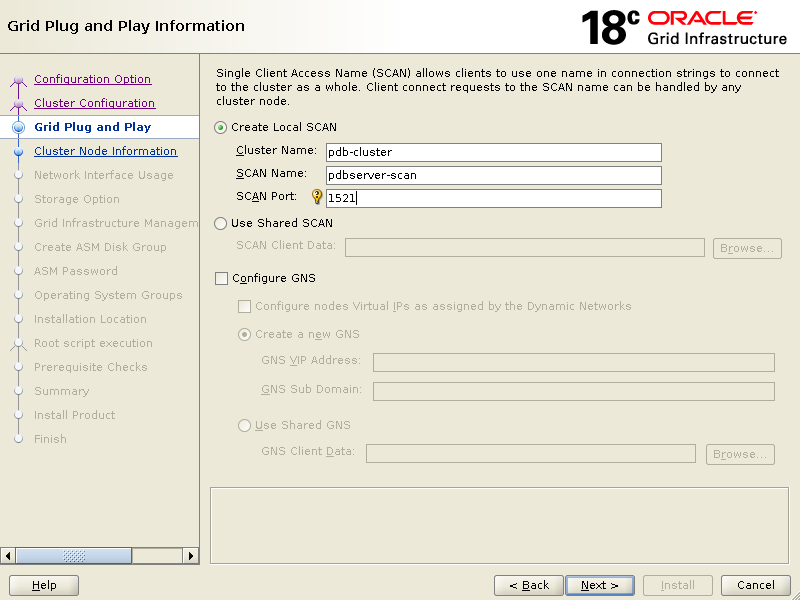
Enter Cluster Name, SCAN Name and keep the SCAN Port default.
Click Next
Click Add to add second node then click SSH connectivity, enter oracle user password in OS Password box then click Setup

This will bring you screen like below which says passwordless ssh connectivity for oracle user is established successfully across the servers.
Click OK

Click Next
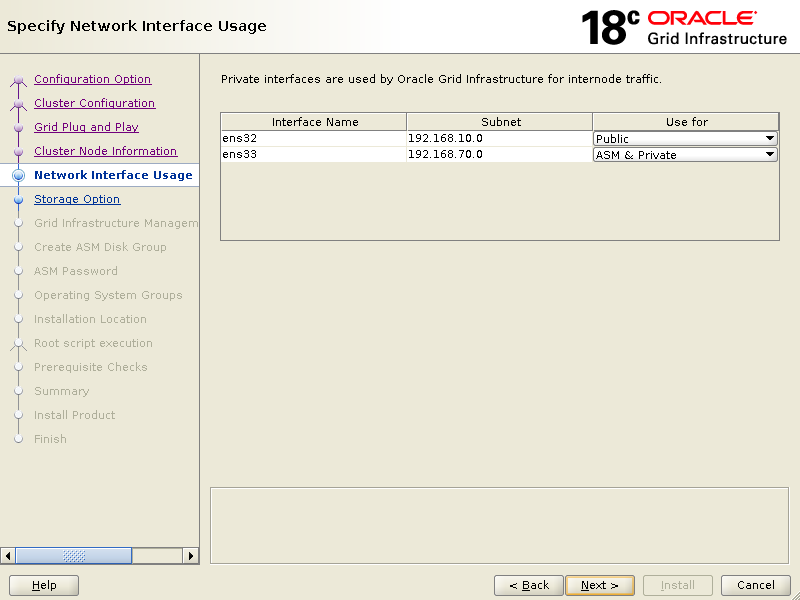
Ensure that it shows correct network interfaces against its use for, then click Next.
We are using iscsi shared storage as we have already configured using oracleasm earlier, so we will go for first option on below screen.
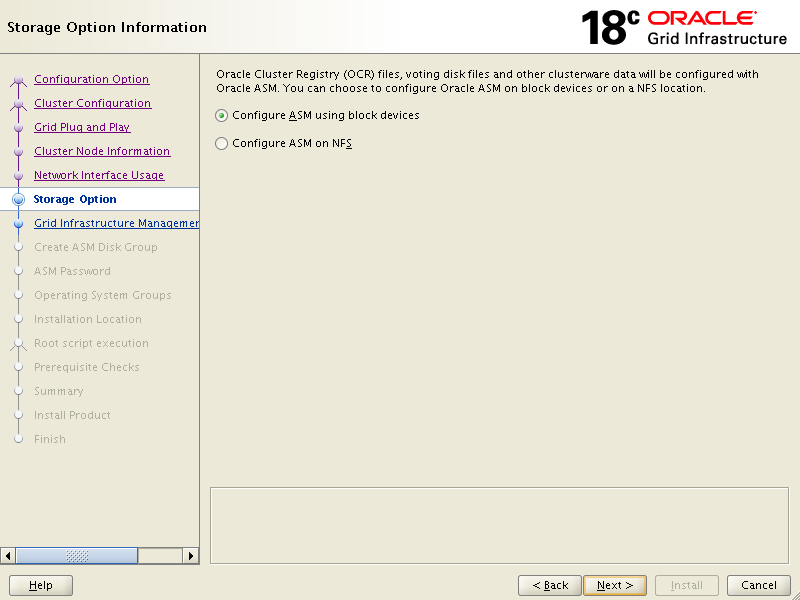
Click No then Next

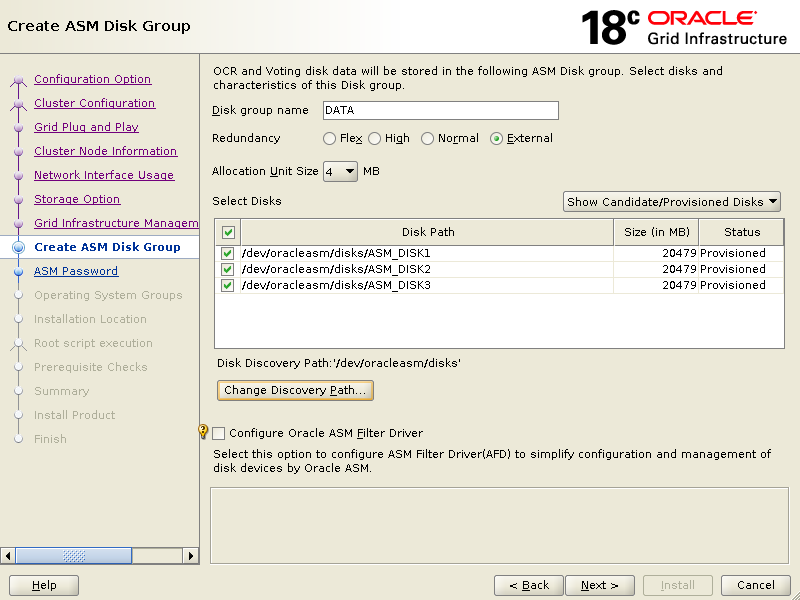
Click External in Redundancy then click Change Discovery Path and enter/dev/oracleasm/disks in the box to retrieve disk groups.
Click Next.
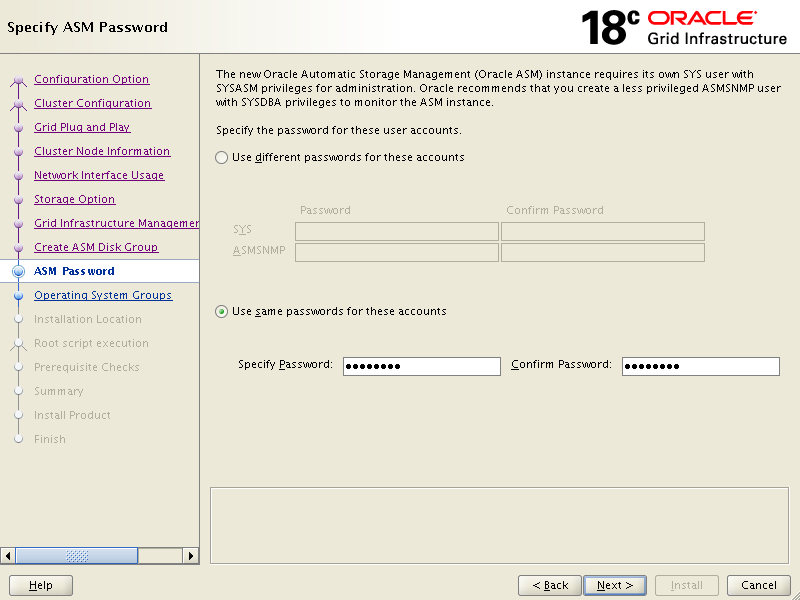
Click {Use same password for these accounts}, Specify Password then Confirm Password click Next.
Click Next.

Click Next.
Keep the default and click Next.

Click Yes on below warning box.
Click Next
Click Next.
Click Next.
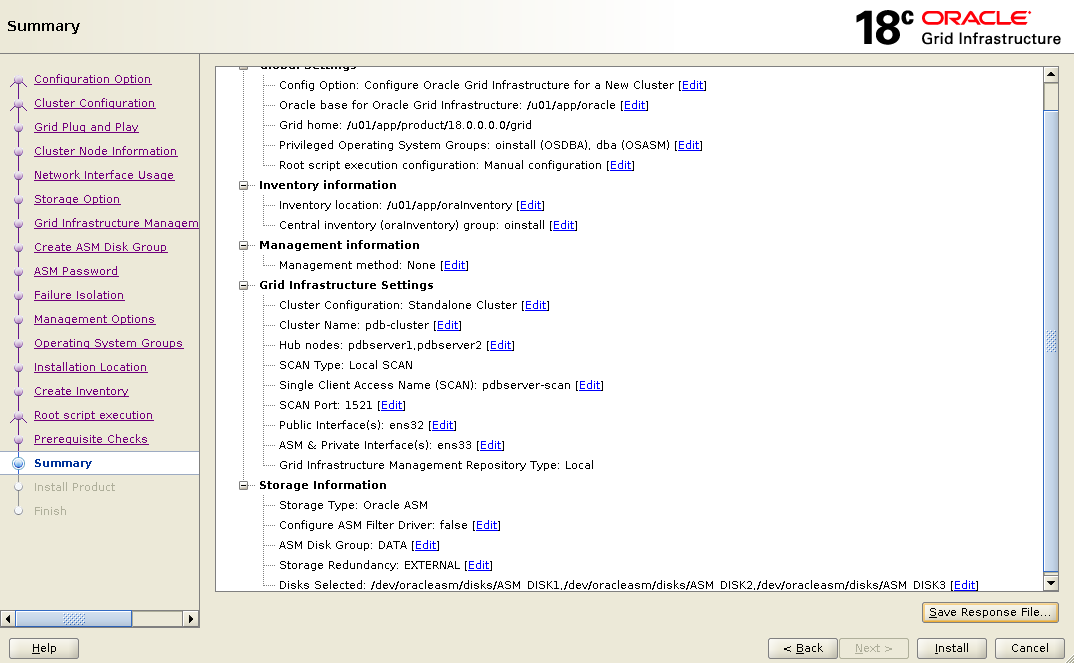
Verify everything then click Install.
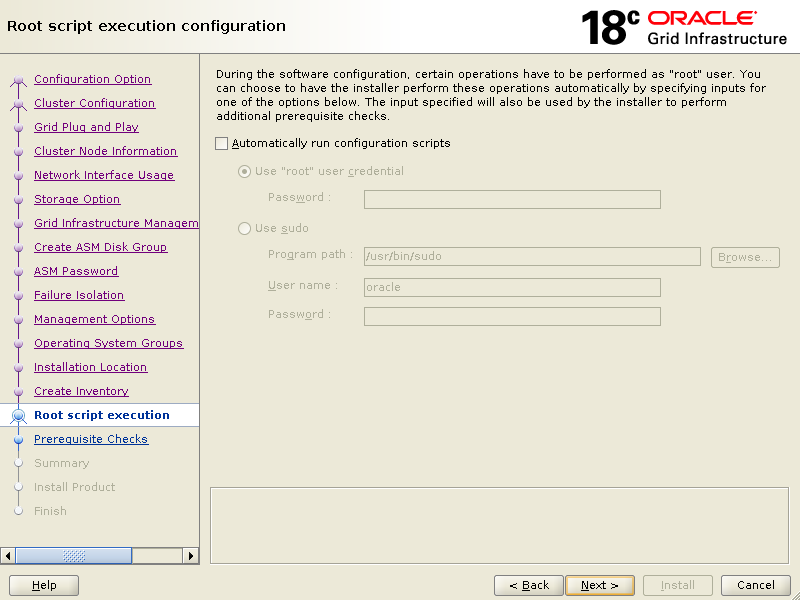
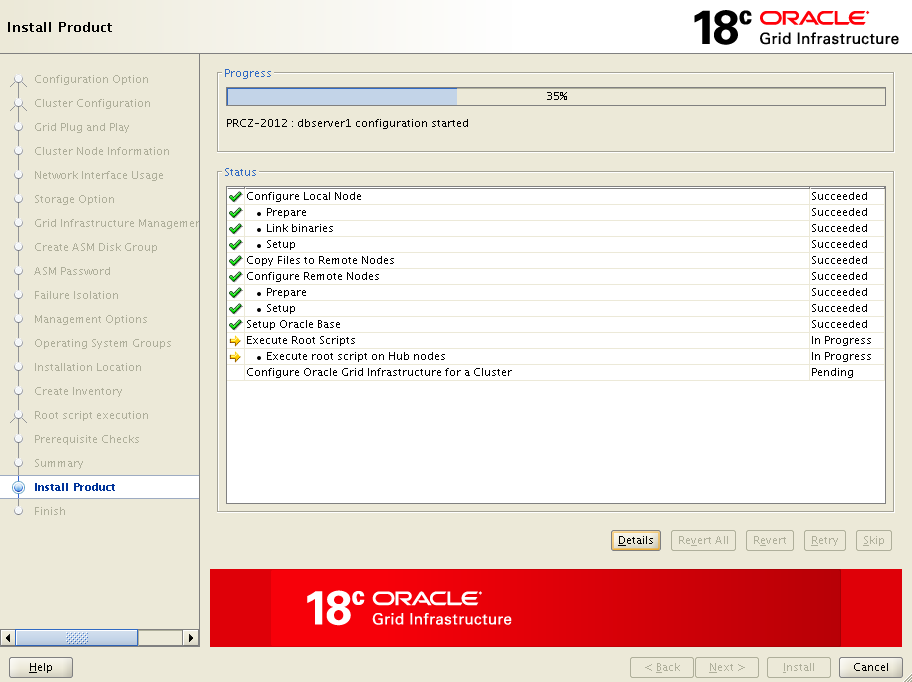
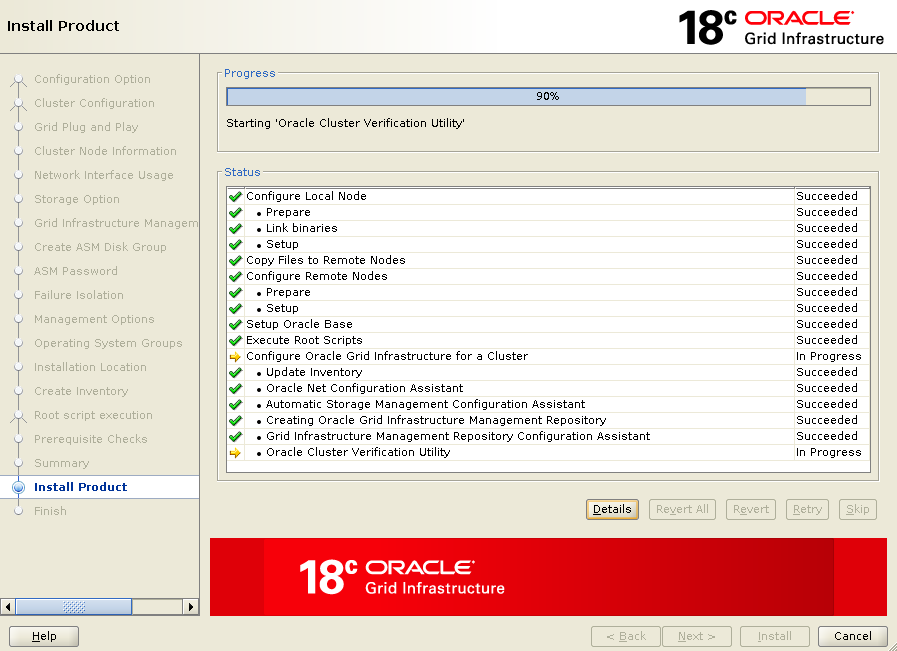
Installation progress screen will prompts you for root scripts execution.
Stop here and go back to your servers, log in with root user and execute these root scripts one by one on each node but on primary node first.
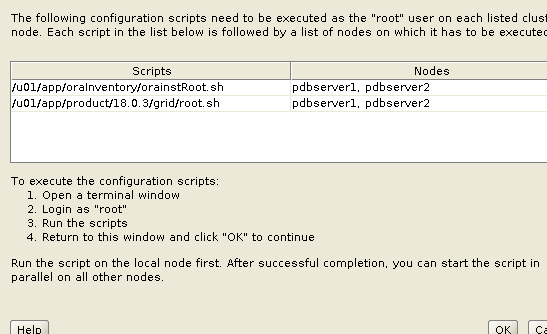
When you are done with root scripts execution on each node, come back to installation screen and click OK on root script prompt. Now, it will take few minutes to complete remaining installation stages.
Click Close.
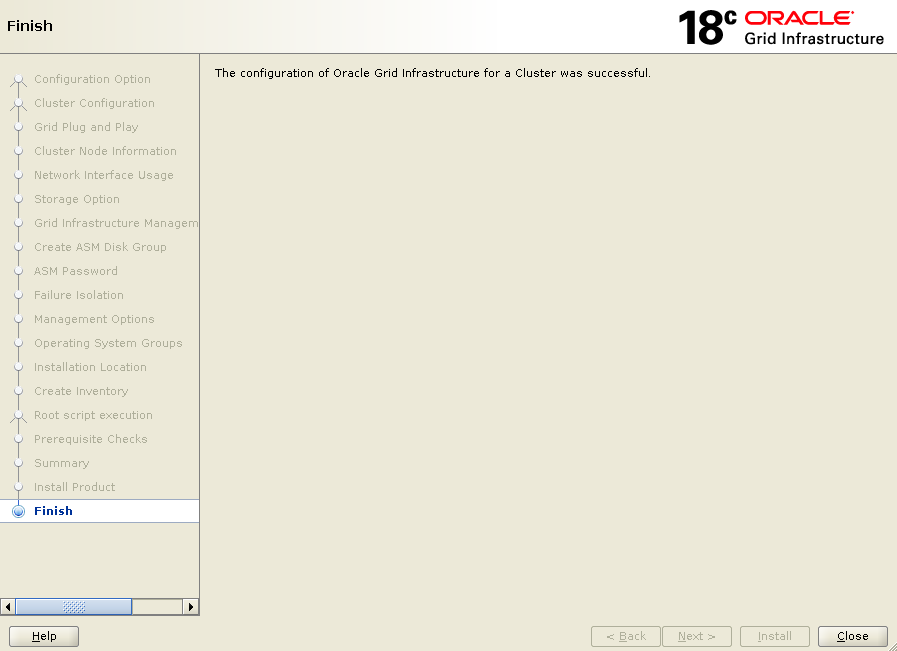
At this stage, your oracle grid infrastructure installation is completed successfully.
13. Installing Oracle Database 18c
Log in to your first node with root user and extract database under /u01/app/oracle/product/18.0.0.0.0/dbhome_1 location like below.
Again, we will run graphical installation, if you wish you can go for silent installation.Type below command to run graphical installation of database 18c
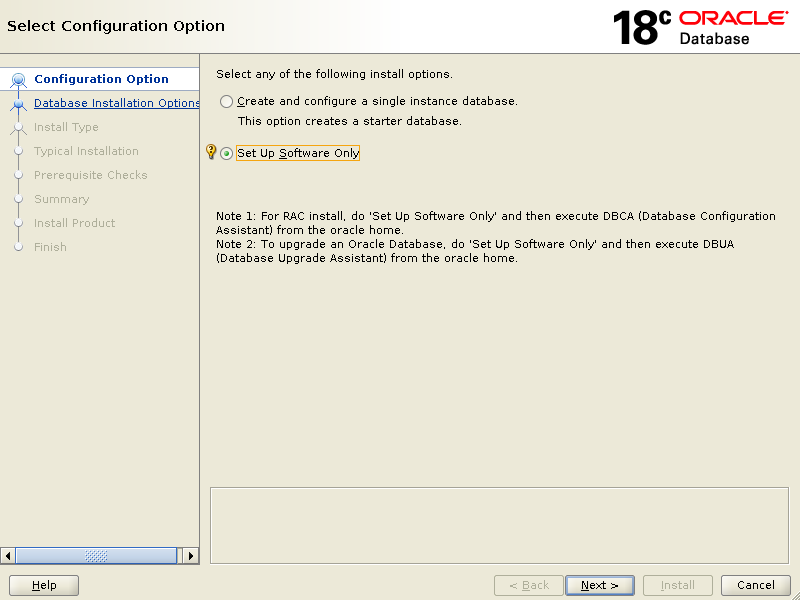
Choose {Set Up Software Only} click Next.
On the below screen, select {Oracle Real Application Clusters database installation} click Next

Click Next.

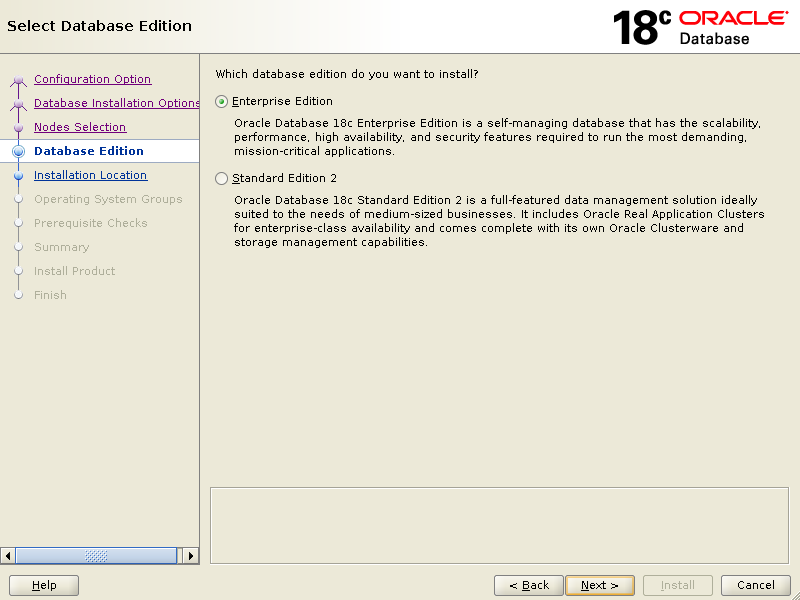
Select {Enterprise Edition} click Next
Click Next.

Keep the default and click Next.

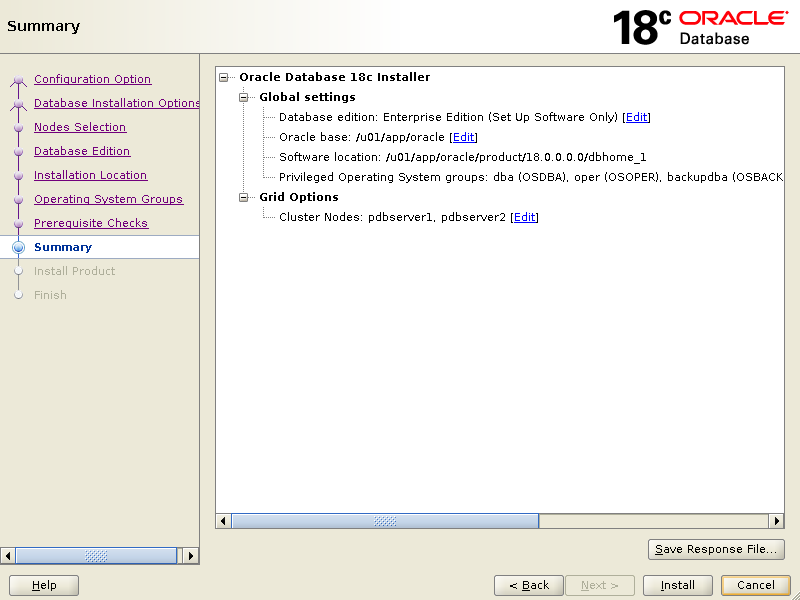
After prerequisites checks, if all goes well, setup will bring you below summary screen.
Click Install.
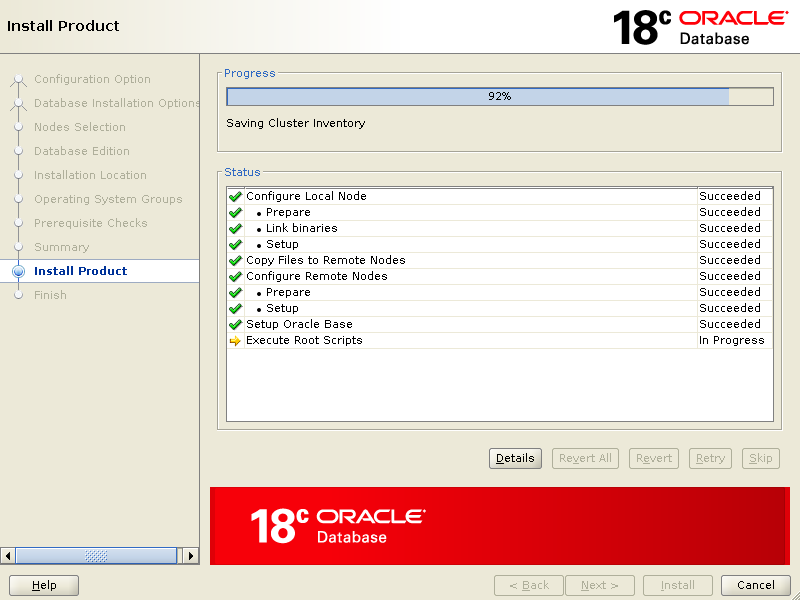
When it says, execute root scripts, stop right there and go back to your first node execute root scripts and then on other nodes as well. Once you are finished executing root scripts, come back to installer screen and click OK
Click Close to finish setup.
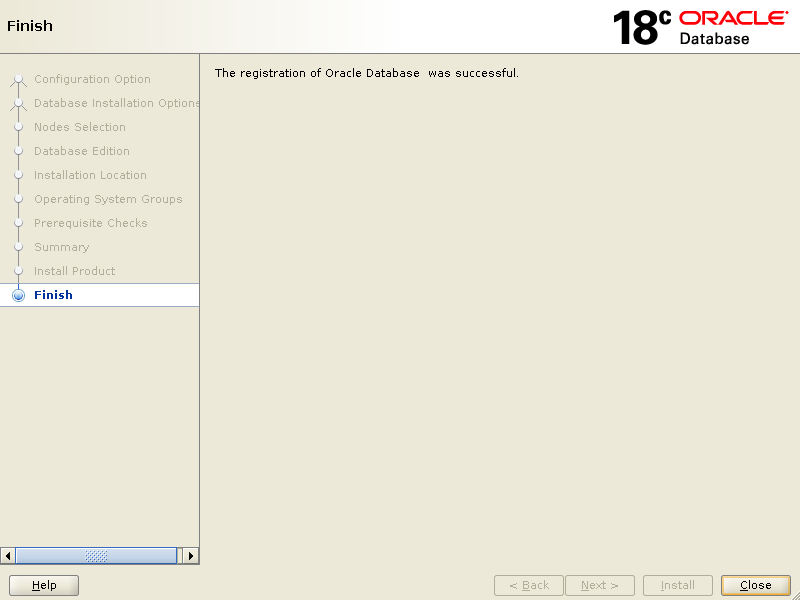
Well, at this stage your database installation has been successful.
14. Creating a Database
Type blow command to set appropriate permission on each node with root user:When you are finished with the above, log in to your first node with oracle user and start database creation wizard like below:
Type dbca to run database creation wizard:
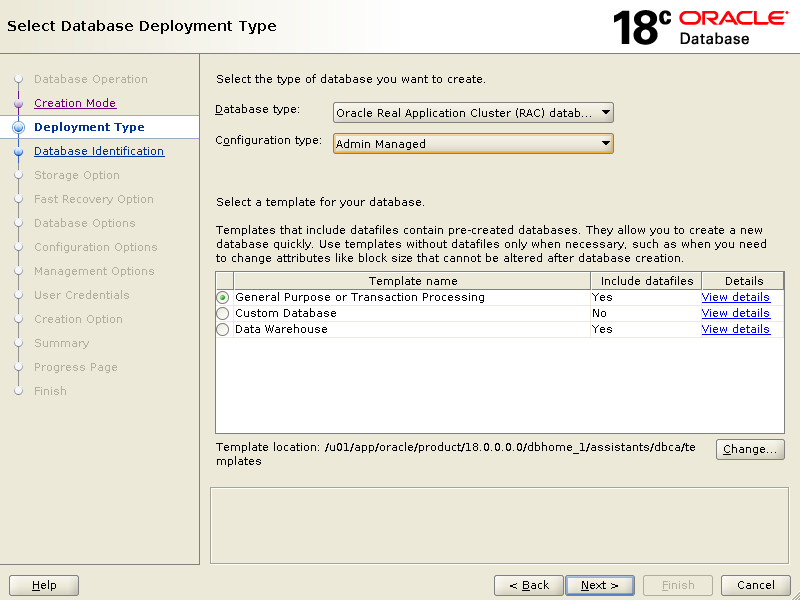
Choose {Create a database} click Next

Select {Advanced configuration} click Next

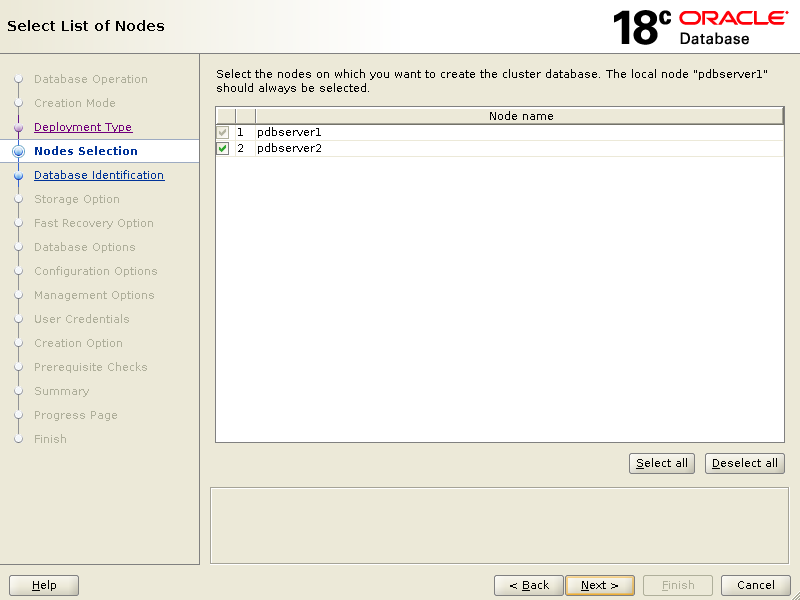
Click Next
Click Next
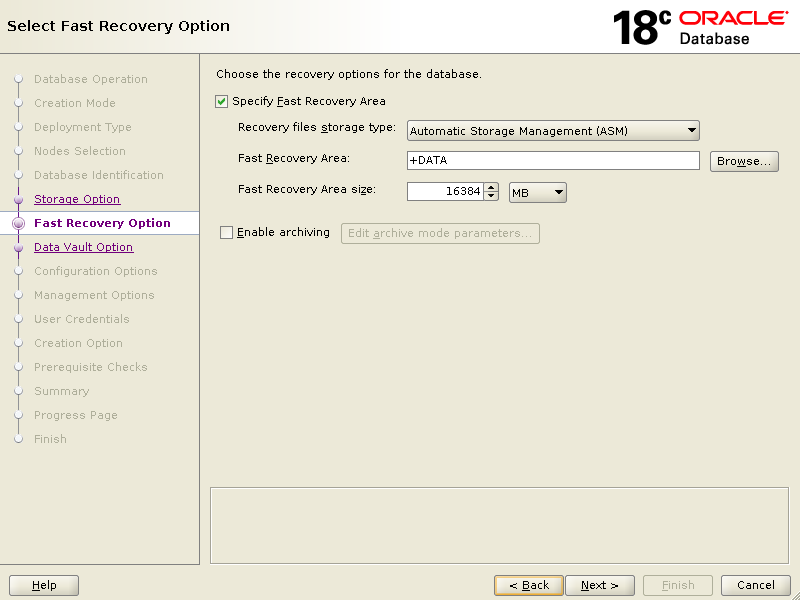
Provide {Fast Recovery Area Size} according to your environment and click Next.
Leave un-ticked and click Next

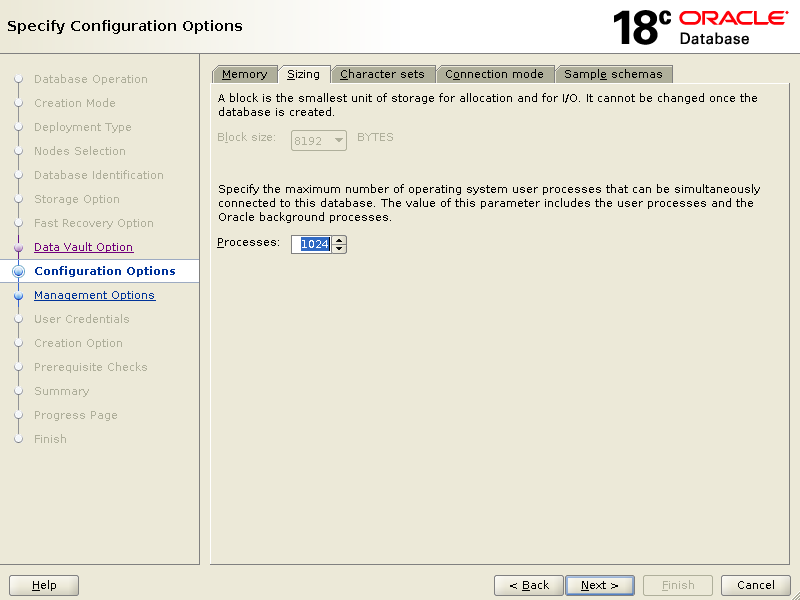
Set {Processes} according to your requirement and click Next.
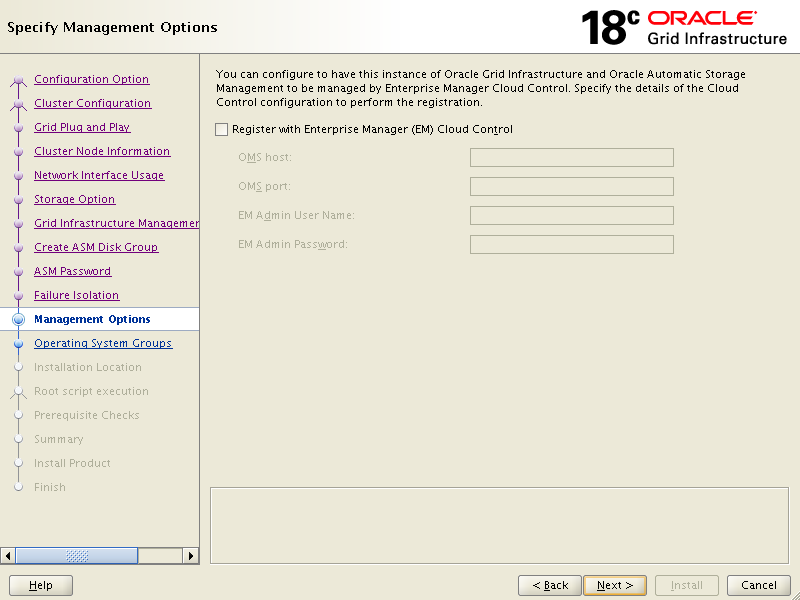
Specify the management options and click Next.

Select {Use the same administrative password for all users} and enter the password.
Click Next.

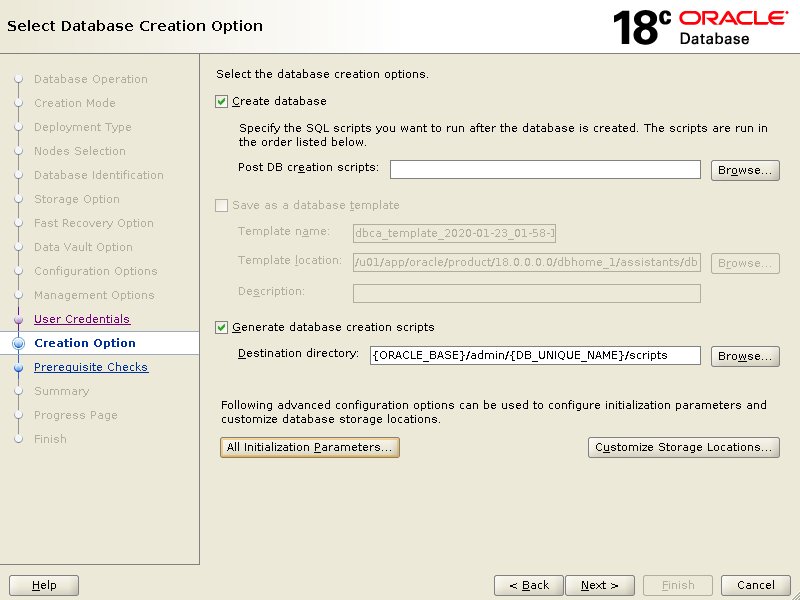
Select {Create database} then click {Generate database creation scripts} and keep the default path.
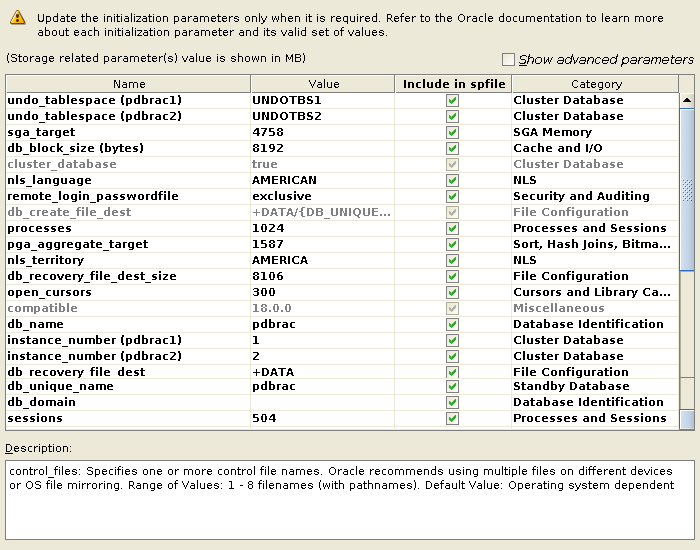
Click { All Initialization Parameters}
Make sure {db_name}, {db_unique_name},{db_domain} and {sessions} are ticked to Include in spfile
When you done, close this window screen.
Click Next.
It will take a moment to perform Prerequisites Checks.

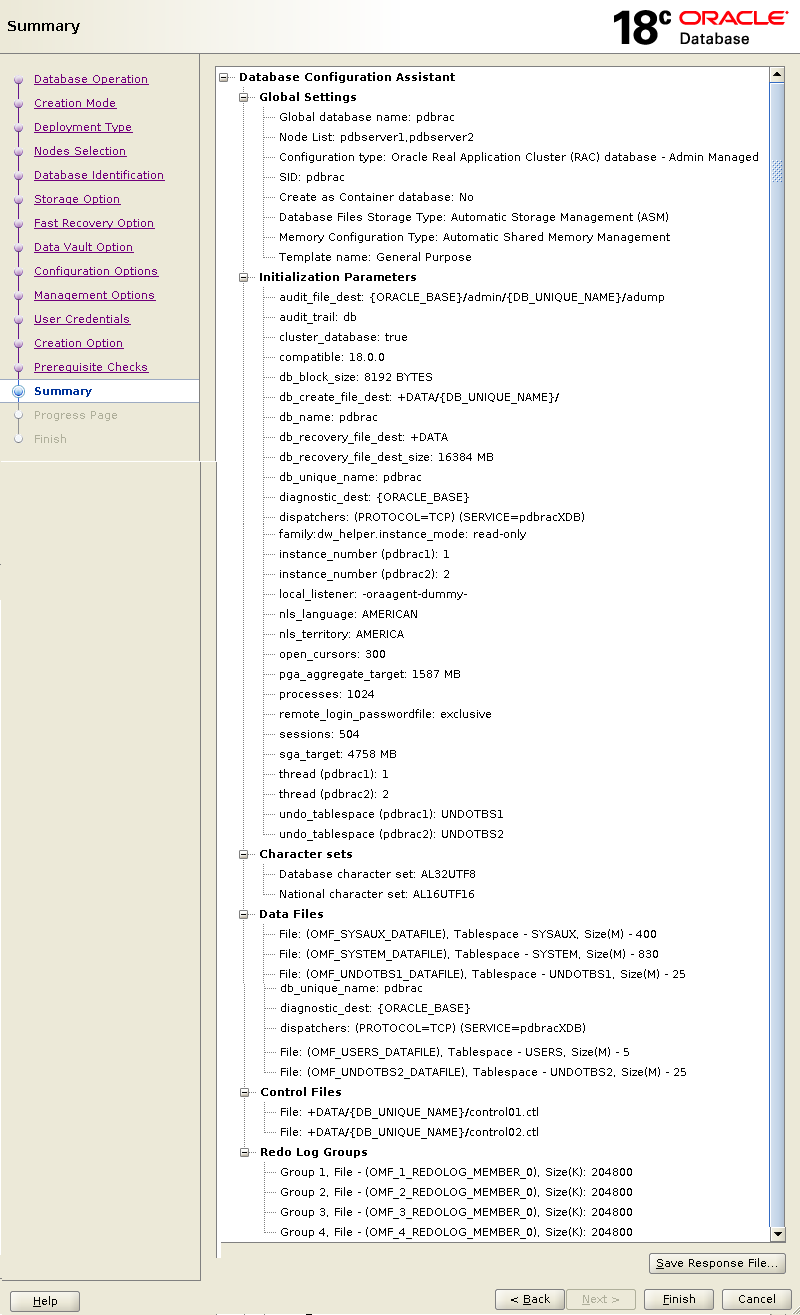
If all goes well with prerequisites checks, you will see the below summary screen.
Click Finish to start database creation process.
Database creation process has begun.
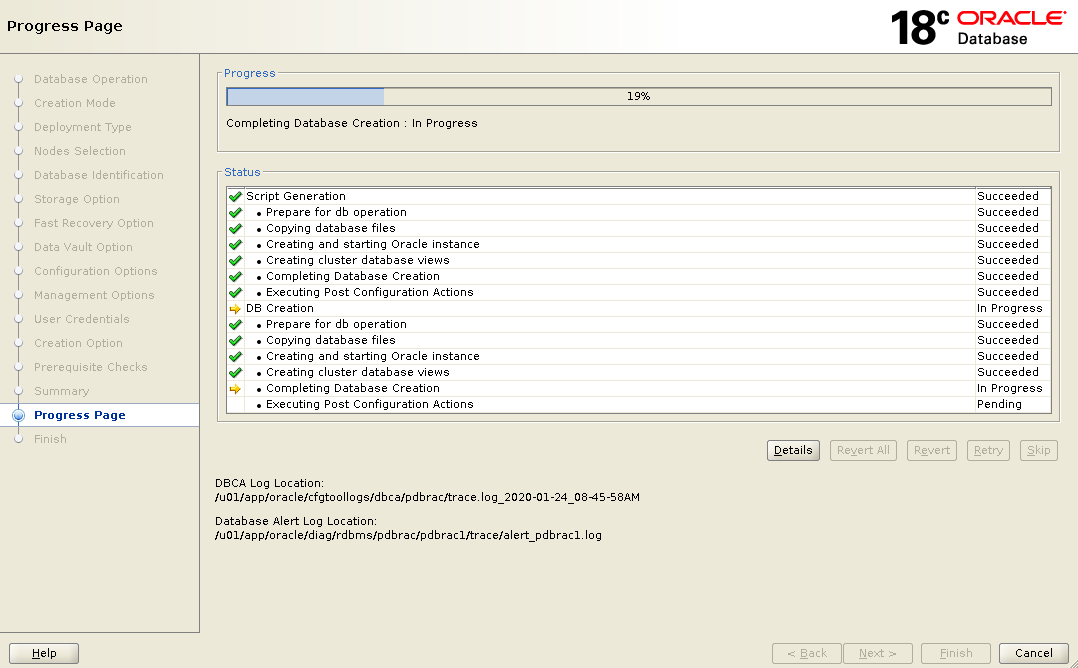
When its done, click Close to finish the database creation wizard.
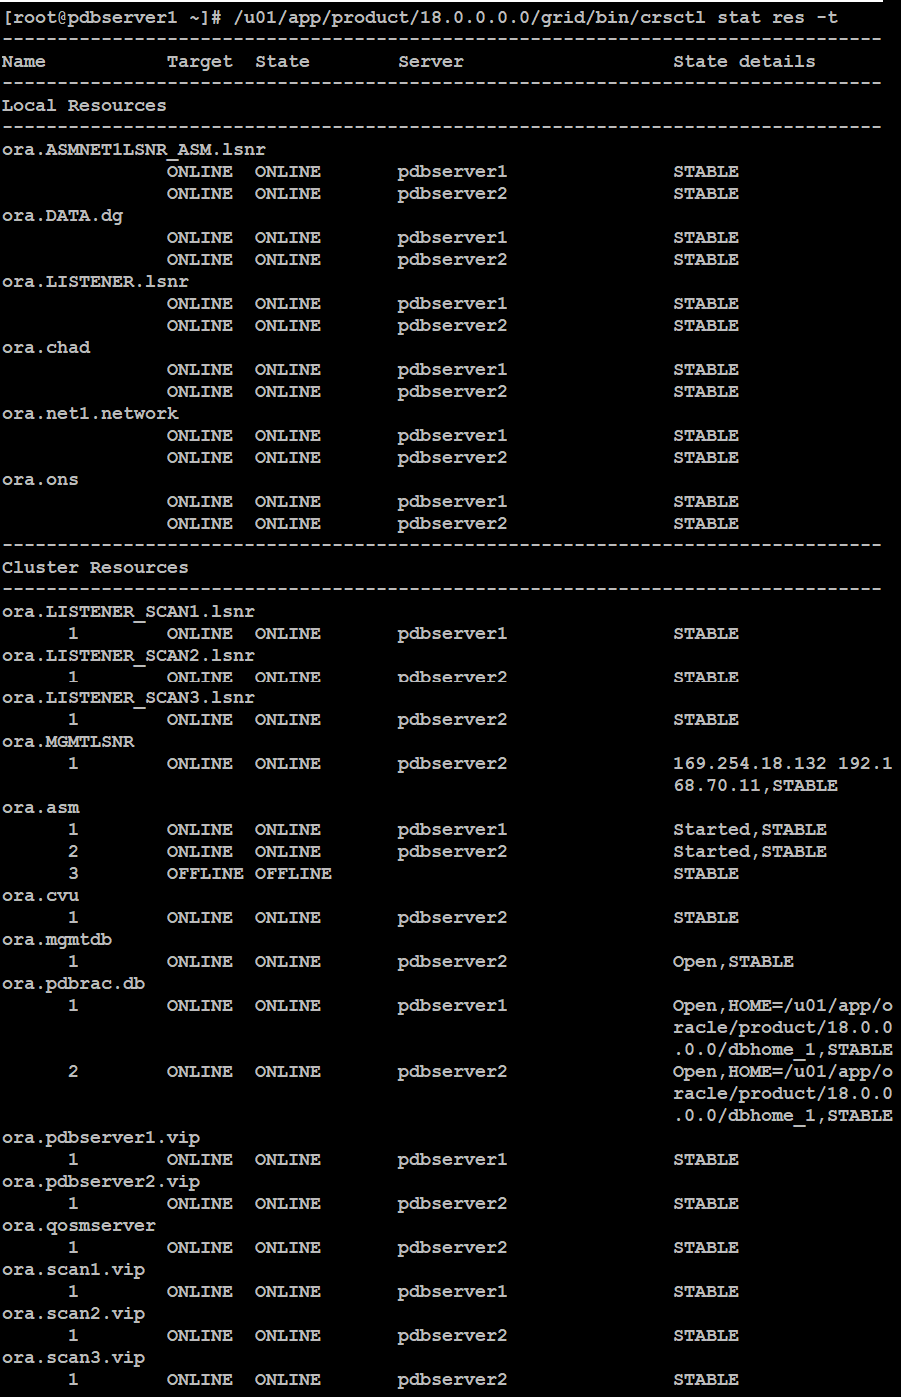
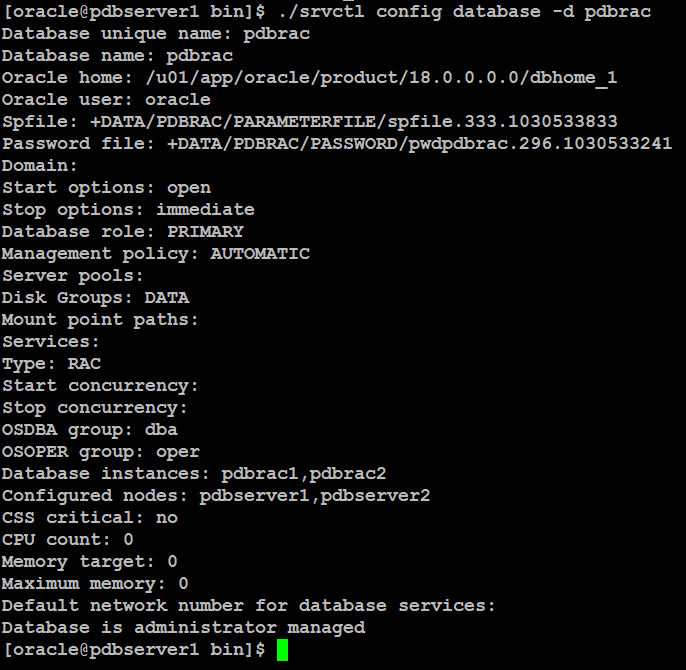
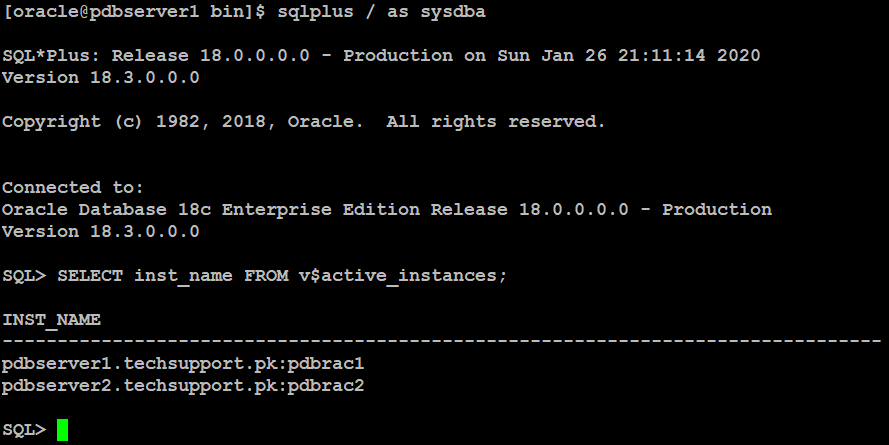
15. Verifying RAC and Database Status
At this stage, your database creation has been successful. Now log in with oracle user on your first node and type below command to verify your RAC cluster and database status.To verify RAC (Real Application Cluster) status, type below command:
To verify database status:

Type below command to verify database configuration in rac.
Type below command on SQL prompt:
16. Startup and Shutdown
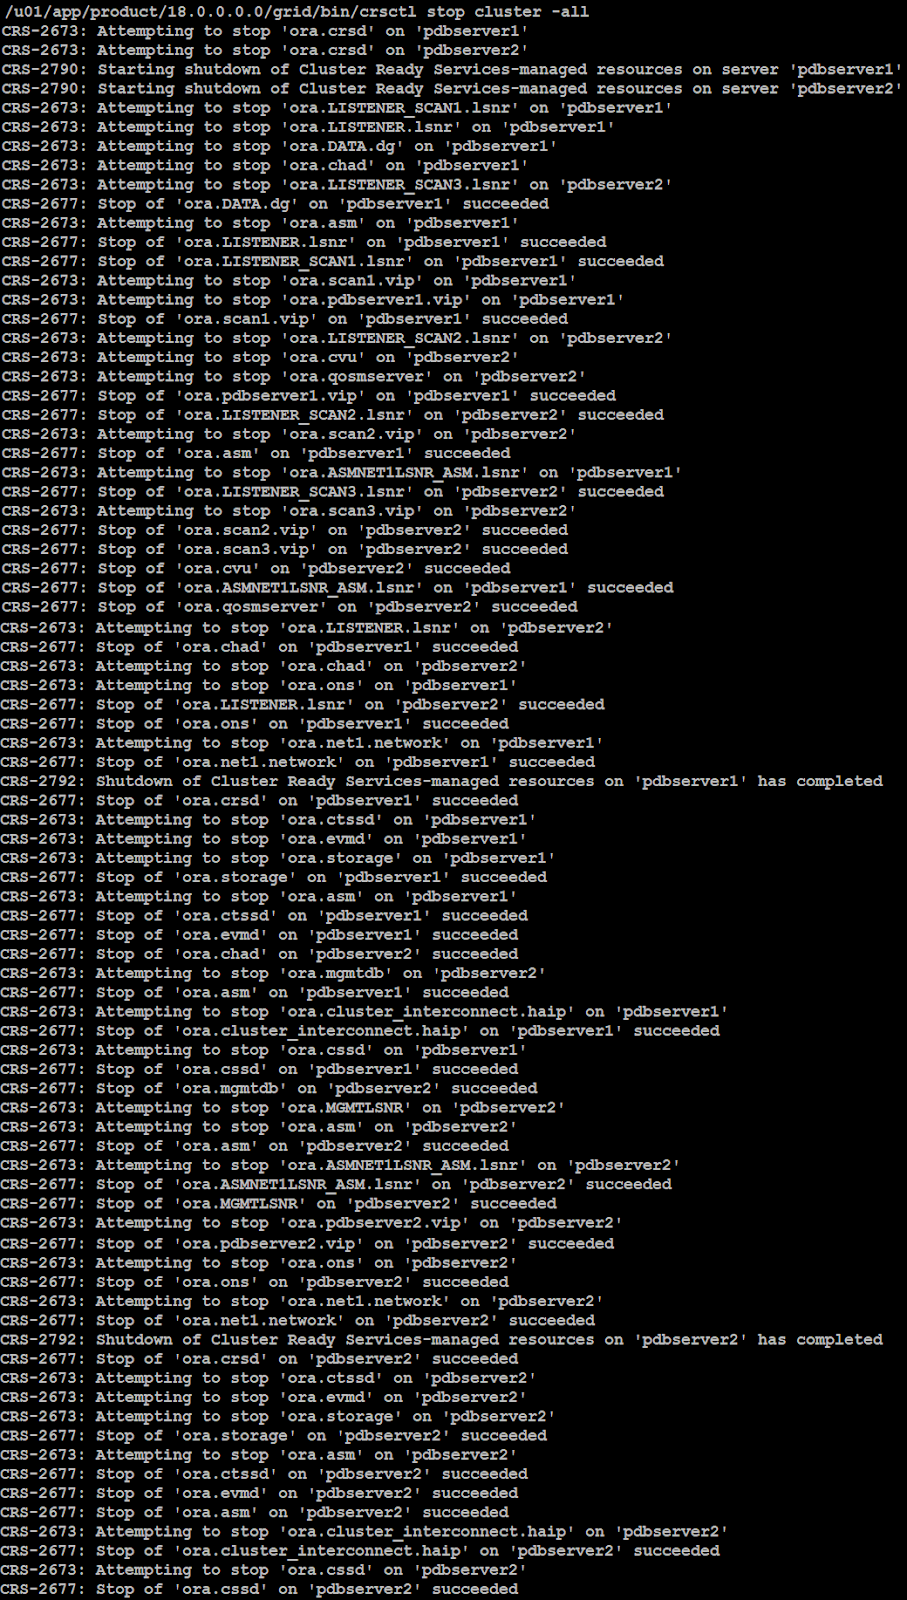
In this step, we will show you how to start or shutdown your cluster and database whenever you required to.Log in to any of the node with root user and type the below command to shutdown database first:
You can verify the database status whether it is stopped or not:

When the database stopped successfully, you can initiate below command to stop real application cluster:
The output similar to like below shows that real application cluster has been stopped.
Top bring back the cluster online, log to any of the node with root user and type the below command:
The output similar to like below shows that cluster is now online:

Now, you can type below command to start database as well: