
OpenVAS is a full-featured vulnerability scanner. Its capabilities include authenticated and unauthenticated testing, various high level and low level Internet and industrial protocols, performance tuning for large-scale scans and a powerful internal programming language to implement any type of vulnerability test.
Ubuntu includes the OpenVAS in its repository, which is free and open source. This tutorial will walk you through the steps to install, tune and run OpenVAS on an Ubuntu 19.04 server.
For this tutorial, our Ubuntu 19.04 virtual machine has 2 vCPUs and 2GB of RAM, which is generally sufficient to scan small numbers of hosts at once. However, still if you can provide more resources to it, the smoother your scanning system will run.
If prerequisites as stated above are in place then you may proceed to install OpenVAS using the following commands:
sudo apt install rpm nsis alien
sudo apt install openvas
The installation will take several minutes to complete.
Configuring OpenVAS
When you are done with installing openvas, execute the following command to run its initial configuration process:
sudo openvas-setup
It will take plenty of time to complete. At the end of the setup, automatically-generated password for the admin user will be displayed. It is highly recommended to change auto generated password so that you can remember it.

If you need to create an additional OpenVAS users, run ‘openvasmd’ with the –create-user option, which will add a new user and display the randomly-generated password.
sudo openvasmd --create-user=operator

sudo openvasmd --get-users
Output
admin
operator
If you’re anything like me, you will forget to save the admin password or accidentally delete it. Fortunately, changing OpenVAS user passwords can easily be accomplished with ‘openvasmd’ and the –new-password option.
sudo openvasmd --user=operator --new-password=yourpassword
sudo openvasmd --user=admin --new-password=yourpassword

Starting and Stopping OpenVAS
You can start or stop openvas services by executing the following commands:
sudo systemctl enable openvas-manager
sudo systemctl enable openvas-scanner
sudo systemctl start openvas-manager
sudo systemctl start openvas-scanner
If you want to stop openvas services, run the following to stop it:
sudo systemctl stop openvas-scanner
sudo systemctl stop openvas-manager
When the services finish initializing, you should find TCP ports 9390 and 9392 listening on your loopback interface.
sudo netstat -ant

By default, the web interface is only accessible from the local computer and you will not be able to access it from a remote machine. If you need to make it accessible from the intranet or internet then open the following file with root privileges in your preferred text editor:
sudo nano /etc/default/greenbone-security-assistant
Near the top, you should see a parameter that specifies the address that the web interface will listen on. You need to change the value from 127.0.0.1 to the real IP address of your Ubuntu machine. This will let it listen to connections from the intranet, and you will be able to connect:
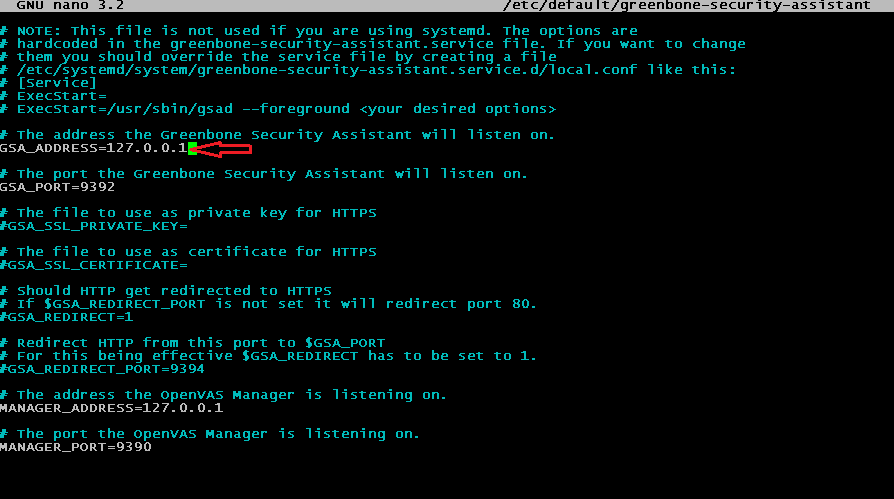
When done, save and close.
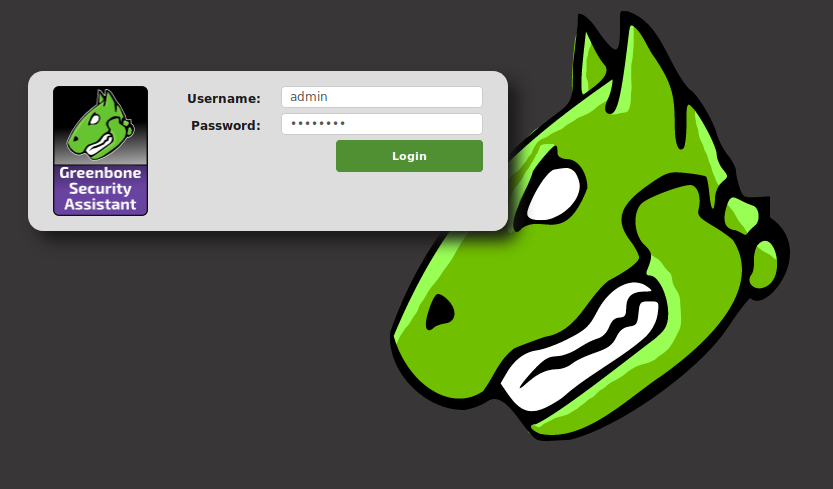
Accessing OpenVAS Web Interface
The Greenbone Security Assistant is the OpenVAS web interface available at https://ip_address:9392. After accepting the self-signed certificate warning you will be presented a login page.

You will need to enter the username and password you configured earlier. For this guide, the username was admin.
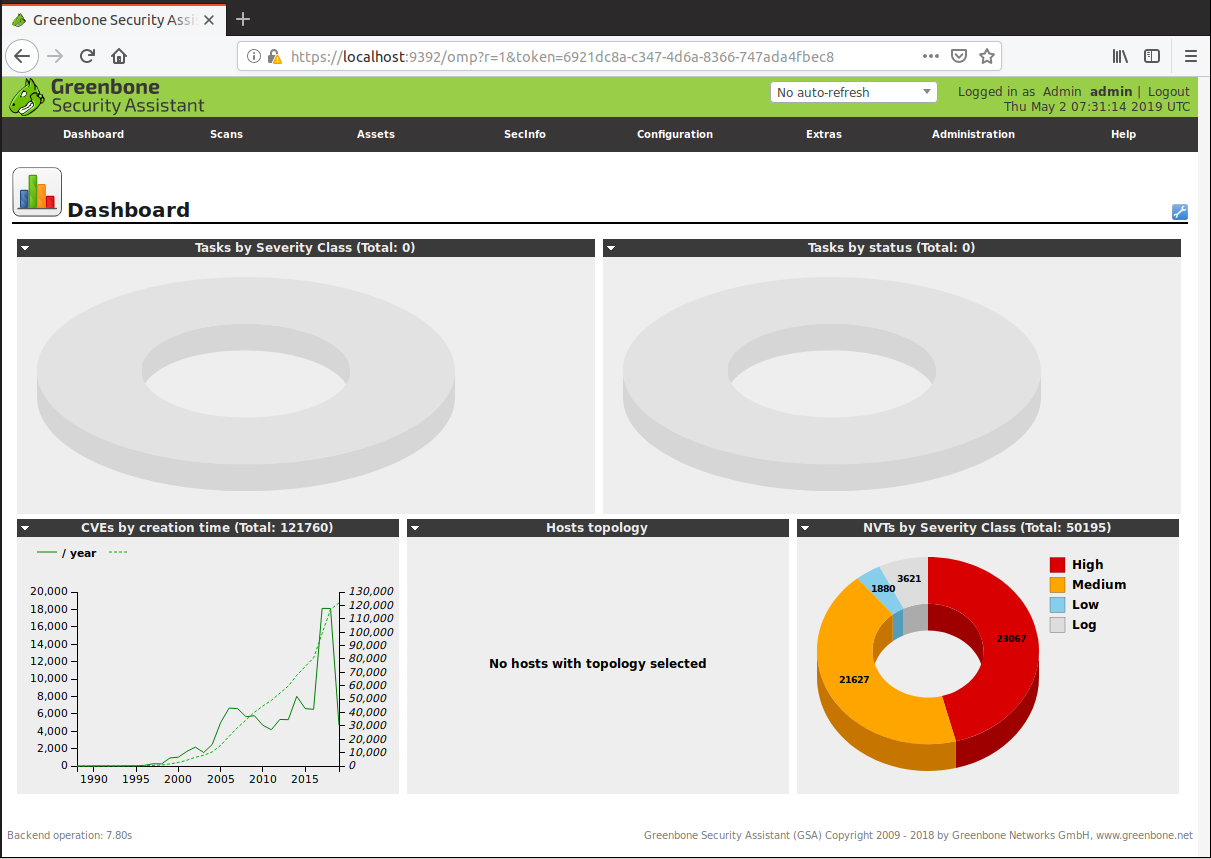
Once you sign in, you will see the main dashboard.
Set Up Credentials
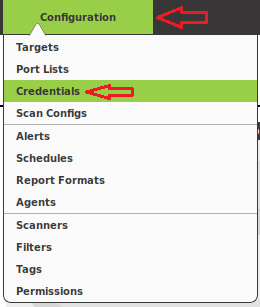
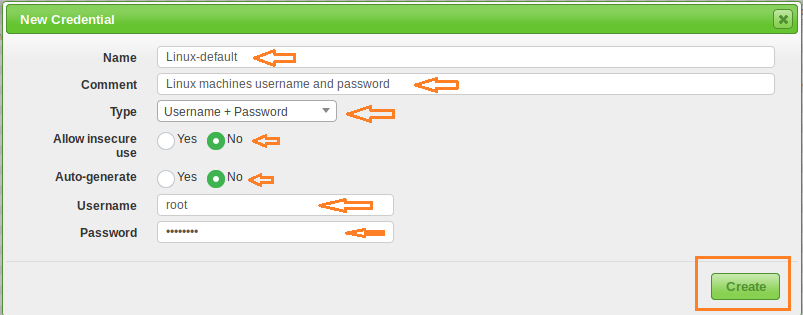
OpenVAS provide the most complete results when you are able to provide the scanning engine with credentials to use on scanned systems. OpenVAS will use these credentials to log in to the scanned system and perform detailed enumeration of installed software, patches, etc. You can add credentials via the “Credentials” entry under the “Configuration” menu.
Click on Star

Enter the credentials information of the hosts you want to scan and click Create.
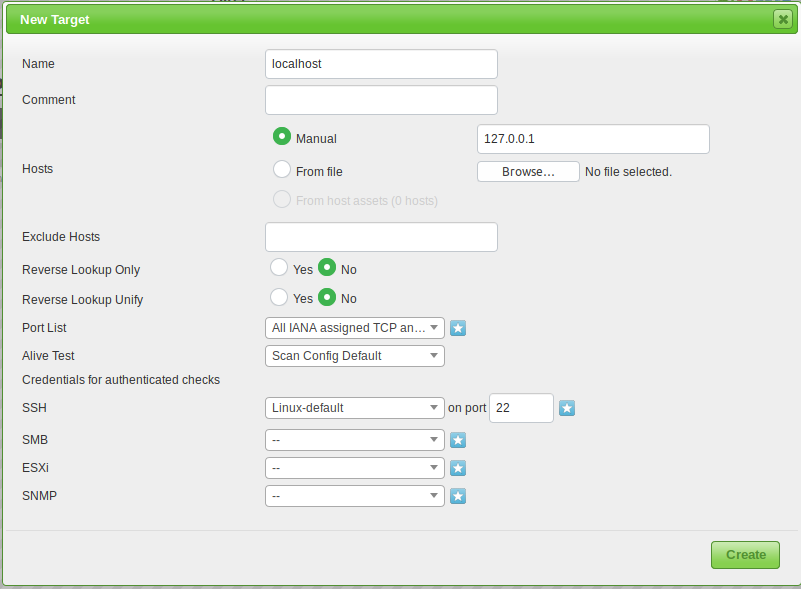
Target Configuration
You can configure them under the “Targets” section of the “Configuration” menu.
![]()
Scan Configuration
Prior to launching a vulnerability scan, you should fine-tune the Scan Config that will be used, which can be done under the “Scan Configs” section of the “Configuration” menu. You can clone any of the default Scan Configs and edit its options, disabling any services or checks that you don’t require.
![]()
Task Configuration
Your credentials, targets, and scan configurations are in place so now you’re ready to put everything together and run a vulnerability scan. In OpenVAS, vulnerability scans are conducted as “Tasks”. When you set up a new task, you can further optimize the scan by either increasing or decreasing the concurrent activities that take place.
With more finely-tuned scan settings and target selection, the results of your scan will be much more useful.
![]()
Wrapping up
You can configure them under the “Targets” section of the “Configuration” menu.
Scan Configuration
Prior to launching a vulnerability scan, you should fine-tune the Scan Config that will be used, which can be done under the “Scan Configs” section of the “Configuration” menu. You can clone any of the default Scan Configs and edit its options, disabling any services or checks that you don’t require.

Task Configuration
Your credentials, targets, and scan configurations are in place so now you’re ready to put everything together and run a vulnerability scan. In OpenVAS, vulnerability scans are conducted as “Tasks”. When you set up a new task, you can further optimize the scan by either increasing or decreasing the concurrent activities that take place.
With more finely-tuned scan settings and target selection, the results of your scan will be much more useful.

Wrapping up
With the wide range of available features in OpenVAS, we were only able to touch the surface. The number of connected devices in our homes and workplaces is increasing all the time and managing them becomes more of a challenge. Making effective use of a vulnerability scanner can make that management at least a little bit easier.


