LibreNMS is an open source auto-discovering and one of the best PHP/MySQL/SNMP based NMS software which includes support for a wide range of network devices, server hardware and almost all of the operating systems.
This article will take you through the steps to install and configure LibreNMS on an Ubuntu 19.04 server.
Installing LibreNMS Dependencies
First, you need to install required dependencies on your Ubuntu 19.04 machine using the following commands:
sudo apt install -y composer fping git graphviz imagemagick mariadb-client mariadb-server
sudo apt install -y php7.2-cli php7.2-curl php7.2-fpm php7.2-gd php7.2-mysql php7.2-snmp php7.2-xml php7.2-zip
sudo apt install -y nginx-full mtr-tiny nmap acl
sudo apt install -y python-memcache python-mysqldb rrdtool snmp snmpd whois
sudo apt install -y policycoreutils-python-utils policycoreutils
Disabling Selinux
We need to change selinux from permissive to disabled in order to allow error free installation of LibreNMS:
sudo nano /etc/selinux/config
SELINUX=disabled
Save and close
Creating LibreNMS User
Now we need to create a regular user called librenms and adding it to www-data group:
sudo useradd librenms -d /opt/librenms -M -r
sudo usermod -a -G librenms www-data
Cloning LibreNMS
At this point we will clone librenms package from github on our Ubuntu machine using the following command:
sudo git clone https://github.com/librenms/librenms.git /opt/librenms
Configuring MySQL
To fulfill librenms database requirement, we need to perform following steps to make it available. Replace highlighted parameters as per your need.
sudo systemctl restart mysql
sudo mysql -u root -p
CREATE DATABASE librenms CHARACTER SET utf8 COLLATE utf8_unicode_ci;
CREATE USER 'librenms'@'localhost' IDENTIFIED BY 'P@ssw0rd';
GRANT ALL PRIVILEGES ON librenms.* TO 'librenms'@'localhost';
FLUSH PRIVILEGES;
mysql> exit
sudo nano /etc/mysql/mariadb.conf.d/50-server.cnf
Within the [mysqld] section please add following:
innodb_file_per_table=1
sql-mode=""
lower_case_table_names=0
Save and close.
sudo systemctl restart mysql
Configuring PHP Timezone
We need to add or update timezone on our Ubuntu machine and in the following two php files as well:
sudo timedatectl set-timezone Asia/Karachi
sudo nano /etc/php/7.2/fpm/php.ini
Set the timezone according to your location:
date.time = Asia/Pakistan
Save and close
sudo nano /etc/php/7.2/cli/php.ini
Set the timezone according to your location:
date.time = Asia/Pakistan
Save and close
sudo systemctl restart php7.2-fpm
sudo service php7.2-fpm start
sudo ln -s /var/run/php/php7.2-fpm.sock /var/run/php/php7.0-fpm.sock
Configuring Nginx
We need to create librenms.conf file with the following parameters under Nginx /etc/nginx/conf.d directory to enable libreNMS WebGui:
sudo nano /etc/nginx/conf.d/librenms.conf
Paste and replace highlighted parameters according to your need:
server {
listen 80;
server_name librenms.example.com;
root /opt/librenms/html;
index index.php;
charset utf-8;
gzip on;
gzip_types text/css application/javascript text/javascript application/x-javascript image/svg+xml text/plain text/xsd text/xsl text/xml image/x-
icon;
location / {
try_files $uri $uri/ /index.php?$query_string;
}
location /api/v0 {
try_files $uri $uri/ /api_v0.php?$query_string;
}
location ~ \.php {
include fastcgi.conf;
fastcgi_split_path_info ^(.+\.php)(/.+)$;
fastcgi_pass unix:/var/run/php/php7.0-fpm.sock;
}
location ~ /\.ht {
deny all;
}
}
When you are done, Save and close
Delete default configuration file from nginx and restart nginx services to take changes effect
sudo rm /etc/nginx/sites-enabled/default
sudo systemctl restart nginx
Configuring SNMP
Copy snmpd.conf.example file from /opt/librenms directory to /etc/snmpd like below:
sudo cp /opt/librenms/snmpd.conf.example /etc/snmp/snmpd.conf
sudo nano /etc/snmp/snmpd.conf
Replace the text which says RANDOMSTRINGGOESHERE and set your own community string:
com2sec readonly default public
Save and close
sudo curl -o /usr/bin/distro https://raw.githubusercontent.com/librenms/librenms-agent/master/snmp/distro
sudo chmod +x /usr/bin/distro
sudo systemctl restart snmpd
Configuring Cron Job
sudo cp /opt/librenms/librenms.nonroot.cron /etc/cron.d/librenms
Configure Logs
sudo cp /opt/librenms/misc/librenms.logrotate /etc/logrotate.d/librenms
Change Permission
sudo chown -R librenms:librenms /opt/librenms
sudo setfacl -d -m g::rwx /opt/librenms/rrd /opt/librenms/logs
sudo setfacl -R -m g::rwx /opt/librenms/rrd /opt/librenms/logs
sudo setfacl -d -m g::rwx /opt/librenms/rrd /opt/librenms/logs /opt/librenms/bootstrap/cache/ /opt/librenms/storage/
sudo chmod -R ug=rwX /opt/librenms/rrd /opt/librenms/logs /opt/librenms/bootstrap/cache/ /opt/librenms/storage/
Run Composer Wrapper
sudo /opt/librenms/scripts/composer_wrapper.php install --no-dev
Configure UFW Firewall
sudo ufw allow ssh
sudo ufw allow http
sudo ufw allow https
sudo ufw allow 161/udp
sudo ufw enable
Verify Nginx Configuration
sudo systemctl restart nginx
sudo nginx -t
Output
nginx: the configuration file /etc/nginx/nginx.conf syntax is ok
nginx: configuration file /etc/nginx/nginx.conf test is successful
Installing LibreNMS
To install LibreNMS through web gui, open up web browser, type the domain name you set up during Nginx configuration or ip address of your Ubuntu machine in the address bar and press Enter.
http://librenms.example.com or http://ip_address
You will be redirected to the install.php page showing the result of PHP module support checks.
Make sure all status is green as shown below. If not then go back to your Ubuntu server and install or verify missing dependencies. If all well click 'Next Stage' to continue.

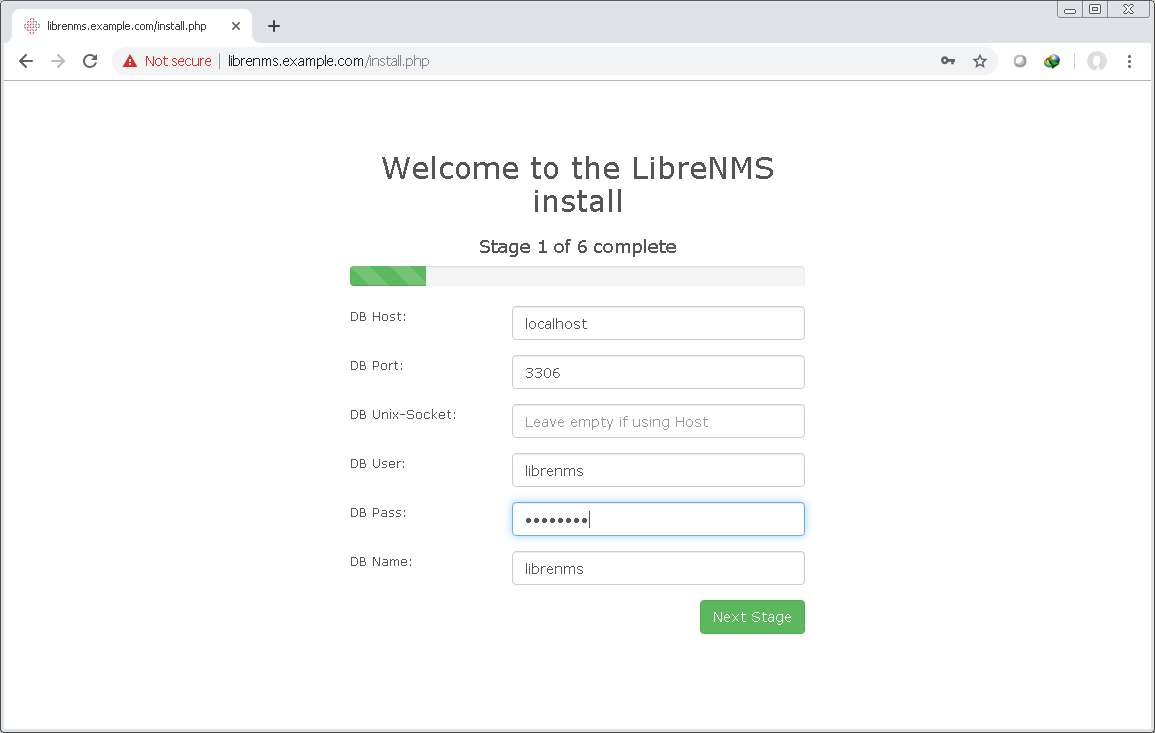
Provide database credentials and click Next Stage to continue
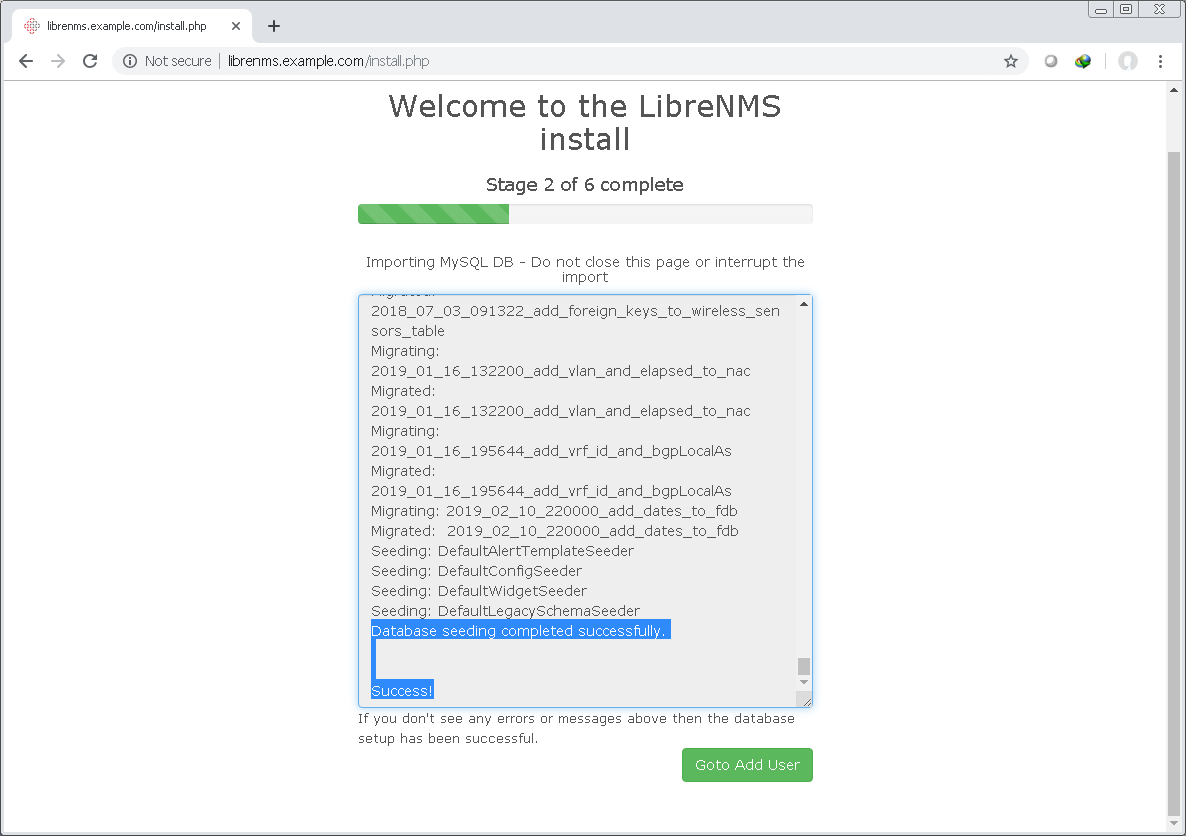
Click Goto Add User
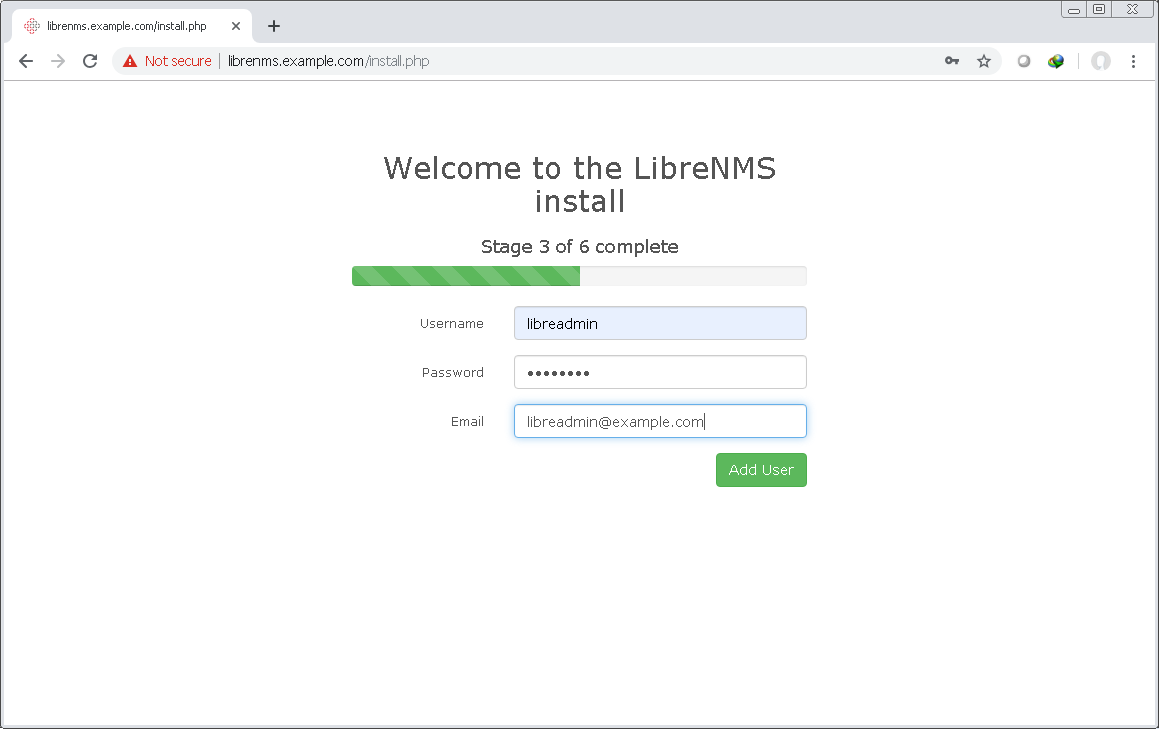
In the following step, you need to create a username and password to access LibreNMS web gui console.
Provide Username, Password and Email to create it and click Add User
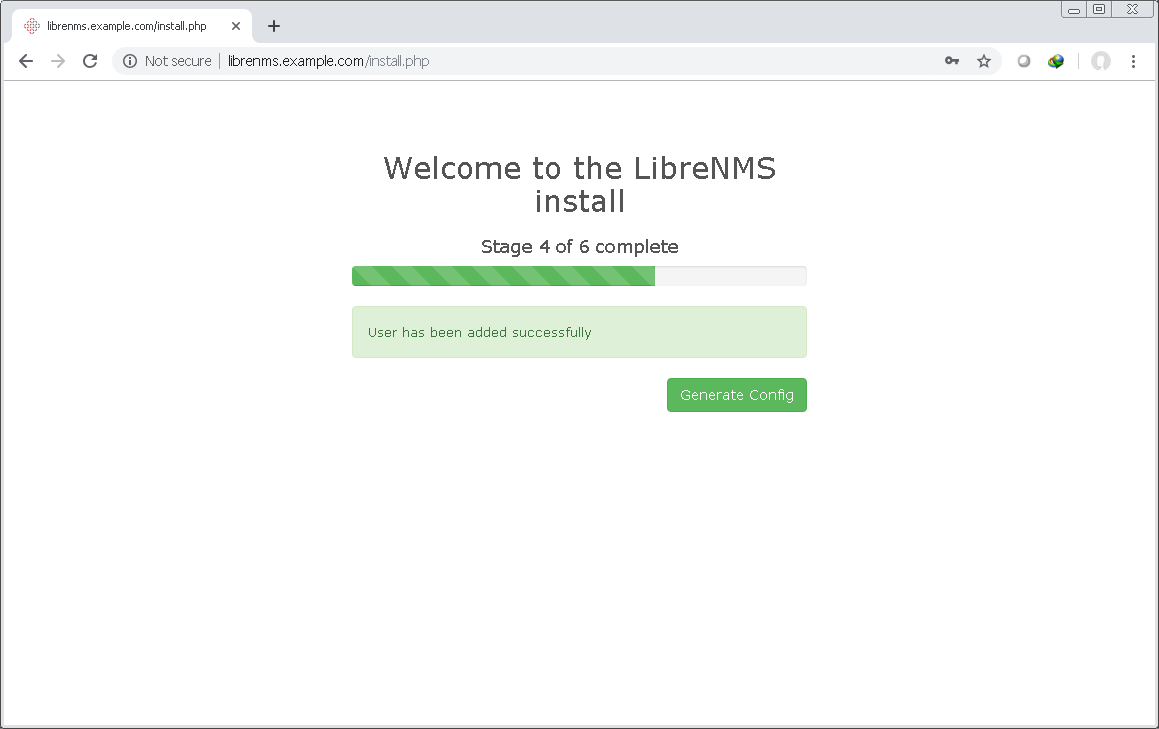
Click Generate Config
At this point you need to copy following php script parameters and go back to your Ubuntu machine
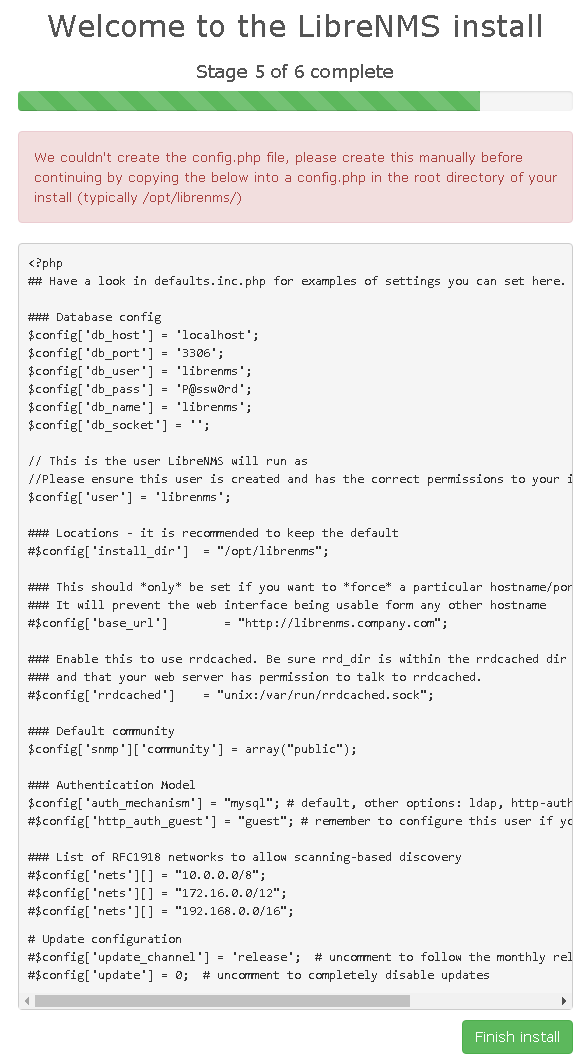
and create config.php file under /opt/librenms directory using the following command:
sudo nano /opt/librenms/config.php
Paste copied script, save and close the file
Change config.php permission using the following command:
sudo chown -R librenms:librenms /opt/librenms/config.php
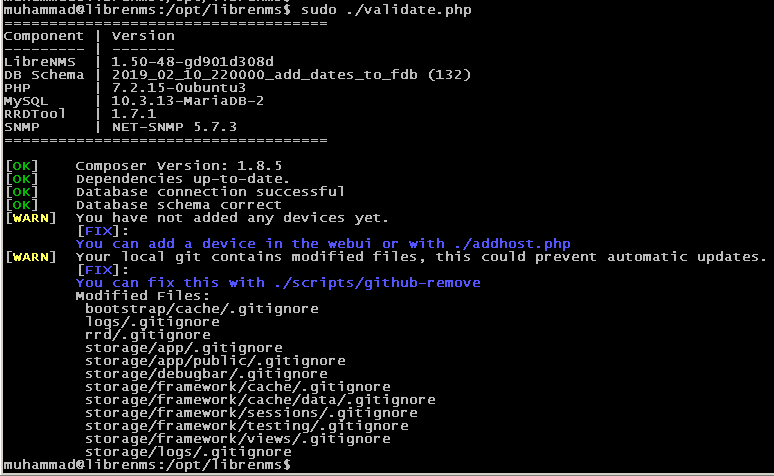
Run validation check using the following command:
sudo /opt/librenms/validate.php
If you see validation check output similar to below then you are at good to go
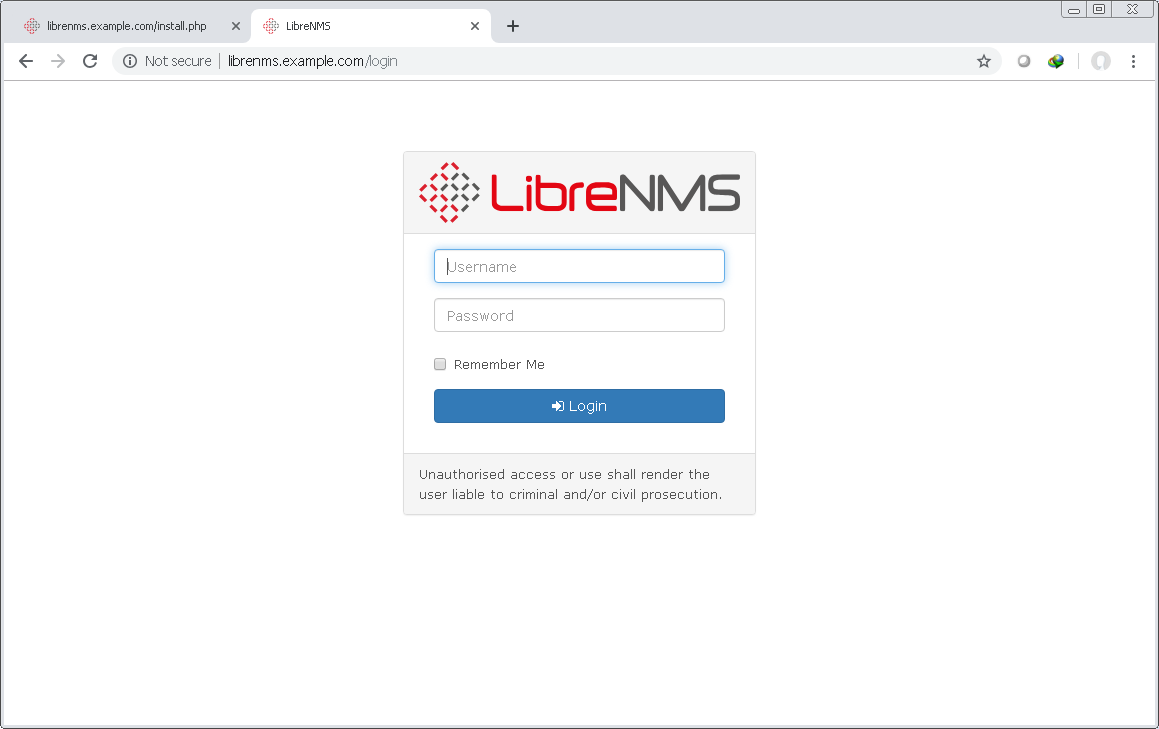
Go back to your web browser, access librenms web gui with http://hostname.domain.name or http://ip_address
You will be presented the following login screen. Login with your username and password and start adding your network devices to monitor.
Wrapping up
You have successfully installed and configured LibreNMS on your Ubuntu 19.04 server. If you have any question or suggestion, please leave the comments below.


