
Single sign-on (SSO) is a property of access control of multiple related, yet independent, software systems. With this property, a user logs in with a single ID and password to gain access to a connected system or systems without using different usernames or passwords, or in some configurations seamlessly sign on at each system.
The Apache HTTP server is the most widely-used web server in the world. It provides many powerful features including dynamically loadable modules, robust media support, and extensive integration with other popular software.
mod_auth_mellon is an authentication module for Apache. It authenticates the user against a SAML 2.0 IdP, and grants access to directories depending on attributes received from the identity provider (IdP).
Active Directory Federation Services (ADFS) is a software component developed by Microsoft that can be installed on Windows Server operating systems to provide users with single sign-on access to systems and applications located across organizational boundaries. In this tutorial, you'll learn how to configure Single sign-on (SSO) for a website or web based application published in Apache web server on Red Hat or CentOS 7 server.
Environment
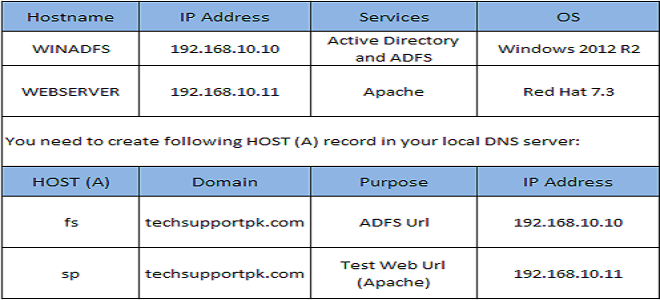
We will use following information throughout this tutorial:
Prerequisites
To follow this tutorial, you will need a Red Hat or CentOS 7 server installed with minimal packages and one Windows 2012 R2 or Windows 2016 server with Active Directory Domain and Active Directory Federation Services (ADFS) installed.
Note: Apache directory and file structure may vary if you are using lower or higher Red Hat release than the release we used for this guide. Directory structure and packages installation method varies if you are on a different linux distribution such as Debian, Ubuntu etc.
For this guide, we'll use Red Hat 7.3 for Apache and Windows 2012 R2 for Active Directory and ADFS services. You'll need to replace red highlighted text to reflect your environment.
Configure Network
Login to your linux server and execute the following command to stop and disable built-in linux firewall.
systemctl stop firewalld
systemctl disable firewalld
Set hostname:
hostnamectl set-hostname webserver.techsupportpk.com
Set IP Address:
vi /etc/sysconfig/network-scripts/ifcfg-ens32
TYPE="Ethernet"
BOOTPROTO="none"
DEFROUTE="yes"
IPV4_FAILURE_FATAL="no"
NAME="ens32"
UUID="d2b38d8d-6d4c-4e30-809a-58bc916a9960"
DEVICE="ens32"
ONBOOT="yes"
IPADDR="192.168.10.11"
PREFIX="24"
GATEWAY="192.168.10.1"
DNS1="192.168.10.10"
DOMAIN="techsupportpk.com"
Save and close using (Esc:wq!Enter)
Now execute ping command to test your network configuration
ping techsupportpk.com
Output
PING techsupportpk.com (192.168.10.10) 56(84) bytes of data.
64 bytes from 192.168.10.10 (192.168.10.10): icmp_seq=1 ttl=128 time=0.863 ms
64 bytes from 192.168.10.10 (192.168.10.10): icmp_seq=2 ttl=128 time=0.750 ms
64 bytes from 192.168.10.10 (192.168.10.10): icmp_seq=3 ttl=128 time=0.982 ms
64 bytes from 192.168.10.10 (192.168.10.10): icmp_seq=4 ttl=128 time=0.858 ms
^C
--- techsupportpk.com ping statistics ---
4 packets transmitted, 4 received, 0% packet loss, time 13017ms
rtt min/avg/max/mdev = 0.750/0.894/0.989/0.079 ms
Synchronize your linux server time with adfs server using the below command:
ntpdate fs.techsupportpk.com
Install Required Packages
Install EPEL repository on your linux server for some extra packages and updates using the following command:
rpm -ivh https://dl.fedoraproject.org/pub/epel/epel-release-latest-7.noarch.rpm
Now install Apache, Mellon and their dependencies:
yum -y install ntpdate httpd mod_ssl mod_auth_mellon php openssl wget
When packages installation complete, perform following steps:
mkdir -p /etc/httpd/mellon
mkdir -p /var/www/your_webdirectory
cd /etc/httpd/mellon
We will not make any configuration in apache default configuration files hence disabling SSLEngine parameter from default /etc/httpd/conf.d/ssl.conf file like below:
vi /etc/httpd/conf.d/ssl.conf
and change from:
SSLEngine
to
#SSLEngine
Save and close
Generate an SSL certificate for enabling https in Apache using the following command:
openssl req -x509 -nodes -days 365 -newkey rsa:2048 -keyout /etc/pki/tls/private/webserver.key -out /etc/pki/tls/certs/webserver.crt
Output:
Generating a 2048 bit RSA private key
................................+++
.......+++
writing new private key to '/etc/pki/tls/private/webserver.key'
-----
You are about to be asked to enter information that will be incorporated
into your certificate request.
What you are about to enter is what is called a Distinguished Name or a DN.
There are quite a few fields but you can leave some blank
For some fields there will be a default value,
If you enter '.', the field will be left blank.
-----
Country Name (2 letter code) [XX]:PK
State or Province Name (full name) []:Sindh
Locality Name (eg, city) [Default City]:Karachi
Organization Name (eg, company) [Default Company Ltd]:TSPK
Organizational Unit Name (eg, section) []:Technical Support
Common Name (eg, your name or your server's hostname) []:sp.techsupportpk.com
Email Address []:support@techsupportpk.com
Now configure a VirtualHost in Apache. In our case, we will provide web services on https://sp.techsupportpk.com from the/var/www/sp directory using the /etc/httpd/conf.d/sp.conf parameter file:
vi /etc/httpd/conf.d/sp.conf
<VirtualHost 192.168.10.11:443>
DocumentRoot /var/www/sp
ServerName sp.techsupportpk.com
ServerSignature Off
ErrorLog /var/log/httpd/error_sp.log
LogLevel info
CustomLog /var/log/httpd/access_sp.log combined
SSLEngine on
SSLCertificateFile /etc/pki/tls/certs/webserver.crt
SSLCertificateKeyFile /etc/pki/tls/private/webserver.key
</VirtualHost>
Save and close.
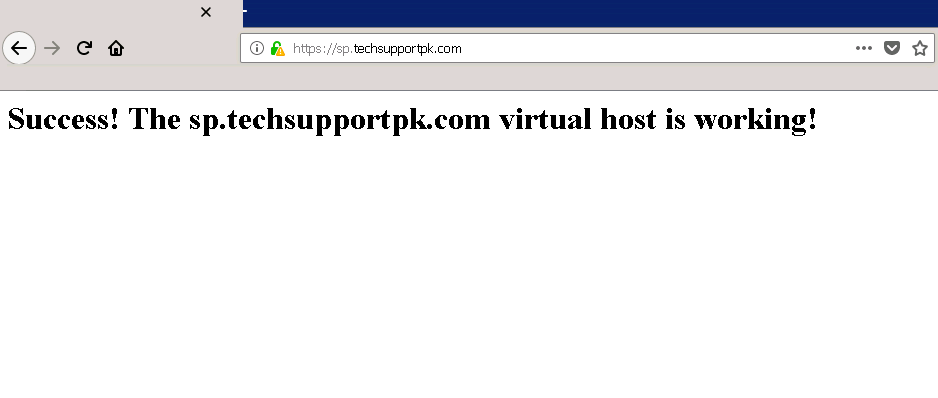
Create a test page index.html in /var/www/sp directory:
echo Welcome! The sp.techsupportpk.com virtual host is working > /var/www/sp/index.html
Now, you need to generate mellon configuration metadata and ssl certificate files.This https://sp.techsupportpk.com/ is the url that we are protecting from unauthorized access and this https://sp.techsupportpk.com/mellon is the endpoint url.
Type the following commands to generate mellon configuration files:
cd /etc/httpd/mellon
/usr/libexec/mod_auth_mellon/mellon_create_metadata.sh https://sp.techsupportpk.com/ "https://sp.techsupportpk.com/mellon"
Above command will generate .key, .cert and .xml files. You should rename these three files to make their name short and easy to remember.
Type the following commands to rename.
mv *.key mellon.key
mv *.cert mellon.cert
mv *.xml mellon_metadata.xml
Optional: If you want to protect a single page instead of entire website:
/usr/libexec/mod_auth_mellon/mellon_create_metadata.sh https://sp.techsupportpk.com/page_name"https://sp.techsupportpk.com/mellon"
Optional: If you want to protect an entire directory:
/usr/libexec/mod_auth_mellon/mellon_create_metadata.sh https://sp.techsupportpk.com/dir_name"https://sp.techsupportpk.com/mellon"
Now you need to download adfs metadata xml file on your linux server using the following command:
wget https://fs.techsupportpk.com/FederationMetadata/2007-06/FederationMetadata.xml -O /etc/httpd/mellon/FederationMetadata.xml --no-check-certificate
At this point, create mellon.conf file in /etc/httpd/conf.d and add the following information:
vi /etc/httpd/conf.d/mellon.conf
MellonSPPrivateKeyFile /etc/httpd/mellon/mellon.key
MellonSPCertFile /etc/httpd/mellon/mellon.cert
MellonSPMetadataFile /etc/httpd/mellon/mellon_metadata.xml
MellonIdPMetadataFile /etc/httpd/mellon/FederationMetadata.xml
MellonEndpointPath /mellon
MellonEnable "auth"
Optional: For a single page, mellon.conf will look like:
<Location />
MellonSPPrivateKeyFile /etc/httpd/mellon/mellon.key
MellonSPCertFile /etc/httpd/mellon/mellon.cert
MellonSPMetadataFile /etc/httpd/mellon/MellonMetadata.xml
MellonIdPMetadataFile /etc/httpd/mellon/FederationMetadata.xml
MellonEndpointPath /mellon
MellonEnable "info"
</Location>
<Location /page_name>
MellonEnable "auth"
</Location>
Optional: For a directory, mellon.conf will look like:
<Location />
MellonSPPrivateKeyFile /etc/httpd/mellon/mellon.key
MellonSPCertFile /etc/httpd/mellon/mellon.cert
MellonSPMetadataFile /etc/httpd/mellon/MellonMetadata.xml
MellonIdPMetadataFile /etc/httpd/mellon/FederationMetadata.xml
MellonEndpointPath /mellon
MellonEnable "info"
</Location>
<Location /dir_name>
MellonEnable "auth"
</Location>
Convert mellon.key and mellon.cert file into mellon.pfx format:
openssl pkcs12 -export -inkey /etc/httpd/mellon/mellon.key -in /etc/httpd/mellon/mellon.cert -out /etc/httpd/mellon/mellon.pfx
Use pscp or any of your favorite tool that can transfer files from linux to windows adfs server. If you are using pscp then you can transfer mellon.pfx and mellon_metadata.xml files using following commands:
Open up cmd.exe from Start > Run > cmd.exe
pscp.exe -sftp root@192.168.10.11:/etc/httpd/mellon/mellon.pfx C:\Users\%username%\Documents
pscp.exe -sftp root@192.168.10.11:/etc/httpd/mellon/mellon_metadata.xml C:\Users\%username%\Documents
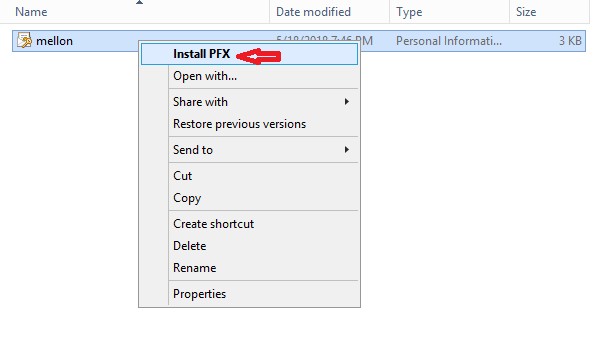
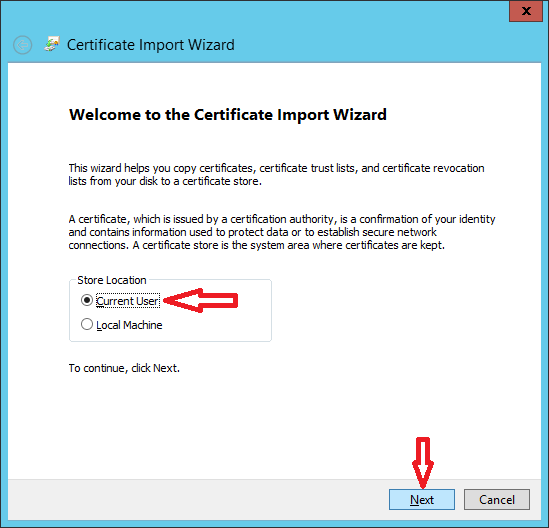
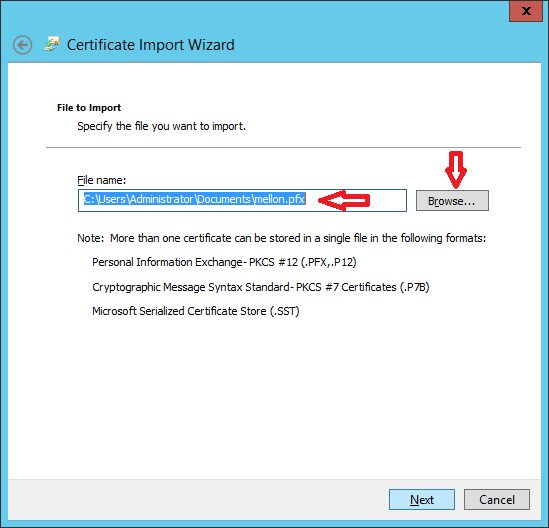
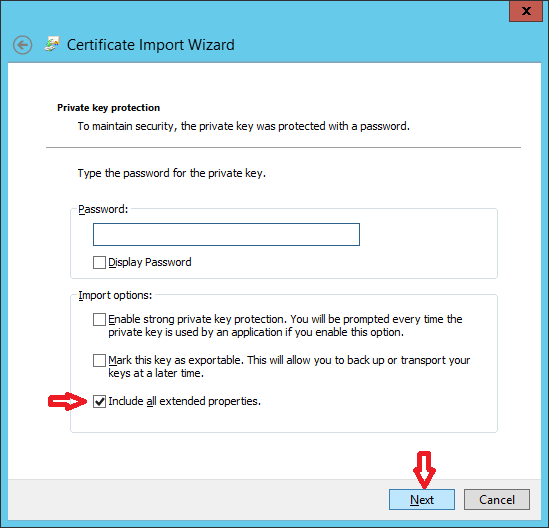
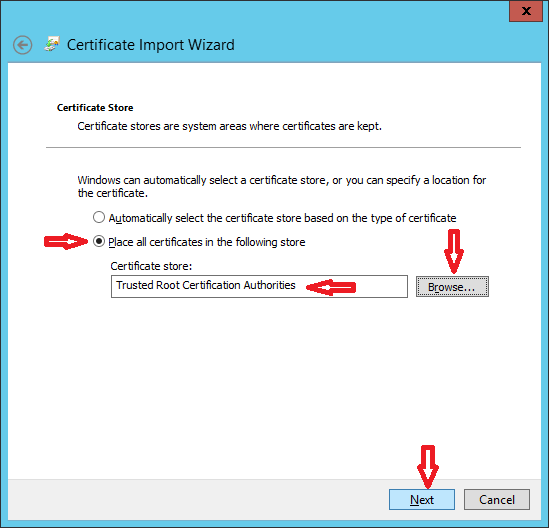
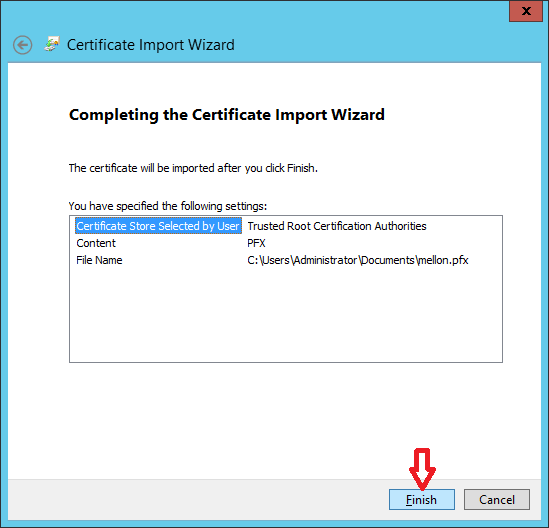
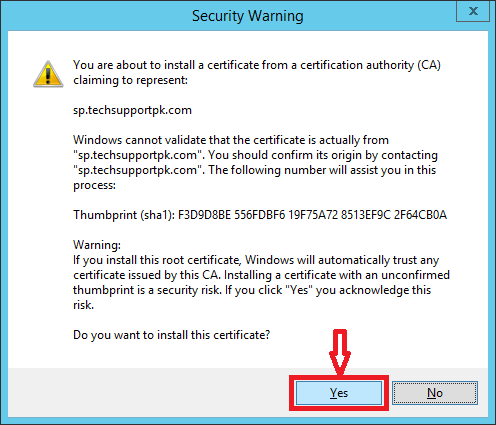
When you are done with file transfer, install mellon.pfx certificate under "Trusted root authority" on Windows ADFS Server as shown in images below.
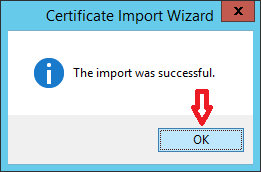
Done.
At this point, you are ready to configure Relaying Party Trust on ADFS server as shown in images below.

Right Click on "Relying Party Trusts" Click "Add Relying Party Trust..."

Click Start

Click "Import data about the relying party from a file"> Browse

Select mellon metadata xml file you transferred from linux server earlier > Click Open
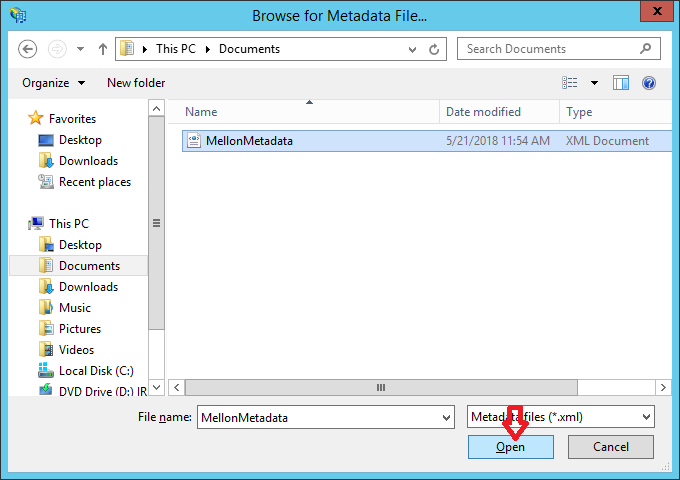
Click Next

Click OK

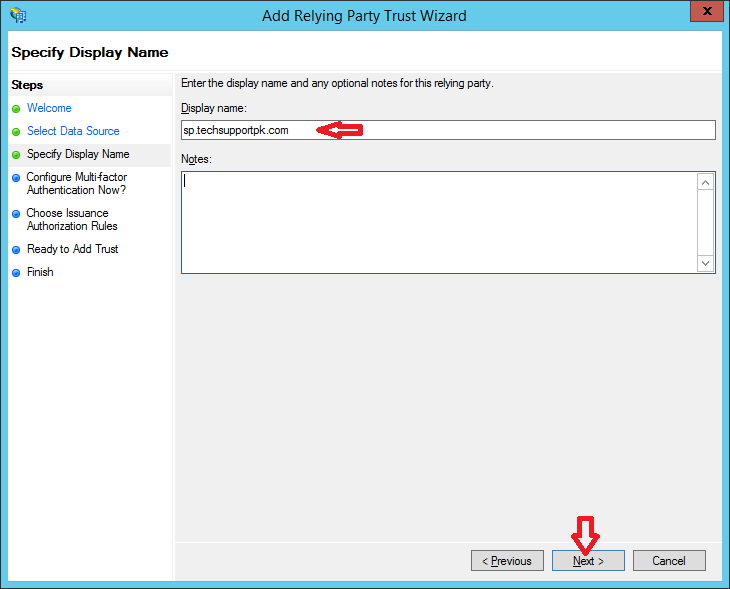
Provide "Display Name" Click Next
Keep the default and click Next

Keep the default and click Next
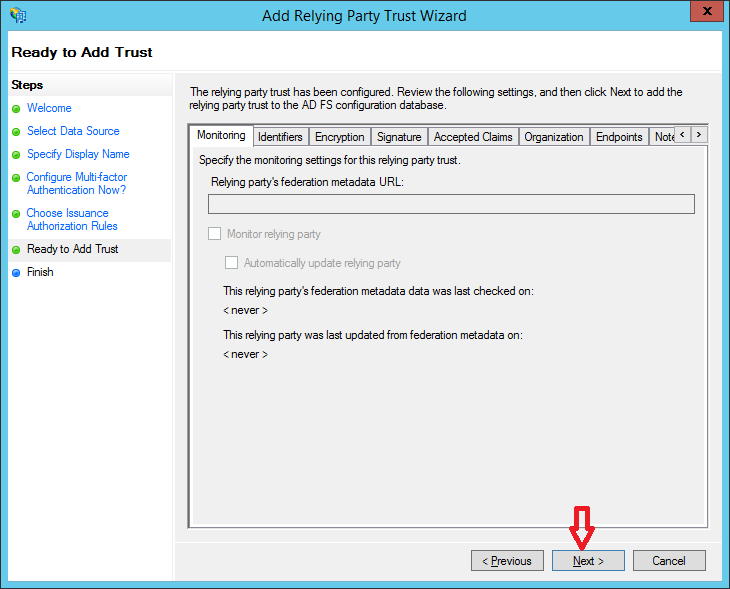
Click Next
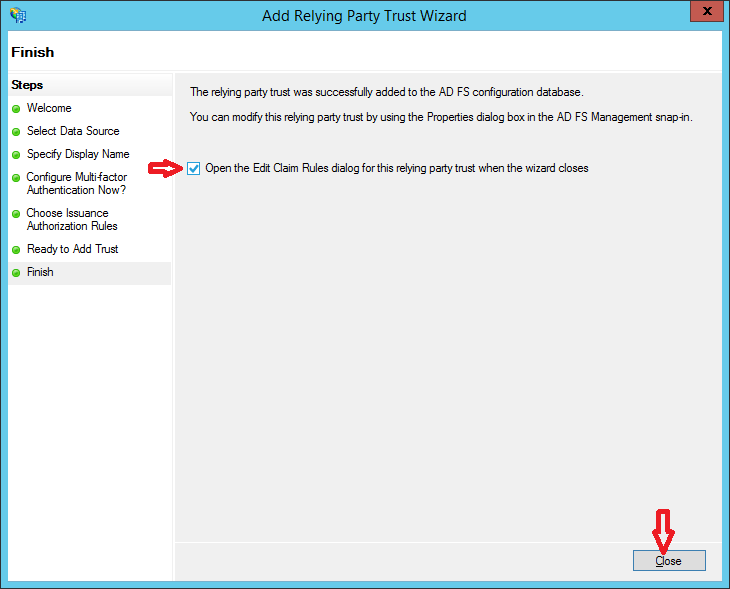
Keep the default and click Close
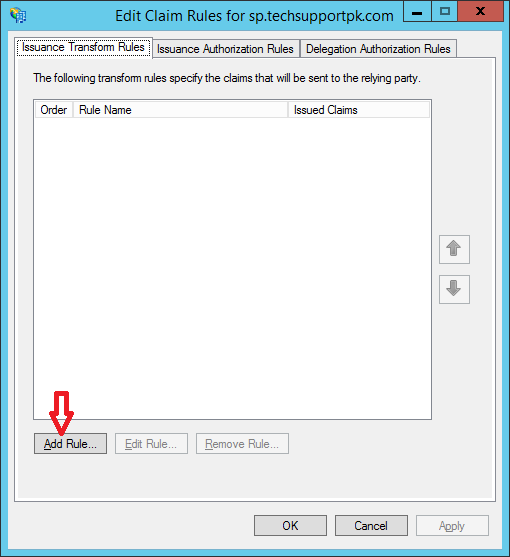
Click Add Rule
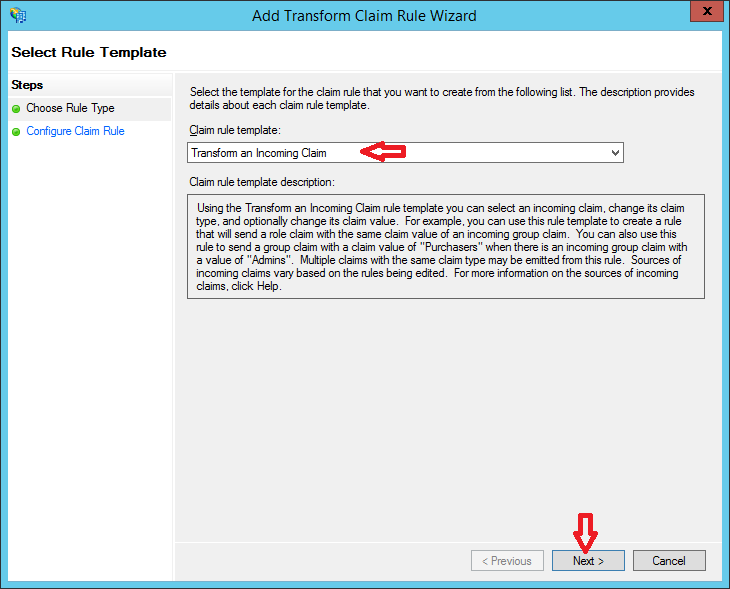
Select "Transform an Incoming Claim" from drop down list and click Next
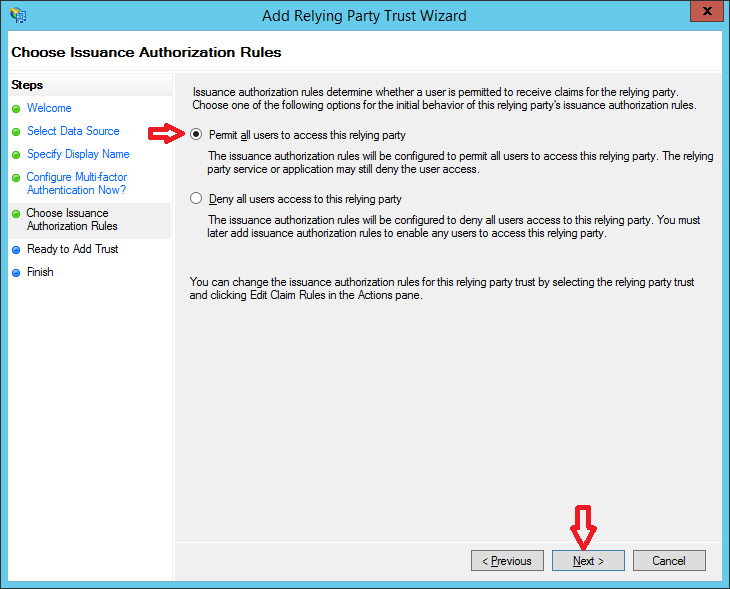
Choose the below information accordingly and click Finish
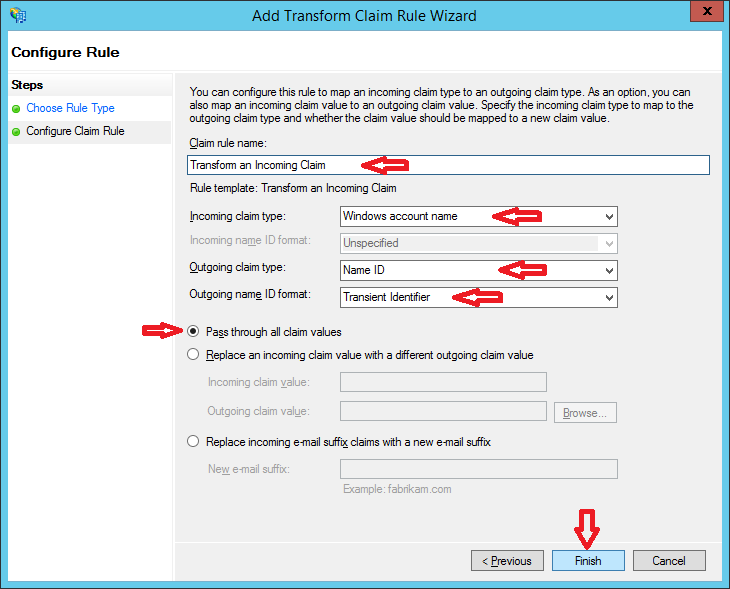
Click Apply > OK

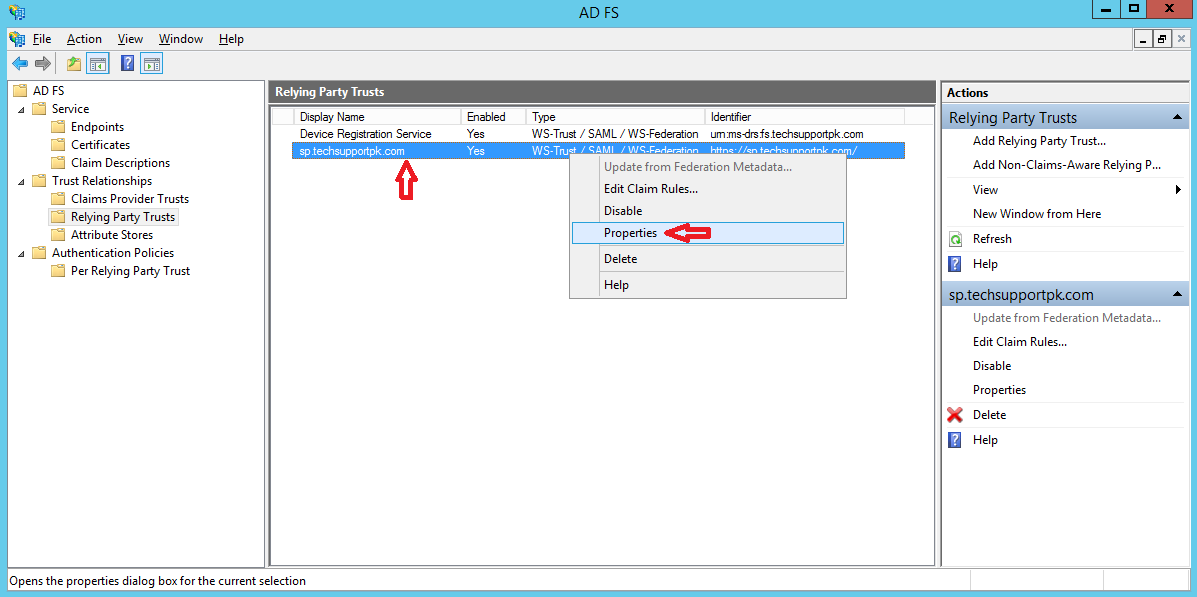
Right Click on Relying Party Trusts you created > Click Properties
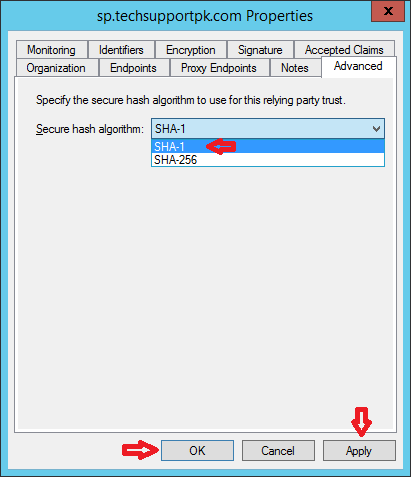
From the Advanced tab select SHA-1 > Apply > OK
Now open Active Directory Users and Computers console > Right Click on domain > Click New> Organizational Unit

Provide OU Name > Click OK

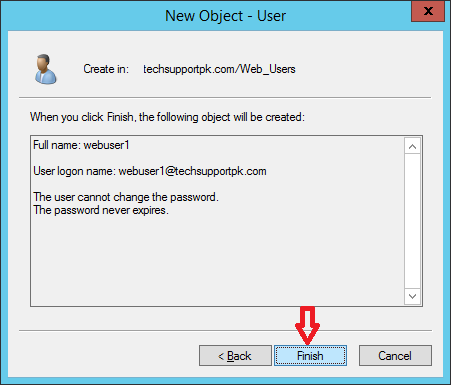
Right Click on OU > New > Users

Provide the username info and click Next

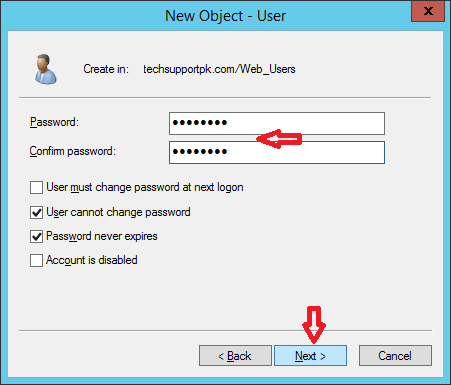
Enter Password and Confirm Password for a user you are creating and click Next
Click Finish
Open up web browser and type your web url to test Single sign-on

Provide the username@domain and password you created earlier and click Sign in

If you see index.html page like below, this means you are done with Single sign-on configuration.
If you are facing errors and unable to access index.html page after Sign in then you might need to resync your linux server time with adfs:
ntpdate fs.techsupportpk.com