
VXLAN enables you to create a logical network for your virtual machines across different networks. You can create a layer 2 network on top of your layer 3 networks. This guide will walk you through the steps to create and configure vxlan on vSphere host for NSX Manager.
Related Articles
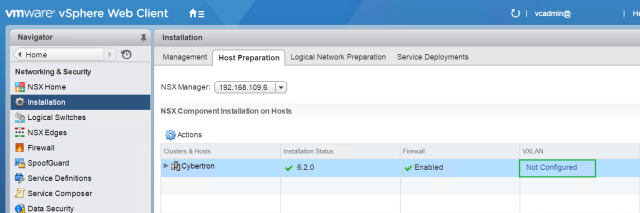
To begin with VXLAN configuration, log into vCenter Web Client and navigating to Networking & Security > Installation > Host Preparation tab
Here you can see that VXLAN status is “Not Configured”. Click on that and a new wizard will open to configure VXLAN settings.
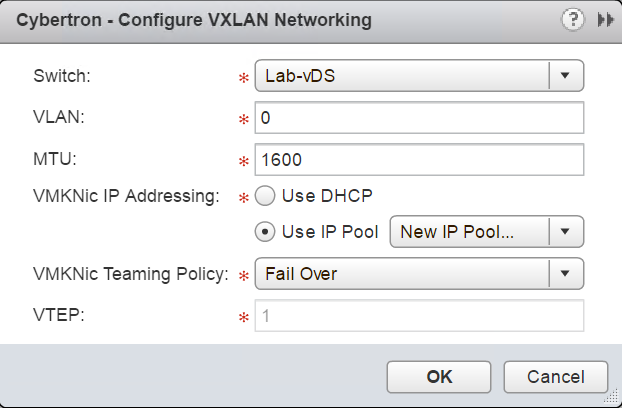
Provide the following detail to configure the VXLAN.
- Switch – Select the vDS from the drop-down for attaching the new VXLAN VMkernel interface.
- VLAN – Enter the VLAN ID to use for VXLAN VMkernel interface. If you are not using any VLAN in your environment Enter “0″. It will pass traffic as untagged.
- MTU – The recommended minimum value of MTU is 1600, which allows for the overhead incurred by VXLAN encapsulation.
- VMKNic IP Addressing – You can specify either IP Pool or DHCP for IP addressing.
Create an IP Pool by selecting “New IP Pool” and a new wizard will be launched to create a new pool.
Provide a name for the pool and define the IP/Netmask/gateway/DNS etc along with Range of IP that will be used in this pool.
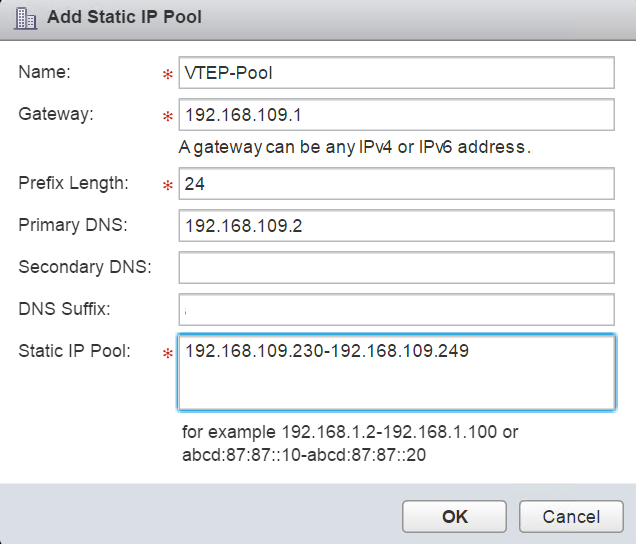
Once you Click OK, you will return to the original window. Select the pool which you have just created.
Next setting is to select VMKNic teaming policy. This option is define the teaming policy used for bonding the physical NICs for use with the VTEP port group. The value of VTEP changes as you select the appropriate policy.
I am going with the default Teaming policy to “Fail Over”. Click OK when you are done.

Here you can see VXLAN creation on your cluster is started.
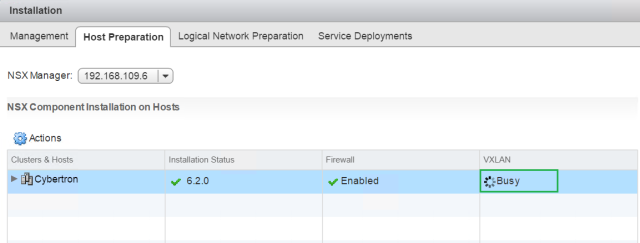
Once the VXLAN created, the status will be changed from busy to Configured.

VXLAN configuration will create a new VMkernel port on each host in the cluster as the VXLAN Tunnel Endpoint (VTEP). You can verify this by selecting your host and navigating to Manage > Networking > VMkernel Adapters.
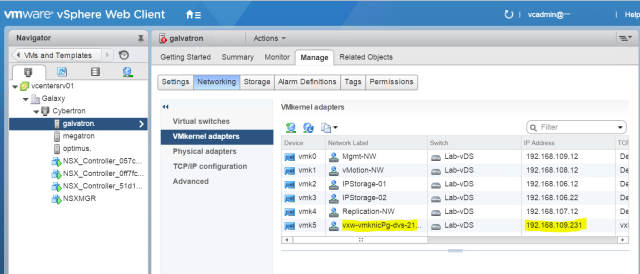
Now you can see that IP allocated to these VMkernel interfaces are from your defined pool by clicking on Logical Network Preparation tab> VXLAN Transport.

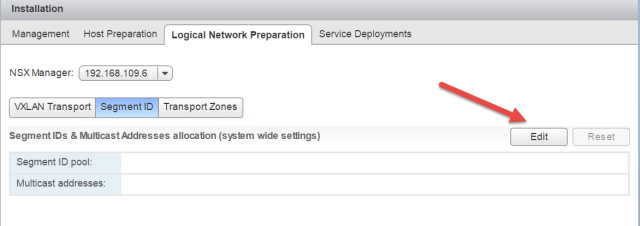
On the Logical Network Preparation tab, click the Segment ID button and Click Edit to open the Segment ID pool dialog box to configure ID Pool.
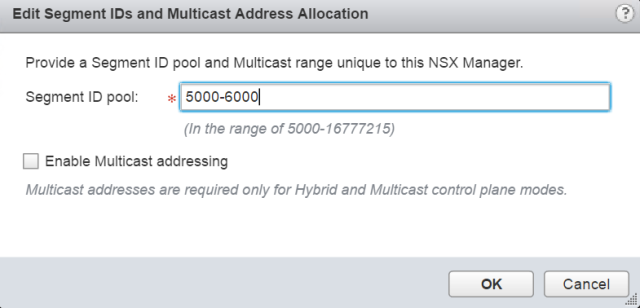
Enter the Segment ID Pool and Click OK to proceed.
Note: VMware NSX VNI ID starts from 5000.
Next step is to Configure a Global Transport Zone:
A transport zone specifies the hosts and clusters that are associated with logical switches created in the zone. Hosts in a transport zone are automatically added to the logical switches that you create.
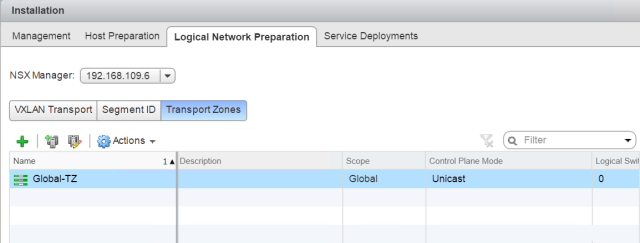
On the Logical Network Preparation tab, click Transport Zones and Click the green + sign to open the New Transport Zone dialog box.

Provide a name for the transport zone and select the Replication Mode according to your environment.

Click OK

You can see the newly created Transport Zone
Conclusion
We have completed VXLAN creation and configuration on ESXi host for NSX Manager.