
vRealize Automation has had a different upgrade process for almost every version. The upgrade from vRA 7.1 to 7.2 is no exception, but now you will see that some improvements are happening to upgrade process. You can upgrade vRA with just few clicks and to make sure the upgrade process goes smoothly a script is being used to upgrade the IaaS Components which is a good change from the earlier release.
This guide will walk you through the steps to upgrade vRA 7.1 to vRA 7.2 in just few easy steps.
Upgrading from vRA 7.1
To begin with your vRA 7.1 to 7.2 upgrade, take a snapshot of the vRA appliance, IaaS Server(s) and a SQL database backup. The new process is pretty easier to tackle, but it is recommended practice to take backup before proceeding upgrade.
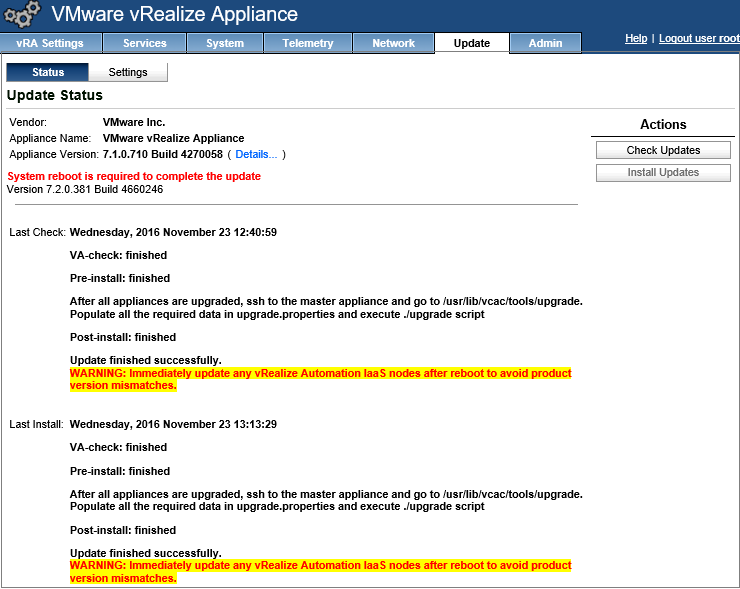
Now open VAMI interface of your vRA appliance by visiting https://vRA-hostname.FQDN:5480 in your favorite browser, login as the root user, navigate to the Update tab and click “Check Updates”. In a moment the interface should show a new version available and then you can click “Install Updates”.
The vRA Upgrade process will run in the background and may take several minutes. My upgrade took about 40 minutes to complete. If you want to keep up with exactly what’s happening in background, you can monitor the /opt/vmware/var/log/vami/updatecli.log file on the vRA appliance.
Once upgrade completed, a message dialog will appear contains information that the appliance has been updated successfully. At this point, you can reboot the vRA appliance.
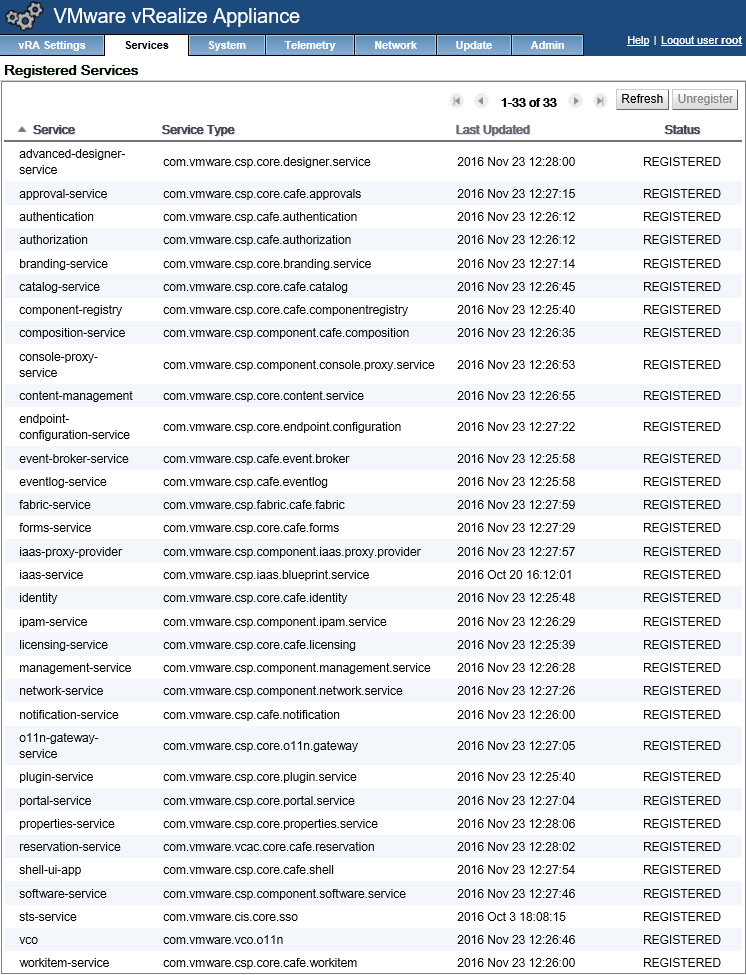
Once the vRA appliance has been upgraded and restarted, ensure that all of the services show “REGISTERED” again. This may take a few minutes.
Now connect vRA appliance through SSH and go to the /usr/lib/vcac/tools/upgrade directory. From here run ./generate_properties which will create a properties file in the same directory. Open this file with your favorite editor such as nano or vi.
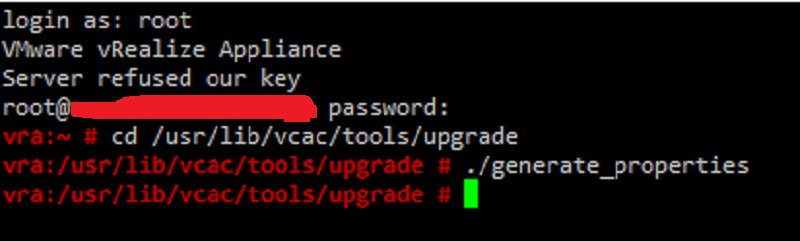
The properties file need to know some information about the IaaS component servers. You’ll need service account information for the web services and DEMs. Enter in the information and save the file.
No need to be worried about security because this file, because next stage will delete this file when it’s done running.

Once you’ve saved the file, now run ./upgrade to begin the upgrade process. You should see something similar to the output listed below.


Conclusion
This guided demonstrated vRA upgrade process and its pretty simple now. The vRO instance that is embedded in the vRA appliance has been upgraded too. Please go through the official document for complete upgrade guide and troubleshooting