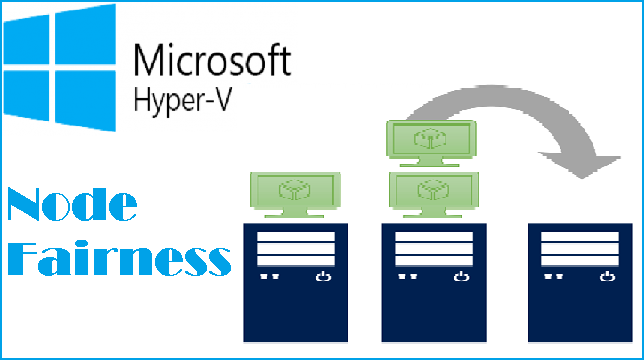
Node Fairness is a latest feature of Failover Clustering (not Hyper-V) that will automatically Live Migrate guests VMs away from an overloaded cluster node. Even though it is a Failover Clustering feature, it only operates on Hyper-V virtual machines.
In this article, we'll show you how Node Fairness works in hyper-v 2016 and how to set it up.
How Does Node Fairness Work?
When triggered, the cluster service will check the host for the presence of two conditions:
- Has the physical host’s average CPU load (not what you see in Task Manager) exceeded the tolerance threshold in the past five minutes?
- Is the physical host’s current memory load above the tolerance threshold?
If either of the conditions are true, the host is a candidate for re-balancing. The heuristics for how it chooses which virtual machines to migrate is not published, and I was not able to determine any distinguishable pattern through my own testing. We may discover more in future.
How is Node Fairness Triggered?
There are only two ways for Node Fairness’s re-balancing operations to be triggered:
- Every 30 minutes (the default)
- When a node joins the cluster. Applies either from a new node joining or an existing node rejoining, such as after a reboot.
I read a note on a TechNet blog article that says that Node Fairness can be triggered manually. If that’s true, they forgot to document it anywhere. I looked through Failover Cluster Manager and the FailoverClusters PowerShell module for any sign of any way to do that and came up empty.
That article was from June of 2016, when 2016 was still in Tech Preview, so it’s entirely possible that they changed their minds on how much control to give you over your environment, or the author might have just been confusing Node Fairness with System Center Virtual Machine Manager’s (VMM) Dynamic Optimization.
What About Storage, Networking, and Power Loads?
Storage load is not considered for Live Migration. Instances would be rare in which a standard cluster Live Migration would solve storage balancing problems anyway. Network traffic and physical host power loads are also not factored into Node Fairness.
How Does Node Fairness Interact with Virtual Machine Manager’s Dynamic Optimization Feature?
When the VMM agent is installed on a 2016 Server running Hyper-V, it disables Node Fairness and replaces it with Dynamic Optimization. Dynamic Optimization does allow optimization to be run manually and on a variable schedule. VMM also allows you to opt out any virtual machines that you don’t want Dynamic Optimization to apply to.
In addition to memory and CPU metrics, Dynamic Optimization will consider storage and network I/O loads. In a sort of opposite to Node Fairness, Dynamic Optimization can also be configured to temporarily remove nodes from the cluster during low-load times so that overall power consumption is reduced. Overall, Dynamic Optimization is a much more powerful feature than Node Fairness, but it’s attached to the high price tag of VMM.
How to Configure Node Fairness?
Node Fairness is on by default for all Windows Server 2016 clusters, set to its least aggressive setting (minimum of 80% load on a node for a rebalance event), and will sample for load values at 30 minute intervals. If you’d like to modify =he settings, it’s simple to do so.
Enabling, Disabling, or Changing Hyper-V Node Fairness’s Operating Mode with PowerShell
To change Node Fairness’s operating mode in PowerShell, set the cluster’s AutoBalancerMode to 0, 1, or 2, which have the following meanings:
- Node Fairness is disabled
- Node Fairness only runs when a node joins the cluster (newly-joined or rejoining)
- Node Fairness runs every 30 minutes
Once you have chosen a value, set it like this:
(Get-Cluster -Name clhv01).AutoBalancerMode = 0
If you’re running the cmdlet from a node that is a member of the cluster that you wish to modify, you can leave off the entire Nameparameter.
Another way that allows for tab completion:
$Cluster = Get-Cluster clhv01$Cluster.AutoBalancerMode = 0
Setting Hyper-V Node Fairness’s Balancing Mode with PowerShell
Changing Node Fairness’s balancing mode in PowerShell is very similar to changing its operating mode. There are three choices, repeated here for convenience:
- Low: CPU load in the past five minutes or the current memory load must be consumed to at least 80% of the node’s capacity
- Medium: CPU load in the past five minutes or the current memory load must be consumed to at least 70% of the node’s capacity
- High: CPU load in the past five minutes or the current memory load must be consumed to at least 60% of the node’s capacity
Once you have chosen a value, set it like this:
(Get-Cluster -Name clhv01).AutoBalancerLevel = 1
If you’re running the cmdlet from a node that is a member of the cluster that you wish to modify, you can leave off the entire Nameparameter.
Another way that allows for tab completion:
$Cluster = Get-Cluster clhv01$Cluster.AutoLevelerMode = 1
How to set up Hyper-V Node Fairness in Failover Cluster Manager
To use Failover Cluster Manager to set Hyper-V Node Fairness:
In Failover Cluster Manager (Windows 10/Windows Server 2016 or later only), right-click on the cluster object in the left pane and click Properties.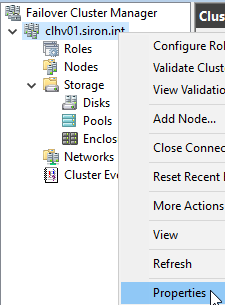
In the properties window, switch to the Balancer tab.
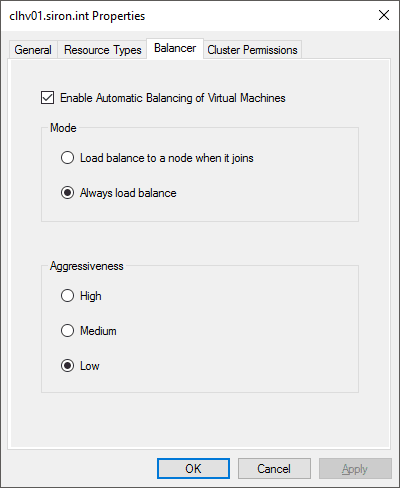
Modify the options in accordance with your desires.
Because Node Fairness is a feature of Failover Clustering, Hyper-V Manager cannot be used to view or set Node Fairness.


