
Nextcloud is fork of ownCloud, a file sharing server that permits you to store your personal content, like documents and pictures, in a centralized location, much like Dropbox. The difference with Nextcloud is that all of its features are open-source. It also returns the control and security of your sensitive data back to you, thus eliminating the use of a third-party cloud hosting service.
In this guide, we will install and configure a Nextcloud instance on an Ubuntu 16.04 server.
Prerequisites
In order to complete the steps in this guide, you will need the following:- A sudo user on your server:
- A LAMP stack: Nextcloud requires a web server, a database, and PHP to properly function. Setting up a LAMP stack (Linux, Apache, MySQL, and PHP) server fulfills all of these requirements.
- An SSL certificate: How you set this up depends on whether or not you have a domain name that resolves to your server. - If you have a domain name... the easiest way to secure your site is with Let's Encrypt, which provides free, trusted certificates. Follow the Let's Encrypt guide for Apache to set this up. - If you do not have a domain... and you are just using this configuration for testing or personal use, you can use a self-signed certificate instead. This provides the same type of encryption, but without the domain validation. Follow the self-signed SSL guide for Apache to get set up.
Downloading Nextcloud
To begin, visit the Nextcloud Releases page:
Scroll down to the bottom of the page, right-click and copy the
.tar.bz2 link for the latest stable release.There may be a more recent version available than the one shown in the image below:

On the server, move into a writable directory:
- cd /tmp
curl command and the link from Nextcloud to download the tarball file:curl -LO https://download.nextcloud.com/server/releases/nextcloud-10.0.1.tar.bz2
Although we downloaded the tarball directly from the project’s website, it is best practice to verify both the authenticity and integrity of items downloaded from the Internet. This verification method certifies that the file was neither tampered with nor corrupted or damaged during the download process.
Return to the Releases page right-click and copy the link for the
.sha256 file that matches the version of the tarball file that you previously downloaded. Back on the server, use the curl command and the new link to download the check sum file:curl -LO https://download.nextcloud.com/server/releases/nextcloud-10.0.1.tar.bz2.sha256
Next, use the
shasum command to calculate the hash for the .tar.bz2 file and compare it to the checksum value in the .sha256 file. The -a flag defines the algorithm and the -c flag reads the sum from a specified file and checks it against the hash of the .tar.bz2 file:
- shasum -a 256 -c nextcloud-10.0.1.tar.bz2.sha256 < nextcloud-10.0.1.tar.bz2
Output
nextcloud-10.0.1.tar.bz2: OK
You can safely delete the
.sha256 file with the rm command:
- rm nextcloud-10.0.1.tar.bz2.sha256
Installing Nextcloud
The installation of Nextcloud consists of extracting the tarball to create a document root directory for Apache, executing a script to set the proper ownership and permissions of the extracted files and updating Apache's configuration to make it aware of the new application.Start by using the
tar command with the -C flag to save the content of the archive into a specified directory. The -x flag performs the extraction function, -v produces a verbose output, -j filters the archive through the bzip2 compression utility, and -f specifies the filename to perform the actions on:
- sudo tar -C /var/www -xvjf /tmp/nextcloud-10.0.1.tar.bz2
nano editor:
- nano /tmp/nextcloud.sh
/tmp/nextcloud.sh
#!/bin/bash
ocpath='/var/www/nextcloud'
htuser='www-data'
htgroup='www-data'
rootuser='root'

printf "Creating possible missing Directories\n"
mkdir -p $ocpath/data
mkdir -p $ocpath/assets
mkdir -p $ocpath/updater

printf "chmod Files and Directories\n"
find ${ocpath}/ -type f -print0 | xargs -0 chmod 0640
find ${ocpath}/ -type d -print0 | xargs -0 chmod 0750
chmod 755 ${ocpath}

printf "chown Directories\n"
chown -R ${rootuser}:${htgroup} ${ocpath}/
chown -R ${htuser}:${htgroup} ${ocpath}/apps/
chown -R ${htuser}:${htgroup} ${ocpath}/assets/
chown -R ${htuser}:${htgroup} ${ocpath}/config/
chown -R ${htuser}:${htgroup} ${ocpath}/data/
chown -R ${htuser}:${htgroup} ${ocpath}/themes/
chown -R ${htuser}:${htgroup} ${ocpath}/updater/

chmod +x ${ocpath}/occ

printf "chmod/chown .htaccess\n"
if [ -f ${ocpath}/.htaccess ]
 then
  chmod 0644 ${ocpath}/.htaccess
  chown ${rootuser}:${htgroup} ${ocpath}/.htaccess
fi
if [ -f ${ocpath}/data/.htaccess ]
 then
  chmod 0644 ${ocpath}/data/.htaccess
  chown ${rootuser}:${htgroup} ${ocpath}/data/.htaccess
fi
Run the script with the
bash command:
- sudo bash /tmp/nextcloud.sh
Output
Creating possible missing Directories
chmod Files and Directories
chown Directories
chmod/chown .htaccess
Next, create a site configuration file in the
/etc/apache2/sites-available directory:
- sudo nano /etc/apache2/sites-available/nextcloud.conf
/etc/apache2/sites-available/nextcloud.conf
Alias /nextcloud "/var/www/nextcloud/"


    Options +FollowSymlinks
    AllowOverride All


        Dav off


    SetEnv HOME /var/www/nextcloud
    SetEnv HTTP_HOME /var/www/nextcloud
Save and exit the file. To enable the site use the
a2ensite command:
- sudo a2ensite nextcloud
Output
Enabling site nextcloud.
. . .
In addition to enabling the site, use the
a2enmod command to enable the mod_rewrite Apache module, which Nextcloud requires to function properly.
- sudo a2enmod rewrite
Output
Enabling module rewrite.
. . .
Finally, before restarting Apache, install some optional PHP modules for additional functionality within Nextcloud:
- sudo apt-get update
- sudo apt-get install php-bz2 php-curl php-gd php-imagick php-intl php-mbstring php-xml php-zip
systemctl utility with the reload command to apply the changes to Apache:
- sudo systemctl reload apache2
Creating a MySQL Database
To get started, log into MySQL with the administrative account:
- mysql -u root -p
Nextcloud requires a separate database for storing administrative data. While you can call this database whatever you prefer, we decided on the name
nextcloud to keep things simple.
- CREATE DATABASE nextcloud;
Next, create a separate MySQL user account that will interact with the newly created database. Creating one-function databases and accounts is a good idea from a management and security standpoint. As with the naming of the database, choose a username that you prefer. We elected to go with the name
nextcloud in this guide.GRANT ALL ON nextcloud.* to 'nextcloud'@'localhost' IDENTIFIED BY 'set_database_password';
Warning: Be sure to put an actual password where the command reads:
set_database_passwordWith the user assigned access to the database, perform the flush-privileges operation to ensure that the running instance of MySQL knows about the recent privilege assignment:
- FLUSH PRIVILEGES;
- exit
Configuring Nextcloud
To access the Nextcloud web interface, open a web browser and navigate to the following address:https://server_domain_or_IP/nextcloud You should see something like this:
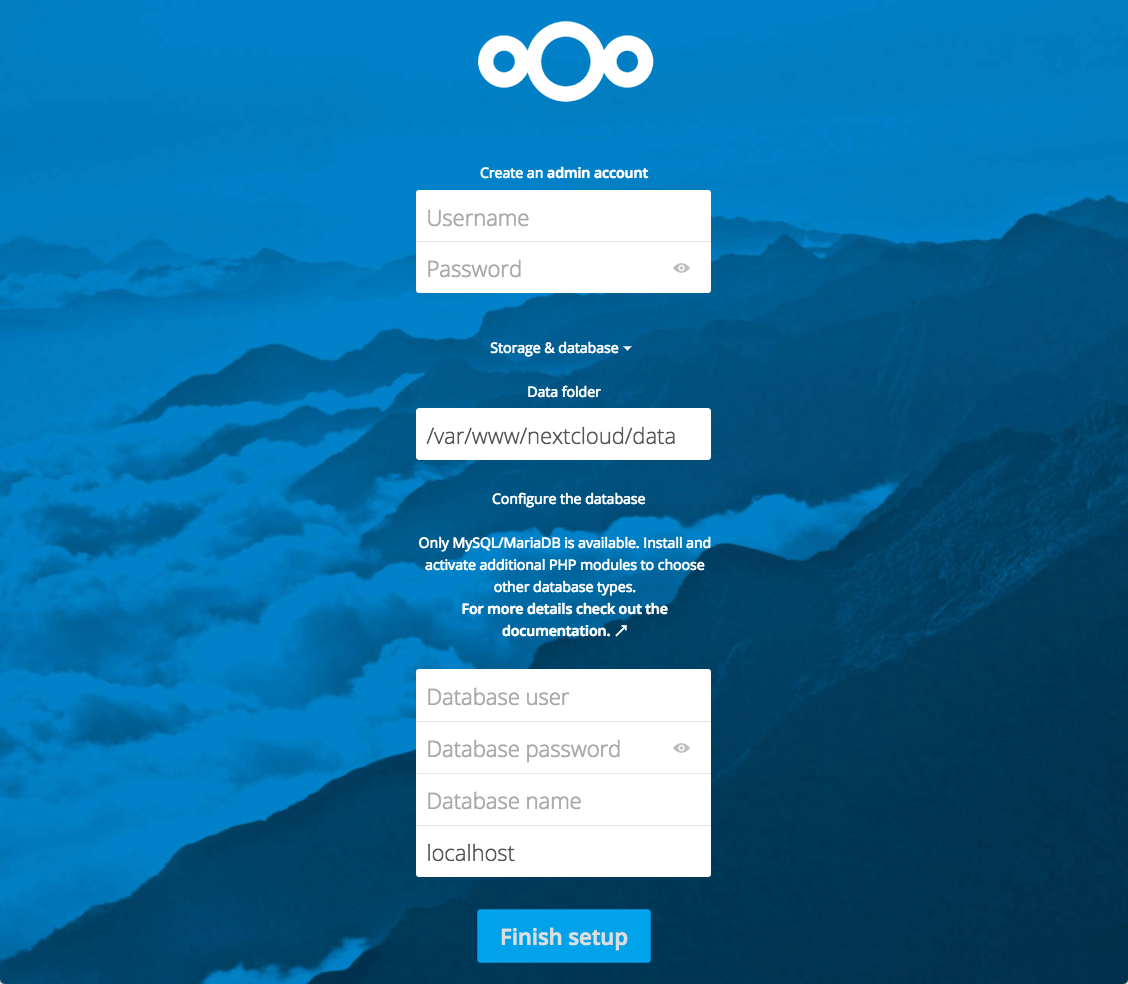
Create an admin account by choosing a username (it is recommended to avoid using something like "admin" for security reasons) and a password.

Under the Storage & database section leave the Data folder setting as-is and enter the database information, you created in the previous step, in the Configure the database section. Below is an example, which matches the database credentials that we used in this guide:
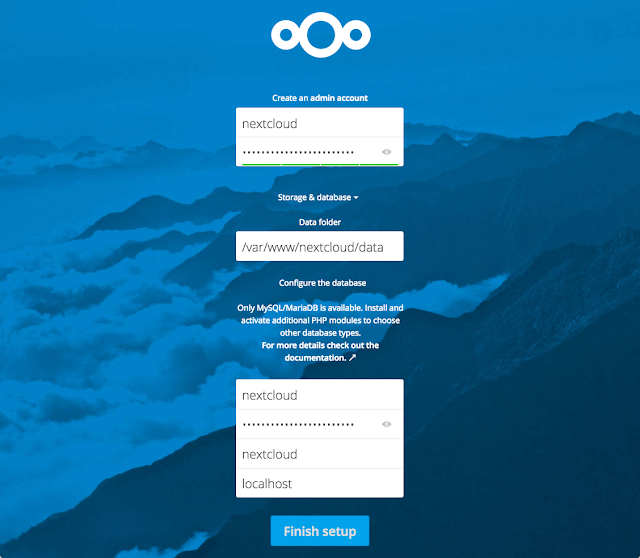
Click the Finish setup button to sign into Nextcloud. a safe home for all your data splash screen should appear:
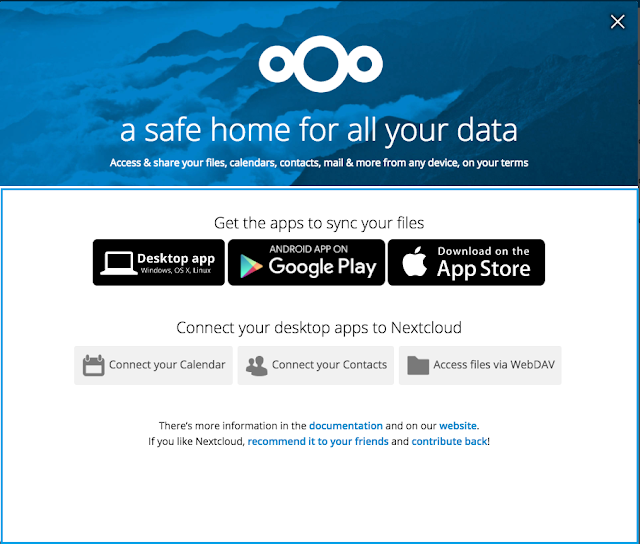
Click the X in the top-right corner of the splash screen to access the main interface:
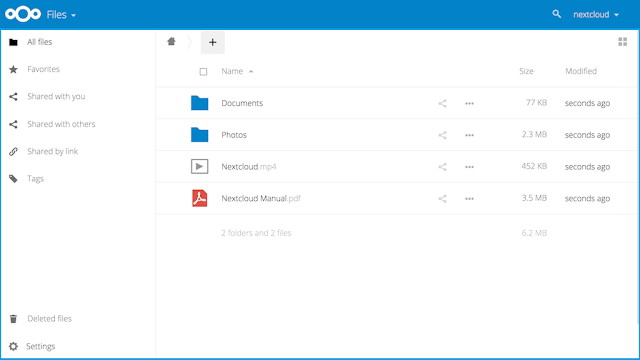
Here, you can create or upload files to your personal cloud.
Conclusion
Nextcloud can replicate the capabilities of popular third-party cloud storage services. Content can be shared between users or externally with public URLs. The advantage of Nextcloud is that the information is stored securely in a place that you control.Explore the interface and for additional functionality, install plugins using Nextcloud's app store.


