In the Previous posts of SRM series, We have discussed about SRM architecture, SRM installation and SRM Site Pairing. Before we add Array Manager at the SRM configuration, we need to have the storage replication setup ready. VMware Site Recovery Manager supports two type of replication:
- Storage array based replication
- VMware’s native vSphere Replication

As we already discussed in previous posts, we are going to utilize the array based replication for this SRM series of posts. For lab or testing purpose, Storage based replication using enterprise SAN storage is not feasible. You can go for vSphere Replication based replication or another option if you would like to test the array based replication in your SRM lab setup is using HP Storevirtual VSA. HP StoreVirtual VSA is a Virtual Storage Appliance that provides complete array functionality for VMware vSphere or Microsoft Hyper-V environments without need of external storage array hardware.
HP StoreVirtual VSA transforms your server’s internal or direct-attached storage into a fully-featured shared storage array without the cost and complexity associated with dedicated storage. StoreVirtual VSA is a virtual storage appliance optimized for VMware vSphere and Microsoft Hyper-V environments.It creates a virtual array within your application server and scales as storage needs evolve. The ability to use internal storage within your environment greatly increases storage utilization, and eliminates the costs and complexity associated with dedicated external storage.Its built-in high availability and disaster recovery features ensure business continuity for the entire virtual environment.
You can regsiter for the HP storeVirtual VSA and download from HP website. You need to download 2 packages 1. HP StoreVirtual VSA installer for vSphere and 2.Centralized Management console for Windows (CMC), Which is the management console for performing all storage related activities like Provisioning, Lun allocation and replication configuration.


Deploying HP StoreVirtual VSA on VMware vSphere:
Double click the HP StoreVirtual VSA Installer for VMware vSphere installer. Specify the location to extract all the necessary files.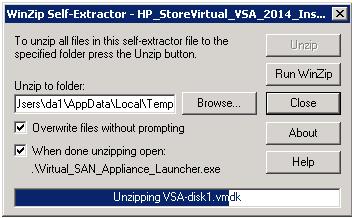
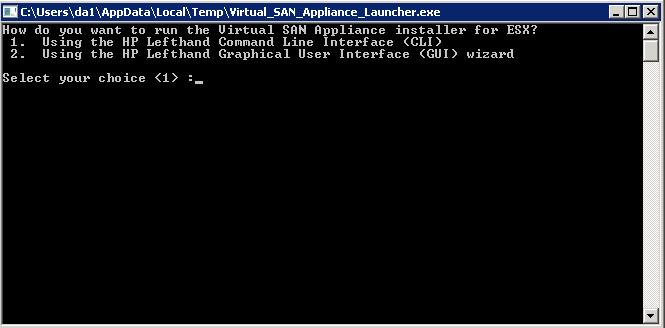
Once all the necessary files are extracted, you will be provided with Virtual_SAN_Appliance_launcher. Select any one of the option to run the Virtual SAN appliance installer. I have entered 2 to begin the installation using HP Lefthand Graphical User Interface (GUI) wizard.
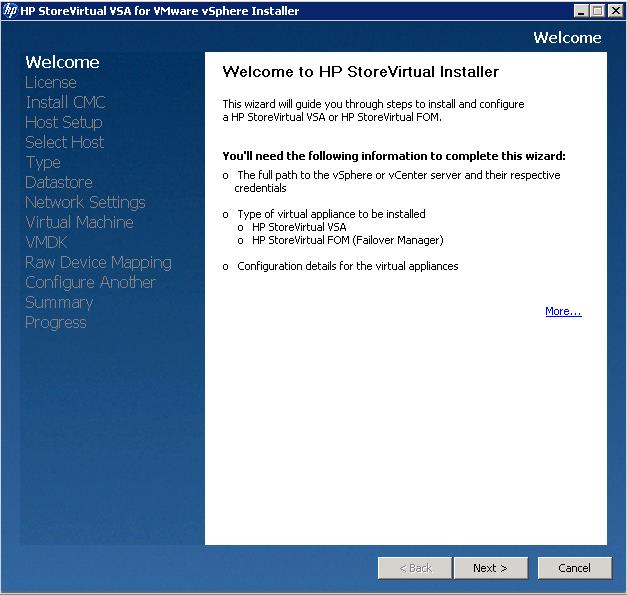
HP StoreVirtual Installer wizard will start. It will be same experience as deploying any virtual appliance in your VMware vSphere. Click on Next to begin the installation.
Accept the End user license agreement and click on Next.

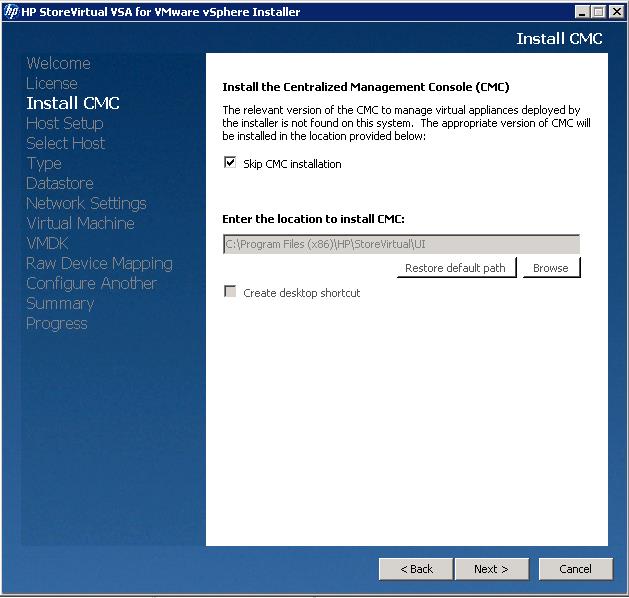
HP VSA installer will also provide you the option to install Centralized Management console (CMC) but we will install it later. Select Skip CMC installation checkbox and click on Next.
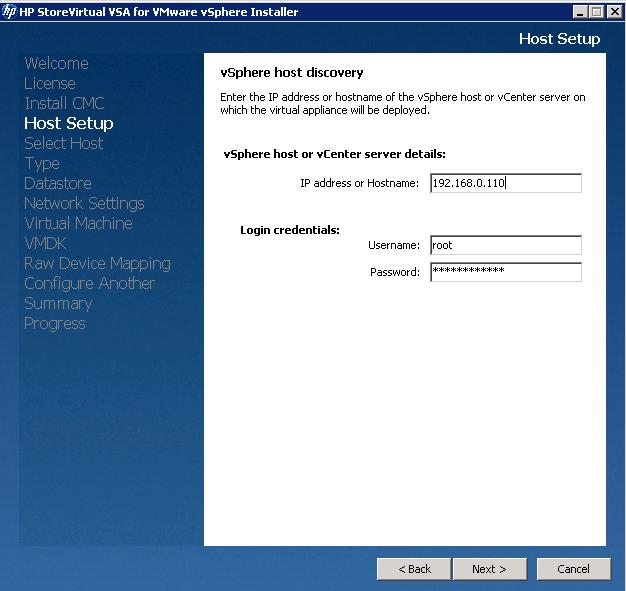
Specify the IP address or hostname of the vSphere ESXi host or vCenter server on which virtual appliance will be deployed. As i am deploying this VSA in my protected site first, I specified one of the ESXi host from the Protected site vCenter. Specify the credentials for it and click on Next.
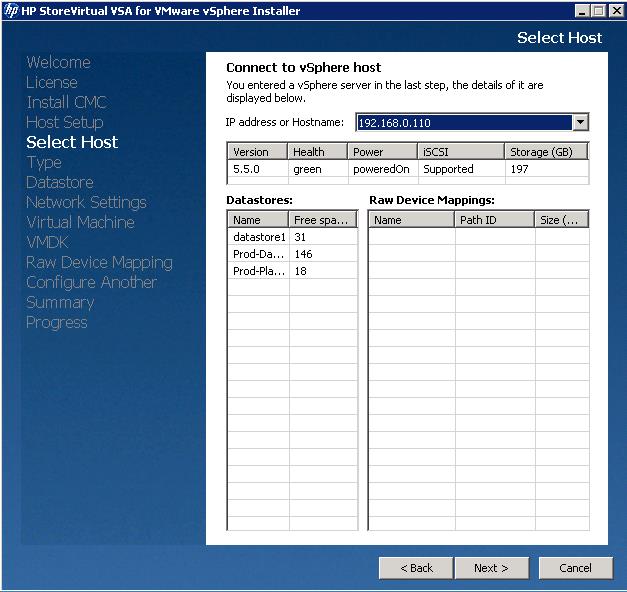
It displays the all the information about the specified ESXi like ESXi build version and datastore details,etc . Click on Next to proceed.
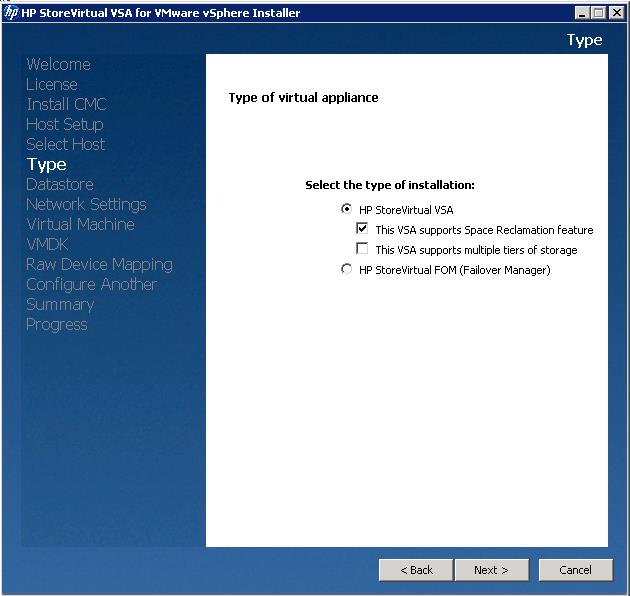
Select HP StoreVirtual under the Installation type. You can also choose to enable the additional features like Space reclamation feature and multi-tier storage support. Click on Next.
Select the datastore on which HP StoreVirtual VSA virtual machine to be deployed and click on Next.

Specify the Virtual appliance DNS name and IP address details for this VSA virtual appliance. Select the virtual machine portgroup for this VM to connect to. Click on Next.

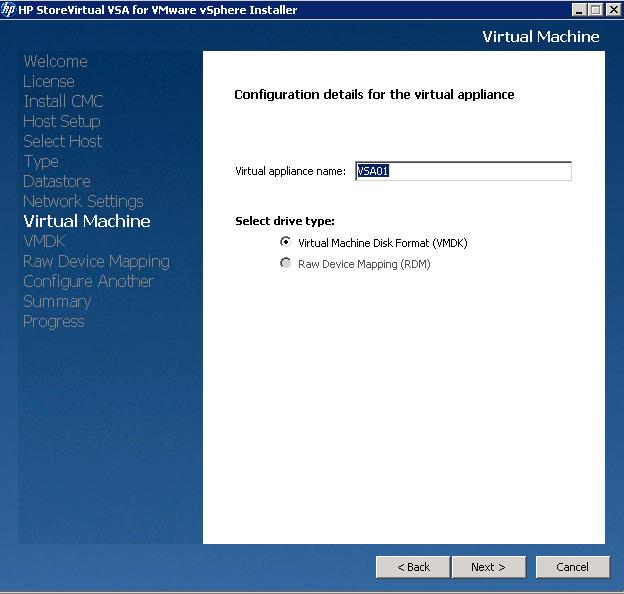
Since I am deploying it first in protected site, I named it as VSA01. Select the drive type to VMDK and click on Next.
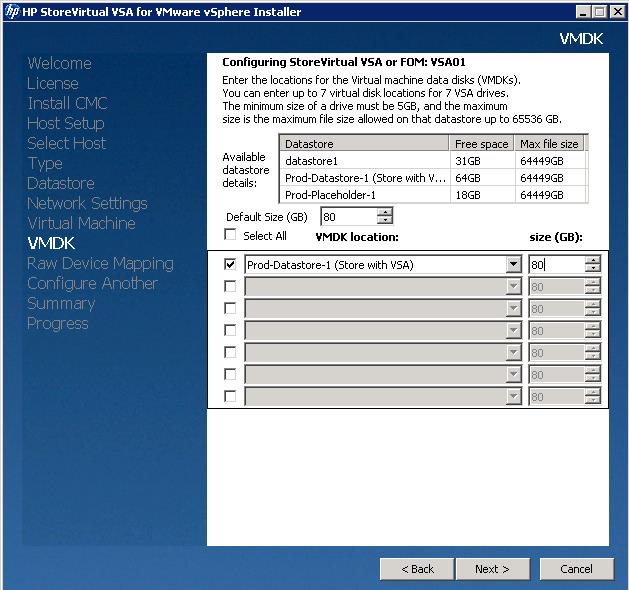
This step allows you to add the additional virtual data disks. This will be the storage that will be used to create volumes and present as LUN to ESXi hosts. For this Lab environment deployment, I have added 80 GB disk. Click on Next.
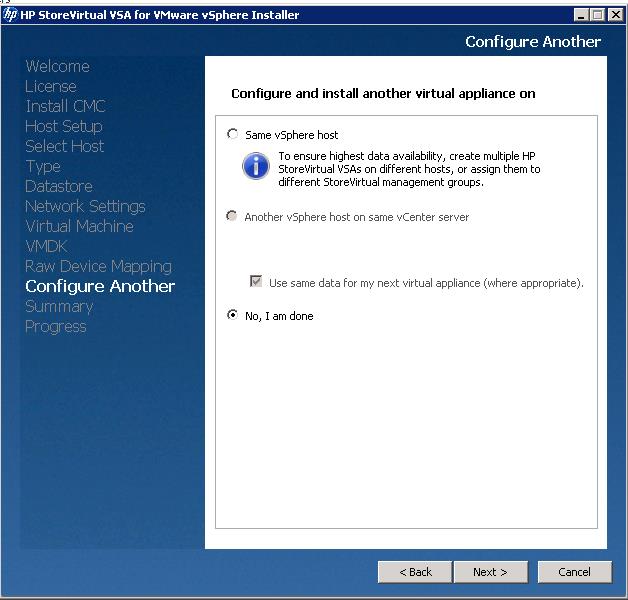
The below wizard “Configure and Install another virtual appliance” allows to deploy a second appliance from the same deployment wizard. As i discussed already, we need to deploy 2 HP StoreVirtual VSA. one for Protected site and one recovery site to establish a replication between them. I selected “I am done” because i will deploy the second VSA on my recovery site later after this deployment. Click on Next.
It will take few minutes to complete the HP StoreVirtual VSA virtual machine deployment. Once you see the message “Successfully deployed” Click on Finish to complete the installation.

HP StoreVirtual VSA in the Protected site deployment is completed. You need to follow the same procedure for your recovery site. Specify the ESXi host from your recovery vCenter server to deploy the second HP VSA. I have named it as VSA02 and deployed. In the next step,we will take a look at the procedure for installing centralized Management Console.
Installing HP Store Virtual VSA Centralized Management Console (CMC)
Installation of HP CMC is straight forward process and simple. The HP VSA centralized management console allows us to centrally manage VSA appliances and other tasks like adding hosts, presenting storage to host, configuring replication between VSA appliance, etc.,which will help you to make everything happen via GUI. HP CMC needs to be installed on the Windows server. Since it is lab environment, I have installed it on one of my vCenter server.Let’s discuss in detail about the setp by step procedure of installation HP Centralized management console (CMC).
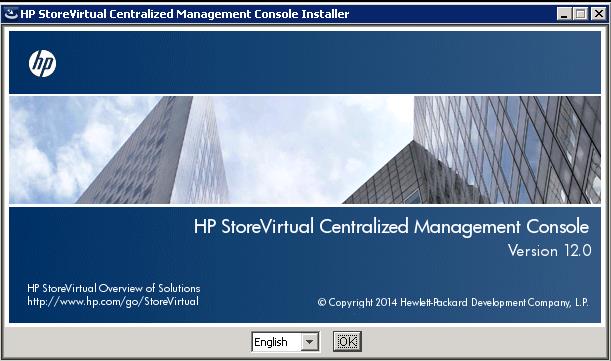
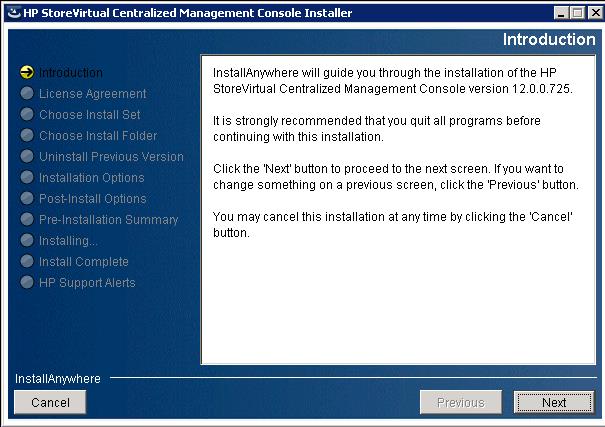
Click on OK to begin the installation of HP StoreVirtual Centralized Management Console.
Click on Next.
You can customize the installation of HP CMC. I am going with the typical settings for my installation. Click on Next.

Click on Next to complete the installation of the HP Centralized Management Console.

We have completed the installation of HP StoreVirtual Centralized Management Console (CMC). We will go through in detail about configuring HP VSA and other tasks in the next steps.
Configuring HP StoreVirtual VSA Management Group
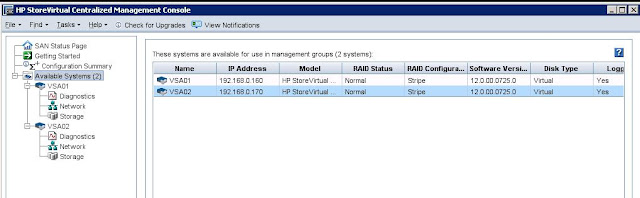
After the installation of CMC,when you launch the CMC for first time, it automatically detects the VSA appliances, which are all part of the same subnet. I have deployed 2 HP StoreVirtual VSA appliance. VSA1 for my Protected site and VSA2 for my recovery site. If the CMC console didn’t detected your VSA, you need to discover it using the “Find” menu.

Once your VSA is discovered, click on “Log in to view” to connect to the VSA and to view more information about it.

Once you logged into VSA, you will be able to see the IP Address, Model,RAID status,software version,Disk type,etc.
Creating Management Group
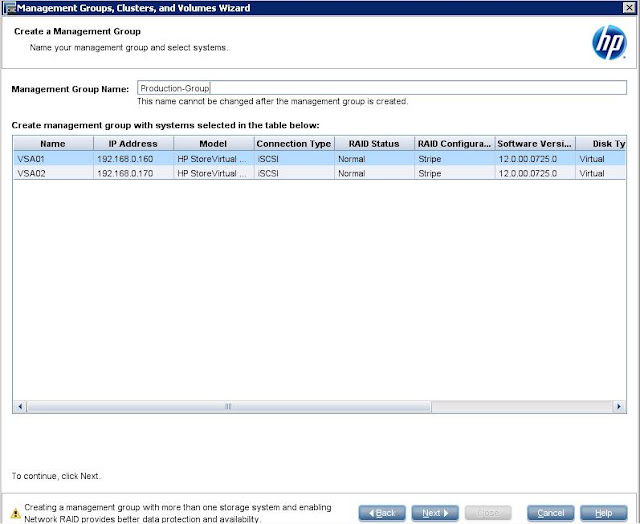
As we already discussed, We have deployed 2 HP StoreVirtual VSA one for protected and other for recovery site.I am going to use this HP StoreVirtual VSA as my array based replication for my SRM setup. I am going to create 2 management group “Production-Group” for protected site and “DR-Group” for recovery site. Add VSA01 to Production-Group and VSA02 to DR-Group.A Management Group is a logical container which allow the management of one or more HP StoreVirtual VSAs, as well as physical appliances counterpart, both on single-site and multi-site configurations.
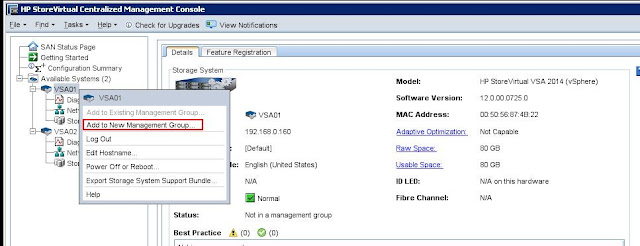
To add the VSA to management group, right click the VSA node and select, “Add to new management group”.
Enter the management group name and select the VSA from the below list to add it into the group. I am creating “production-Group” management group and adding VSA01 into it. Click on Next.
Add an administrative user for the management group. Specify the username, description, password. Click On Next.

Once you configured the NTP and DNS settings.Click on next to select the type of cluster. Select Standard or Multi-Site Cluster. A Multi-Site cluster is necessary if site fault tolerance is needed. Since i have only VSA node in this management group. I have selected Standard cluster.

Specify the cluster name and select the VSA which is going to be part of this cluster. I specified the name “Prod-Cluster” and added VSA01 node into it.

Enter the Virtual IP and subnet mask for this cluster. We will use this Virtual IP ,when connecting ESXi hosts to the storage. with standard cluster type, we will have only one VIP and subnet mask.

In the below screen, you will be able to create the Volume. I have created a volume called “Prod-volume” with the size of 40 GB. which will be later presented to ESXi host in upcoming posts.

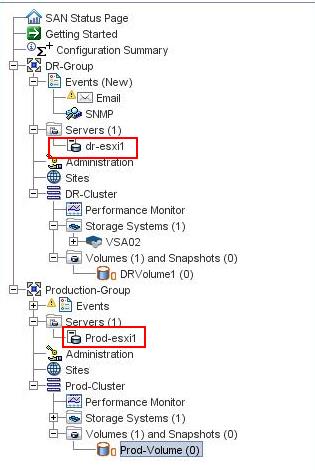
We are done with creating management group for Protected site. I have followed the same procedure to create the recovery site management group “DR-group” and cluster called”DR-cluster” and volume “DR-volume”. Thats’it. In the next step, we will take a look at adding ESXi host to management group and allocating storage to ESXi hosts.
Adding ESXi Host to HP VSA Management Group and Presenting Storage to ESXi
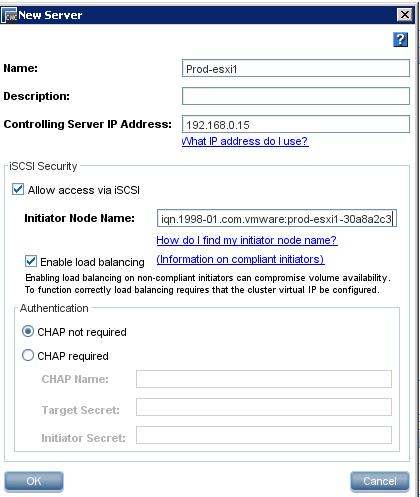
To add the new server into management group. Right-click the Servers under the management group and Select New Server.

I'm going to add my esxi host “Prod-esxi1” in the protected site into the “Production-Group” management group. Specify the name of the ESXi host and controlling Server IP address is your vCenter Server IP address. additionally you can also enable the CHAP authentication for the security purpose. Click on Ok to add the server into management group.
You need to perform the same procedure to add your the ESXi host in the DR site. I have added my DR esxi host “dr-esxi1” into the management group “DR-group. Both the Prod and DR esxi server are appearing under the servers under management group.
Assigning Storage to the ESXi host:
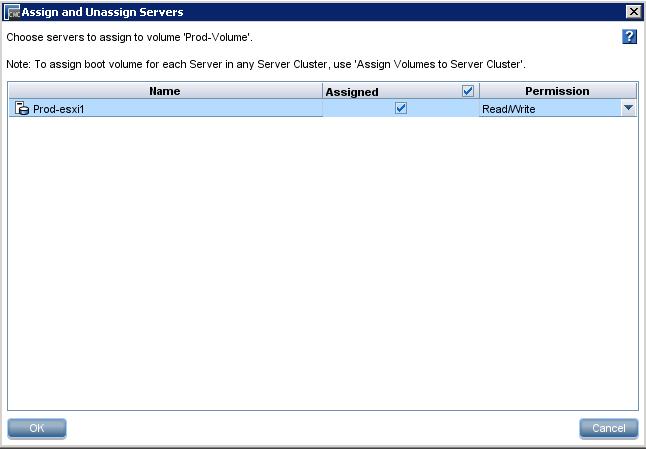
We have added the ESXi host into the management group. Now we need to assign the access to the storage volumes for the ESXi host. To assign the volume to the server, Right-click the volume and select “Assign and Unassign Servers”.

Select the “Prod-esxi1” from the Server list and Select the Check mark “Assigned” and Permission from the drop-down.We are done from the HP CMC.
Adding HP VSA Storage to the ESXi host
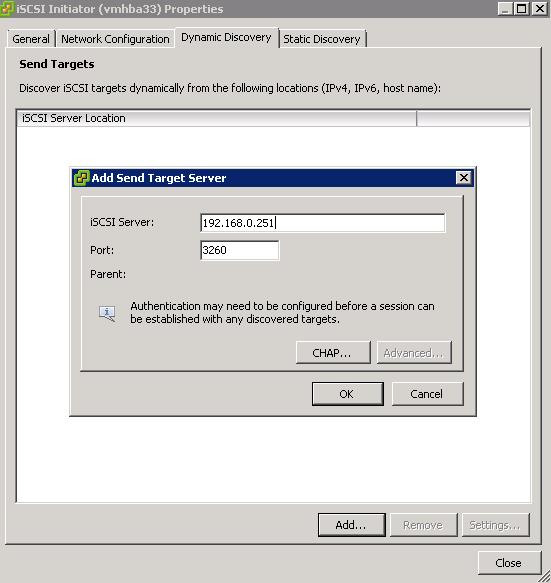
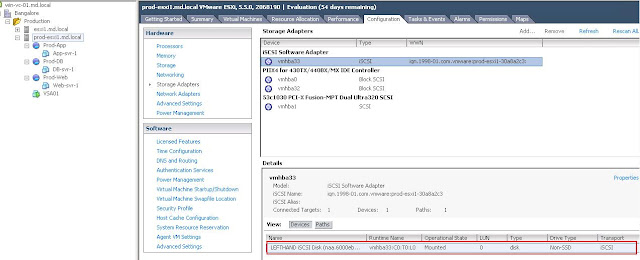
Once volume has been assigned to the server from HP StoreVirtual CMC,Click on iSCSI initiator properties from your ESXi host and add the Virtual IP address (VIP) address of your Management cluster. I have assigned the VIP of 192.168.0.251 for my Prod-cluster in the above step.Click OK
Click on Rescan All for the iSCSI software Adapter. Once rescan is completed, you will be able to see the assigned storage under the Devices tab.
Create the datastore from the visible storage.
In the next step , we will take a look at configuring the storage replication between the storage in Protected site and your DR site. i.e Replication between your Prod-Volume and DR-volume.
Configuring HP StoreVirtual VSA Replication
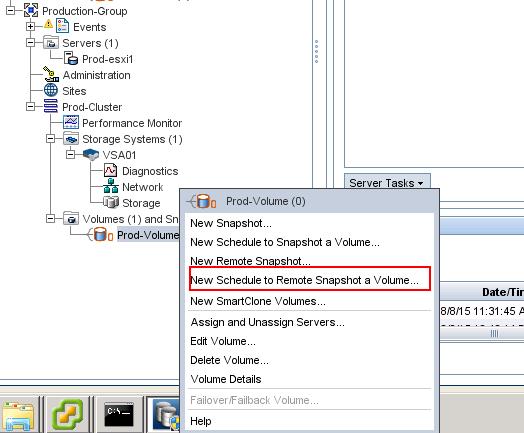
To configure the replication, Right-click the volume in your primary site and Select “New Schedule to Remote Snapshot a Volume”
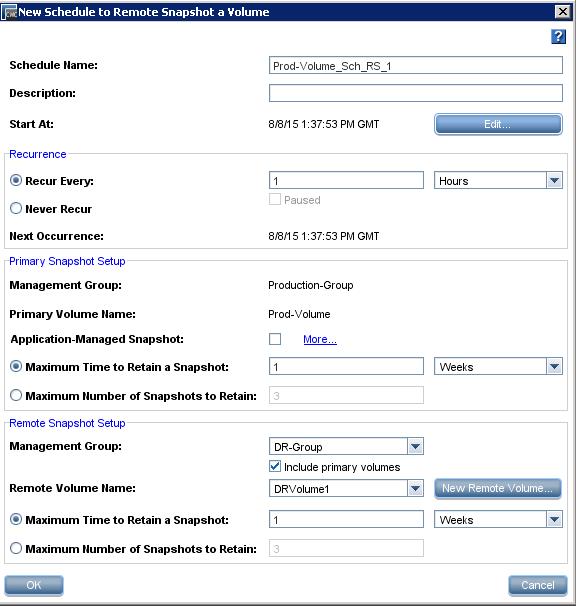
Specify the replication Schedule name and select your DR site management group and DR site volume under Remote Snaphot setup. You can configure replication recurrence and maximum time to retain a snapshot and Click OK
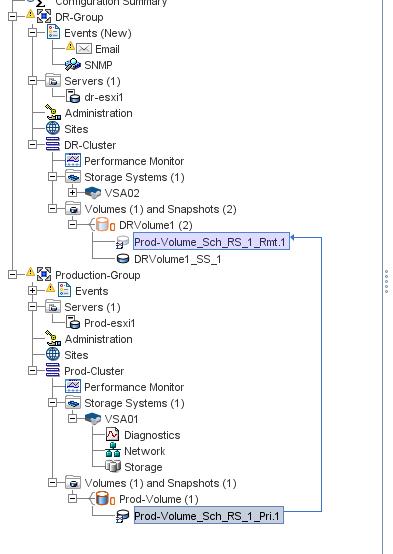
Once you have configured the replication, you can notice in HP StoreVirtual VSA CMC, replication will be established between your Production site and DR site.
We are done with the SRM Array Based Replication Configuration.
If you don't know How to Setup VMware Site Recovery Manager (SRM) 6.0, please go through the step by step guide.
If you don't know How to Setup VMware Site Recovery Manager (SRM) 6.0, please go through the step by step guide.