Android 7.0 Nougat is officially available for the Nexus 6, Nexus 5X, Nexus 6P, Nexus 9, Nexus Player and Pixel C (and the General Mobile 4G Android One), but your phone may not get the OTA (over-the-air) update for another couple of weeks. If you don't have a Nexus, you can get a feel for when (or if) your phone will get Nougat based on our expectations.
If you know your way around a command line, you can skip the waiting game by downloading the factory image for your particular device and flashing it on top of your software. But there are some caveats you need to know about when flashing a factory image, so read on to find out what you need to know.
![]()
Another way to get Android 7.0 Nougat right now is by opting into the Android Beta program, which has been extended beyond the initial release of Nougat.
Any Nexus device eligible for the receiving Nougat can also opt into the Beta program — Nexus 6P, Nexus 5X, Nexus 6, Nexus 9, Nexus Player, Pixel C — any continue receiving updates past the stable version.
That is because Google has announced that it will continue offering preview versions of Nougat as it prepares the first of its Maintenance Releases, which is expected later this fall.
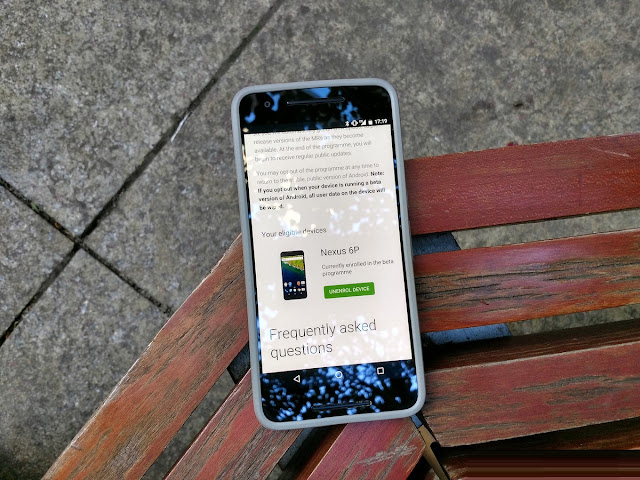
Devices that are currently enrolled in the Beta program are the first to receive the stable version of Android 7.0, and the opt-in process is fairly easy.
The first thing you need to know about flashing a factory image on top of your Nexus phone is that you need to have a portion of Android SDK installed on your computer. Specifically, you need adb and fastboot, which you can download from the Android Studio portal.
Unlocking your bootloader is relatively simple, but you must know one thing: Your phone will factory reset, and you will lose all of your apps and personal data stored on the phone. Make sure that you back up your device before this process.
![]()
If you know your way around a command line, you can skip the waiting game by downloading the factory image for your particular device and flashing it on top of your software. But there are some caveats you need to know about when flashing a factory image, so read on to find out what you need to know.
How to get Nougat through the Android Beta program
Another way to get Android 7.0 Nougat right now is by opting into the Android Beta program, which has been extended beyond the initial release of Nougat.
Any Nexus device eligible for the receiving Nougat can also opt into the Beta program — Nexus 6P, Nexus 5X, Nexus 6, Nexus 9, Nexus Player, Pixel C — any continue receiving updates past the stable version.
That is because Google has announced that it will continue offering preview versions of Nougat as it prepares the first of its Maintenance Releases, which is expected later this fall.
Devices that are currently enrolled in the Beta program are the first to receive the stable version of Android 7.0, and the opt-in process is fairly easy.
- Head to Android Beta programme portal on your Nexus phone or Pixel C tablet.
- Sign into the Google account associated with that phone.
- Scroll down to Your eligible devices.
- Find the device you want to enrol in the Beta programme and tap Enrol device.
- Follow the prompts to accept the over-the-air download.
How to get Nougat by flashing a factory image
Get the right tools to flash a factory image
Note: This portion is performed on your computer.
The first thing you need to know about flashing a factory image on top of your Nexus phone is that you need to have a portion of Android SDK installed on your computer. Specifically, you need adb and fastboot, which you can download from the Android Studio portal.
- Go to Android Studio webpage
- Scroll to the bottom of the page.
- Find command line tools for your platform — Windows, Mac, or Linux.
- Extract the accompanying file (.exe, .zip, .tgz)
Enable developer settings and USB debugging
Note: This portion is performed on your device.
- Go to your Nexus'Settings.
- Scroll down to About Phone/Tablet.
- Tap on the Build number seven times until the dialog box says you are now a developer.
- Open Settings and you should find a new option called Developer options.
- Click into the Developer options.
- Make sure that the developer options are turned on and that USB debugging is checked on.
- Check Enable OEM unlock.
- Plug your Nexus device into your computer.
- Tap OK on the dialog box asking you to Allow USB debugging while connected to the computer.
Unlocking your bootloader
Note: This portion is performed on your device and computer .
Unlocking your bootloader is relatively simple, but you must know one thing: Your phone will factory reset, and you will lose all of your apps and personal data stored on the phone. Make sure that you back up your device before this process.
- Turn off your phone or tablet.
- Hold down the power button and the volume down button.
- On your computer, open Command Prompt (Windows) or Terminal (Mac). Navigate to folder with Platform tools.
- On your computer, type:
./fastboot flashing unlockin a terminal or command prompt. - Press volume up button and the power button on your device to confirm bootloader unlock.
- On your computer, type:
./fastboot reboot
Flashing the Android 7.0 factory image
Note: The Android 7.0 factory images are not yet available, but these steps will apply when they go live. This portion is performed on your computer.
- Visit Nexus Factory Images page.
- Scroll down to your phone and find the Android 7.0 image for your phone.
- Once downloaded, extract the file in your Platform tools folder.
- Put your phone into bootloader mode (see above) and plug it into your computer.
- Open Command Prompt (Windows) or Terminal (Mac). Navigate to folder with Platform tools.
- On the command line, type:
./adb devicesto ensure your phone is seen by your computer. - Type the flash-all command.
On Windows, that will beflash-all.bat
On Mac, that will beflash-all.sh