In this article, you learn how to install Hyper-V in Windows 10 and how to configure basic Hyper-V settings. You are also introduced to the Windows PowerShell cmdlet that allows you to perform Hyper-V installation, and how you can configure Hyper-V using Hyper-V Manager and Virtual Switch Manager. In addition, you learn how to create a new Virtual Machine and how to connect to it using the VMConnect tool.
Requirements for Hyper-V on Windows 10
Before installing Hyper-V on Windows 10, you must first ensure that you have one of the operating system editions that support Hyper-V. If you have a Windows 10 Pro, Enterprise, or Education edition, then you can enable Hyper-V on your system. However, if you own Windows 10 Home edition, then you will have to upgrade to one of the supported editions before you can install and use Hyper-V.
In terms of hardware requirements, you must have a system with at least 4 GB of RAM. Of course, the more virtual machines that you want to run simultaneously, the more memory that you will need in your system.
A crucial hardware requirement is that your system must have a 64-bit processor that supports Second Level Address Translation (SLAT). Hyper-V began to leverage SLAT in Windows Server 2008 R2 to reduce the overhead required in virtual to physical address mappings for virtual machines. Based on AMD-V Rapid Virtualization Indexing (RVI) and Intel VT Extended Page Tables (EPT) architectures, supported AMD and Intel processors can maintain address mappings and perform the two levels of address space translations required for each virtual machine in hardware.
Leveraging the hardware eliminates the need to perform these tasks within Hyper-V, reducing the complexity of the hypervisor and the context switches needed to manage virtual machine page faults. The reduction in processor and memory overhead associated with SLAT improves scalability with respect to the number of virtual machines that can be executed concurrently.
Verifying Hardware Compatibility for Hyper-V on Windows 10
In order to verify if your system is hardware compatible before you try to install Hyper-V in Windows 10, open a command prompt (cmd.exe) and run systeminfo.exe. If your system is hardware compatible, you will see the Hyper-V related entries shown in Figure 1.

Figure 1: Hyper-V Requirements from Systeminfo.exe
If all of these requirements have a value of Yes, then your system is ready for Hyper-V installation. If some of these values have a value of No, such as Virtualization Enabled in Firmware and Data Execution Prevention Available, then you may have to enable them in your system BIOS. The Second Level Address Translation and VM Monitor Mode Extensions are hardware properties, so if these do not display a Yes value, then you either have to upgrade your system processor if that is possible, or select a different system with a compatible processor architecture.
Installing Hyper-V on Windows 10
Once you have verified the hardware compatibility of your system, you can start the Hyper-V installation.- Click on the Windows button, and select Programs and Features (Figure 2).

- As shown in Figure 3, click on Turn Windows features on or off to configure new Windows features.

- From the Windows Features options, click Hyper-V, ensure that all the sub-options are selected, and then click OK (Figure 4).

- After the Hyper-V features are installed, click Restart now in the Windows Features dialog (Figure 5).

In order to verify Hyper-V installation success on your system, open a command prompt and run systeminfo.exe again. You will see that the Hyper-V related entries have changed (Figure 6).

Using PowerShell to Install Hyper-V
If you prefer to use the command line to install Hyper-V on your system, you can use PowerShell instead of going through the graphical user interface (GUI).- Click on the Windows button, select Search, and then enter PowerShell (Figure 7).

- Right-click on Windows PowerShell and then select Run as Administrator.
- In Windows PowerShell, enter the cmdlet shown in Figure 8, and then press the Enter key.
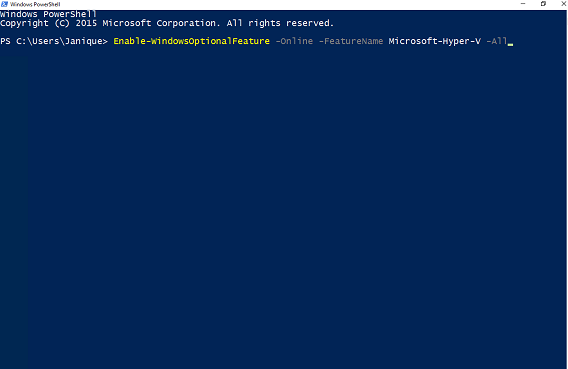
- Once the Windows PowerShell cmdlet successfully completes, you will see the output shown in Figure 9.

Configuring Hyper-V Settings using Hyper-V Manager
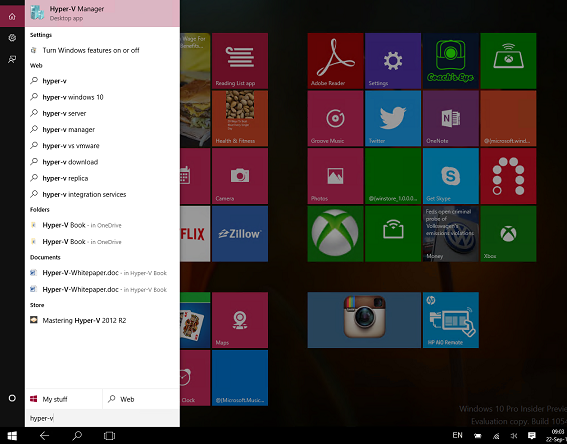
There are two main ways that you can configure Hyper-V after installation. You can continue to use Windows PowerShell cmdlets, or if you are more comfortable using a GUI, you can use Hyper-V Manager.- In order to run Hyper-V Manager, click on the Windows button, select Search, and then enter Hyper-V Manager (Figure 10).
- Click on Hyper-V Manager to run the application.
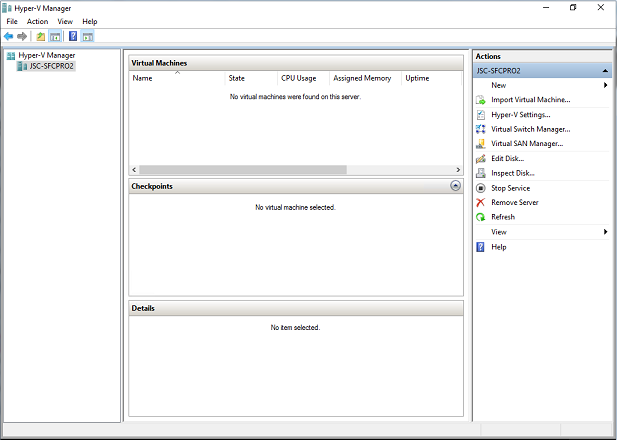
- In Hyper-V Manager, in the Actions pane, click Hyper-V Settings (Figure 11).
- On the Hyper-V Settings page, select Virtual Hard Disks to specify the default drive and folder to store virtual hard disk files (C:\Virtual Machines, in this example), and then click Apply (Figure 12).

- On the Hyper-V Settings page, select Virtual Machines to specify the default folder to store virtual machine configuration files (C:\Virtual Machines, in this example), and then click Apply (Figure 13).

- On the Hyper-V Settings page, select Storage Migrations to set the number of simultaneous storage migrations that are allowed (4 allowed, in this example), and then click Apply (Figure 14).

Creating a Virtual Switch using Virtual Switch Manager
Similar to a network interface card (NIC) in a physical system, a virtual switch allows you to create one of more virtual networks and to use these virtual networks to interconnect virtual machines. You can create External, Internal, and Private virtual switches in Hyper-V. External switches allow you to interconnect virtual machines, and provide them with connectivity to external physical networks by redirecting the traffic through a physical system network adapter. Internal virtual switches allow you to interconnect virtual machines and provide them with the ability to communicate with the Hyper-V host, but the virtual machines are isolated from external physical networks. Private virtual switches allow you to interconnect virtual machines, but they are isolated from both the Hyper-V host, and from external physical networks. You can use the Virtual Switch Manager to create and manage virtual switches in Hyper-V.
- In Hyper-V Manager, in the Actions pane, click Virtual Switch Manager.
- Select New virtual network switch, then in the Actions pane, select External, and then click Create Virtual Switch (Figure 15).

- In the Virtual Switch Properties pane, name the virtual switch Public, allow the management operating system to share the network adapter bound to the virtual switch, and then click Apply (Figure 16).

- After you click Apply, you will see a warning message, as shown in Figure 17, indicating a potential loss of network connectivity while Hyper-V creates the new virtual switch.

- Click Yes to proceed with the virtual switch creation.
- Click OK to close the Virtual Switch Manager.
Creating a New Virtual Machine using Hyper-V Manager
After you have configured these very basic Hyper-V settings and created a new virtual switch, you can move on to create a new virtual machine using Hyper-V Manager.
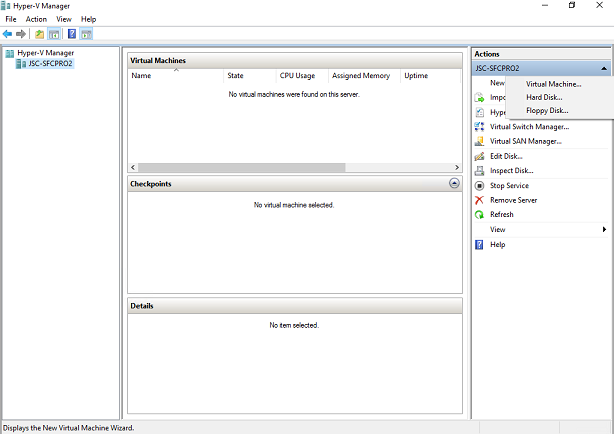
- In Hyper-V Manager, in the Actions pane, click New, and then click Virtual Machine, (Figure 18).
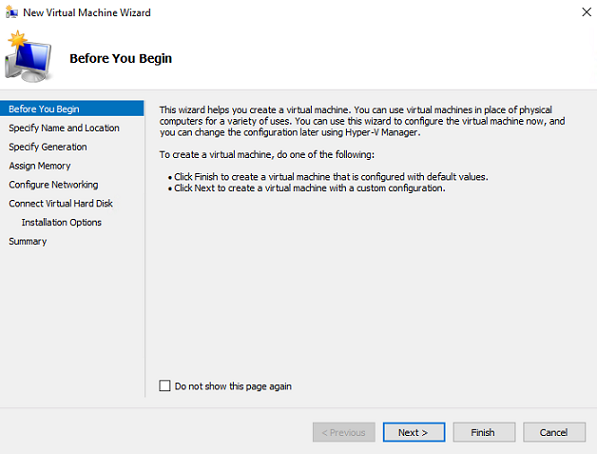
- In the New Virtual Machine Wizard, click Next to skip the Before You Begin page (Figure 19).
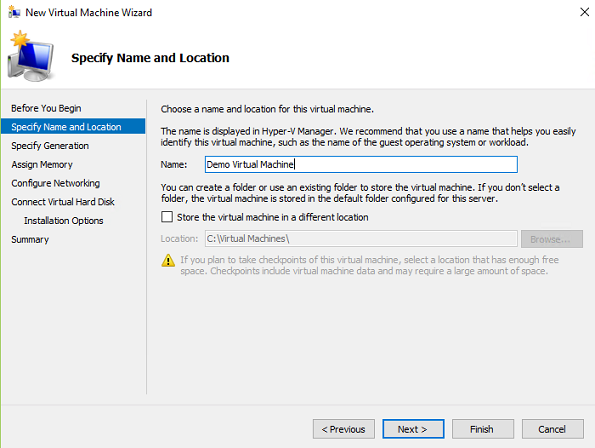
- On the Specify Name and Location page, enter a name for the new virtual machine (Demo Virtual Machine, in this example), and then click Next to continue (Figure 20).
- On the Specify Generation page, select the Generation option that supports the guest operating system you will install in the virtual machine. Generation 1 supports most 32-bit guest operating systems, while Generation 2 supports most 64-bit versions of Windows and newer Linux and FreeBSD operating systems. If in doubt, review which generation option best supports your selected guest operating system. Once you have made a selection, click Next to continue (Figure 21).

- On the Assign Memory page, enter a value for the amount of memory to allocate to your new virtual machine at startup (1024 MB, in this example), and leave the Dynamic Memory option selected to allow Hyper-V to manage the memory allocation. After you have entered a memory value, click Next (Figure 22).

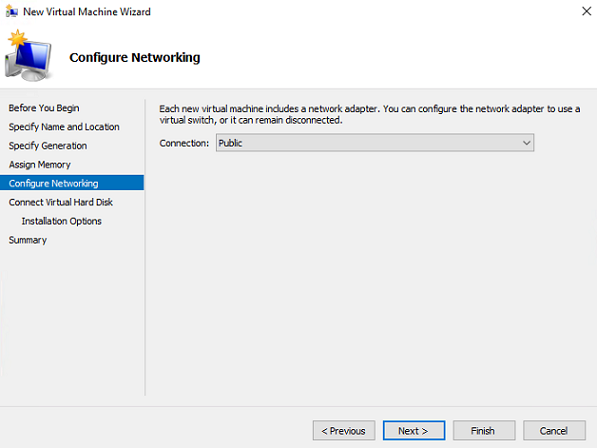
- On the Configure Network page, select the virtual switch that you just created (Public, in this example), and then click Next (Figure 23).
- On the Connect Virtual Hard Disk page, review the options and then click Next (Figure 24).

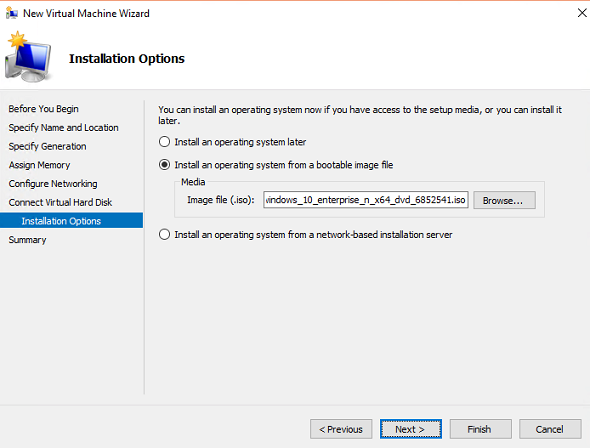
- On the Installation Options page, select the option to Install an operating system from a bootable image file, click Browse to navigate and select the ISO image, and then click Next (Figure 25).
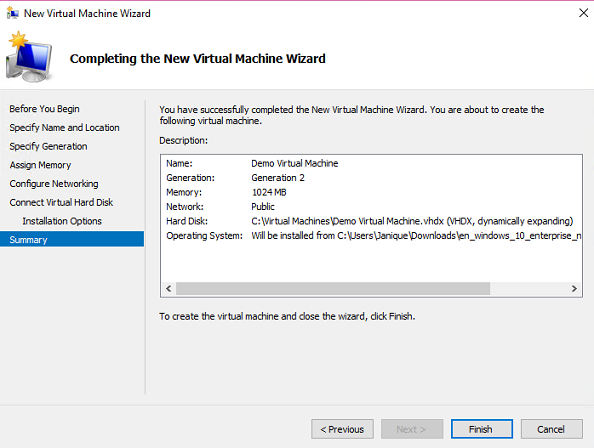
- On the Completing the New Virtual Machine Wizard page, review the settings, and then click Finish to create the virtual machine and close the wizard (Figure 26).
- After Hyper-V creates the new virtual machine, you can view it in Hyper-V Manager (Figure 27).

Finishing Guest Operating System Installation using VMConnect
After the creation of the new virtual machine hard disk and configuration files, you have to start the virtual machine to finish the guest operating system installation using the selected image file.- In Hyper-V Manager, double-click on the new virtual machine to launch the VMConnect tool.
- In VMConnect, click on the green Start button, and follow the instructions on the screen to boot the virtual machine, as shown in Figure 28.

- As shown in Figure 29, the new virtual machine boots into the Windows setup, and you can complete the installation in the same manner as you would on a physical system.

Figure 29: Completing Windows Setup using VMConnect
After you complete the virtual machine guest operating system installation, you can continue to access and manage it using VMConnect. To name just a few, VMConnect allows you to start, turn off, shut down, save, pause, and reset the virtual machine. Table 1 contains a more extensive list of VMConnect command options, the icon associated with each commands, and the alternate key sequence that you can use to execute the command.
| Command | Icon | Alternate Key Sequence |
| Start the virtual machine |  | CTRL+S |
| Turn off the VM |  | |
| Shut down a VM |  | |
| Save |  | |
| Pause |  | |
| Reset |  | |
| Mouse release |  | CTRL+ALT+LEFT arrow |
| Send CTRL+ALT+DELETE to the virtual machine | CTRL+ALT+END | |
| Switch from full-screen mode back to windowed mode | CTRL+ALT+BREAK | |
| Use enhanced session mode |  | |
| Open the settings for the virtual machine | CTRL+O | |
| Create a checkpoint |  | CTRL+N or select Action> Checkpoint |
| Revert to a checkpoint |  | CTRL+E |
| Do a screen capture | CTRL+C | |
| Return mouse clicks or keyboard input to the physical computer | Press CTRL+ALT+LEFT arrow and then move the mouse pointer outside of the virtual machine window. This is the mouse release key combination and it can be changed in the Hyper-V settings in Hyper-V Manager. | |
| Send mouse clicks or keyboard input to the virtual machine | Click anywhere in the virtual machine window. The mouse pointer may appear as a small dot when you connect to a running virtual machine. | |
| Change the settings of the virtual machine | Select File> Settings. | |
| Connect to an image file (.iso) or a virtual floppy disk file (.vfd) | Click Media on the menu. Virtual floppy disks are not supported for Generation 2 virtual machines. |
Table 1: VMConnect Commands, Icons, and Key Sequences
Conclusion
In this article, you learned about the hardware and software prerequisites to install Hyper-V in Windows 10 using the GUI and Windows PowerShell cmdlet. Hyper-V configuration is performed using Hyper-V Manager or Windows PowerShell if you like to manage systems from the command line. You can use Virtual Switch Manager to create new networks that allow the connection of virtual machines to each other, the Hyper-V host, or external physical networks. You can create new virtual machines using Hyper-V Manager, and connect to them using the VMConnect tool. All of these tools should look very familiar to anyone that has used previous versions of Hyper-V on Windows desktop and server operating system editions.